How to 'lock' the camera and microphone on a Mac
Anyone who is online often should care about privacy. Protecting digital data is a very important thing. However, there is a big flaw you didn't expect. That is the webcam.
The bridge between the real world and this virtual world can be easily exploited. This is also an important tool that can be used all the time, so it will definitely need an easy and effective method to control which applications have access to the webcam.
There are many effective methods for webcam 'locking', but they have some disadvantages. Fortunately, new features available in macOS Mojave make it easy and safer to turn off and turn on the webcam when needed.
Disable camera and microphone on Mac
- Old methods (applicable to macOS Sierra and older versions)
- Tape the tape to the camera
- Remove the camera
- Disable camera
- Do not forget the microphone!
- New methods (using macOS security features)
- Options for websites on Safari
- Privacy Protection feature in macOS Mojave
- T2 chip
Old methods (applicable to macOS Sierra and older versions)
Before checking out the new options available in macOS, take a look at some methods to block access to old cameras. These options are best suited for people who are running macOS Sierra or older versions, because they still have drawbacks.
Tape the tape to the camera

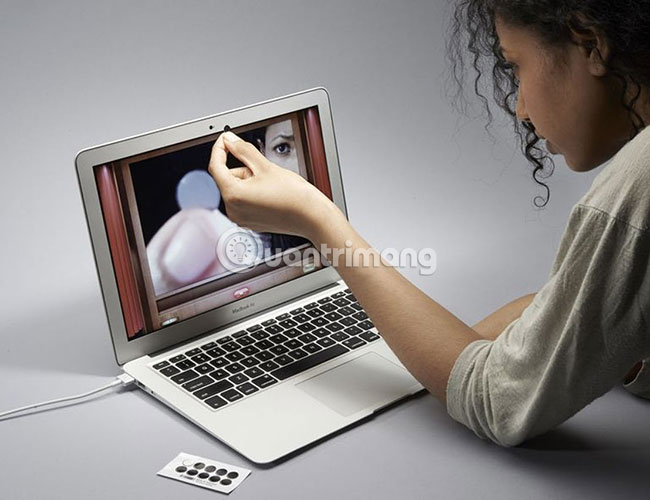
This is a 'classic' method: Use tape to paste on the camera when not in use. You can do this easily with materials available at home and can be removed easily when you really want to use the camera.
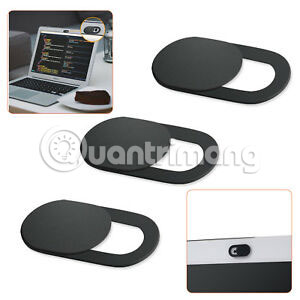
To look more elegant, you can even buy a stylish webcam cover, to easily block or remove the camera shield.

Remove the camera
This is an easy method when most webcams are external USB devices. However, on Macs, webcams are built-in, so removing this device requires some hardware knowledge and courage because doing so will void the warranty. Mac.
In new models, the cable can be soldered to the logic board (mainboard), which means it is completely impossible to remove the webcam. Also, if you do this method, you will not be able to easily use the webcam when needed. Apply this method only if you really want to permanently remove the camera on your Mac.
Disable camera
If you are comfortable using Terminal, you can use the script to disable the camera. Again, this can cause problems when you want to re-enable the camera later, but at least you don't have to unpack it.
Do not forget the microphone!
The major drawback of using any of these methods is that it cannot disable the microphone, so anyone who keeps track of you from a distance can still hear what you say. There is a solution to this problem, but not very ideal.
You can stick the tape on the microphone but this is not entirely okay.
Alternatively, you can try to fix it quickly by going to System Preferences> Sound> Input . Reduce the Input Volume (microphone input volume ) to prevent the microphone from capturing sound. However, if someone has root access to the computer, they can adjust this setting again.
There are Terminal commands to disable the audio driver and can also handle audio output, but does not mean the speaker is not working.
Similar to the camera, you can open the Mac and disable the microphone, but it will certainly void the device's warranty. Depending on the model, this method may not work.
New methods (using macOS security features)
Fortunately, Apple recently introduced many new security features that help manage camera access quickly, simply, and customizable.
Options for websites on Safari
If you have macOS High Sierra or more, you can use Safari to turn on or off the camera and microphone for certain websites.
Visit Safari> Preferences> Websites> Camera to customize which websites have access. On the right, you will see a list of websites currently available for camera access. You can change the setting to Deny, Allow or Ask whenever websites want to use the camera.
At the bottom, you can also set the default policy for all new sites. You can even use the same feature with a microphone. Just switch to the Microphone tab on the left.

Privacy Protection feature in macOS Mojave
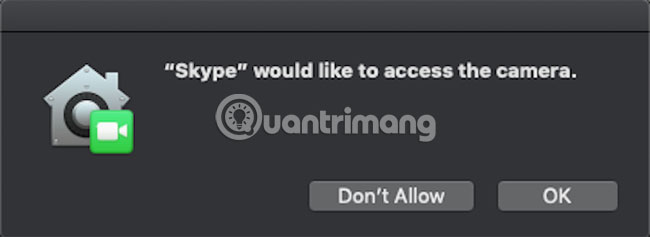
Introduced in macOS Mojave, the Privacy Protection feature applies to all applications in the system. Regardless of what is installed, if the application wants to access the camera or microphone, user permission is required.
If an application tries to access the camera or microphone, a prompt will appear to confirm or deny access.

You can manage applications that have access at any time. Go to the Privacy section in System Preferences> Security & Privacy and select Camera. List of applications that want to access the camera located in the right window. Uncheck any applications that you do not want to have access to the camera.
Follow the same process to control access to the microphone. If the Mac is not compatible with Mojave, you can try a free tool from Mac Objective-See security developer to warn about all use of webcams.
T2 chip
The latest MacBook and MacBook Pro products are equipped with Apple's T2 security chip, providing the foundation for other macOS security features such as FileVault and Touch ID encryption. An additional security feature that T2 offers is that it will completely disconnect the microphone of the Mac laptop when it folds up.
The most amazing part of this feature is that it disconnects the hardware. Which means that even if someone has root access to the machine, they have no way to turn on the microphone when the device is folded down.
Apple notes that it is not necessary to do this for the camera, because when the camera is turned down, the camera's vision has been hindered.
Security is only the 'tip of the iceberg' in Mojave. After you take these steps to ensure online safety, take some time to check out other new features in the Mojave update, such as protecting your eyes from fatigue with Dark Mode, using iPhone like a handheld scanner, clean the desktop with stacks and more. The upgrade to this update is completely free.
Hope you are succesful.
You should read it
- ★ How to disable the Caps Lock key in Windows 10
- ★ How to enable the auto-lock feature when users leave - Dynamic Lock on Windows 10
- ★ How to set up security cameras that can be accessed remotely
- ★ How to lock Windows 11 PC via Bluetooth connection with Dynamic Lock feature
- ★ How to lock the MacBook keyboard for cleaning and repair