How to fix microphone error does not work on Mac
MacBooks and lots of Mac desktops have built-in microphones. However, you can also connect peripherals via USB, 3.5mm headphone jack or Bluetooth. Here's how to fix a microphone that doesn't work on a Mac..
Find out what type of microphone is being used
To solve the problem, the most important thing is to know what kind of microphone you are using.
There will be the following types:
- Microphone is integrated inside all MacBook or iMac.
- External microphone: Connects directly via USB.
- External 3.5mm microphone: Connect to the computer via the 3.5mm headphone jack.
- AirPods or similar Bluetooth headsets: Connect wirelessly to your Mac.
If you are sure your microphone is connected, learn about the following audio settings.
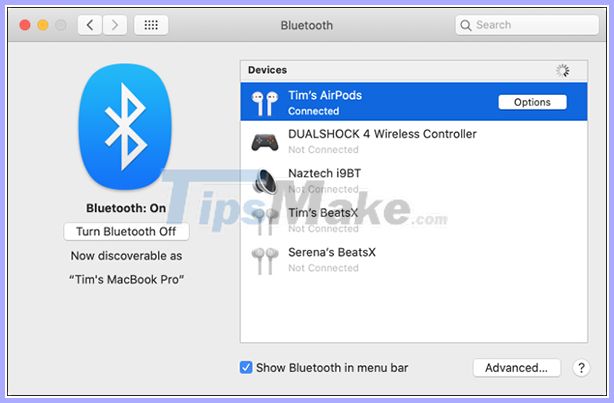 The microphone connects on the Mac
Check audio settings
A common cause of microphone faults is the wrong input port. Go to System Preferences> Sound , open the Input tab. You will see a list of devices that can be used as audio sources, including the microphone you want to use.
To use a device, click Internal Microphone . If everything works properly, you will see a sound bar next to the Input Level when speaking.
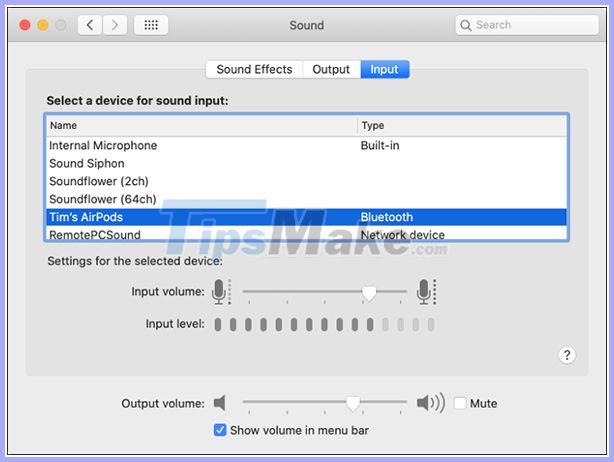 Check audio settings
If you don't see anything, drag the Input Volume bar and repeat. The slider moves too slowly, and the Mac doesn't recognize the sound.
If you want to use a microphone from AirPods, choose AirPods from the list. In case you are in the audio interface, select from the list.
If you see movement at the Input Level, that's a good sign, but more processing may be needed to work properly.
Check the microphone operation permission
Another possible cause for microphone problems is that Apple has expanded its operating system permissions. This will prevent apps from accessing the microphone until you allow this app to work. When the application wants to access the microphone, a notification will appear, asking you to accept or reject the request.
Go to System Preferences> Security and Privacy> Privacy , select Microphone from the sidebar. You will see a list of applications that require access to the microphone. If yes, put a checkmark next to the application.
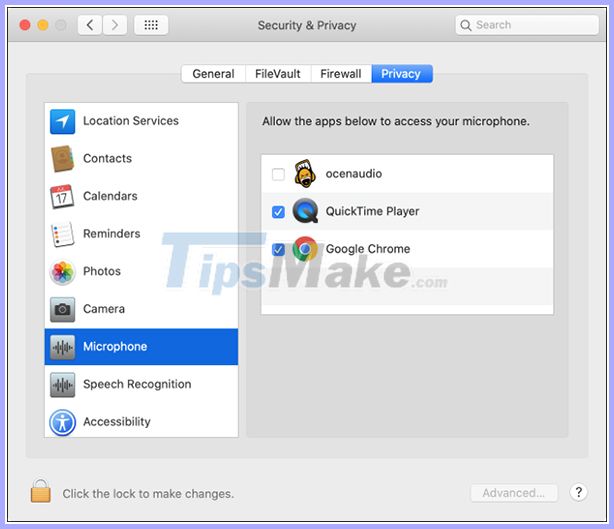 Allows the app to access the microphone
Click the lock icon to confirm the admin password (or Touch ID, Apple Watch). You can agree or refuse by checking / unchecking the box next to that application.
Delete the application that is causing the problem
After granting access, the microphones still do not work, maybe the problem is due to a special application.
Try checking the application options to see if there are any specific settings for the app. Apps like Adobe Audition and Audacity will allow you to specify an input device that is separate from the device selected in the Input settings in System Preferences .
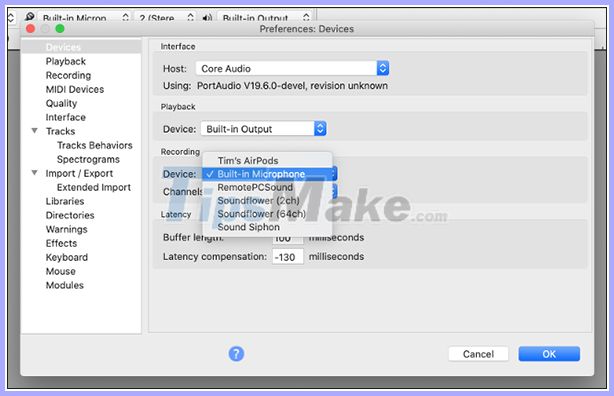 Delete the error application
If everything looks normal, delete and reinstall the application. You should find the latest version of the application to download, in case the error occurs due to old software. Apple has changed some system access rights in several recent versions of macOS.
Reset NVRAM / PRAM
Unstable RAM (NVRAM) or Parametric RAM (PRAM) is the type of memory the Mac uses to remember settings, such as time or volume settings. These settings persist even after the device is turned off. Sometimes problems that occur and resetting NVRAM / PRAM can help.
Because this memory specifically handles sound settings, it is especially suited to microphone issues. How you reset depends on which Mac you're using, but you can learn how to do it below.
Turn on spell check
It may seem unrelated, but the macOS spell checking feature can help you solve microphone problems, especially with the device's built-in device.
 Turn on spell check
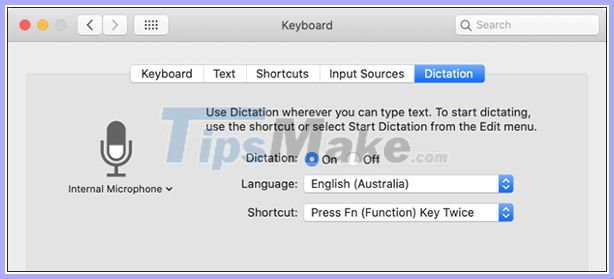
Go to System Preferences> Keyboard , then click on the Dictation tab . Click the On button and wait for the download to complete. Make sure the microphone you want to use is in the menu, so if everything is set up correctly, you'll see the volume bar move.
Check the volume of the external microphone
Most external microphones allow you to change the volume directly on the device, while others have a mute button. Check carefully to not accidentally turn off the mic when you need to use.
If you use audio editing software, you can adjust it right on the interface.
Restart the Mac
Sometimes, you need to reboot to solve any problems.