How to lock formulas in Google Sheets
By locking formulas in Google Sheets, you can ensure that other users cannot access and edit your spreadsheet data. Below, TipsMake will guide you through the detailed steps to do this.
Table of Contents
Locking cells and formulas in Google Sheets is a great way to prevent other users from editing data. The process for locking cells and formulas in Google Sheets is slightly different from in Excel and does not require a password to unlock.
Simple guide to locking formulas in Google Sheets
Table of Contents:
1. Locking formulas in an entire Google Sheets spreadsheet .
2. Locking formulas in a single cell or data range in Google Sheets .
3. Changing/Editing locked data ranges in Google Sheets .
How to lock formulas in Google Sheets
1. Lock formulas throughout a Google Sheets spreadsheet.
If you don't want other users to edit your Google Sheets spreadsheet file, the simplest solution is to lock all the spreadsheet formulas.
Follow the steps below:
Step 1: First, open the Google Sheets file where you need to lock the formulas. To protect all spreadsheet cells, click the downward arrow icon next to the spreadsheet name in the bottom left corner of the screen, then select " Protect sheet" as shown below:
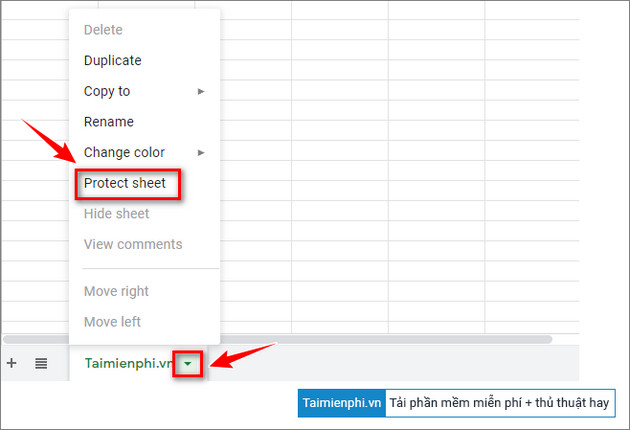
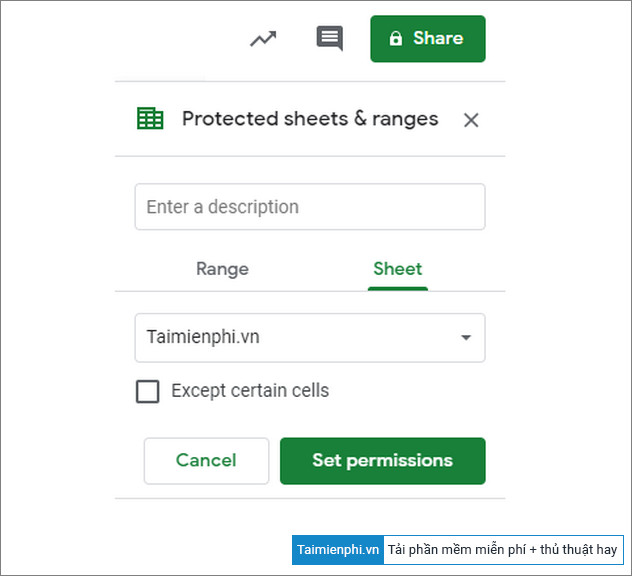
This action will open the Protected sheets and ranges dialog box.
Step 2: Here, click the Set Permissions button to open the editing options.
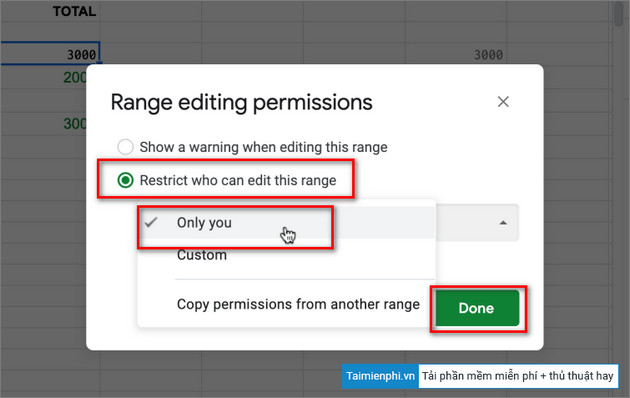
Step 3: Check the box next to the option " Restrict who can edit this range," then click " Only you" from the menu.
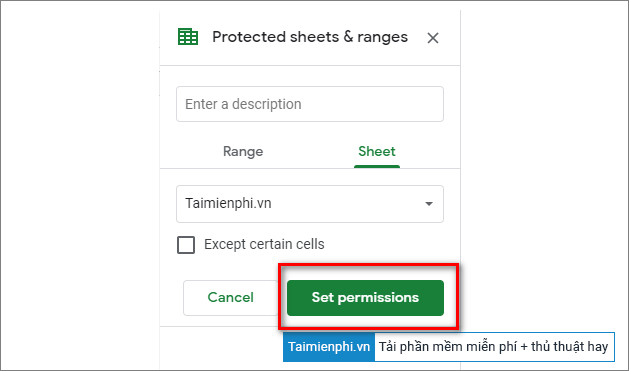
Step 4: Finally, click Done to complete the process.
This action locks all spreadsheet cells and prevents other users, with whom you share the spreadsheet, from editing or changing formulas and data.
2. Lock formulas in a cell or data range in Google Sheets.
Important note: If the cell you select is protected, locking the formula will cause errors if the steps below are applied, and other users may be able to edit the formula throughout the entire spreadsheet. Therefore, before proceeding, check that the cell or data range is formula-locked.
Next, follow the steps below to lock a formula in a cell or data range in Google Sheets:
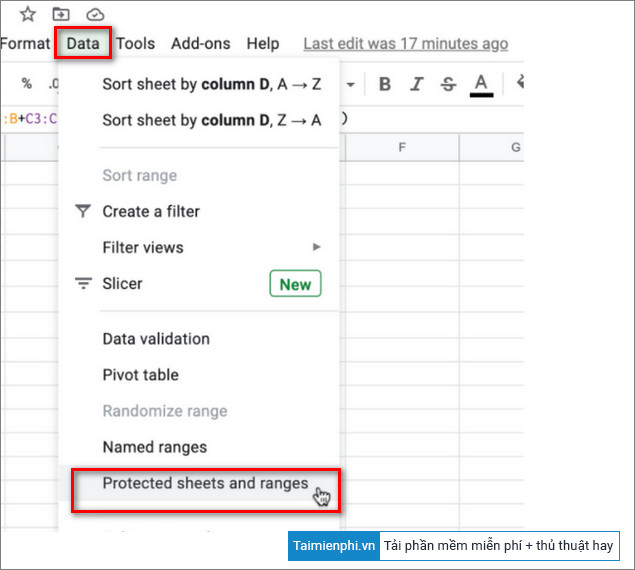
Step 1: First, select the cell or data range where you want to lock the formula.
Step 2: Click on Data in the top corner of the menu, then select Protected Sheets and ranges.
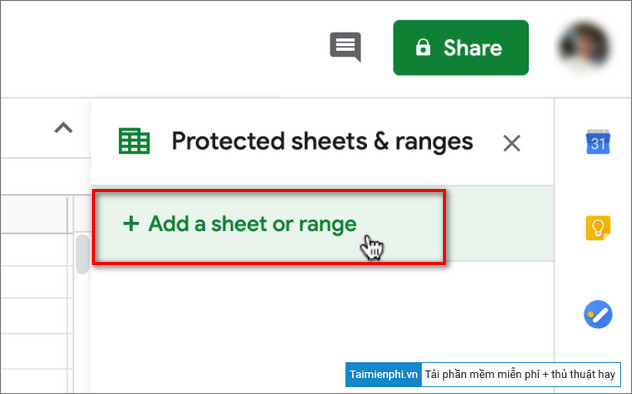
Step 3: In the Protected sheets & ranges window, select Add a sheet or range.
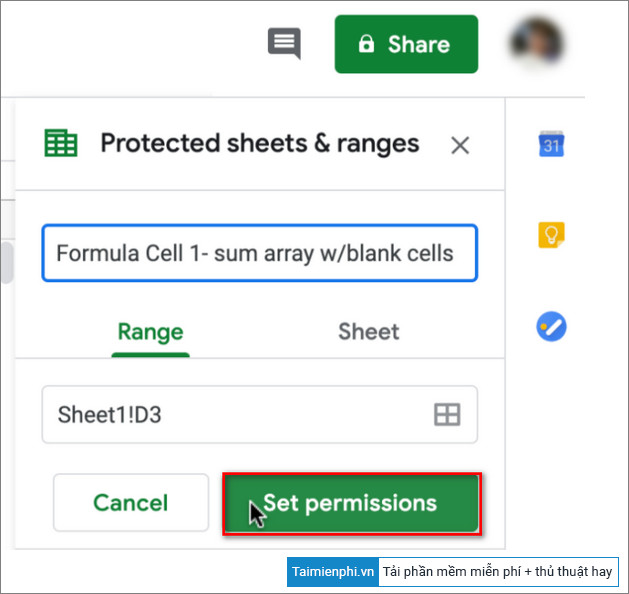
Step 4: Name the cell or data range to be protected in the first box. Check and confirm the selected cells or data ranges in the second box. Once complete, click Set permissions .
Step 5: Next, in the Range editing permissions window on the screen, select the option Restrict who can edit this range, then click Only you from the menu. Click Done to complete the process.
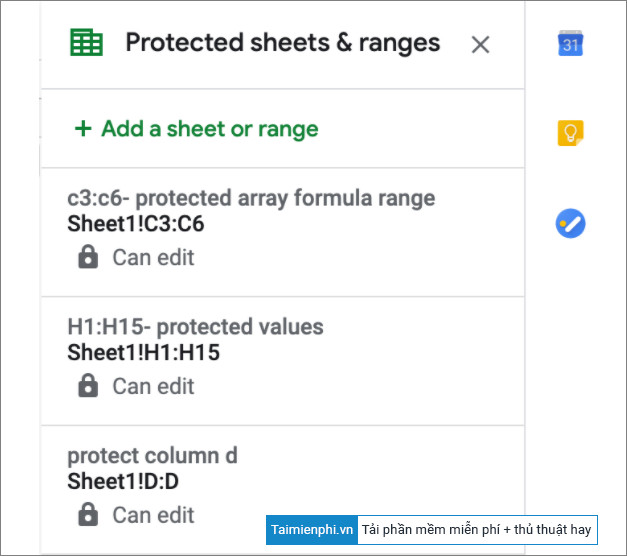
Step 6: Your new settings will appear in the Protected sheets & ranges settings section, located on the right side of the spreadsheet.
In Google Sheets, you have general permissions to view and edit spreadsheets. If you want to set permissions to edit spreadsheets, cells, sheets, or specific areas within Google Sheets, please refer to the content below.
3. Change/Edit Locked Data Ranges in Google Sheets
Follow the steps below to edit locked cells or data ranges in Sheets:
Step 1: On the Google Sheets toolbar, find and click Tools => Protected sheets and ranges.
If a message appears prompting you to add a new item, click Cancel to return to the protected list as shown below:
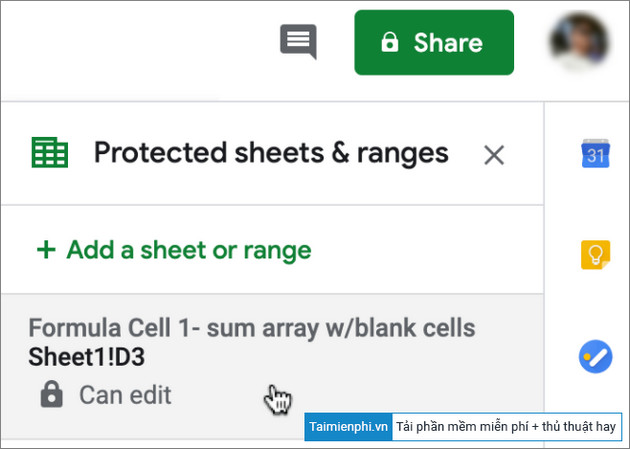
Step 2: If you have selected a data range to edit, a new window will appear containing the names and ranges of the cells. Here, find and click on Change permissions .
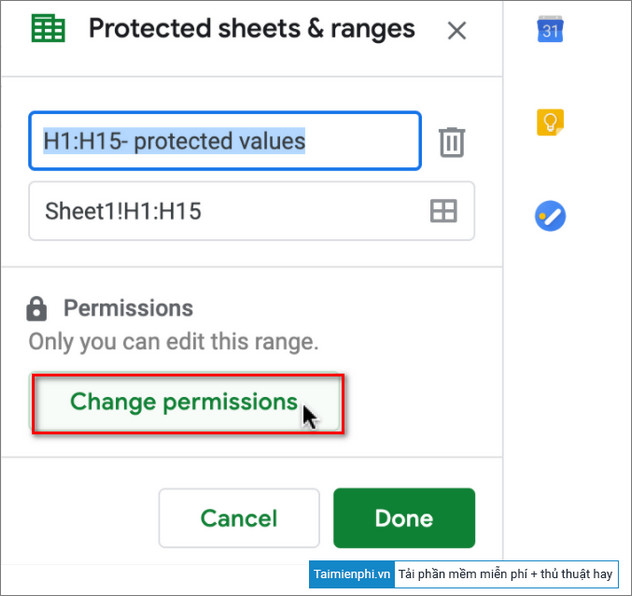
Step 3 : In the Range editing permissions window, adjust the user settings you want.
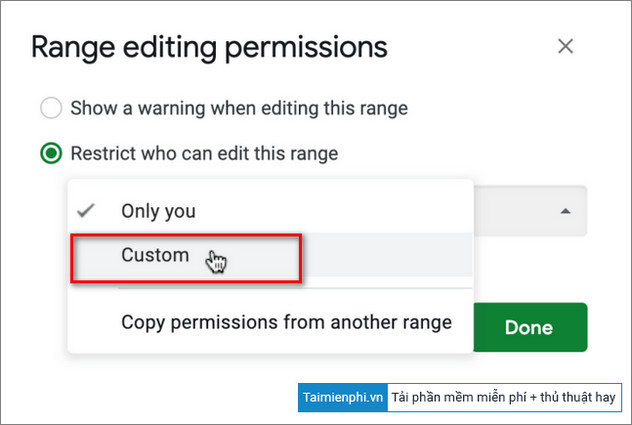
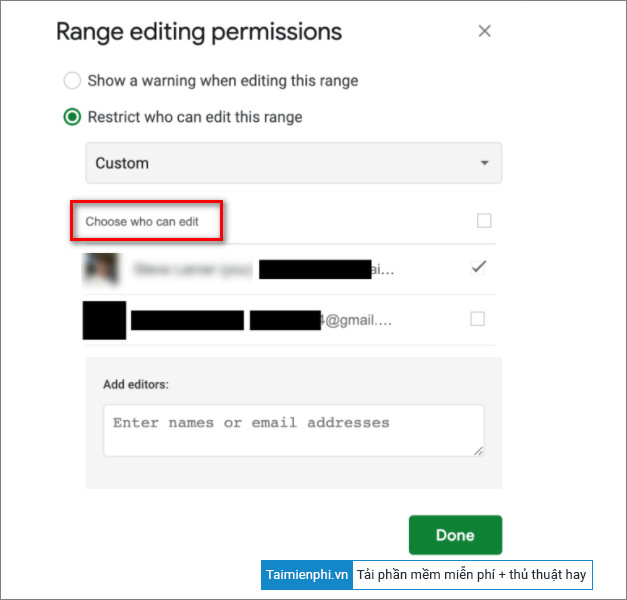
Step 4: If you select the Custom option , choose the users you want to allow to edit. Repeat steps 1-3 on different cells or data ranges in the Sheets.
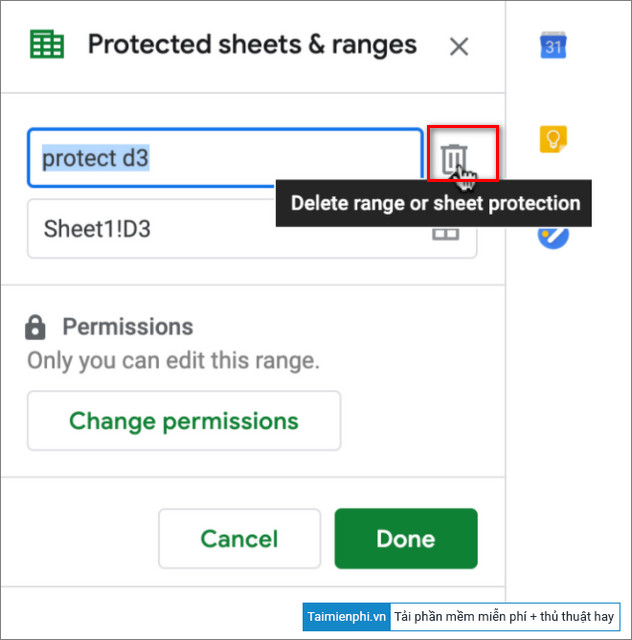
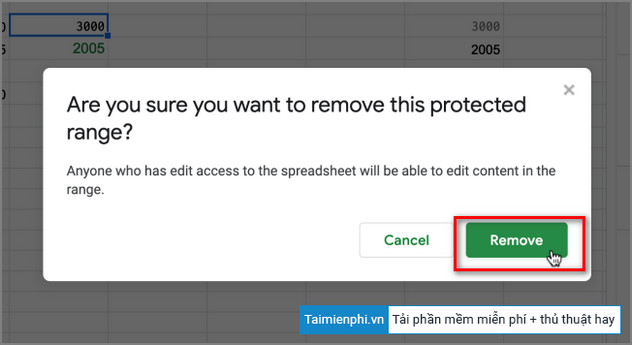
Step 5: To delete a cell or data range, simply select the cell or range from the locked list and then click the trash can icon to delete it.
In the next window, simply confirm your action and you're done.
Download the latest version of Google Sheets here:


In summary, the above article from TipsMake has guided you on how to lock formulas in Google Sheets. Additionally, readers can refer to other articles on the site to learn more about how to restore a previous working version in Google Sheets.
Was this article helpful?
Your feedback helps us improve.
Related Articles
 5 Google Sheets formulas that will save you hours of tedious work.7 minutes read
 Create a simple recipe5 minutes read
 Create complex formulas3 minutes read
 Guide to using AI to create functions and formulas in Canva Sheets3 minutes read
 How to count words on Google Sheets3 minutes read
 Google Sheets Functions to Simplify Your Budget Spreadsheets4 minutes read
Reader Comments 0
Sign in with email or Google to join the discussion.