How to crop images in Google Docs, Google Documents
Rotating and cropping images in Google Docs makes your documents more dynamic and professional. With just three basic steps, you can crop images in Google Docs without needing to use image editing software on your computer.
Table of Contents
Google Docs , also known as Google Documents, is an online word processor similar to Word. Therefore, Google Docs also supports inserting images into articles and documents. After inserting an image, you can crop, rotate, or flip it horizontally or vertically to suit your document.

How to crop images in Google Docs simply and quickly.
How to crop images in Google Docs
1. Quick guide to cropping images in Google Docs
Step 1: Open the existing Docs file containing the image you want to edit, or upload an image.
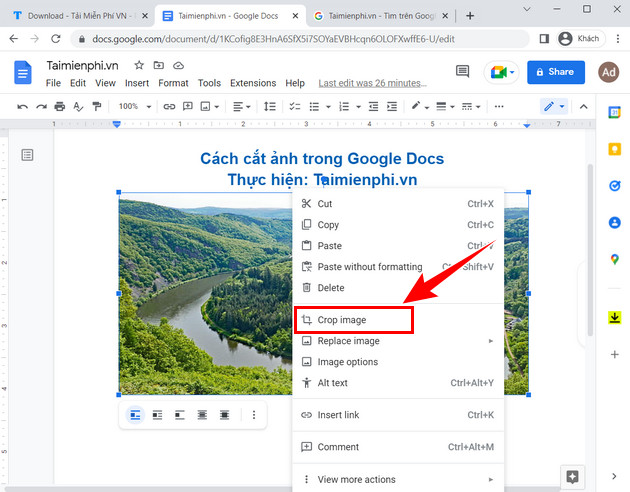
Step 2: Right-click on the image and select " Crop image ".
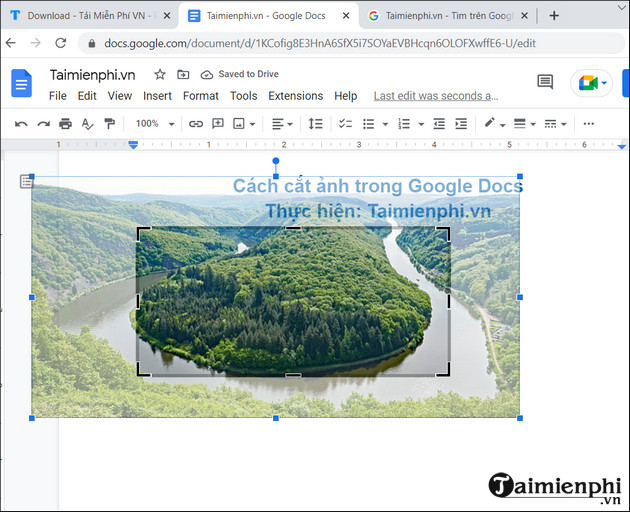
Step 3: Select the area you want to crop.
2. Detailed instructions on how to crop images in Google Docs
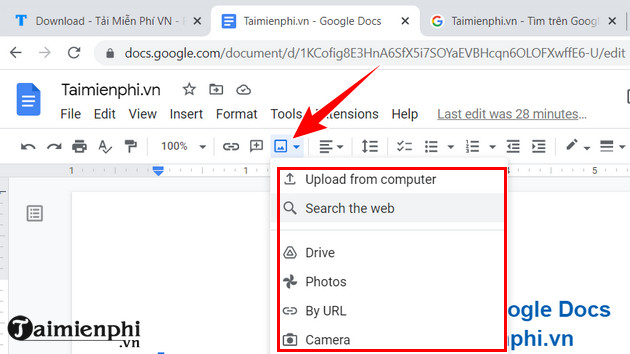
Step 1: Open the Docs file containing the image or upload the image to Google Docs by clicking the image icon => Select the option to upload an image (from Drive, Photos, from your computer, etc.) => Select the image you want to upload . (as shown in the image)
Step 2: Crop the image in Google Docs. Right-click on the image => Select Crop image .
Step 3: Now, to crop an image in Google Docs, simply drag the icons to the area of the image you want to keep.
See also How to rotate and flip images in Google Docs
1. How to rotate images in Google Docs
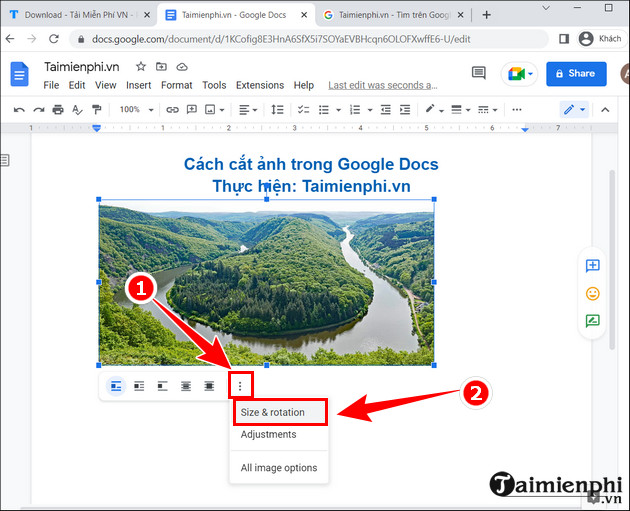
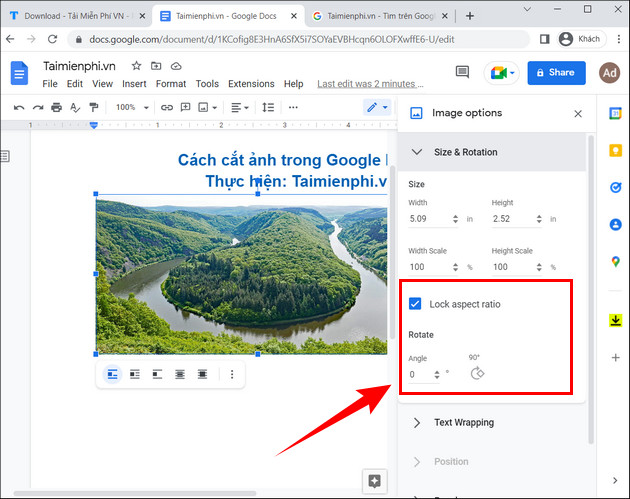
To rotate an image in Google Docs, click the three-dot icon below the image (as shown) => Select Size & Rotation .
When the image editing interface appears, in the Rotate section , simply enter the desired rotation angle in the Angle box .
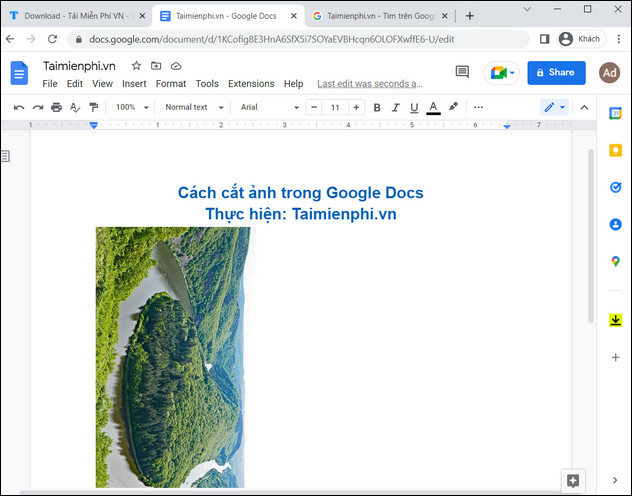
And this is the result after rotating 90 degrees.
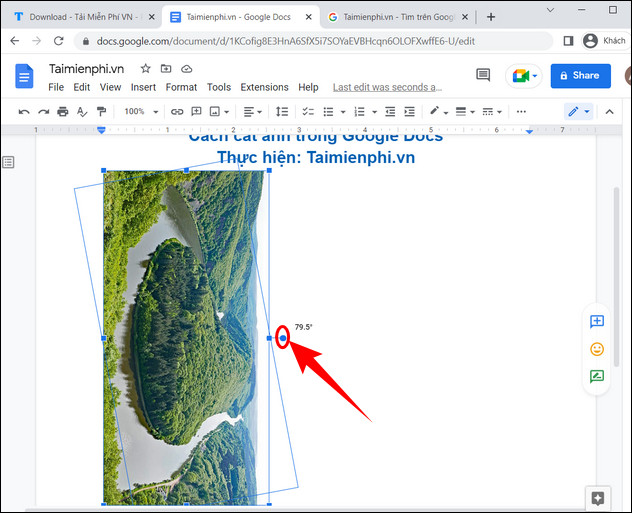
Alternatively, you can also rotate images in Google Docs by clicking on the image, then selecting the circular icon next to it and rotating it.
In addition, inserting a signature in Google Docs is also a solution widely used when drafting documents, contracts, etc.
2. How to flip images in Google Docs
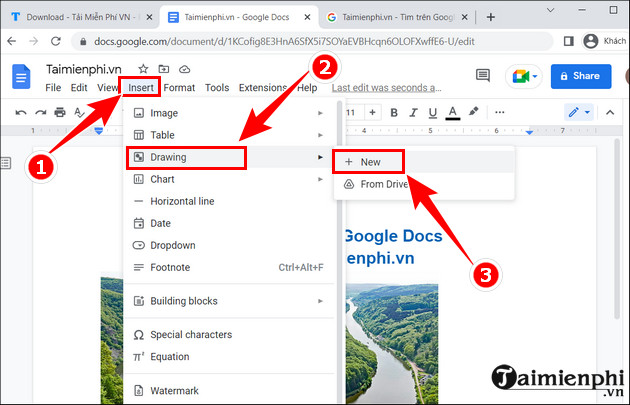
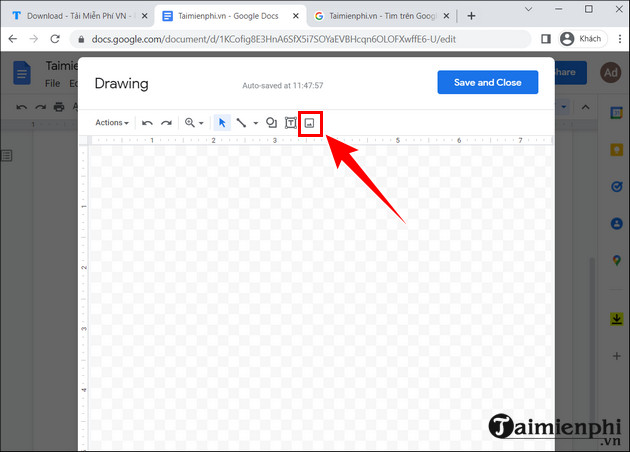
To flip an image in Google Docs, first select Insert => Select Drawing => Select New .
Now the Drawing dialog box will appear; you need to re-insert the image by selecting the image icon (as shown in the picture).
To flip an image, select Actions => Select Rotate => Select Flip horizontally .
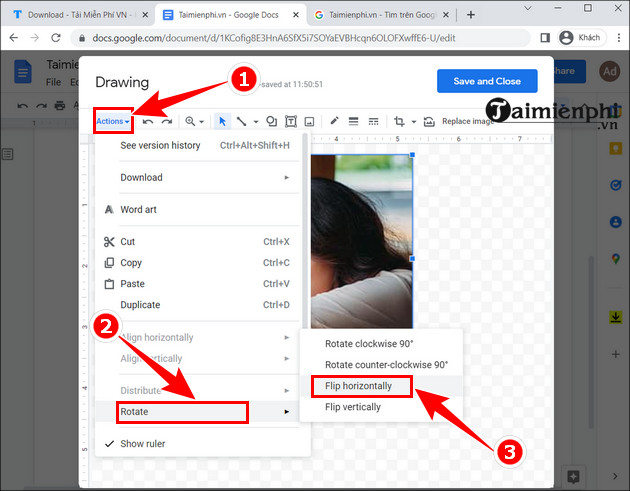
Finally, just click Save and Close and you're done.
In summary, this article from TipsMake has guided readers on how to use the image editing feature in Google Docs without needing any other image editing software , saving time and helping you complete your work more quickly.
Was this article helpful?
Your feedback helps us improve.
Related Articles
 Instructions for cutting and rotating photos on Google Docs2 minutes read
 How to insert link links in Google Docs documents4 minutes read
 How to extract images in Google Docs5 minutes read
 How many of the best features have you missed on Google Docs?8 minutes read
 How to compare two documents in Google Docs4 minutes read
Reader Comments 0
Sign in with email or Google to join the discussion.