How to Install Hadoop
This wikiHow teaches you how to install Hadoop on a Windows computer. [[Use-WinRAR.
Method 1 of 5:
Preparing to Install Hadoop
-
 Install WinRAR with TAR support. Since you'll need to extract a TAR file to install Hadoop, make sure that you check the "TAR" box when installing WinRAR.
 -
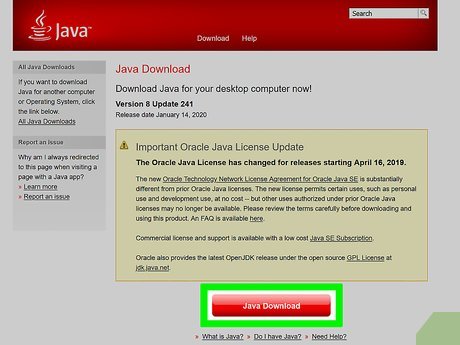 Install Java. To do so:
- Go to https://www.java.com/en/download/ and click Free Java Download.
- Click Agree and Start Free Download.
- Double-click the downloaded Java file.
- Click Yes when prompted.
- Click Install, then follow any on-screen prompts.
-
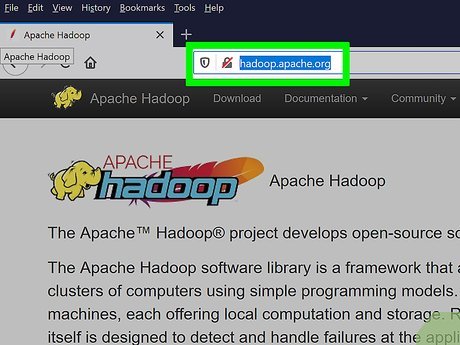 Open the Hadoop page. Go to https://hadoop.apache.org/ in your computer's web browser.
 -
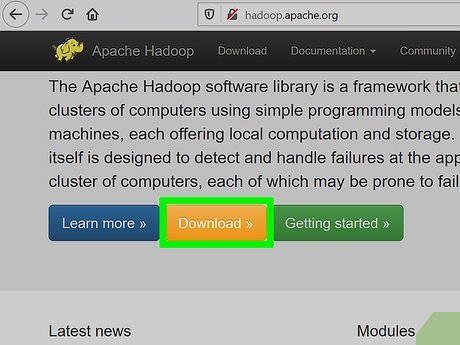 Click Download. It's at the top of the page.
 -
 Click binary next to the top result. This will take you to the Binary mirror link page for the most recent version of Hadoop.
 -
 Click the recommended link. It's the link below the "We suggest the following mirror site for your download:" line of text near the top of the page. Doing so prompts your computer to begin downloading the Hadoop TAR file.
 -
 Open the Java Development Kit (JDK) site. Go to http://www.oracle.com/technetwork/java/javase/downloads/index.html in your browser.
 -
 Click DOWNLOAD. You'll find this under the "JDK" heading on the right side of the page.
 -
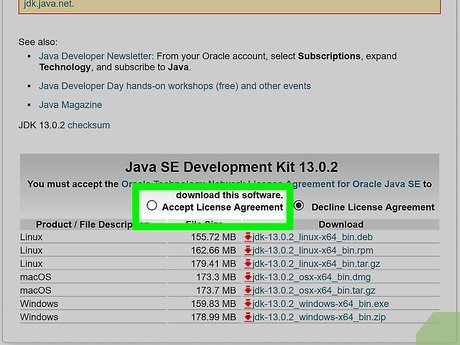 Check the "Accept License Agreement" box. It's near the bottom of the page.
 -
 Click the Windows "Download" link. This is the link under the "Downloads" heading and to the right of the "Windows" category near the bottom of the page. Doing so prompts the JDK setup file to download onto your computer.
 -
 Install the JDK. Double-click the JDK's setup file, then do the following:
- Click Yes when prompted.
- Click Next twice.
- Allow the JDK to install, and follow any on-screen prompts if necessary.
Method 2 of 5:
Adding Hadoop to Your Hard Drive
-
 Open the Hadoop TAR file. Double-click the downloaded Hadoop TAR file to do so. It should open in WinRAR.
 -
 Click Extract To. It's at the top of the WinRAR window. Doing so opens a pop-up window.
 -
 Select your hard drive as the extraction location. In most cases, your hard drive should be labeled OS (C:); click it in the right-hand pane of the pop-up window to select it.
 -
 Click OK. It's at the bottom of the window. Doing so will extract the Hadoop folder to your computer's "C" drive. Once the extraction is complete, you can proceed.
Method 3 of 5:
Adding Hadoop and Java Environment Variables
-
 Open This PC. Double-click the This PC app icon, which resembles a computer monitor.
- If you don't have This PC on your desktop, click File Explorer and then click This PC on the left side of the window.

- If you don't have This PC on your desktop, click File Explorer
-
 Open your hard drive. Double-click your hard drive's name (again, usually OS (C:)) below the "Devices and drives" heading.
 -
 Open the Hadoop installation folder. Double-click the "hadoop" folder in the list of folders on your hard drive.
- You'll see the Hadoop version number after "hadoop" in the folder's name.
-
 Open the "bin" folder. Double-click the "bin" folder to do so.
 -
 Copy the address. Click the address bar at the top of the File Explorer to highlight the address, then press Ctrl+C to copy it.
 -
 Open Start. Click the Windows logo in the bottom-left corner of the screen.
-
 Open the System Variables window. Type in edit the system, then click Edit the system environment variables at the top of the Start menu.
 -
 Click Environment Variables…. It's at the bottom of the System Variables window. A new window will appear.
 -
 Click New… under the "User variables" section. Doing so opens yet another window.
 -
 Name the variable. Type HADOOP_HOME into the "Variable name" text box.
 -
 Enter the path to the Hadoop folder. Click the "Variable value" text box, then press Ctrl+V.
 -
 Click OK. It's at the bottom of the window. You should now have a "HADOOP_HOME" variable listed in the top pane.
 -
 Add Java to the "User variables" section. Go to your hard drive, open the "Program Files" folder, open the "Java" folder, open the "jdk" folder (this folder will have a number after it), and open the "bin" folder, then copy the address. You can then add Java to the environment by doing the following:
- Click New... under the "User variables" section.
- Type JAVA_HOME into the "Name" text box.
- Click the "Variable value" text box, then press Ctrl+V.
- Click OK.
-
 Add both addresses to the PATH variable. You can add both the Hadoop address and the Java address to the PATH variable by doing the following:
- Click the "Path" heading in the "System variables" section.
- Click Edit....
- Click New... on the right side of the window.
- Paste in the Java address by pressing Ctrl+V, then press ↵ Enter.
- Go back and copy the Hadoop "bin" folder's address, then click New..., paste it in, and press ↵ Enter.
-
 Save your changes to the environment variables. Click OK on all three open System Environment Variables windows to do so.
Method 4 of 5:
Configuring Hadoop
-
 Open the Hadoop installation folder. Go to your hard drive in This PC, then double-click the "hadoop" folder.
 -
 Open the "etc" folder. Double-click it to do so.
 -
 Open the "hadoop" folder. This should be the only folder in the "etc" folder.
 -
 Open the "core-site" file in Notepad. To do so:
- Right-click the "core-site" file.
- Select Open with in the drop-down menu.
- Click Notepad.
-
 Add the proper configuration. Delete the "" tags at the end of the document, then copy and paste in the following code:
<configuration> <property> <name>fs.defaultFS</name> <value>hdfs://localhost:9000</value> </property> </configuration>
-
 Save the document. Press Ctrl+S, then click OK if prompted. You can then close the document.
 -
 Open the "mapred-site" file in Notepad. You should see a file similar to the "core-site" file open.
 -
 Add the proper configuration. Delete the "" tags at the end of the document, then copy and paste in the following code:
<configuration> <property> <name>mapreduce.framework.name</name> <value>yarn</value> </property> </configuration>
-
 Save the document. Press Ctrl+S, then click OK if prompted. You can then close the document.
 -
 Go back to the "hadoop" installation folder. Click the "hadoop" folder which includes the Hadoop version number in the address bar.
 -
 Create a new folder named "data". To do this, right-click a blank space in the window, select New, click Folder, type in data, and press ↵ Enter.
 -
 Open the "data" folder. Double-click it to do so.
 -
 Create two new folders named "datanode" and "namenode". When you're done, you should have a "data" folder that has one folder named "datanode" and one folder named "namenode".
 -
 Open the "hdfs-site" file in Notepad. You'll find this file in the "hadoop" folder that's inside the "etc" folder from earlier.
 -
 Add the proper configuration. Delete the "" tags at the end of the document, then copy and paste in the following code:
<configuration> <property> <name>dfs.replication</name> <value>1</value> </property> <property> <name>dfs.namenode.name.dir</name> <value>C:hadoop-2.8.0datanamenode</value> </property> <property> <name>dfs.datanode.data.dir</name> <value>C:hadoop-2.8.0datadatanode</value> </property> </configuration>
-
 Save the document. Press Ctrl+S, then click OK if prompted. You can then close the document.
 -
 Open the "yarn-site" file in Notepad. This file is also in the "hadoop" folder.
 -
 Add the proper configuration. Delete the "" tags at the end of the document, then copy and paste in the following code:
<configuration> <property> <name>yarn.nodemanager.aux-services</name> <value>mapreduce_shuffle</value> </property> <property> <name>yarn.nodemanager.auxservices.mapreduce.shuffle.class</name> <value>org.apache.hadoop.mapred.ShuffleHandler</value> </property> </configuration>
-
 Save the document. Press Ctrl+S, then click OK if prompted. You can then close the document.
 -
 Open the "hadoop-env" file in Notepad. Simply right-click this file and then click Edit to do so.
 -
 Update the Java path. Find the
set JAVA_HOME=%JAVA_HOME%line, type @rem in front of it, and then type below it the phrase "set JAVA_HOME=" followed by your Java JDK folder's address (not the "bin" folder's address). For example, your line might resemble the following:@rem set JAVA_HOME=%JAVA_HOME% set JAVA_HOME=C:Program FilesJavajdk-10.0.2
Method 5 of 5:
Applying the Hadoop Fix
-
 Download and extract the Hadoop fix file. Open the fix file's Google Drive page and click Download, then extract it by doing the following:
- Double-click the fix file.
- Click Extract To.
- Click Desktop.
- Click OK.
-
 Open the extracted fix file. Once the file finishes extracting, double-click it to open it.
 -
 Copy the "bin" folder. Click once the "bin" folder to select it, then press Ctrl+C to copy it.
 -
 Open the Hadoop installation folder. Go to your hard drive's folder, then double-click the "hadoop" folder there.
 -
 Paste in the "bin" folder. Press Ctrl+V to do so.
 -
 Click Replace the files in the destination when prompted. Once this process is complete, Hadoop should be installed on your computer.