How to install Deepin desktop environment on Ubuntu
In this article, you will learn how to install the Deepin desktop environment on Ubuntu. The procedure is mentioned in this article to install Deepin desktop environment on Ubuntu 18.04 LTS.
Deepin Desktop on Ubuntu - Deepin Desktop environment is beautiful and stylish. Are you wondering how to install Deepin Desktop Environment on Ubuntu 18.04?
Well, we will tell you how to install Deepin Desktop Environment on Ubuntu 18.04.
All you need is an updated version of Ubuntu 18.04 'Bionic Beaver' (or the latest Linux Mint 19 beta), a working internet connection.
No tar.gz archives, no filescripts, no fuss. So, provided you are using a computer with a good graphics driver (Deepin is not light at all).
Deepin Desktop Environment

Deepin Desktop is the default interface for the Deepin Linux distribution, released by the Chinese software company Deepin (Deepin is also a member of the Linux Foundation).
It provides an attractive alternative to GNOME Shell, Cinnamon and Unity.
But it's also quite different.
It does some things differently than traditional Linux Desktop. This results in a unique user experience.
Deepin is like Budgie, a custom interface built on popular technologies. In this case it is Qt / C ++ and Golang.
A wide range of applications are also available for use with Deepin, from a text editor, multi-tab terminal to a screen recorder, a screen capture utility, and a Microsoft Paint style drawing program.
Sadly, not all of these apps are available for Ubuntu.
Themes for Ubuntu - How to install Deepin Desktop on Ubuntu 18.04 LTS
Be careful
Before we show you the commands you need to run to install Deepin on Ubuntu 18.04 or Linux Mint, there are some warnings we need to give.
First, remember that you are adding a third-party PPA to your system. This repository is not maintained by Deepin or Ubuntu. It comes with risks and limitations.
There is no "official" support for this PPA and packages can get corrupted, conflict with other parts of your desktop, including core and critical system files.
Finally, before you install Deepin Desktop on ubuntu from a PPA on Ubuntu 18.04 LTS, be smart and make a backup of your important files or settings before you proceed.
Going deep into Deepin
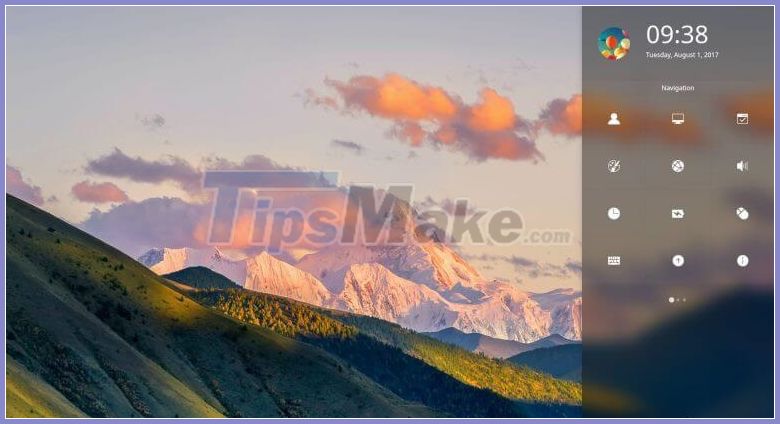
At the time of writing the latest version of Deepin Desktop Environment available was 15.5.
If you want to continue then the first step is to add PPA Deepin to your computer.
To do this, just run the command below:
sudo add-apt-repository ppa:leaeasy/ddeUbuntu 18.04 automatically refreshes the system pack list after adding a new PPA. After this update is complete, you can run the next command:
sudo apt install dde dde-file-managerThis is a downloadable metadata bundle (including a large number of Qt packages since it is a Qt based DE) needed. You should see total downloads (about 150MB) and estimated download time.
When you're ready to proceed, read the prompt (press 'Y' and press Enter). Ubuntu will continue to download, extract and install the Deepin software packages on your computer.
Note: this section takes some time - it depends on your network connection!
During the installation, you need to pay attention to the console because, at a certain point, you will be prompted to choose which display manager (also known as the login screen) you want to use. use. The installation will not continue until you have answered this:
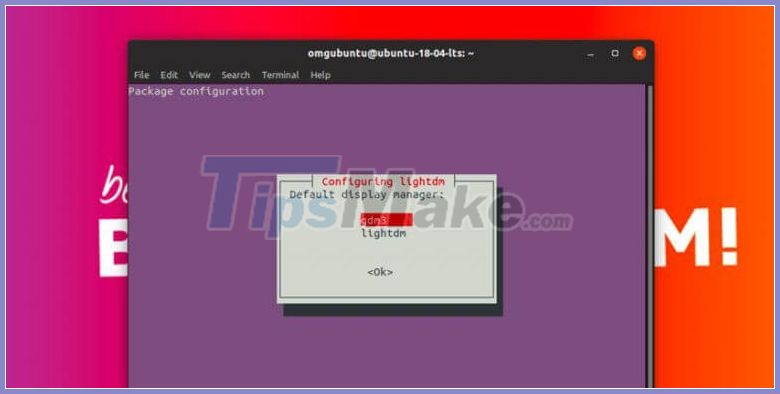
Deepin relies on LightDM to power the login and lock / unlock screen ("Deepin Greeter") but you should choose to keep GDM3 by default.
Details of the steps to install Deepin desktop environment on Ubuntu
Step 1: Add the Deepin Linux repository to Ubuntu
The Deepin Desktop Environment package is not an official package and is published by third parties. Therefore, you will need to add them to your system.
To do so, press Ctrl + Alt + T to launch Terminal. Then run the following command in Terminal:
$ sudo add-apt-repository ppa:leaeasy/ddePress Enter to continue.

Step 2: Update the system package manager
After adding the repository, now update the system package manager with the new Deepin Linux repository. Run the following command in Terminal with sudo to update the package manager:
$ sudo apt-get updateStep 3: Install Deepin desktop environment
Now with everything up to date, you will need to install the Deepin desktop environment.
Run the following command in Terminal with sudo:
$ sudo apt install dde 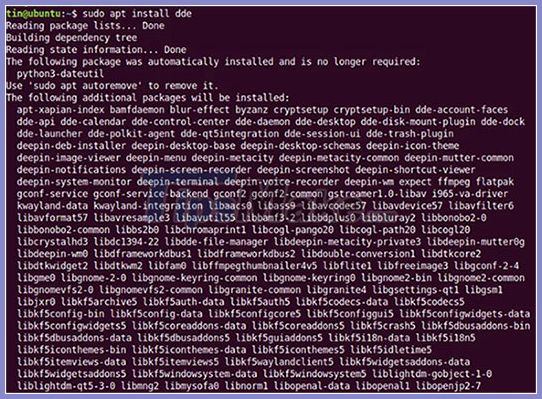
During the installation of the Deepin desktop environment, you will be asked if you want to choose the default display manager or login manager. Just press Enter. Then select GDM3 and press Enter.
Step 4: Install Deepin File Manager
When the installation is finished, you will need to install Deepin File Manager. To do so, run the following command in Terminal:
$ sudo apt-get install dde-file-managerStep 5: Install Deepin desktop theme
If you want to install the Deepin desktop theme for a nicer interface, run the following command in Terminal as sudo:
$ sudo apt install deepin-gtk-theme 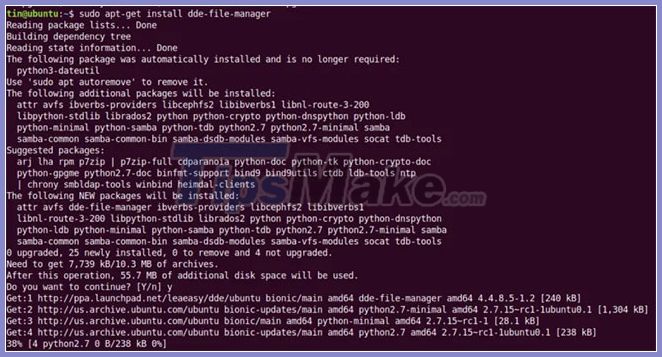
Step 6: Log in to Deepin desktop environment
You have completed the basic and necessary setup for setting up the Deepin desktop environment. Now it is time to reboot the system and log into the Deepin desktop environment.
Enter the following command in Terminal to reboot the system:
$ sudo rebootOnce the system is rebooted, you will see the login screen. Enter your credentials and click the settings icon to the left of the Sign In button . Select the Deepin option and click Sign In.

After logging in, you will see the freshly installed Deepin desktop environment. This is the screen to launch the Deepin Desktop application.
Deepin Linux provides a beautiful and elegant desktop interface. In this article, you have had the opportunity to learn how to install Deepin desktop environment in Ubuntu 18.04 LTS. You can now install and use as many applications as you want, and enjoy a new and beautiful experience in your Deepin desktop environment.
Configure Deepin Desktop on Ubuntu
After the entire installation is complete, log out of your computer.
From the login screen (depending on which one you have chosen), click on the " cog " icon and select the " Deepin " session .
You will be greeted by a Deepin screen. Click " ok " to take a screenshot you will just see… a dock bar, besides nothing else.
Click the Setting icon in the toolbar to open Control Center:
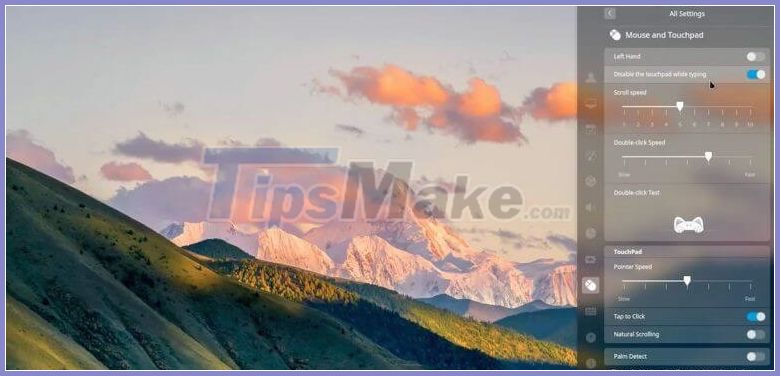
Here you can browse through different system settings, change themes, try a different icon theme, etc.
Click the "Launcher" button (far left side) to open the app launcher. Deepin Launcher is full screen mode by default and its icons are tiny. You can hold Ctrl and press the + button to increase the size or to shrink the launch down, click the expand icon in the upper right corner.
Deepin Desktop on Ubuntu - Deepin GTK Themes
You will notice that Deepin applications look great, but regular Ubuntu applications will be less. To make GTK apps easier on the eyes, you will need to install Themes Deepin GTK:
sudo apt install deepin-gtk-themeOnce the Deepin GTK theme has been installed, simply open the Deepin Control Center and go to Personalization> Window Theme> Deepin / Deepin Dark to apply it.
The rest is up to you! Explore your new look for a calculator.
You should read it
- How to install desktop/GUI environment in Ubuntu Server
- 5 reasons why Linux distros create their own desktop environment
- How to check the desktop environment you are using on Linux
- Learn about Linux MATE desktop environment
- 5 ways to make Linux desktops look great
- How to run and install Pantheon Desktop on Ubuntu
 How to change screen resolution in Ubuntu
 Is Linux the operating system or the kernel?
 How to Install Gradle on Debian 10
 How to access Linux Ext4 partition from Windows
 What is Linux Hosting?
 How to install Deepin Linux