Table of Contents
This practical guide walks through how to install Canon 2900 Printer for Macbook. It organizes the required steps, settings, and checks so you can complete the task with fewer mistakes.
Canon 2900 printer driver helps limit errors during the printing process such as smudged ink, missing prints, not receiving commands, etc. If this driver is missing, the printer will operate unstable and you cannot even connect to a Macbook. with printer. Below is how to quickly install Canon 2900 printer on Macbook.
Disable Gatekeeper and SIP on Macbook
Before installing the Canon 2900 printer for Macbook, you need to turn off the Gatekeeper and SIP (System Integrity Protection) features on the macOS operating system. These are two features that prevent downloading and installing applications of unknown origin on the computer. Only when you turn off Gatekeeper and SIP can you install the Canon 2900 printer driver on your Macbook. How to turn off Gatekeeper and SIP specifically as follows:
How to Turn Off Gatekeeper
Step 1: Open Applications On your Mac computer, select Utilities Then open Terminal .
Step 2: In the Terminal interface, enter the following command line: Sudo spctl --master-disable
Step 3: Select Enter And enter the Macbook login password and select Enter Again.
Step 4: Select The Apple icon In the corner of the screen.
Step 5: Select System Preferences > Security &Privacy > General.
Step 6: Check the Anywhere Box under Allow apps downloaded from .
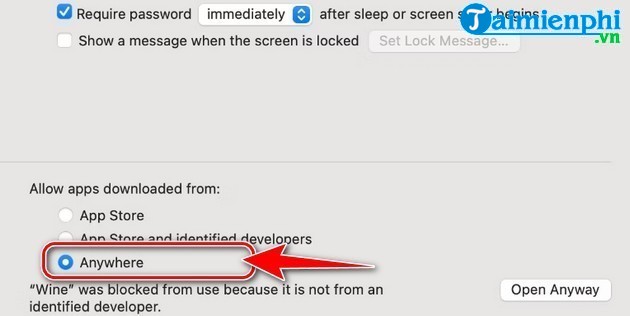
Note: Gatekeeper is one of the important security features on Macbook. Therefore, you should turn this feature back on after successfully installing the Canon 2900 printer for Macbook. To turn Gatekeeper back on, simply follow these steps:
Step 1 : Open Terminal .
Step 2: Enter the command line: Sudo spctl --master-enable
Step 3: Select Enter And enter the Macbook administrator password and select Enter Again.
How to Turn Off SIP
Step 1: Restart Macbook.
Step 2: Hold down theCommand + R Keys when the Macbook restarts to open Recovery Mode .
Step 3: Select Utilities on theRecovery Mode Interface.
Step 4: Select theTerminal Application.
Step 5: On theTerminal Interface, enter the command: Csrutil disable
Step 6: Select the Return Or Enter Key on the keyboard.
Step 7: Select The Apple icon On the menu bar.
Step 8: Select Restart To restart Macbook.
Note: To enable SIP, repeat the steps above, the only difference is that in step 5 you need to enter the command: Csrutil enable
Uninstall the Old Printer Driver
To avoid conflicts between printer drivers, you need to remove the old printer driver on your Macbook before installing the new printer driver. To remove the printer driver, follow these instructions:
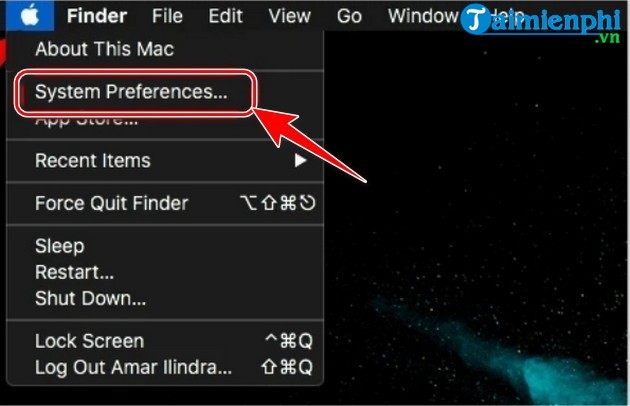
Step 1: Select The Apple icon In the upper left corner of the screen => System Preferences .
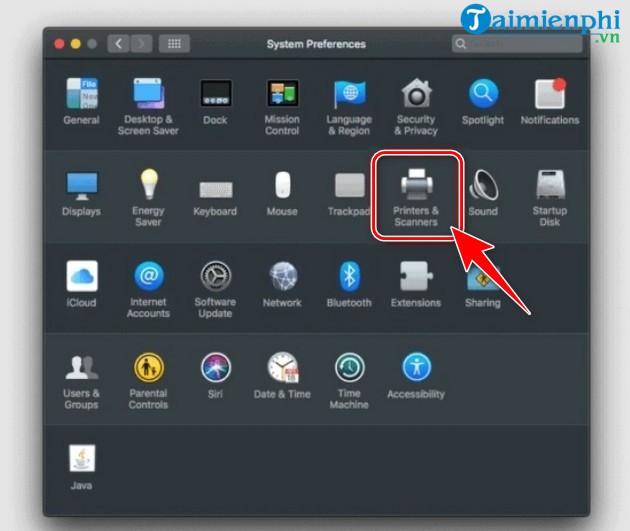
Step 2: Select Printers and Scanners .
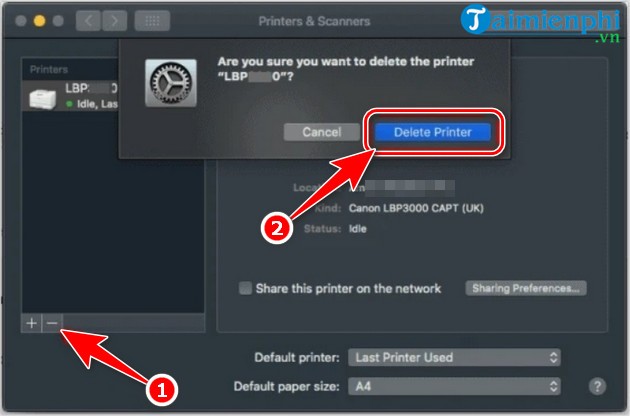
Step 3: Select the old printer icon on the Macbook, then choose The minus sign (-) Below, select Delete Driver and then turn offThe Printers and Scanners Window.
Step 4: select theFinder Icon in the Dock bar in the window => Macintosh HD in the bar on the left side of the screen => open theLibrary Folder.
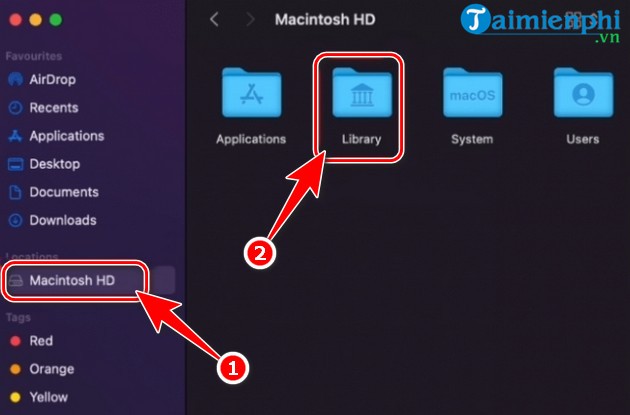
Step 7: In theLibrary Folder, find and open the Printer Folder.
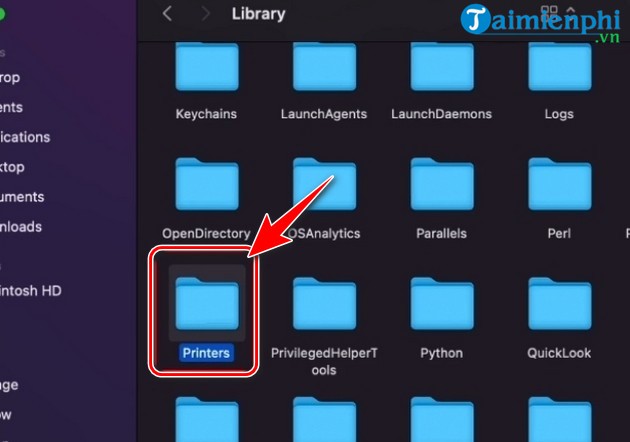
Step 8: Find and right-select theCanon Folder and select Move to Bin .

Step 9: Enter the Macbook administrator password and select OK To confirm deletion of the Canon folder.
Step 10: Hold down the Control Key, then choose the trash can icon on the Dock, select Empty Trash And restart your Macbook.
Install Canon 2900 Printer Driver on Macbook
Step 1: Turn on the Canon 2900 printer and connect the printer to the Macbook using a USB cable.
Step 2: Download Canon 2900 printer driver for Macbook from the official provider .
Step 3: Check the box I have read and agree. Then choose Download To download the driver to your computer.
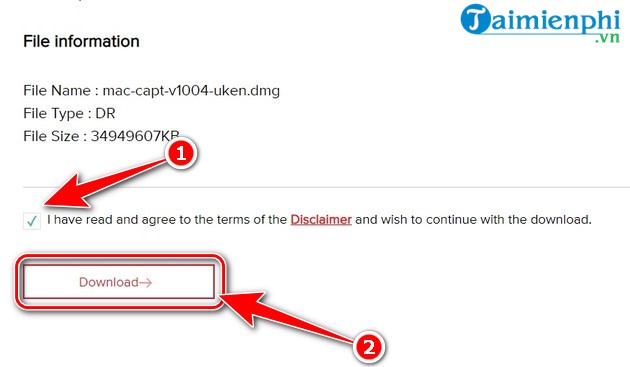
Step 4: Double select the downloaded file, open the macOS folder, double select the Canon_CAPT_installer. pkg File to install the driver.
Step 5: When installation finishes, select the Apple icon in the corner of the screen = > System Preferences => Printers & Scanners.
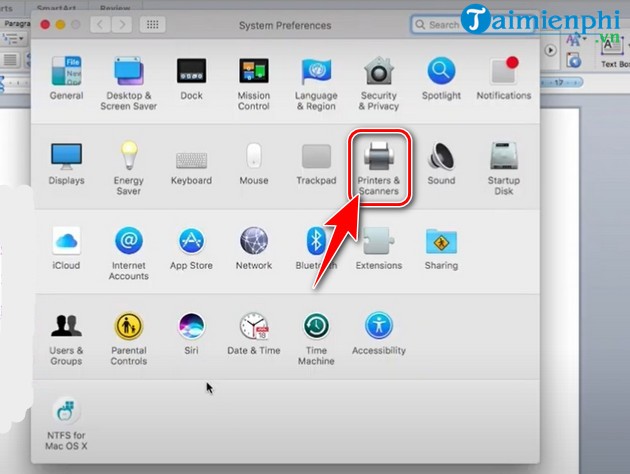
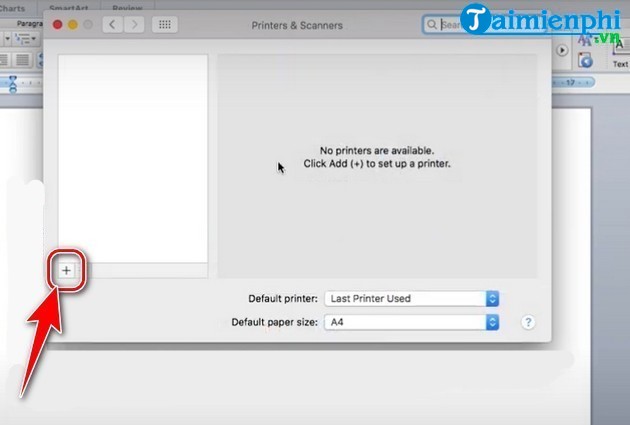
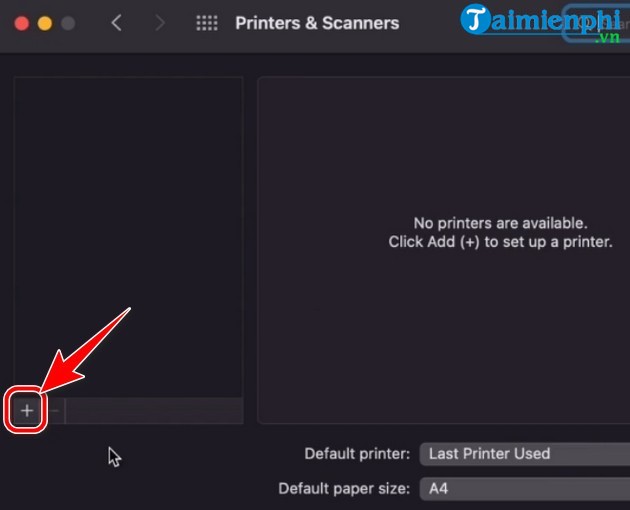
Step 6: Select the Plus icon (+) To add a new printer.
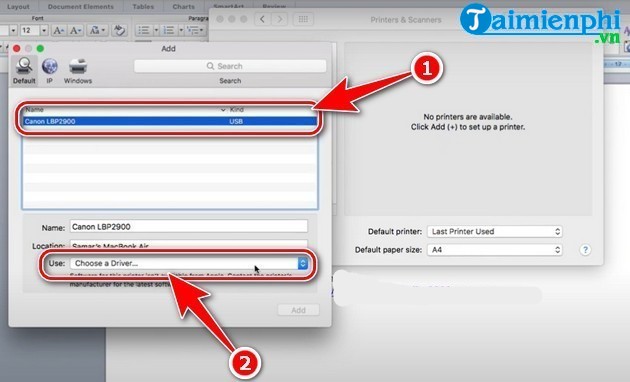
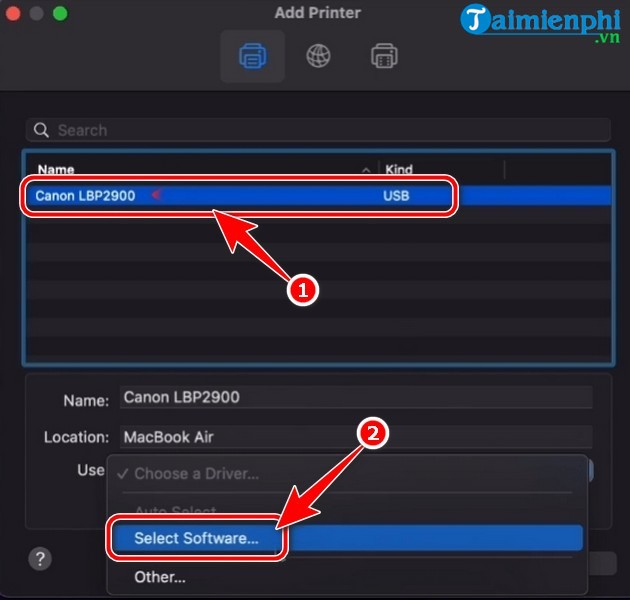
Step 7: select theCanon LBP2900 Printer name and then choose Choose a driver Below => Select Software .
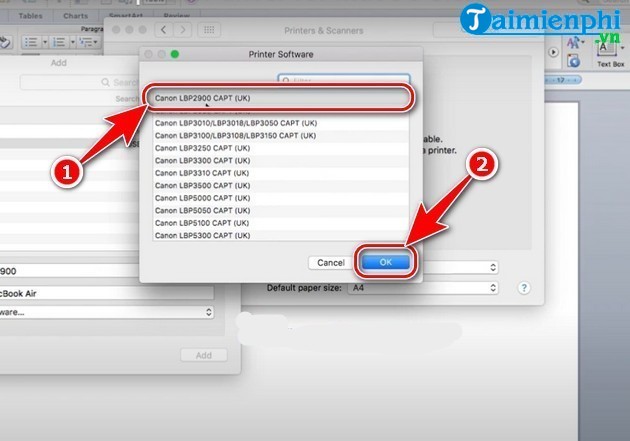
Step 8: Select the correct driver named Canon LBP2900 CAPT (UK) And then choose OK .
Step 9: Select Add in theAdd Printer Window to complete the installation of the Canon 2900 printer on the Macbook.
Some Macbook users running macOS Mojave or higher may encounter an error of not recognizing the Canon 2900 printer even after installing the driver. In this case, you must use an unofficial patch so that the Canon 2900 printer can use the Canon 3000 printer driver on the Macbook. The specific way to do it is as follows:
Step 1: Download the driver patch file for Canon 2900 printer from the official provider .
Step 2: Unzip the downloaded file into any folder and open that folder.
Step 3: Select Finder On the Dock => Macintosh HD => Library folder .
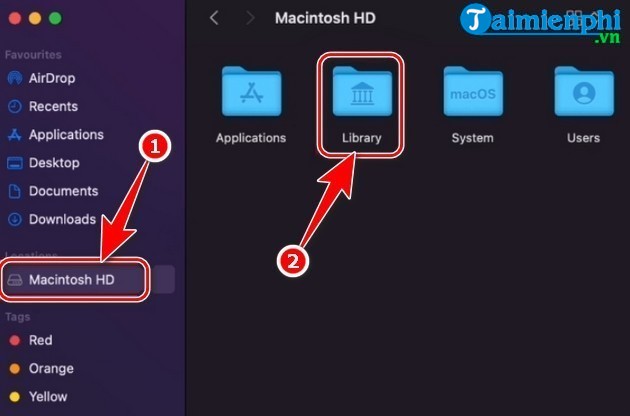
Step 4: Open thePrinters Folder in the Library Folder.
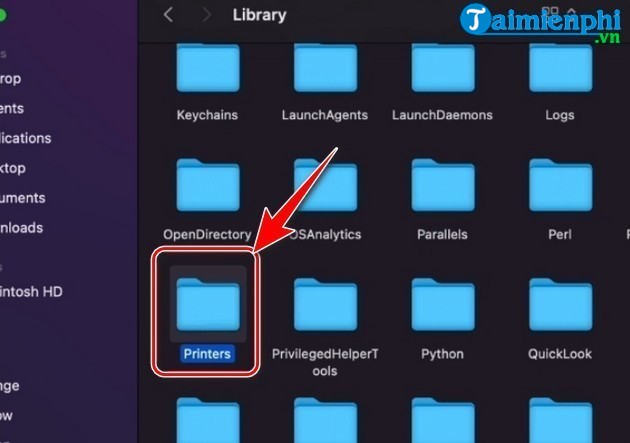
Step 5: Find and open theCanon Folder.
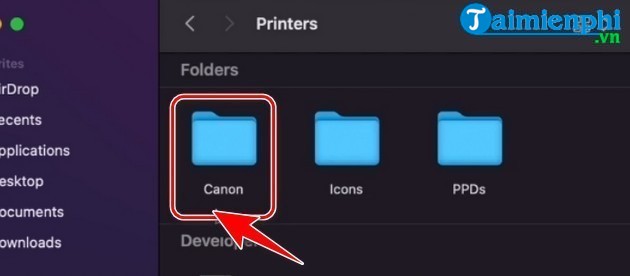
Step 6: Open theCUPSCAPT2 Folder.
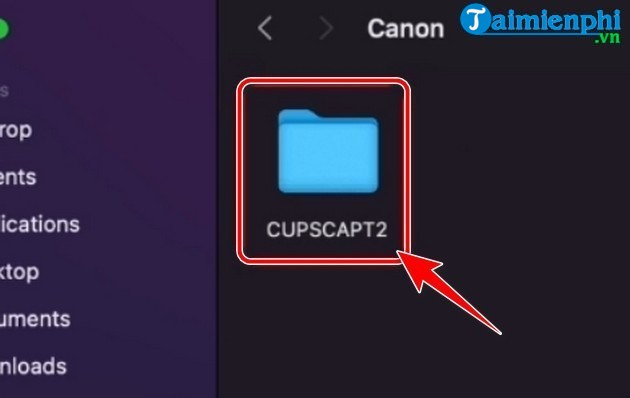
Step 7: Find and open theBidi Folder.
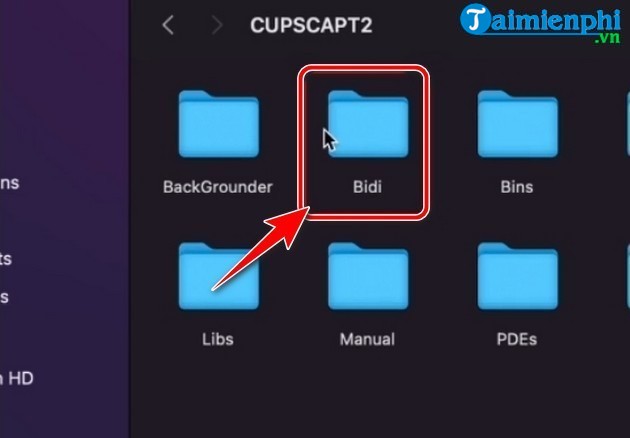
Step 8: Return to the folder where you just extracted the patch file in Step 2 , right-select the file named Captmoncnab3 And then choose Copy .
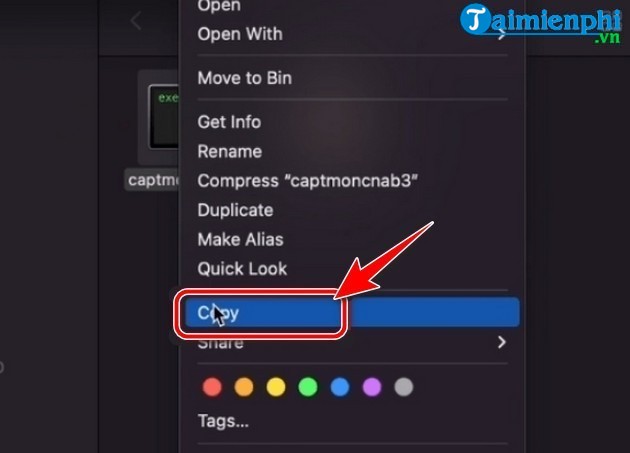
Step 9: Right-select and select Paste item To paste the Captmoncnab3 File into the Bidi folder.
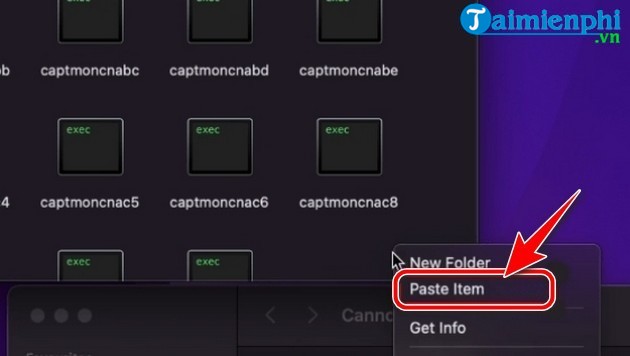
Step 10: Select Replace To confirm overwriting the Captmoncnab3 File into the Bidi folder.
Step 11: Enter the Macbook administrator password and select OK .
Step 12: Return to the CUPSCAPT2 folderIn step 6, find and open theCnaccm Folder.

Step 13: Copy the file CnAC28B9 In the Canon folder extracted in Step 2 .
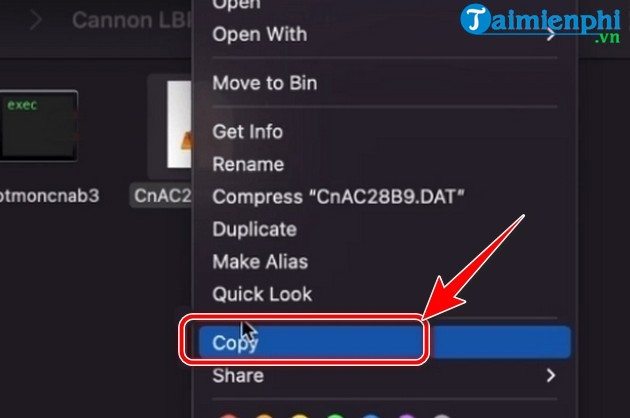
Step 14: Right-select inside the Cnaccm Folder and select Paste Item .
Step 15: On the file overwrite warning window, select Replace , enter the administrator password and then choose OK .
Step 16: After successfully copying the 2 files, select the Search Icon in the upper right corner of the screen => enter the keyword Terminal And select Enter .

Step 17: on theTerminal Interface, enter the command line: Xattr -cr
/Library/Printers/Canon/CUPSCAPT2/Bidi/captmoncnab3 Then choose Enter .
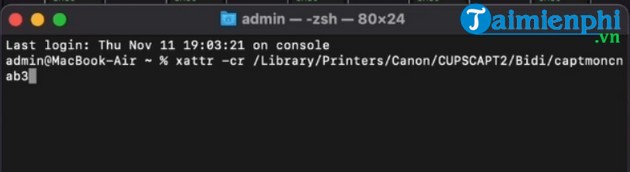
Step 18: Select the Close button in the corner ofThe Terminal Window to turn off this application.
Step 19: Select the Apple icon=>System Preferences .
Step 20: Select Printers & Scanners .
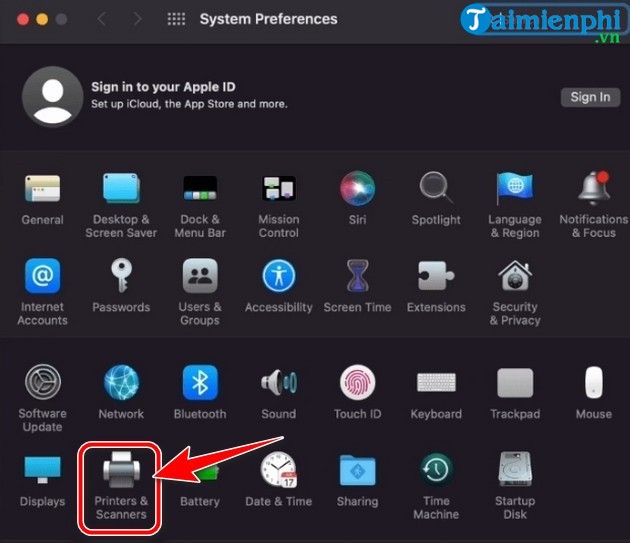
Step 21: Select the Plus icon (+) To add a printer.
Step 22: Left select theCanon LBP2900 Printer name then choose Select Software. In the Use Section below.
Step 23: OnThe Printer Software Window, find and select Canon LBP3000 CAPT (UK) And then choose OK .
Step 24: Select Add in theAddPrinter Window.

Step 25: Wait a few minutes while the printer driver is installed.
Step 26: Right-select the printer name and select Set default printer To set Canon 2900 As the default printer.
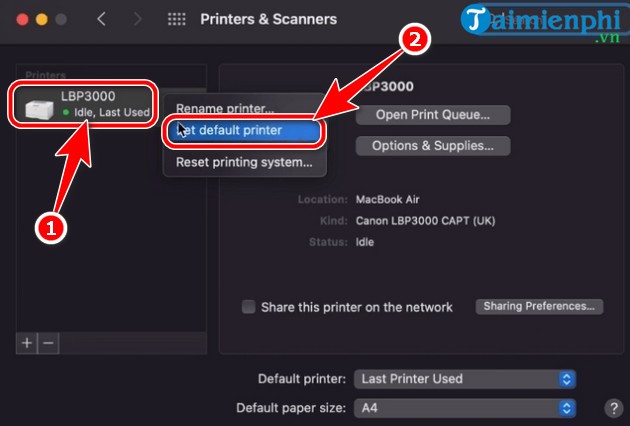
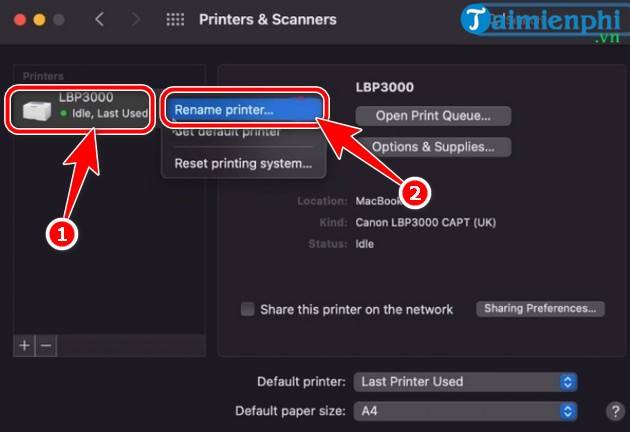
Step 27: To rename the printer, right-select the printer icon, select Rename printer .
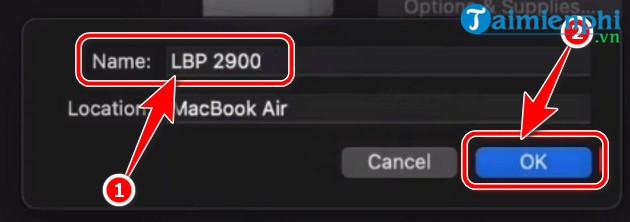
Step 28: Enter the new printer name in the Name Box and select OK .
Recently, TipsMake showed you how to install Canon 2900 printer for Macbook. As long as you follow the above steps one by one, the process of connecting the Canon 2900 printer to the Macbook will take place extremely quickly. Good luck!
FAQ
What do I need before I install Canon 2900 Printer for Macbook?
Prepare the required device, software, account access, and any files mentioned in the steps. Back up important data before changing system settings.
Why does the process look different on my device?
Menus and options can vary by operating system, app version, device model, or region. Use the closest matching setting and check the official documentation when needed.
What should I do if a step does not work?
Restart the app or device, confirm permissions and connectivity, update the software, and repeat the step carefully. Avoid unofficial downloads or tools.
Related Articles
 How to Quickly and Easily Install a Canon 2900 Printer on a MacBook8 minutes read
 How to Install Canon LBP 2900 Printer on Windows4 minutes read
 How to Install Canon LBP 1210 Printer on the Computer5 minutes read
 Popular Genuine Canon Inks2 minutes read
 How to Adjust the Canon 2900 Printer in Dark and Light Ink3 minutes read
 How to Fix Printer Error Canon 2900 Not Receiving Print Job3 minutes read
Reader Comments 0
Sign in with email or Google to join the discussion.