Table of Contents
This practical guide explains how to install asahi linux on an apple silicon mac with clear steps and useful context. It also covers common requirements, potential problems, and the details that can help you get better results.
It also has early support for graphics acceleration, with OpenGL initially implemented for GPUs on Apple's M-series chips. this guide will show you how to install Asahi Linux on your Mac Apple silicon.
Features Not Yet Supported by Asahi Linux
Asahi Linux is still a work in progress and some essential features are not yet available. So you can wait for future releases before installing it, especially if you need the following features:
- Thunderbolt
- DisplayPort Alt Mode
- HDMI on MacBook
- Internal speaker
- Webcams
- Touch Bar
You can find a more specific list of devices on the Asahi Linux GitHub page.
Install Asahi Linux on Mac
To install Asahi Linux on your Mac, your Mac must be running macOS 12.3 or later and have at least 53GB of free disk space. Follow the steps below to start the installation process.
Warning : Before you proceed with installing Asahi Linux on your Mac, it is important to back up all important files on your Mac. Any mistakes made in the following steps could result in permanent data loss, so be cautious.
Download Asahi Linux
To download the installer and begin the installation process, follow these steps:
1. Open Terminal on your Mac and type the following command:
curl https://alx.sh | sh2. Enter your administrator password when prompted by the installer. This will download and automatically run the Asahi Linux installation script.
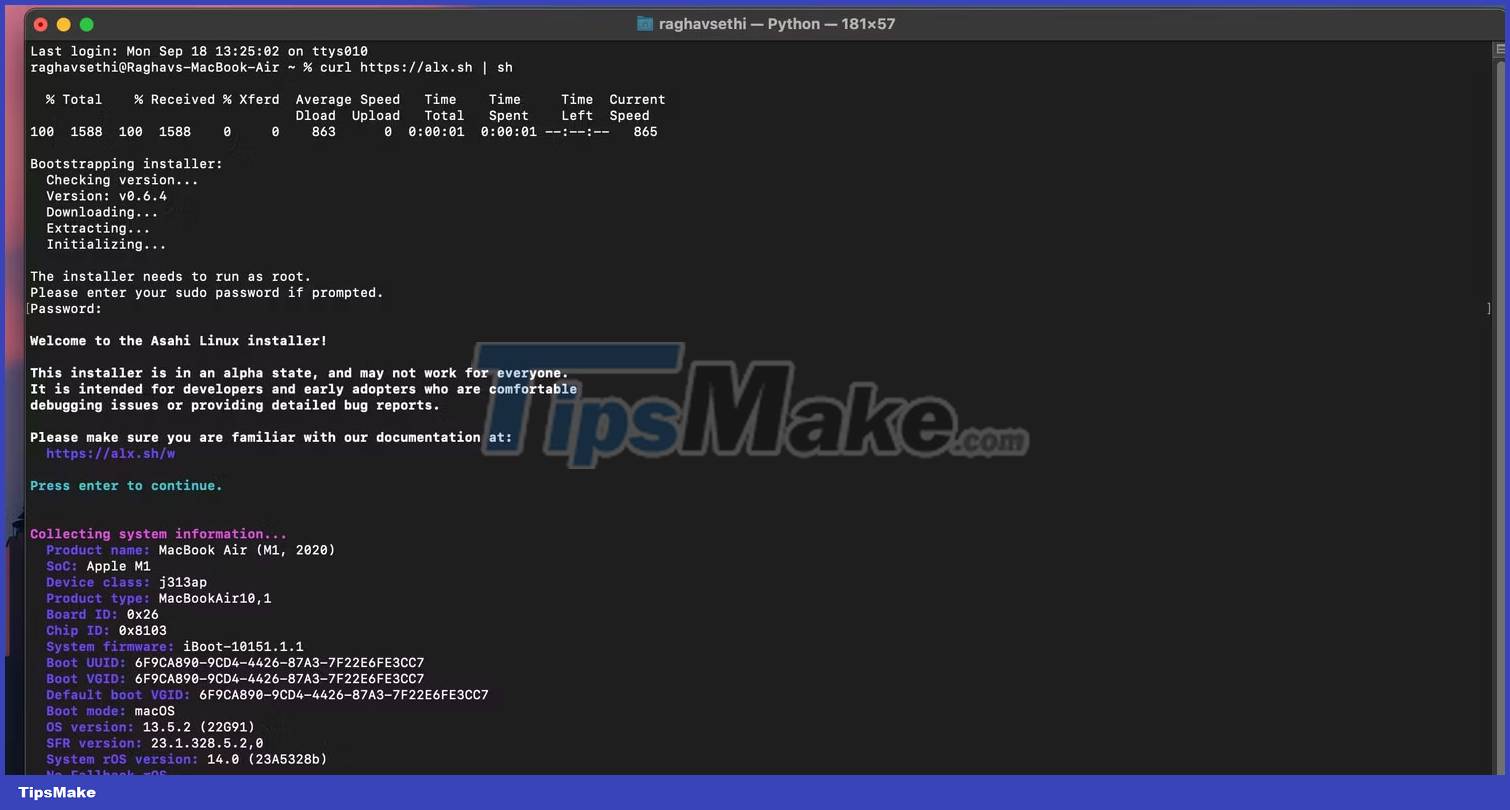
Resize Drive Partition for Asahi Linux
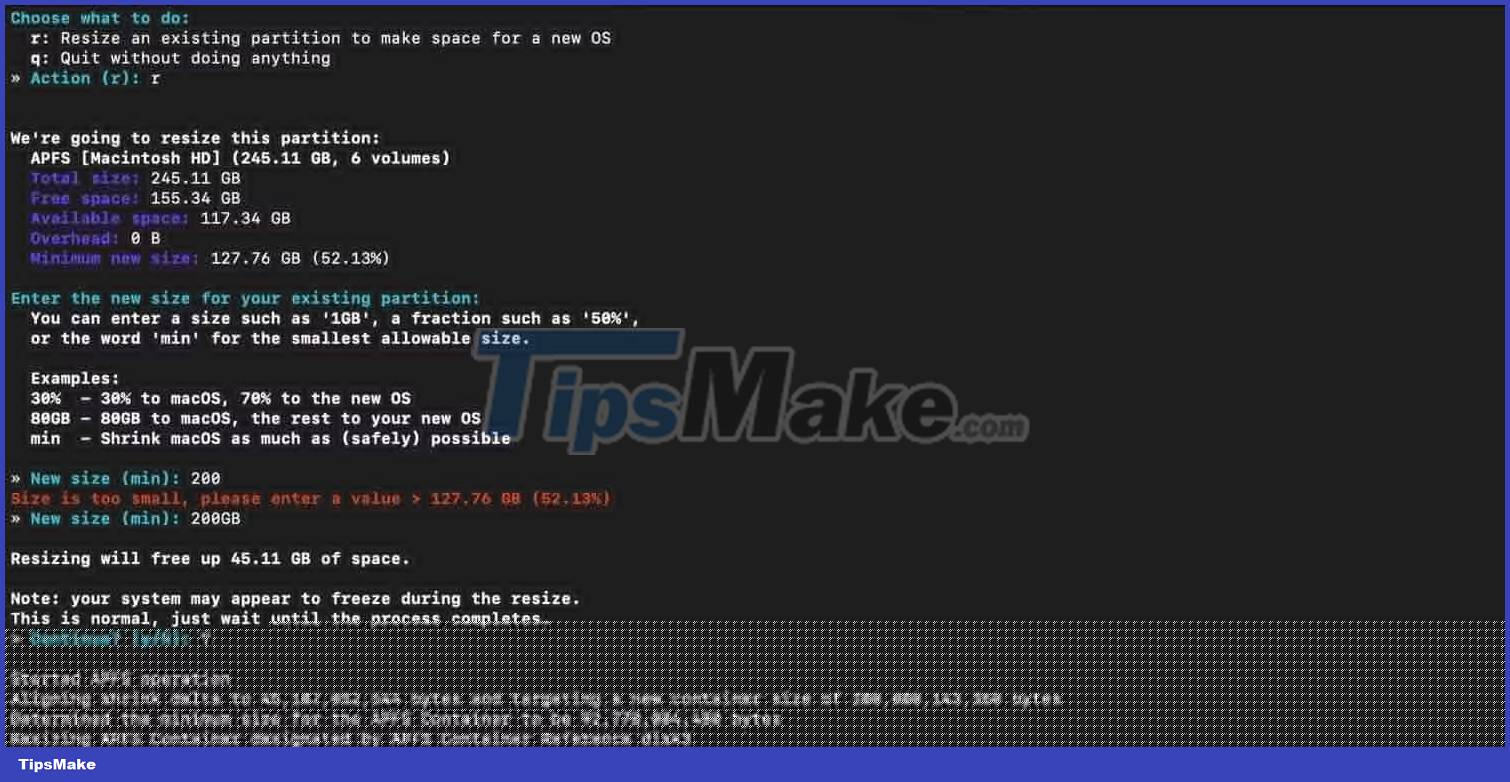
The installer will now show you all available partitions on your Mac and allow you to create new ones for Asahi Linux.
- The installer will ask if you want to create a new partition for Asahi Linux. You can do so by pressing R and then Return (or Enter ) on your keyboard.
- When prompted, you can resize your macOS partition if needed. You have the option to specify size in percentage or storage capacity. For example, you can enter 200GB to reduce the size of macOS to 200 gigabytes, or 60% to allocate 60% of your drive space to macOS.
- The installer will now show how much space you will free up for Asahi Linux. Press Y then Enter to resize your partition. Your Mac may freeze for a few seconds after this step.
- Press the Return key when the resizing process is complete.
Install Asahi Linux
Now that you have created a new partition for Asahi Linux, you can install it to dual-boot between macOS and Linux. To do so, follow these steps:
1. When you see the Choose what to do prompt again, simply press F then Return to proceed with the installation of Asahi Linux in the available free space.
2. When you reach the prompt that says Choose an OS to install , select the option that suits your preferences. In most cases, you should choose 1 to install Asahi Linux along with all the pre-installed applications.
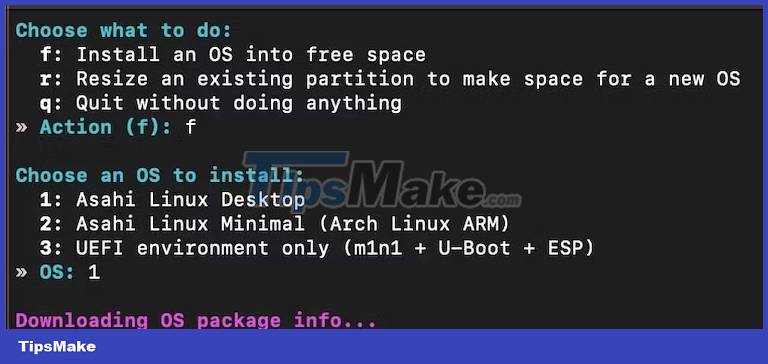
3. When asked, determine the capacity allocation for the new operating system. You can specify size or percentage. Additionally, you can enter min for the minimum value and max for the maximum value.
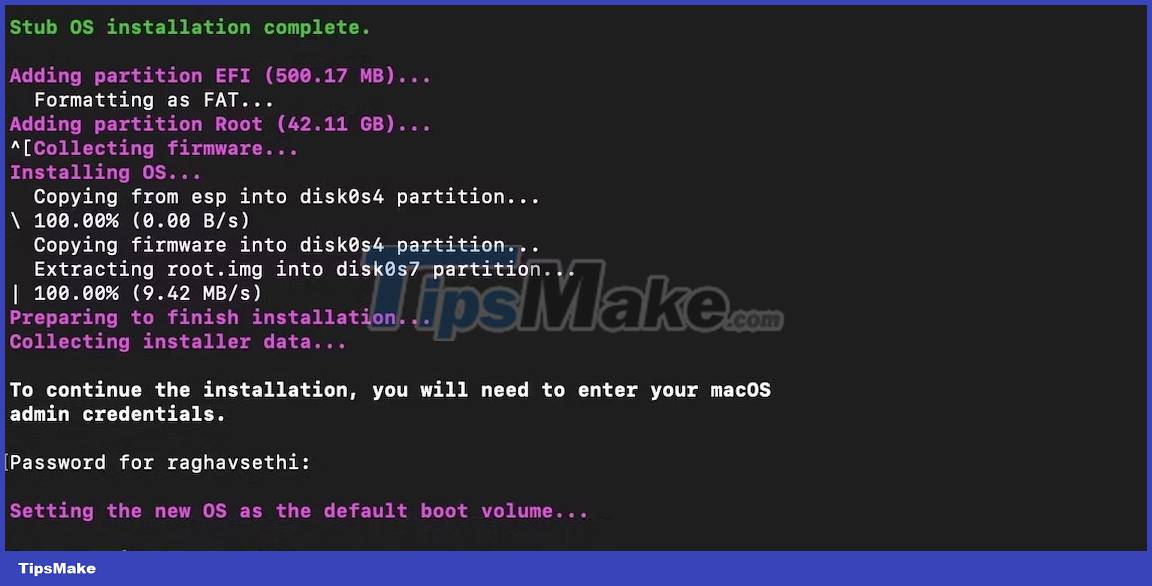
4. Next, name your operating system, press Return , and the script will automatically install and configure everything. If asked, provide your macOS user password to gain admin access.
5. Once configuration is complete, you will receive a prompt to press Return and read important instructions to boot Asahi Linux successfully. After reading the instructions carefully, press Return again to power off your Mac.
Boot into Your Mac's Boot Options
After your Mac powers off, you need to access the boot options and select the appropriate partition to boot from. So, follow these instructions:
1. Press and hold the power button until you see the words "Entering Startup Options" below the Apple logo.
2. This will show all the partitions you can boot from. Select the Asahi Linux option and select Continue .
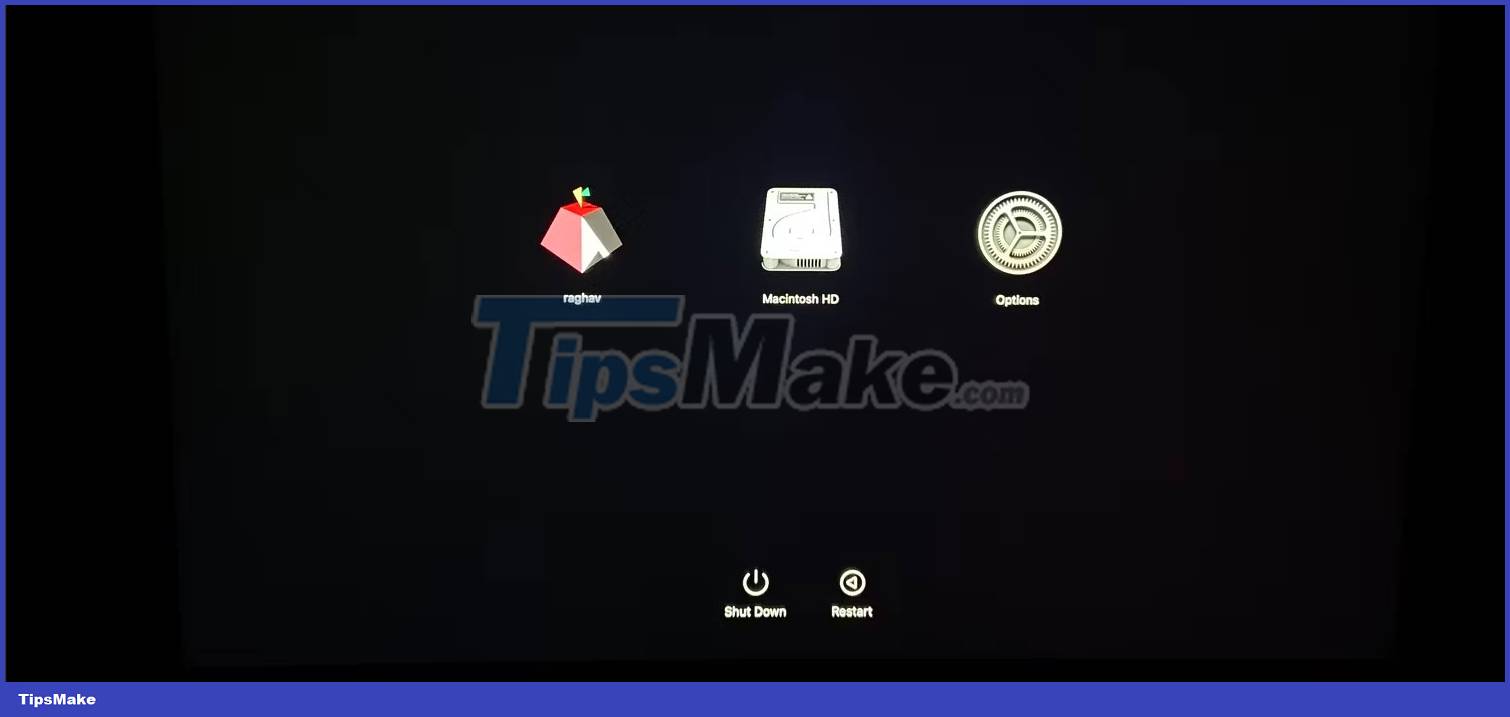
3. Your Mac will now prompt you for a password. When you authenticate, a Terminal window opens.
4. In the Terminal window, press the Return key to continue the installation process.
5. Re-enter your username and password after the installer prompts you to do so.
6. Press Y to confirm changes and press Return to boot into Asahi Linux.

Complete Installation of Asahi Linux on Mac
Your Mac will eventually boot into Asahi Linux, where you can complete setup and configure all important settings by following these steps:
- After successfully launching Asahi Linux, you will encounter a configuration page where you can customize settings such as language, region, time zone, and keyboard layout.
- Choose your username and password for Asahi Linux and click Next .
- Finally, click Set up at the bottom right to complete the installation and boot to the login screen.

Install GPU Driver for Asahi Linux on Mac
The developers behind the Asahi Linux project also created GPU drivers using Apple's driver reverse engineering technique. This allows for full hardware acceleration and significantly better performance and battery life. You can install the GPU driver by following these steps:
1. Open Terminal on your Linux installation.
2. Enter the following commands to install the latest GPU driver and change your display server to Wayland.
sudo pacman -Syu sudo pacman -S linux-asahi-edge mesa-asahi-edge sudo update-grub sudo pacman -S plasma-wayland-session 3. Restart your Linux installation.
Conclusion
Understanding Asahi Linux makes it easier to compare options, avoid common mistakes, and apply the information in this guide more effectively. Review the relevant requirements before making changes or choosing a solution.
FAQ
How do you install asahi linux on an apple silicon mac?
Follow the steps in this guide in order, confirm the required settings or tools, and verify the result before making additional changes.
Is it safe to install asahi linux on an apple silicon mac?
It is generally safe when you follow the recommended instructions, use trusted tools, and avoid changing settings you do not understand.
What should you do if the process does not work?
Recheck the requirements, restart the device or application when appropriate, and review each step for missed settings or compatibility issues.
Related Articles
 Linux 6.2 Officially Supports Apple Silicon4 minutes read
 What Is Apple Silicon?4 minutes read
 What Is Silicon Valley? Explained2 minutes read
 How to Install VirtualBox on an Apple Silicon Mac: Step-by-Step Guide7 minutes read
 Install Linux Linux on Mac: How to Install Kali Linux on macOS12 minutes read
 Ordinary Things in Silicon Valley but Strange to the Rest of the5 minutes read
Reader Comments 0
Sign in with email or Google to join the discussion.