How to install a virtual keyboard in a Raspberry Pi
If you have a touchscreen on your Raspberry Pi (or don't already have a keyboard for it), then installing a virtual keyboard on the Raspberry Pi OS can be really helpful..
In this tutorial, make tech easier than ever to show you how to install and use this keyboard type.
Install the operating system for the Raspberry Pi
Obviously, the first step is to install the operating system on the Raspberry Pi. If you need help installing an operating system on a Raspberry Pi (e.g. Raspbian), you can read the detailed instructions at: How to Install an Operating System for the Raspberry Pi.
However, if you don't have a keyboard at home, you can quickly get 'stuck' in the configuration process.
How to configure network or complete welcome wizard without keyboard? That's why the guide to setting up headless on your Raspberry Pi can be helpful.
You will see how to configure the network and enable SSH from your computer, so no keyboard is required.
This method is often used when creating a new SD card, even if you have a good wireless keyboard. This saves time for each installation.
System update
Once the system is installed (or if you've taken that step before reading this guide), there's an additional step.
With that said, this virtual keyboard pack is available in the default Raspbian repository. So, you should start by updating your system.
Here are the commands to update all packages from a terminal:
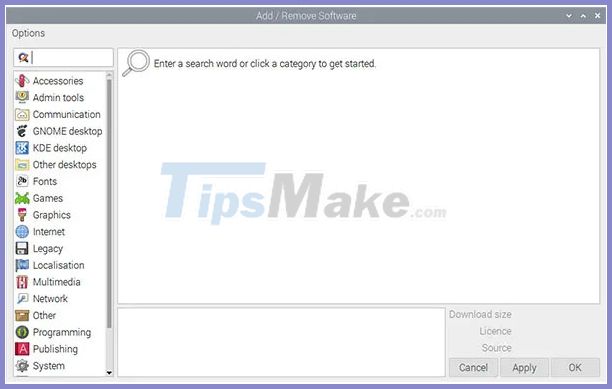
sudo apt update sudo apt upgrade sudo rebootYou can also do this in the Add / Remove software tool if you want. Go to the main menu, choose Accessories> Add / Remove Software .
Then click Options , then check for updates and upgrades for everything.
Turn on SSH
If you use a touchscreen or don't have a keyboard, you should probably enable SSH on your Raspberry Pi. This way, you can install and configure new packages from your computer.
This step isn't required, but if you need it here's how:
- Open the main menu.
- Go to Preferences> Raspberry Pi Configuration .
- Then, enable SSH in the Interfaces tab .
- You can now connect to your Raspberry Pi from your computer.
On Windows, you need a software like Putty. On Linux, you can use a terminal with the command:
ssh pi@IPInstall a virtual keyboard
Finally, you can also install the on-screen keyboard package. The article will show you how to do this using two methods: via SSH or directly on Raspbian Desktop.
Install on Raspberry Pi OS Desktop
If you have a keyboard to install, you can do this directly in the desktop interface:
- Open the main menu.
Go to Preferences> Add / Remove Software .
In the search field, type matchbox and press Enter.
In the results, look for the on-screen keyboard package . The package name will be the same as matchbox-keyboard. Check the corresponding box.

Click Apply to install it. The system will automatically install the dependencies.
You can now exit this tool and go directly to the section using the keyboard.
Install over SSH
From your computer, you can also install the package on your Raspberry Pi, if SSH is enabled:
- Connect to the Raspberry Pi using SSH.
- Enter the following command:
sudo apt install matchbox-keyboardNow, you can switch back to the Raspberry Pi screen and read the following.
Use the virtual keyboard
Open the keyboard
Once installed, the keyboard will be available in the main menu. Go to Accessories and click on Keyboard.
The keyboard should now be visible on your screen:
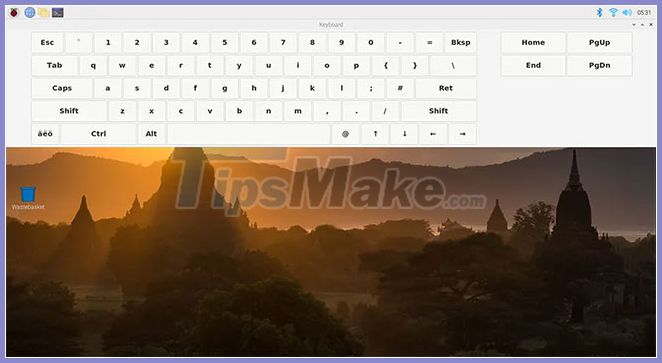
Desktop icons will move to the bottom, and you can also move the keyboard where you want.
Using the virtual keyboard is very intuitive (it really resembles a smartphone keyboard).
On a touchscreen, this virtual keyboard is perfect, but if you're using a large screen the keyboard can take up too much space. You can reduce the window size with the mouse, as you can with any other application.
Create a shortcut
If you use the virtual keyboard all the time, launch it from the main menu. You can create a shortcut in the top bar:
- Right click on an icon from the top bar (Example: Terminal).
Click Application Launch Bar Settings .
- A window like this will display:

Find a keyboard app on the right and click Add to add it on the left.
- Close the window.
- The icon is now available in the top bar.

Automatically started
From your computer, connect to your Raspberry Pi via SSH. Create a new script in / usr / local / bin (or anywhere else).
sudo nano /usr/local/bin/keyboard.sh- Paste the following lines:
#!/bin/bash sleep 5 /usr/bin/matchbox-keyboard- Save and exit ( CTRL+ O, CTRL+ X).
- Add execution permission:
sudo chmod +x /usr/local/bin/keyboard.sh- Edit the following file:
sudo nano /etc/xdg/lxsession/LXDE-pi/autostartAdd this line to the end:
@/usr/local/bin/keyboard.sh- Save and exit.
If you add the matchbox-keyboard command directly to the autostart file, the keyboard will open at a minimum size (which is not very useful). So I created a script with time to wait (sleep 5) while the desktop loads. After the reboot, everything was fine, the keyboard automatically showed up in full size.