How to create the Discord bot on the Raspberry Pi
Discord is a great tool for chatting with the community (originally gamers, but now expanded to other groups). You can use webhooks and bots to interact with the server..
Today, TipsMake.com will read with you how to do this on Raspberry Pi with Python.
Sign up for an account
If you do not have an account, here's how to sign up:
- Visit Discord.com and click Login , then select Register.
- Fill out the following form on the website:
 Fill out the registration form
- After logging in, directly create a new server.
- Then choose the name and icon.
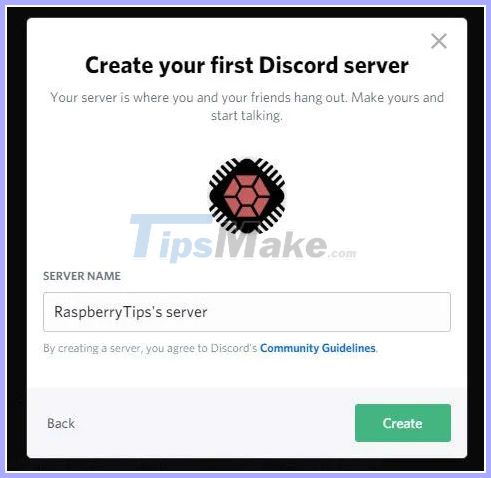 Choose a name and icon
You already have your account and server. Now you can move on to the next step. Don't forget to confirm your email address as it is a must for creating a bot.
Create an application
You need to declare a new application before creating the bot:
- Start by opening Discord's developer console by clicking here.
It looks like this:
 Discord's developer console
- Create a new application by clicking the top right button
- Choose a name.
Your bot will get the application name. So, 'test' or 'myfirstapp' is probably not a good idea.
- To create the application, you need to confirm your email.
The application has been created, now you can create a new bot.
 The application has been created
Create a bot
- Click Bot in the menu on the left.
- Then click Add bot and accept the confirmation message.
- A bot has been automatically created associated with your application.
Invite bot on server
The final step is to invite the bot to join your server:
- The first thing is to access this URL:
https://discord.com/api/oauth2/authorize?client_id=&scope=bot&permissions=1Replaced with your client ID, you can find it on the application page.
- On the page that opens, select the server to join:
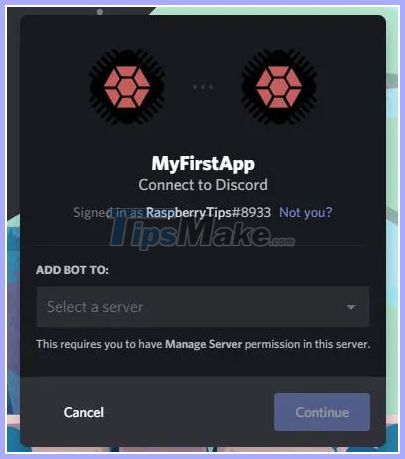 Select server to join
- Click Continue.
- Then click Authorization on the next screen.
The bot is already connected on the server. You can check it on your server:
 The bot is already connected on the server
The Discord section is now complete, you have everything you need to start working on your Raspberry Pi.
Code bot on Raspberry Pi
The goal here is to create a 'brain' for your bot. For now, it cannot do anything.
After a few prerequisites, the main part is to create a script that suits your needs.
Operating system
The example used the Raspberry Pi OS Lite to do this, but any system might be fine, because you only need Python.
As always, don't forget to update your system before going any further:
sudo apt update sudo apt upgradePrerequisite of Python
You need to install several Python packages:
sudo apt install python3-pip python3-cffiPIP is the Python extension manager and CFFI is the interface between C and Python that the library uses.
Python 3 is required because the library does not work with earlier versions.
So it is python3-pip, not python-pip.
Basically, with this command, apt will install all other necessary packages.
Then update setuptools to make sure you have the latest version (if you have had PIP on your system before)
sudo pip3 install -U setuptoolsLibrary
To keep things simple, you will use the library to interact with Discord
The article I chose is Discord.py from this GitHub repository because it is very easy to use.
To install it, simply copy this command:
sudo pip3 install discord.pyBasic script first
The article will start with a short example of how this library works, so you can check if everything in the configuration is good and move on to creating your projects.
When on Raspbian Lite, for example, use Nano as an editor, but you can use the option you like.
For example, on the Raspberry Pi OS Desktop, you can copy and paste code in Thorny or another editor.
Open your editor and create a new file:
nano MyFirstApp.pyCopy and paste these lines:
import discord from discord.ext import commands bot = commands.Bot(command_prefix='>') @bot.command() async def ping(ctx): await ctx.send('pong') bot.run('token')Here is an example from the GitHub repository, see more here.
Basically, the goal is to answer pong when someone runs the ping command.
- The first two lines are here to import the necessary prerequisites from the library.
- Then, the prefix to detect a command ('>') is declared.
- The next block is to determine what order you are waiting for and what to do if you receive it. The syntax will be the same for each command you add later.
Finally, the example runs the bot with these parameters.
Here is the command to run the bot if you don't have an editor to do this:
python3 MyFirstApp.pyChange the name to match the one you created.
The code is fairly easy to read, and you don't need much else to do something interesting.
If you already have some basic knowledge in Python, you can add a few lines before the 'await' line and send a text variable instead of a static word (e.g. > ping => 40ms to monitor the Internet or another machine) such as.