How to fix Windows Defender error 0x8007139f on Windows 10
Windows Defender error 0x8007139f prevents you from opening downloaded software on your computer as well as other software with security errors on Windows 10/11.
For Windows 10/11 operating system, errors on the computer are still present, although Microsoft representatives have continuously improved with updates. Each new update on Windows always brings with it different errors, and error 0x8007139f appears on the recently updated version of Windows.
Currently, Windows has many different ways to solve error 0x8007139f on the computer. Here's how to thoroughly handle Windows Defender error 0x8007139f on Windows 10/11 computers.
1. Fix error 0x8007139f with Command Prompt
In the Command Prompt, you can use the general scan command to handle basic errors on Windows computers.
Step 1: Open the Start Menu, enter Command Prompt and select Run as administrator to launch with Admin rights.
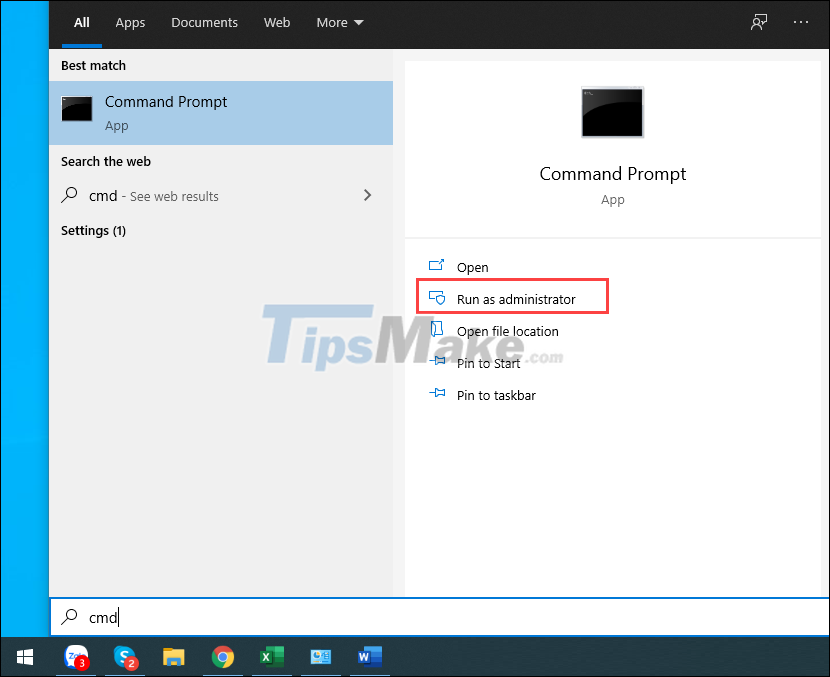
Step 2: When the Command Prompt window appears, copy the command below and paste it into the system to start scanning. The data scanning process will take 3-5 minutes, and when it's done, try again to check for error 0x8007139f on your computer.
Sfc /scannow

2. Fix error 0x8007139f by restarting Services
Restarting Services is the fastest way to re-enable protection services on Windows 10/11.
Step 1: Press the Windows + R combination to open the RUN window on the computer and enter the Services.msc command to open the Windows service on the computer.
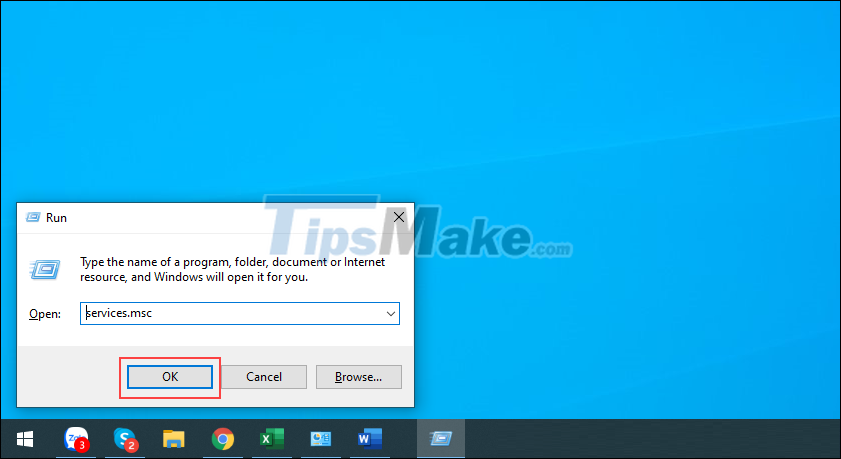
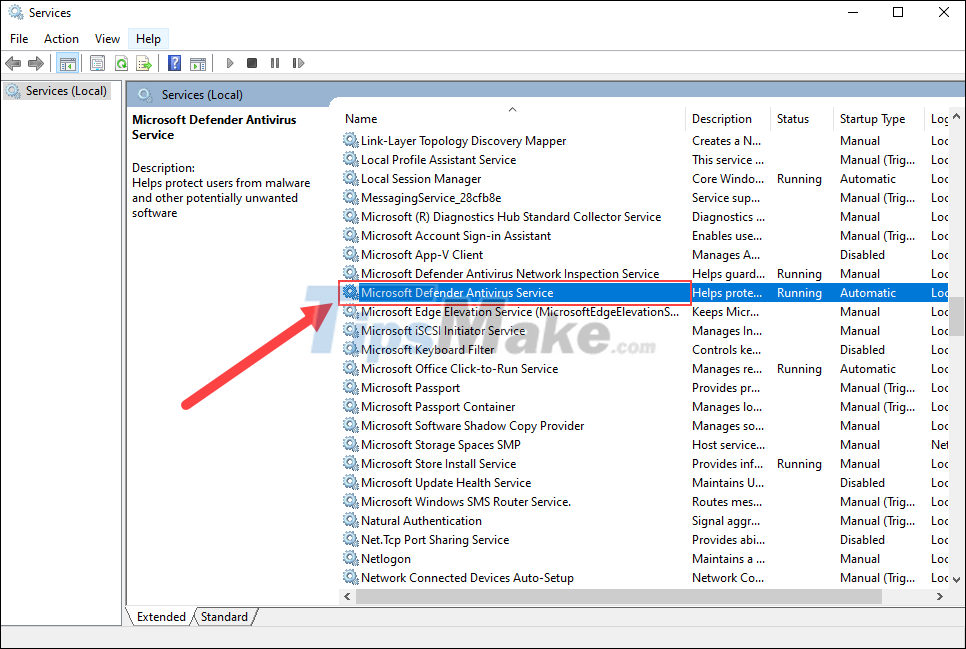
Step 2: In the list of active services on your computer, go to Microsoft Defender Antivirus Service to check.
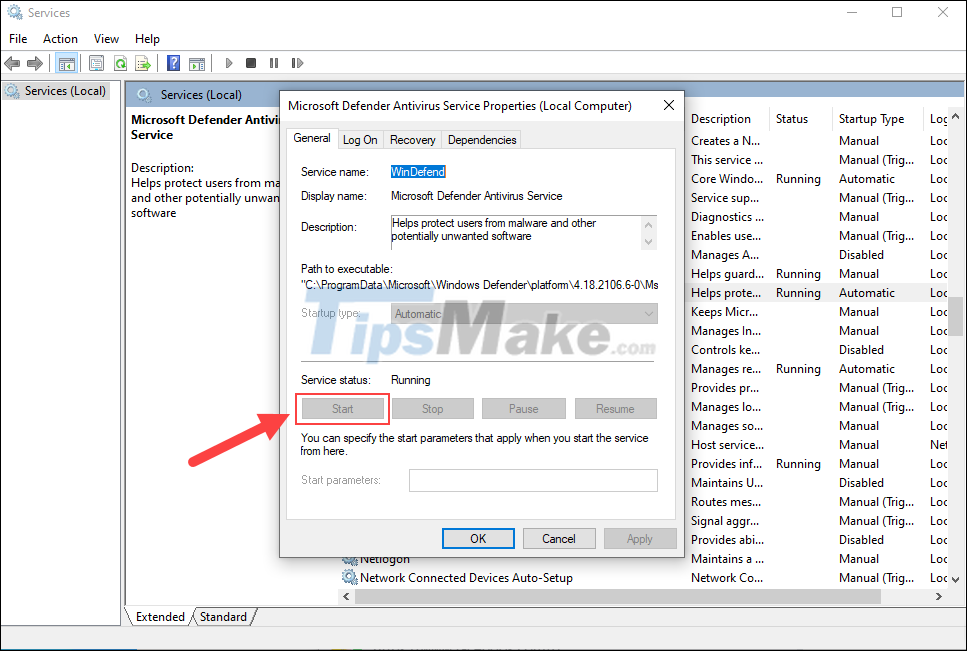
Step 3: On machines with errors related to 0x8007139f , the default Microsoft Defender Antivirus Service will be stopped. You just need to select Start to reactivate the service on your computer.
3. Fix error 0x8007139f with FixWin toolkit
FixWin is the fixers are highly appreciated as they solve a lot of problems on the computer. For error 0x8007139f, you can also do a quick fix on FixWin.
Step 1: Go to Fix Win's homepage and download the software to use. This is a direct use software so you will not need to install it.

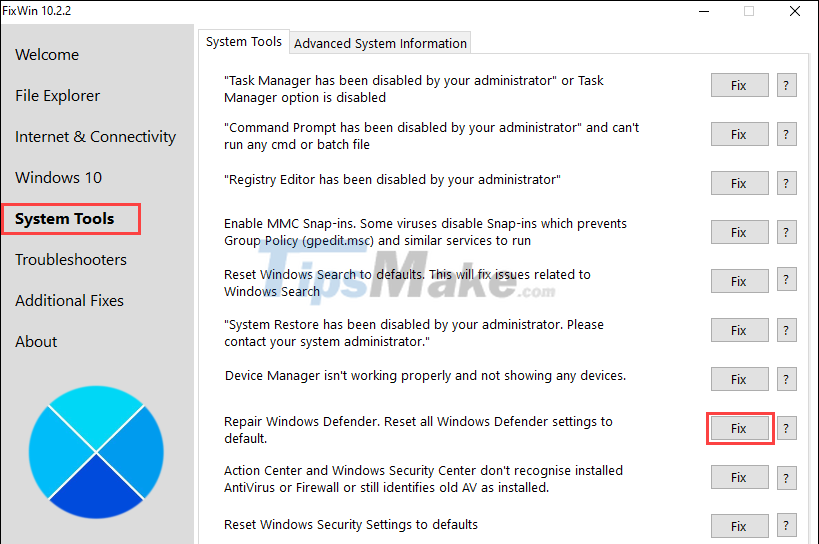
Step 2: In the software window, go to the System Tools tab and select the Fix item of the Repair Windows Defender section, Reset all Windows Defender settings to default.
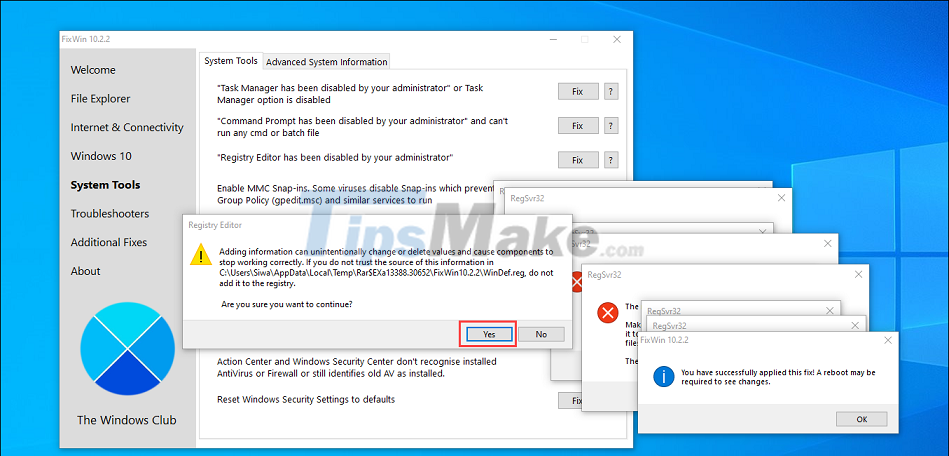
Step 3: When the command is run, the system will intervene in the Registry on the computer to return the services to default. Please select Yes to complete the setup.
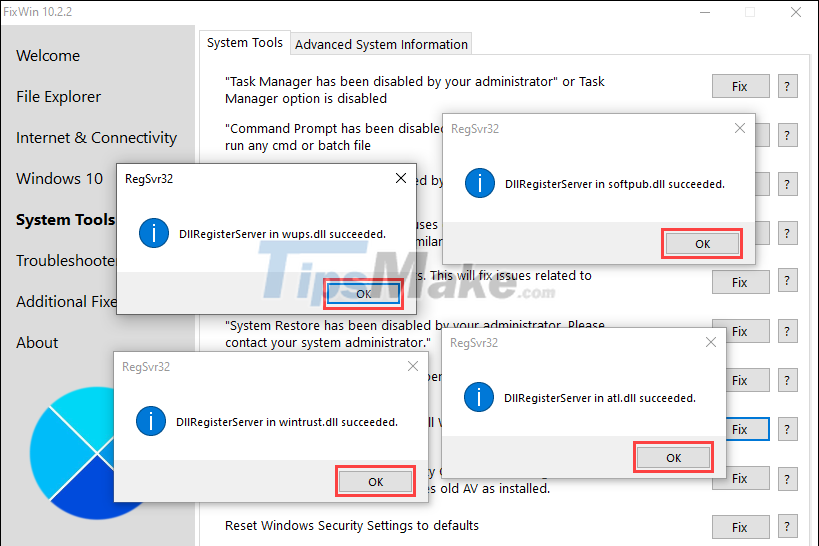
Step 4: Next, a series of commands will appear to handle error 0x8007139f on the computer. You just need to select OK to finish fixing the error.
In this article, Tipsmake has shown you how to handle error 0x8007139f on Windows Defender of Windows 10/11. Good luck!