How to Fix Error 3194 on iOS
When you experience Error 3194 in iTunes, you are not properly connecting to Apple's firmware signature verification server. This typically happens because you've jailbroken your device in the past and have changed the way iTunes connects....
Part 1 of 2:
Editing Your Hosts File
-
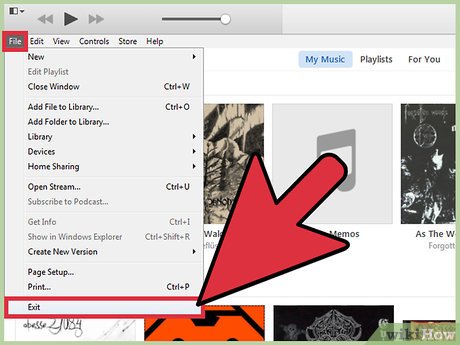 Quit iTunes. Make sure iTunes is completely closed before proceeding so that the changes you make take effect.
 -
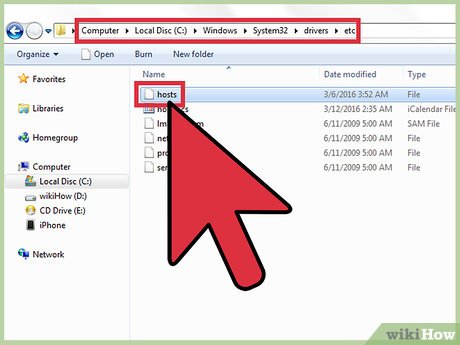 Open the hosts file on the computer. Error 3194 most often appears when you are trying to update or restore your iOS device through iTunes, and iTunes cannot connect to the Apple verification servers. This is common if you have jailbroken your device in the past or are trying to downgrade iOS.
- Windows - Navigate to C:WindowsSystem32driversetc and double-click the hosts file. Select "Notepad" from the list of available programs.
- Mac - Open the Terminal from the Utilities folder, type sudo nano /etc/hosts, and press ⏎ Return. This will open the hosts file in a text editor.
-
 Find the bottom of the hosts file. You'll be looking for an Apple address at the bottom. A standard hosts file will not have any lines without a # at the front.
 -
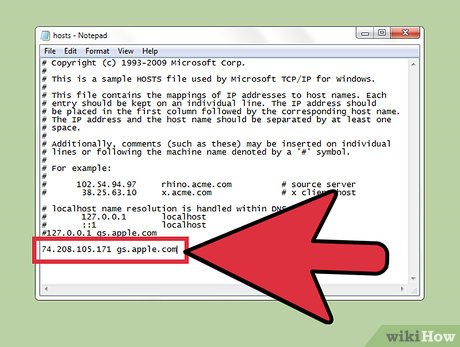
 Look for a .74.208.105.171 gs.apple.com entry. This redirects the signature verification process to the Cydia servers.[1] It is the presence or lack of this redirection that is causing the error. What you do next depends on whether or not you can find this line:
- If you have 74.208.105.171 gs.apple.com at the bottom of the file, add a # to the front.
- If you don't have the line, add 74.208.105.171 gs.apple.com to the bottom of the hosts file.
-
 Save your changes. This should allow your iPhone to make the connection properly.[2]
- Windows - Click the File menu and select "Save."
- Mac - Press Ctrl+O to save and Ctrl+X to quit.
-
 Open iTunes and attempt your restore or update again. In many cases, the changes you made to your hosts file should allow you to proceed.
- Note: If you're trying to downgrade to a previous version, it may not be possible with the version of the firmware you have downloaded. Try a normal restore using the firmware downloaded directly through iTunes.
-
 Put your iOS device into Device Firmware Update (DFU) mode. This may be necessary if iTunes is still not able to connect. You will be prompted to restore your iPhone, which will erase all of the data on it:
- Connect the iOS device to your computer and turn it completely off.
- Press and hold the Power and Home buttons for 10 seconds.
- After 10 seconds, release the Power button but continue holding the Home button. You'll see a message in iTunes prompting you to restore the iPhone.
Part 2 of 2:
Remotely Resetting Your iOS Device
-
 Log into the iCloud website or open the "Find My iPhone" app on another device. If you can't get the update process to work even after changing your hosts file, you can try remotely erasing your iOS device using iCloud. The device you're trying to erase will need to have internet access and "Find My iPhone" enabled. You'll be able to restore the device from any iCloud or iTunes backup after erasing it.
- You can access your iCloud account from any computer by visiting icloud.com. Log in with the Apple ID associated with your iOS device.
-
 Open the Find My iPhone service in iCloud. This will open a map with your registered iOS devices.
 -
 Select your iOS device from the top menu. Click the "All Devices" menu and select the iOS device you want to restore.
 -
 Click the "Erase" button in the iOS device's card. After confirming, the iOS device will begin automatically resetting to factory settings. This may take a while to complete.
 -
 Setup your iOS device and restore your backup. Start the iOS device setup process as if it were a new phone. You'll be given the choice to choose a backup from iCloud or iTunes, or you can proceed with a fresh install.