How to extract ISO file with Linux
You may have downloaded an image file using the popular ISO extension. These files (usually quite large) are basically digital versions of optical media discs. All the files on that disk are in the ISO archive.
Table of Contents
You may have downloaded an image file using the popular ISO extension. These files (usually quite large) are basically digital versions of optical media discs. All the files on that disk are in the ISO archive.
Like Apple macOS and newer versions of Microsoft Windows, Linux has built-in support for mounting image files. This means you do not need third-party software to access the ISO archive and its files.
There are actually many ways to do this, so you can choose one that suits you.
TipsMake.com has an article explaining what an ISO file is and how to create an ISO file on Linux, readers can refer to for more details.
Open the ISO file

To be frank, this job may be much simpler than you think. Many distributions come with the ability to extract ISO images via a right-click menu. Find your ISO image in the file manager, right click and click on the Extract Here option .
If not, you can use ISO-read applications that come pre-installed or included in the distro's application store.
Extract ISO using GNOME Archive Manager

If you do not want to extract all the files at once, you are not required to do so. Instead, open any programs that your Linux distribution uses to manage compressed archives (for example, in ZIP and TAR formats). GNOME Archive Manager (also known as File Roller ) is the default option in many releases, including Ubuntu and Fedora, so the article will use it as an example.
First, select Menu> Open and navigate to the ISO you want to open (the button with three horizontal lines is the Menu button). The files and folders contained inside will now appear, just like when you were opening a ZIP archive. You can now proceed to choose which bits you want to extract and where to place these files on your computer.
You do not want to use GNOME?
No problem. Opening an ISO file is a standard part of many Linux repository management applications. For example, on KDE Plasma, you can open ISO files using the Ark tool. Engrampa is a repository manager built for the MATE desktop environment and can also open ISO files.
If you want an approach that works in any distro or desktop environment and on machines without a graphical interface, then you might want to use a command-line method instead.
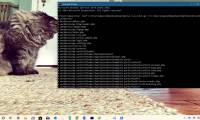
Extract ISO file using command line
First, you will need to create a directory to mount the image. To do so, open Terminal and enter:
sudo mkdir /mnt/iso
Enter the password when asked. You can now mount the file by typing:
sudo mount -o loop .iso /mnt/iso
Replace with your ISO file location. For example:
sudo mount -o loop /home/user/Downloads/image1.iso /mnt/iso
Now you can navigate to the directory you created and access the files in ISO. At this point, you can close the Terminal. You can use your file manager to browse the ISO and select the file you want.
But if you want to extract the entire ISO via the command line, you can copy the contents of the directory by typing:
sudo cp -r /mnt/iso /home/user/Documents
This command will copy the entire contents into a separate ISO folder in the Documents folder. The -r option indicates that you want to copy the contents of the directory, not just the directory itself.
Note : If the previous command cannot mount your ISO, you can also try:
mount -o loop -t iso9660 .iso /mnt/iso
Was this article helpful?
Your feedback helps us improve.
Related Articles
 How to extract Zip files on your computer10 minutes read
 How to decompress IMG files in Windows and macOS5 minutes read
 How to quickly extract .tar.gz file on Windows 106 minutes read
 How to extract a file or folder from a TAR or TAR.GZ file5 minutes read
 3 Simple way to extract ISO file3 minutes read
 How to Extract a JAR File7 minutes read
Reader Comments 0
Sign in with email or Google to join the discussion.