Table of Contents
- 5x performance increase
- Allow BlueStacks 5 to use more than 1 CPU core
- Eliminate FPS stutter/lag in various games.
- The game can be played at the highest graphics settings
How to Enable Virtualization?
This practical guide explains how to enable virtualization (vt) on windows 10 for bluestacks 5 with clear steps and useful context. It also covers common requirements, potential problems, and the details that can help you get better results.
Step 1. Click the Start menu and open Windows Settings by clicking the gear icon, as shown below.

Step 2. Click Update & Security.

Step 3. In the Recovery tab, click Restart now.

Step 4. Now, you will have 4 options to choose from. Click Troubleshoot.
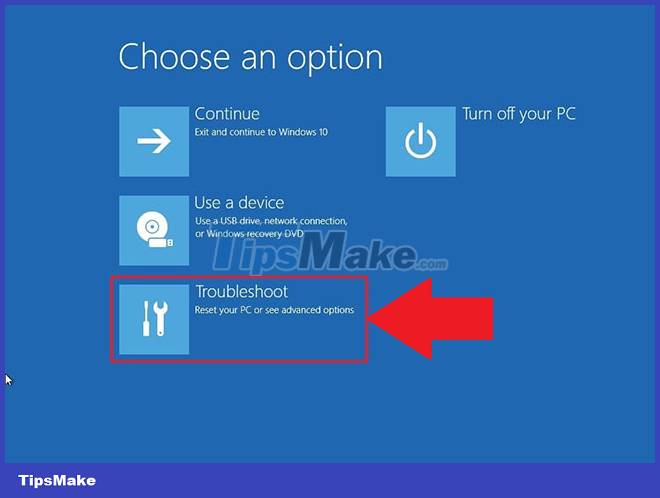
Step 5. Next, click on Advanced Options.
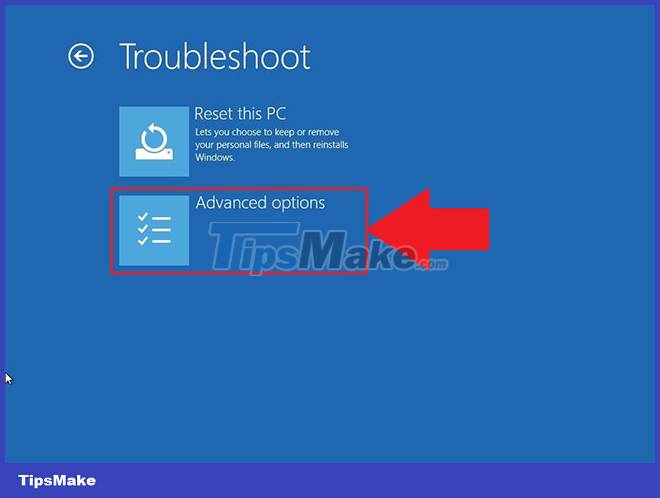
Step 6. In Advanced options, select UEFI Firmware Settings, as shown below.
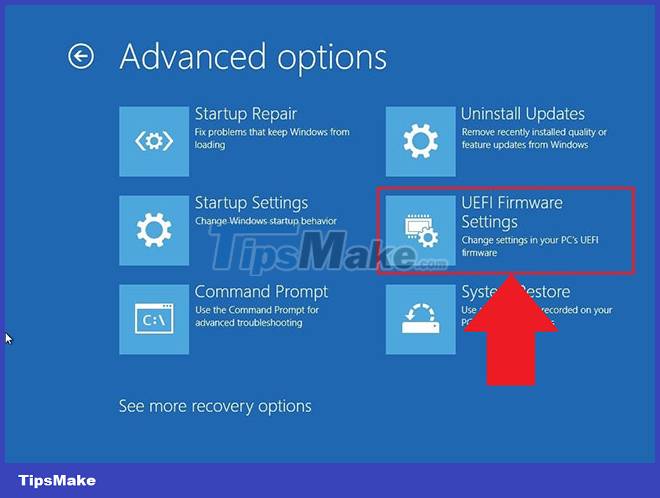
NOTE: If you don't see UEFI Firmware Settings, disable Fast Startup or refer to this alternative method to access BIOS.
Step 7. You will now be prompted to restart your computer. Click Restart Now.
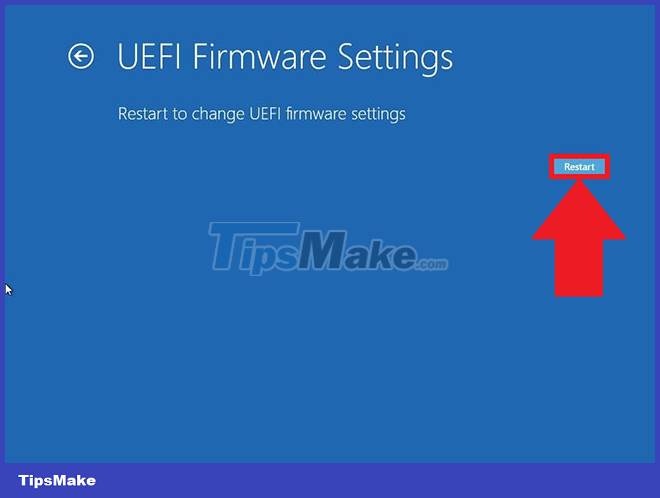
Step 8. Once you have entered the BIOS settings in your PC, the steps to enable virtualization will vary according to the CPU you have. Based on the CPU you have in your PC, follow one of the 2 sections below.
Enable Virtualization in BIOS for Intel Cpus
NOTE: The layout of BIOS Settings may also vary depending on various factors such as your motherboard, chipset, computer model and OEM.
Step 1. After entering the BIOS settings, press the F7 key or click the Advanced Mode button, as shown below.
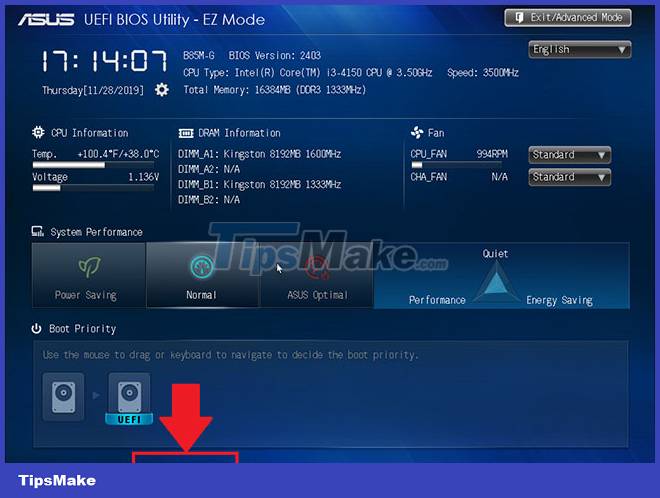
Step 2. Now, open the Advanced tab, as shown below.

Step 3. Here, you will be given different options. Select CPU Configuration.

Step 4. To enable Virtualization, click Disabled next to Intel Virtualization Technology and change it to Enabled.
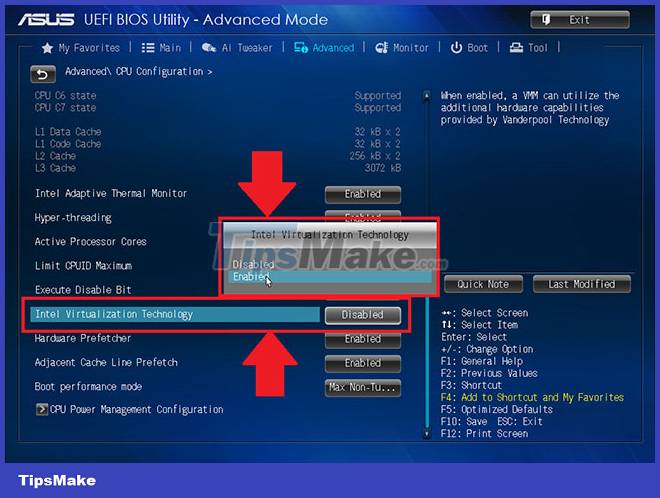
Step 5. Finally, click Exit and select Save changes & reset.
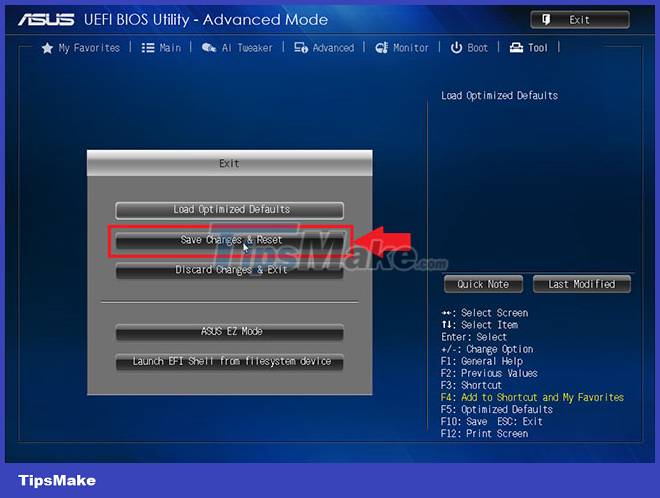
NOTE: The options names may vary depending on your PC model, but in any case, remember to save before exiting.
Enable Virtualization in BIOS for AMD Cpus
NOTE: The layout of BIOS Settings may also vary depending on various factors such as your motherboard, chipset, computer model and OEM.
Step 1. In BIOS settings, press F7 key or click on Advanced Mode option, as shown below.
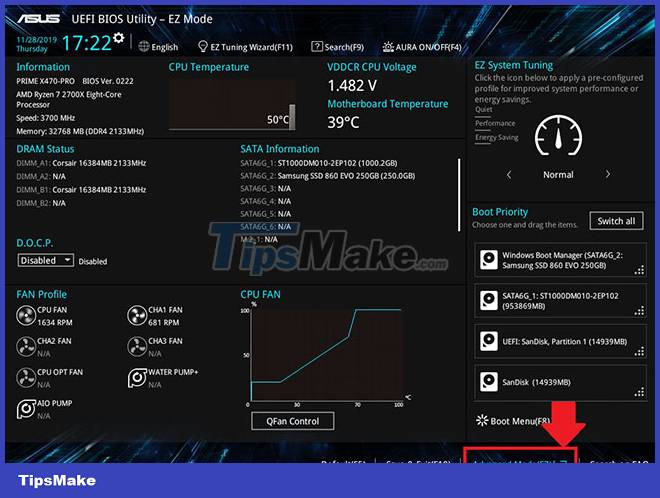
Step 2. Now, navigate to the Advanced tab.

Step 3. Find and select CPU configuration.
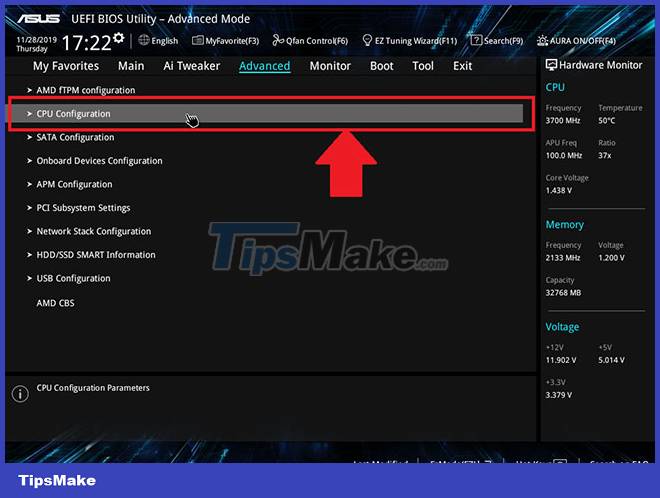
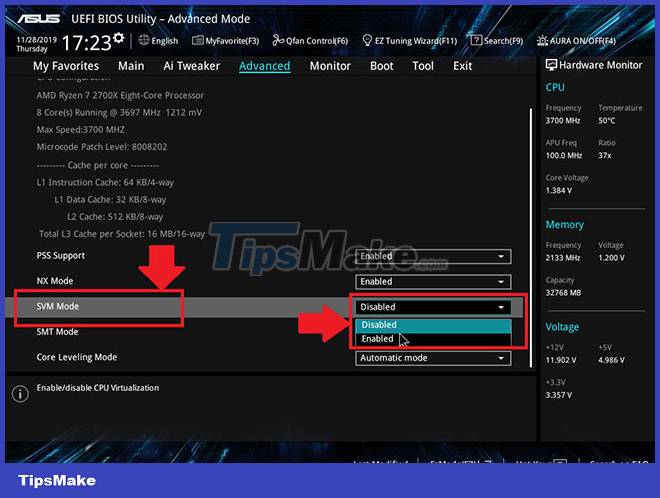
Step 4. To enable Virtualization, open the drop-down menu next to SVM Mode and select Enabled.
Step 5. Next, click Exit.

Step 6. You will now be asked to save your changes.

Click OK to apply the changes you made to the BIOS settings.
Conclusion
Understanding Windows 10 makes it easier to compare options, avoid common mistakes, and apply the information in this guide more effectively. Review the relevant requirements before making changes or choosing a solution.
FAQ
How do you enable virtualization (vt) on windows 10 for bluestacks 5?
Follow the steps in this guide in order, confirm the required settings or tools, and verify the result before making additional changes.
Is it safe to enable virtualization (vt) on windows 10 for bluestacks 5?
It is generally safe when you follow the recommended instructions, use trusted tools, and avoid changing settings you do not understand.
What should you do if the process does not work?
Recheck the requirements, restart the device or application when appropriate, and review each step for missed settings or compatibility issues.
Related Articles
 Bluestacks Are Heavy?: Bluestacks Configuration Requirements.5 minutes read
 What Is Virtualization? Why Should You Use This Technology?11 minutes read
 Bluestacks - Quality Android Emulator Software on PC: Key Facts12 minutes read
 4 Free Virtualization Software Solutions on Windows8 minutes read
 Ways to Fix Bluestacks Not Working on Windows 104 minutes read
 Link Download Bluestacks 4.260.0.1032: Android Emulator4 minutes read
Reader Comments 0
Sign in with email or Google to join the discussion.