How to enable duplex printing in Windows 10
Steps to enable duplex printing in Windows 10
To turn on duplex mode in Windows 10, follow the steps below.
Step 1. Click the "Notifications" icon on the taskbar. You can find it in the bottom right corner of the screen.
Step 2. Now, click "All Settings" button to open Settings.
Step 3. After opening the Settings app, go to the Devices page .
Step 4. Select the Printers & Scanners page on the left panel.
Step 5. Click the default printer and click the Manage button .
Step 6. Select the Printing Properties link from the list of options.
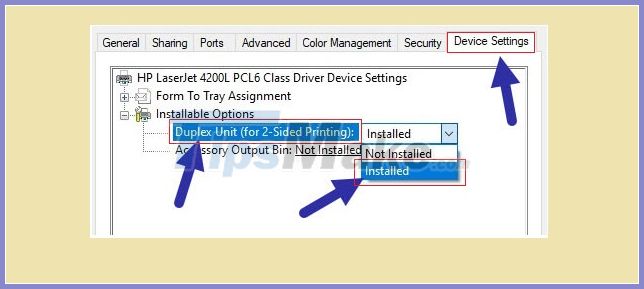
Step 7. Go to the Device Settings tab
Step 8. Select the Installed option from "Duplex Unit" .

Step 9. Click OK to save the changes.
Step 10. Close the Properties window .
Step 11. Close the Settings app .
From now on, you will be able to print on both sides of the paper thanks to the duplex feature.
Important Note
If you cannot see the duplex option in the Printer Properties window , your printer might not support it or the driver needs to be updated. If the problem is with the driver, try the steps again after updating the driver.
Depending on your printer and its driver, the two-sided printing option might be in a tab or another option. So see all tabs if you cannot find the two-sided printing option shown in the steps above.
To print on both sides of the paper, you need to select the duplex option while sending the printing instructions. Generally, the option will be available in the Advanced options section in the print dialog.