How to enable Core isolation protection on Windows 10 April 2018
Core isolation is a new protection feature in Windows Defender Windows 10 April 2018. This feature will help your computer to be more secure..
In the article Windows Defender on Windows 10 April 2018, Network Administrator has emphasized users with the new Core isolation feature, increasing the system's security for virus attacks or malware.
This feature uses virtualization technology to create a secure security wall, avoiding attacks from malicious software or programs. So how to use Core isolation security feature on Windows 10 April 2018?
- Windows Defender in Windows 10 April 2018 Update What's new?
- How to download Windows 10 April update 2018 Update 1803
- Notable new features on the Windows 10 April update 2018 Update
How to activate Core isolation Windows 10 April 2018
Step 1:
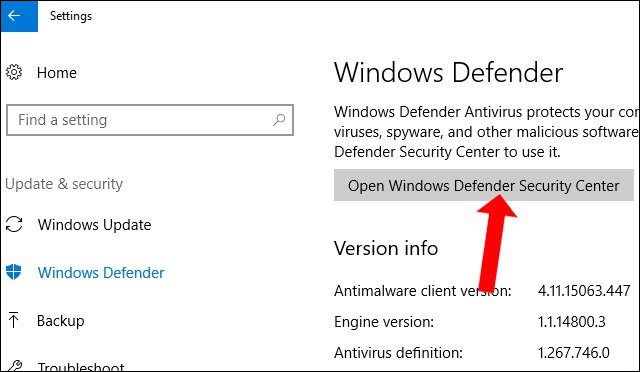
First of all, we need to access Windows Defender Security Center by going to Settings> Update & Security , then clicking Windows Security> Open Windows Defender Security Center .
Step 2:
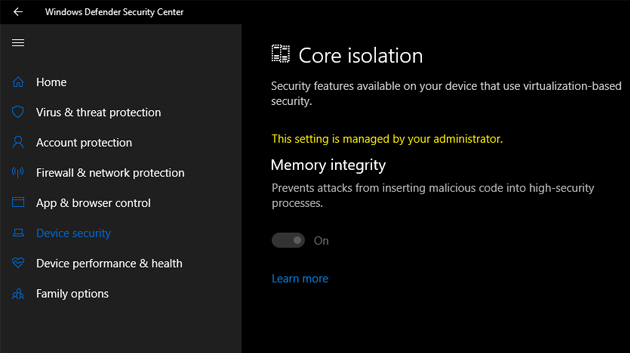
In the Windows Defender Secutiry Center interface, click on the Device security item.

Then in the new interface click the option Core isolation details .

Step 3:
Then, when calculating Memory integrity , switch to On mode by swiping the bar below.

Step 4:
After turning on this feature, the system will ask the user to restart the computer. If this feature is enabled, the computer will not appear any notifications. Thus, Core isolation feature is enabled on your computer.
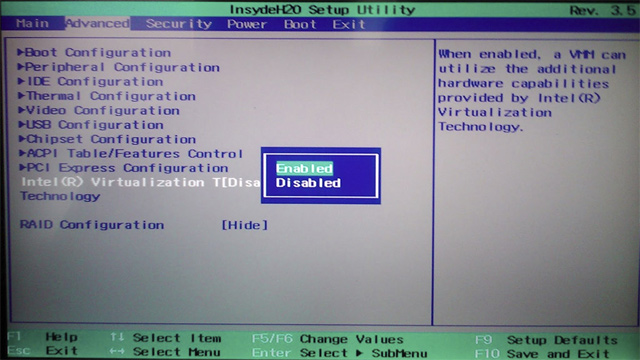
Note to readers , Core isolation will be operated based on virtualization technology, so computer processors must also support virtualization. Virtualization mode in BIOS or UEFI must also be turned on. Access the BIOS on your computer and click on Advanced then navigate to Virtualization or Intel virtualization options to switch to Enable mode.
- Instructions for entering BIOS on different computers
Note to the reader, in the process of turning on Core isolation and restarting the problem as shown below, please follow the steps below.
Press the Winfows + R key combination to open the Run dialog box and enter the regedit keyword to access the Registry. Next, users need to access the directory path as below.
HKEY_LOCAL_MACHINESYSTEMCurrentControlSetControlDeviceGuardScenariosHypervisorEnforcedCodeIntegrity
Then, double-click Enabled to bring up the value editing interface, enter a value of 0 .

So, you have enabled Core isolation in Windows Defender on Windows 10 April 2018. In case the installation and reboot fails, users just need to customize the value in Registry Editor.
See more:
- Turn off Windows Defender on Windows 10
- Experience fast Windows 10 April 2018 Update
- Error 0x8007042b when updating Windows 10 April 2018 and how to fix it
I wish you all success!