How to create Ghost files and extract ghost files with Norton Ghost
How to create Ghost files and extract ghost files with Norton Ghost. Ghost Windows time will be a lot faster than reinstalling Windows and we will not have to spend time reinstalling the software. The following article of TipsMake.com will guide you each
Table of Contents
Normally when our computer has a windows error, people will often think of reinstalling Windows, but that will be very time consuming and will often lose data and applications that we have installed on the computer before. . But a faster and more convenient way that is Ghost again windows.
With this method, we will create Ghost version for windows when windows is in the best state and full of software, until the computer fails, we just need to extract that Ghost file and the computer will return to good condition. the most original. Of course Ghost windows will be a lot faster than reinstalling Windows and we will not have to spend time reinstalling the software.
The following article of TipsMake.com will guide you step by step to create Ghost files and extract Ghost files with Norton Ghost, please follow along.
1. Preparation
To create Ghost file and extract Ghost file, we need to have a USB boot, there are many softwares supporting creating USB boot and creating method is quite simple.
You can refer to the article Create USB Boot with Hiren's Boot of TipsMake.com at the following link.
After having USB boot, we will perform the steps to create and extract the Ghost file.
2. Create a Ghost file
Step 1: You connect the USB to the computer and then restart the computer, when the computer starts to restart you access the BIOS and install to give the computer the priority to boot into the USB boot that we have create.
To enter the BIOS will usually press the DEL key while the computer is booting.

If you do not want to enter the BIOS to set the priority mode, you can go directly to the Boot Menu to select the USB boot directly using the shortcut. Every computer has a shortcut to select the preferred boot mode, try with keys like ESC, from F1> F12, Del, Tab . for quick access to the Boot Menu.
Step 2 : After the USB boot, you select Dos Programs

Step 3 : Select Custom Menu
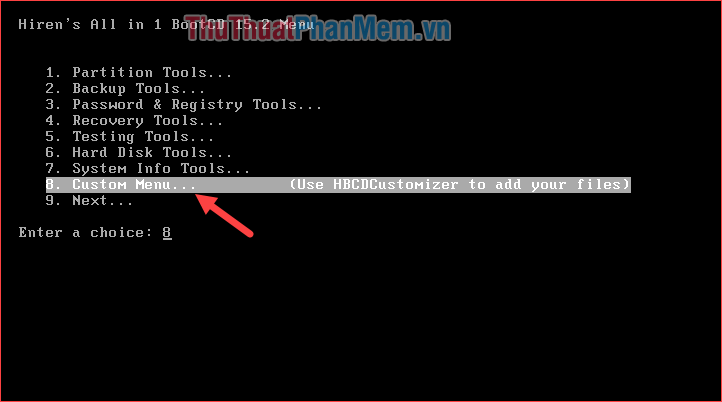
Step 4 : Select Norton Ghost

Step 5 : Select Ghost (Normal)
Then you let the software run the settings themselves.

Step 6 : When booting into the Ghost screen you select OK

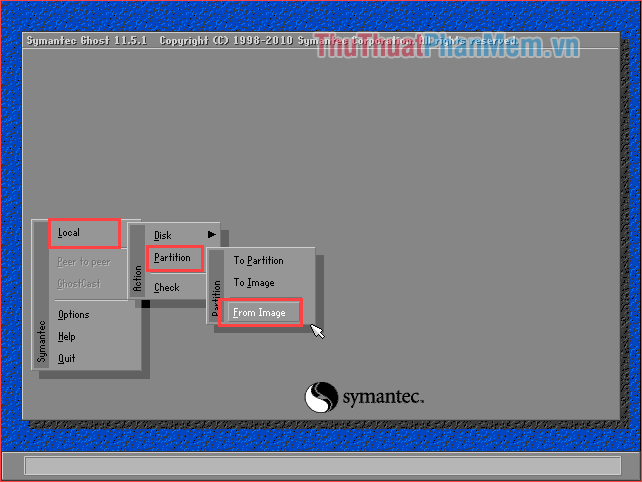
Step 7 : Select Local -> Partition -> To Image

Step 8: Select the hard drive containing Windows

Step 9: Continue to select the partition containing Windows

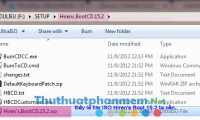
Step 10 : You select the folder to save Ghost files (not saved in the Windows drive), name the file Ghost and click Save

Step 11: You choose the mode of creating Ghost file is Hight

Step 12: Click Yes to start the process of creating the Ghost file

Now our job is to wait for the Ghost file creation process to complete.

3. How to extract Ghost file
When your windows encounters errors we will proceed to extract the ghost file that we have created to bring windows back to its original state.
The steps to extract Ghost file are similar to those when creating Ghost file from Step 1 to Step 6 above.
Go to step 7, select Local -> Partition -> From Image
Next, find the ghost file we created and click Open.

Select the hard drive to extract the Ghost file:

Select the partition containing windows to extract the Ghost file

Select Yes to start the Ghost process:

Now we wait for the Ghost process to complete then restart the computer and you're done.

Above is a detailed tutorial on how to create and extract Ghost files with Norton Ghost of TipsMake.com. It is not too difficult to implement, right? Good luck!
Was this article helpful?
Your feedback helps us improve.
Related Articles
 Instructions to use Onekey Ghost to create and extract Ghost files quickly3 minutes read
 How to create Ghost files on your computer using Norton Ghost4 minutes read
 Backup and Ghost reinstall Win with Norton ghost from HDD9 minutes read
 How to ghost Windows 10 using Onkey, USB, Norton ghost without a disk6 minutes read
 Instructions on how to ghost Windows 7 using USB5 minutes read
 Use Norton Ghost8 minutes read
Reader Comments 0
Sign in with email or Google to join the discussion.