How to create beautiful 3D text using Illustrator
Create 3D text in Illustrator to make your text more dynamic and professional. With Extrude and Bevel effects, you can turn flat text into impressive 3D artwork.
Table of Contents
Creating 3D text with Illustrator is made simple with step-by-step instructions, from setting up your document, applying effects to adjusting brightness.
Preparation before creating 3D letters
- Install Illustrator
- Download Etna Font to your computer
1. Create a new document and background
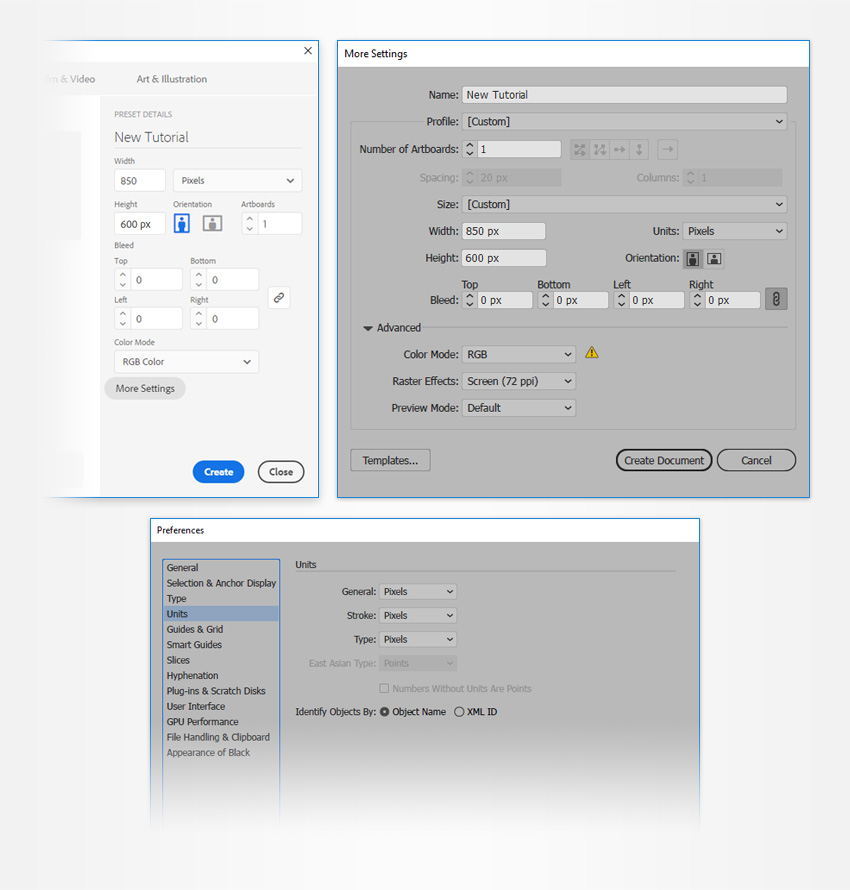
Step 1: In the Units menu, select Pixels and enter 850 in the Width box and 600 in the Height box , then click the More Settings button.
Select RGB for Color Mode , and set Raster Effects to Screen (72 ppi), then click Create Document.
Open the Info panel (Windows => Info ) to preview the document shape size and position, and set the measurement unit to Pixels in Edit => Preferences => Units. These options will improve performance and work speed significantly.
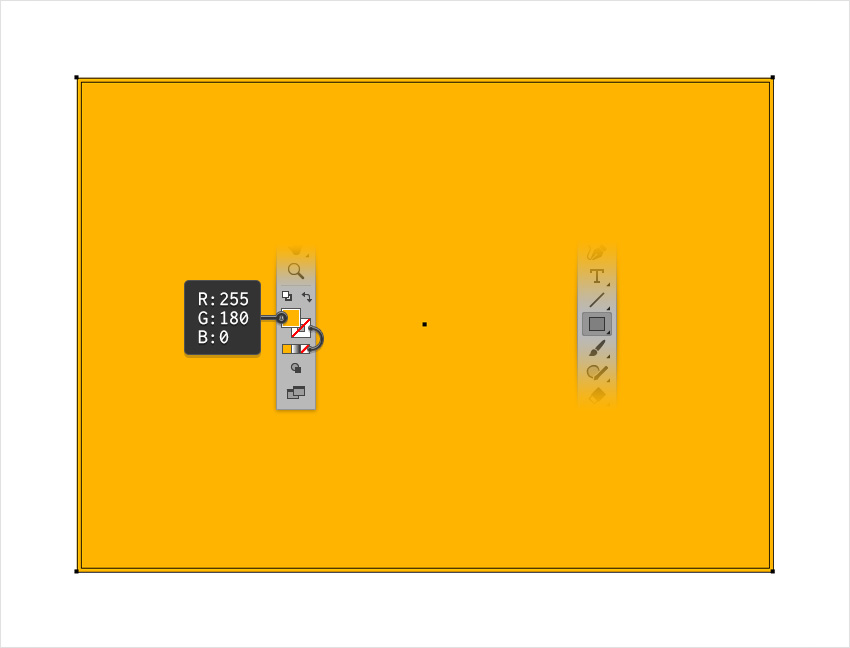
Step 2: Select the Rectangle Tool (M) and focus on the Toolbar. Delete the stroke color and select the fill color, set the new color to R=255 G=180 B=0.
Click on the artboard to open the Rectangle window. Set the Width to 870px and Height to 630px , then click OK .
2. Create the main text shape
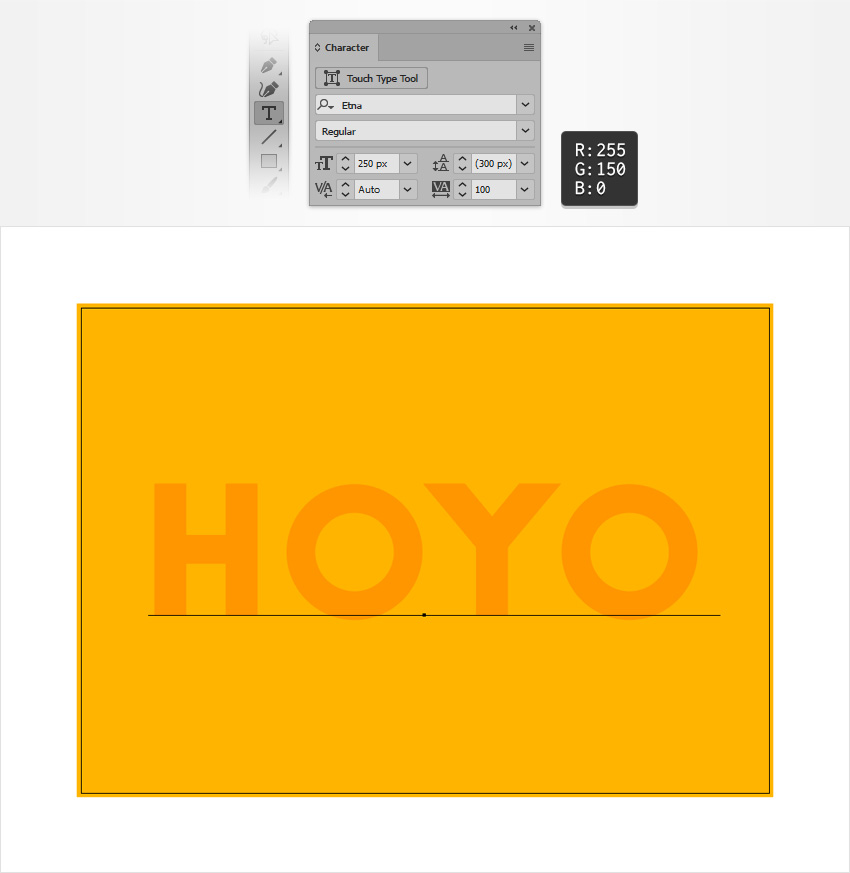
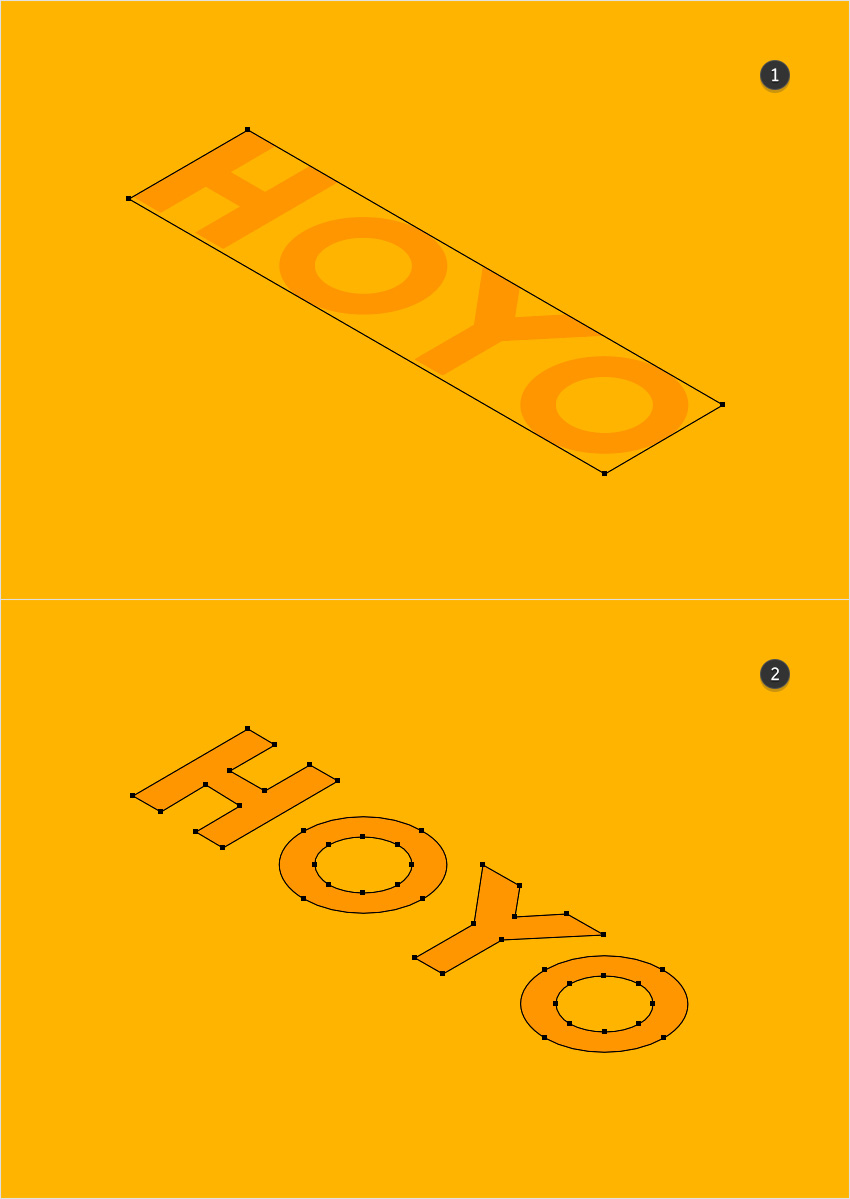
Step 1: Select the Type Tool (T) and open the Character panel ( Window => Type => Character ). Select the Etna font and set the size to 250px and the spacing to 100.
Click on the artboard and add text as shown below. Set the color to R =255 G=150 B=0 . Make sure your text is selected and copy the text (Ctrl + C) to use in the next step.
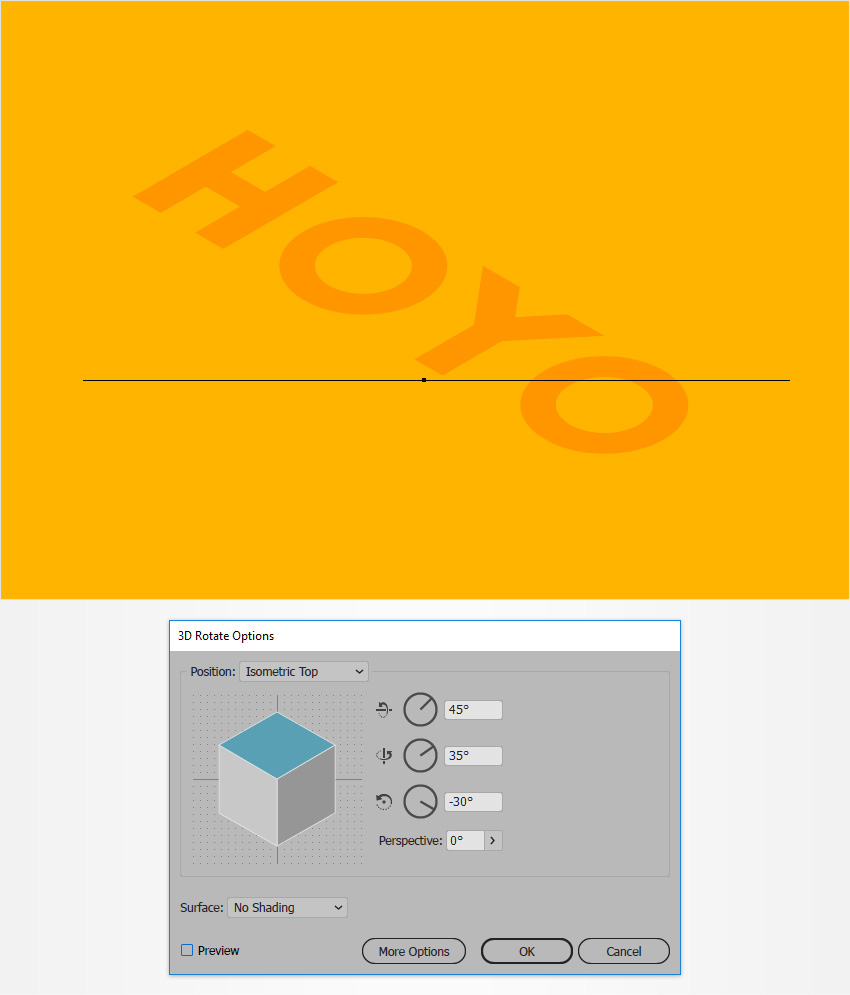
Step 2: Make sure the text is selected, then go to Effect => 3D => Rotate . Enter all the properties as shown below and click OK.
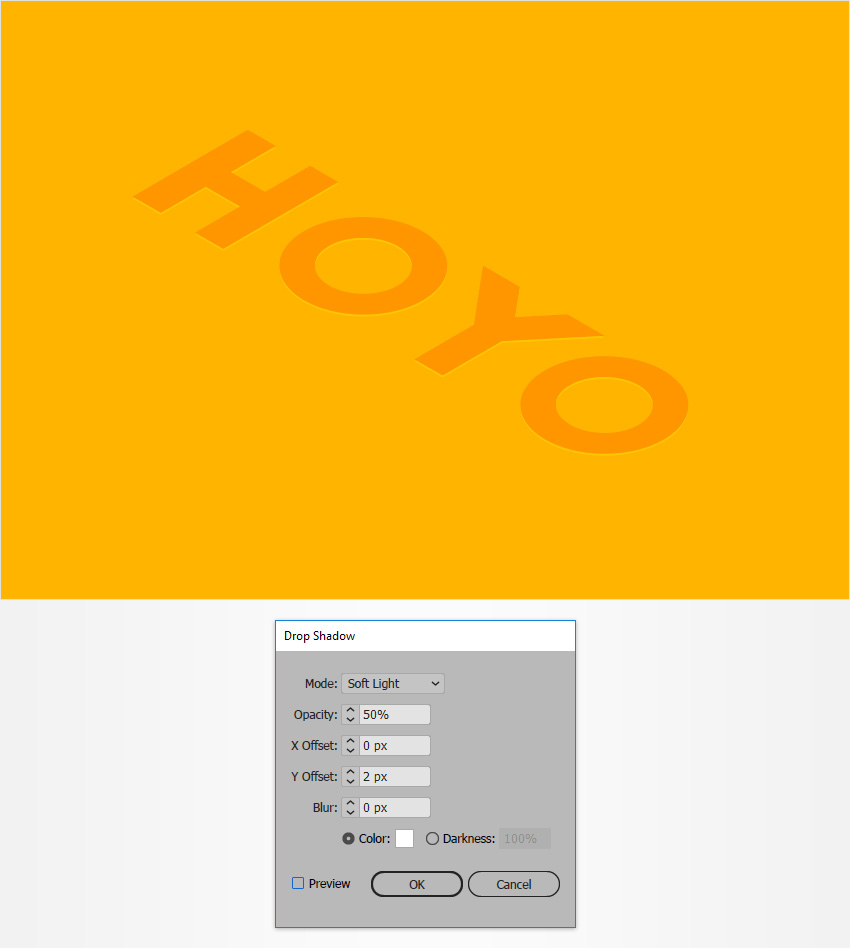
Step 3: Make sure the text is still selected, and go to Object => Expand Appearance . First ungroup (use Shift + Control + G) the newly created group. Add a clipping mask (Alt-Control-7), then ungroup (Shift + Control + G) the newly created group.
Select the shape that surrounds the entire text and delete it. Select the shapes that make up the text and create a compound path ( Object => Compound Path => Make or use the shortcut Control + 8 ).
Step 4: Make sure the compound path you just created is selected, and go to Effect => Stylize => Drop Shadow . Enter the properties as shown in the image below and click OK .
3. Create 3D text art effects
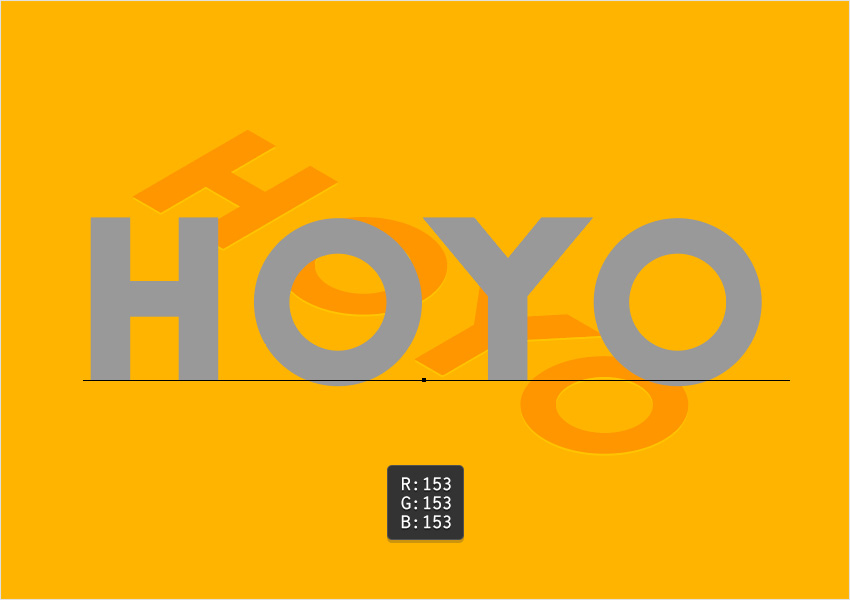
Step 1: Press Ctrl + F to add the text you copied to the same location. Change the text color to R=153 G=153 B=153.
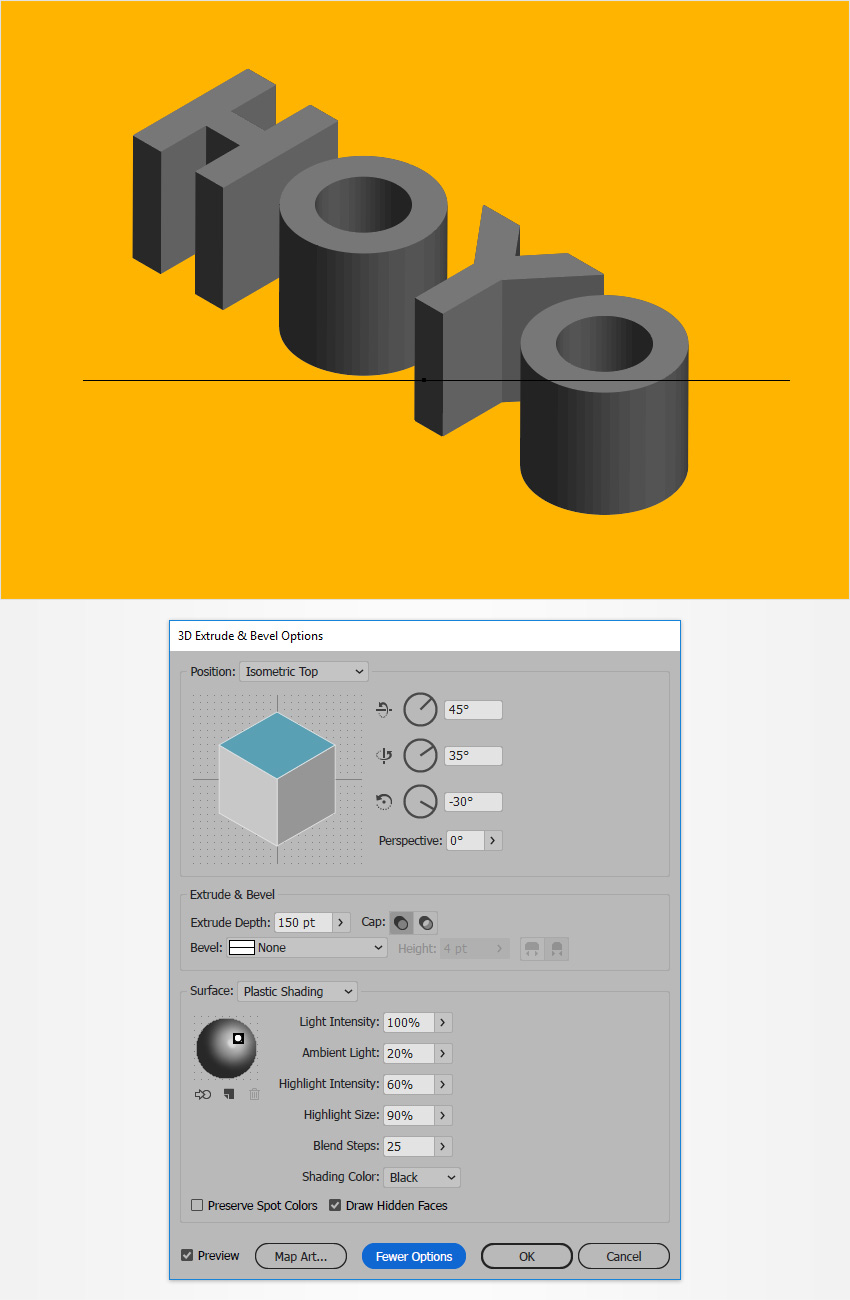
Step 2: Select the gray text, then go to Effect => 3D => Extrude & Bevel . Click the More Options button and enter all the properties as shown in the image below, and don't forget to check the Draw Hidden Faces box and click OK .
Step 3: Make sure the gray text is still selected and go to Object => Expand Appearance. Select the Direct Selection Tool (A), select the shapes that make up the front of the text (highlighted in the first image) and delete them. The text should now look like the second image below.
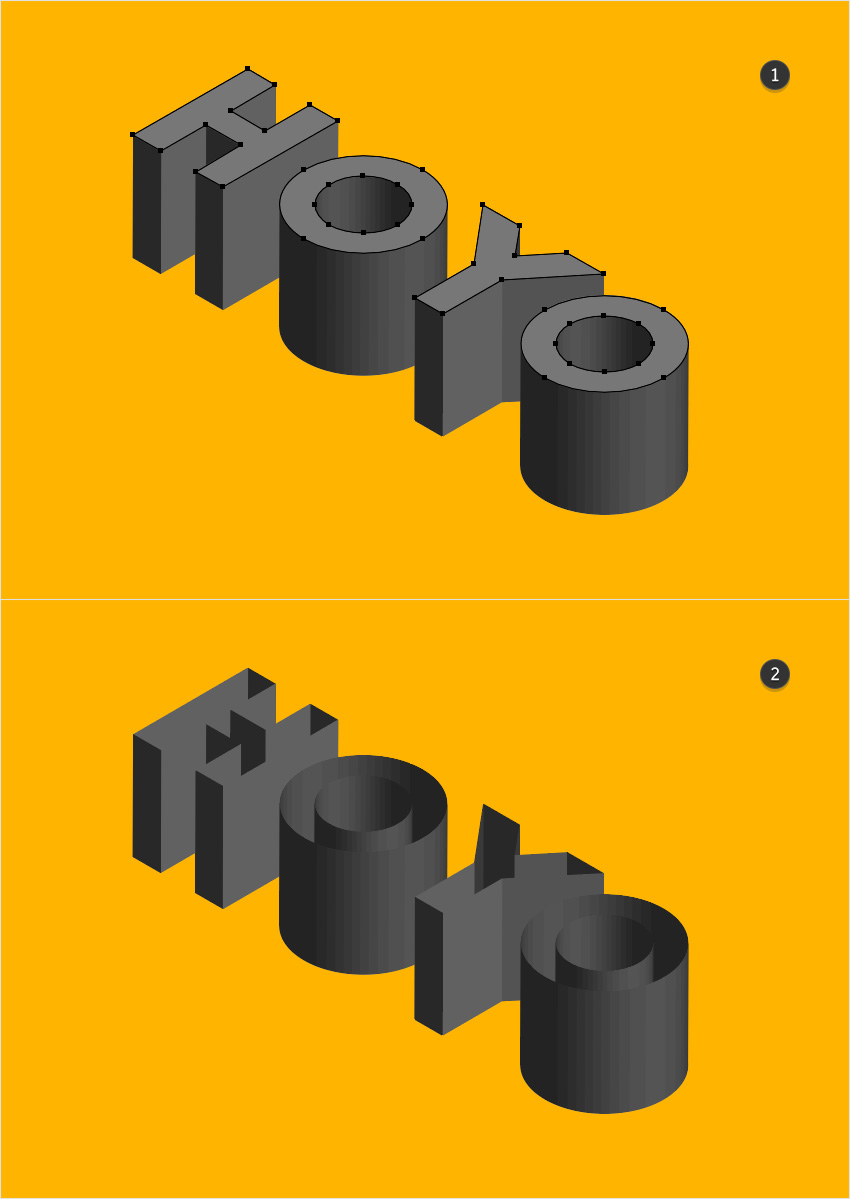
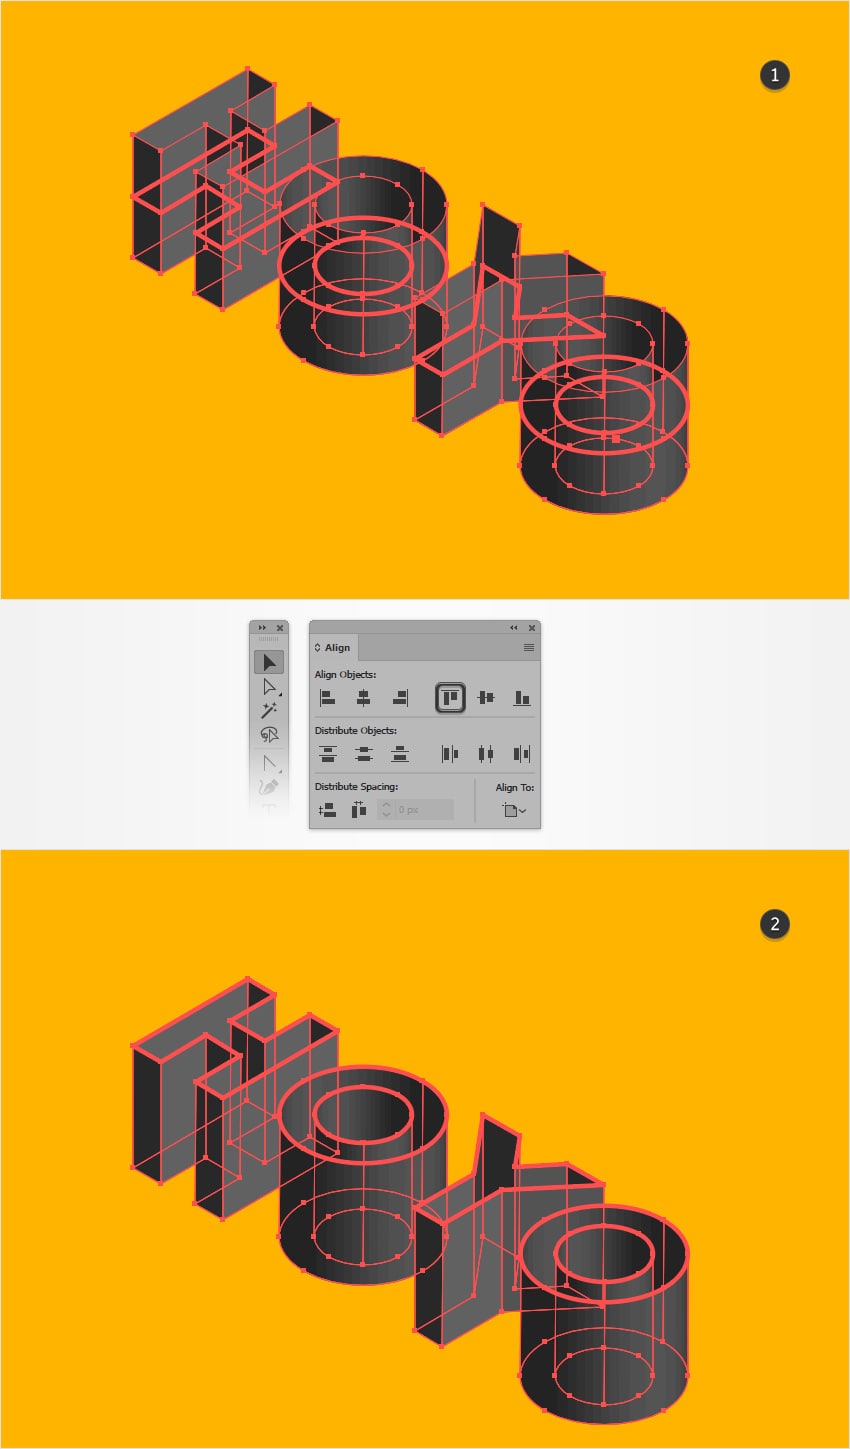
Step 4: Pick the Move Tool (V) and select your group of shapes along with the orange compound path. Click on the edge of the compound path to highlight it (as shown in the first image below) then click the Vertical Align Top button in the Align panel (Window => Align).
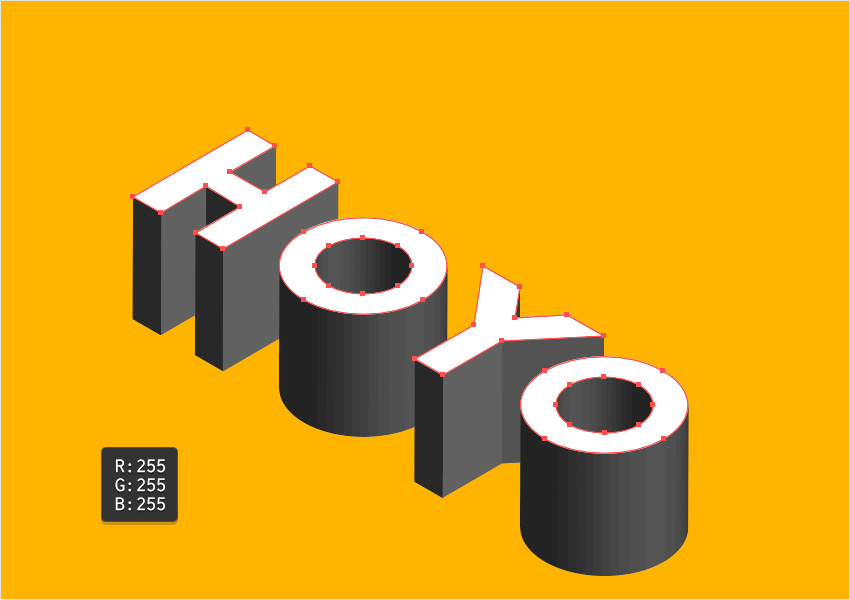
Step 5: Select the orange compound path, then make a copy in front ( Ctrl + C => Ctrl + F ) and move it forward (press Shift + Ctrl + ]). Fill the new shape with white ( R=255 G=255 B=255 ).
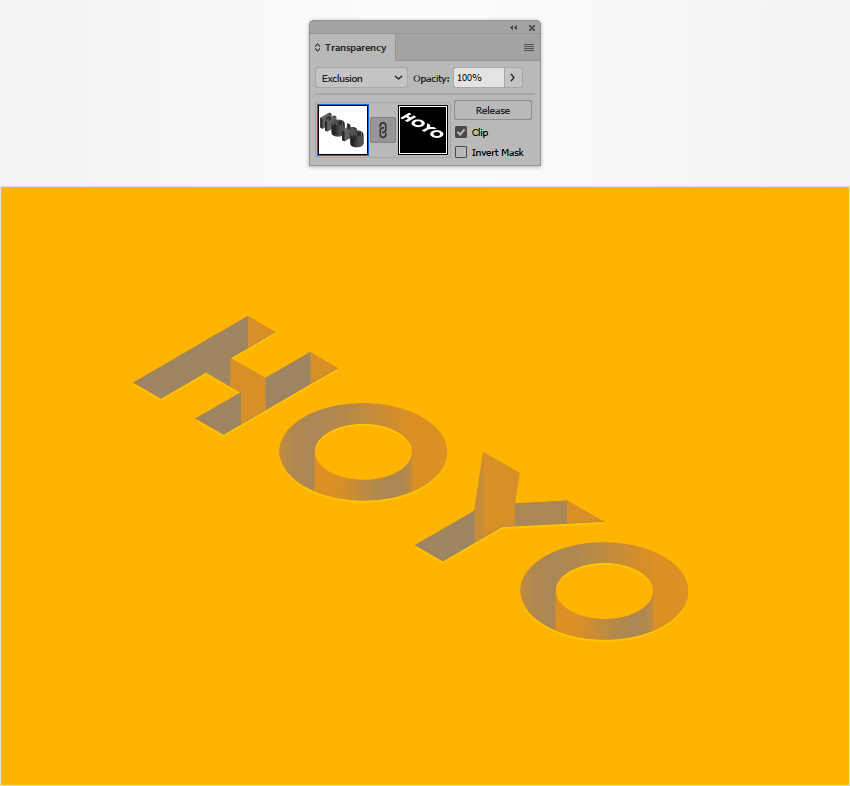
Step 6: Select your white blend path and shape group and click the Make Mask button in the Transparency panel ( Window => Transparency ).
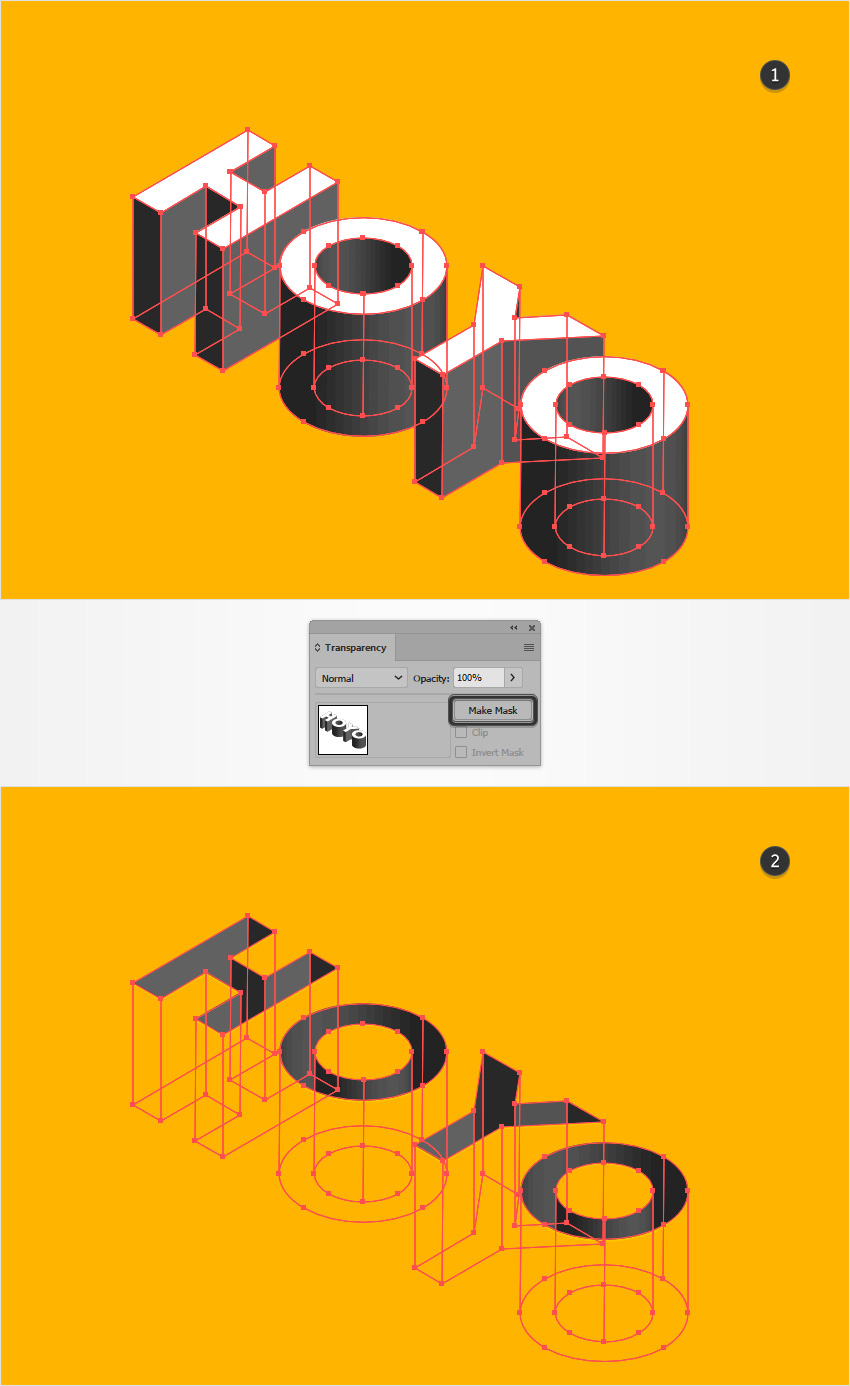
Step 7: Make sure the mask group is still selected and change the Blending Mode to Exclusion.
4. Add subtle textures
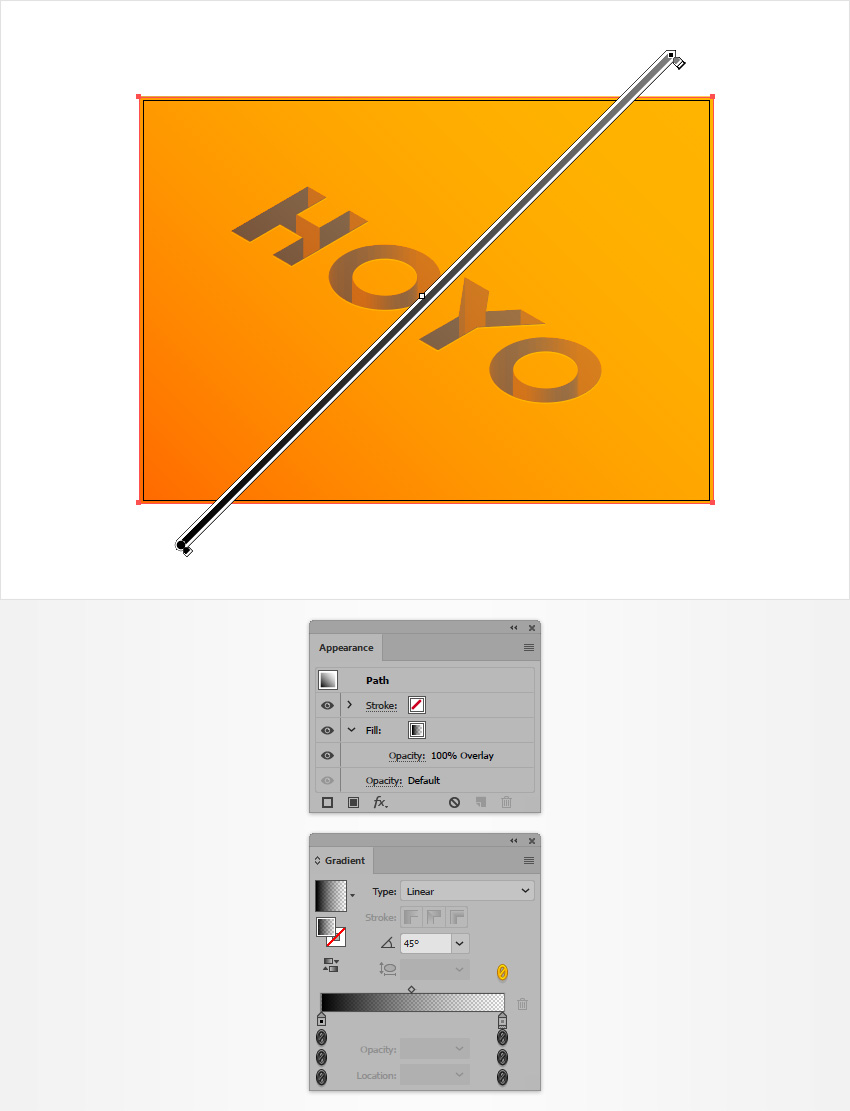
Step 1: Select the yellow rectangle and make a copy in front ( Ctrl + C => Ctrl + F ) then move forward ( Shift + Ctrl + ]).
Make sure that this new shape stays selected and focus on the Appearance panel (Window => Appearance). Select the fill and change its Blending Mode to Overlay , and replace the flat fill layer with the linear gradient as shown in the image below, and select the right gradient slider and lower its Opacity to 0%.
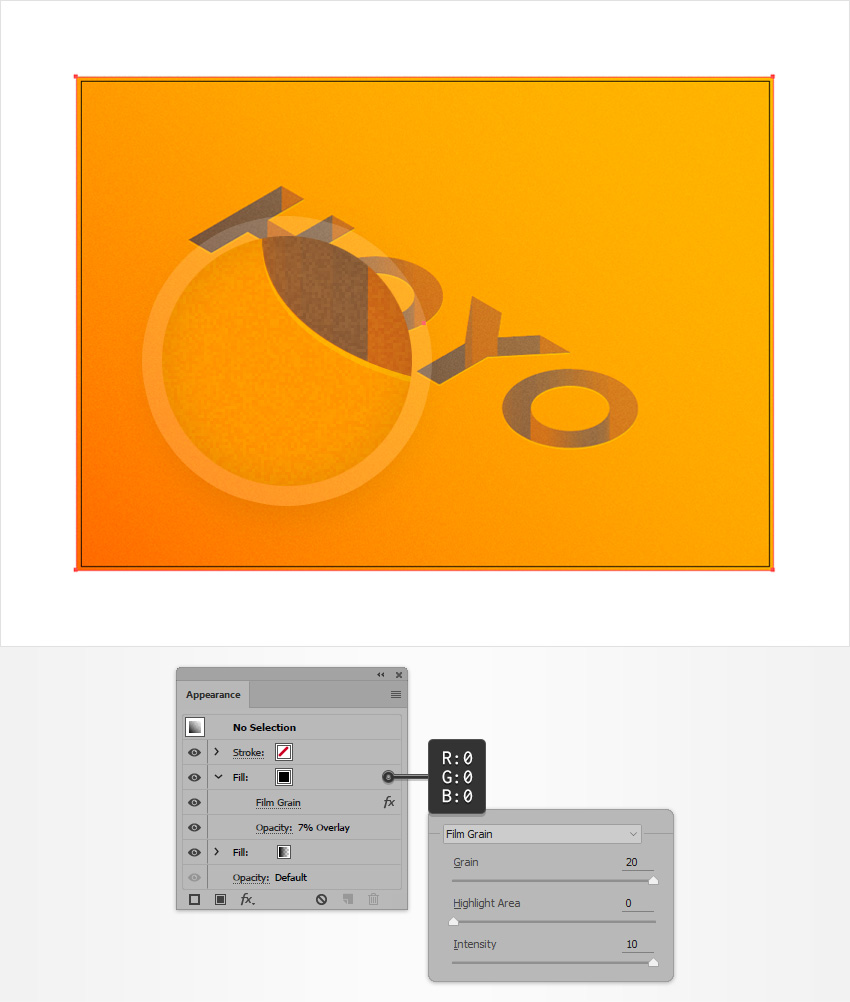
Step 2: Make sure that the shape added in the previous step is still selected and keep focusing on the Appearance panel (Window => Appearance).
Use the Add New Fill button to fill the second color, set the color to black (R=0 G=0 B=0), reduce the Opacity to 7%, change the Blending Mode to Overlay , then go to Effect => Artistic => Film Grain. Enter the attribute values as shown in the table below and click OK.
The finished result is in the form:
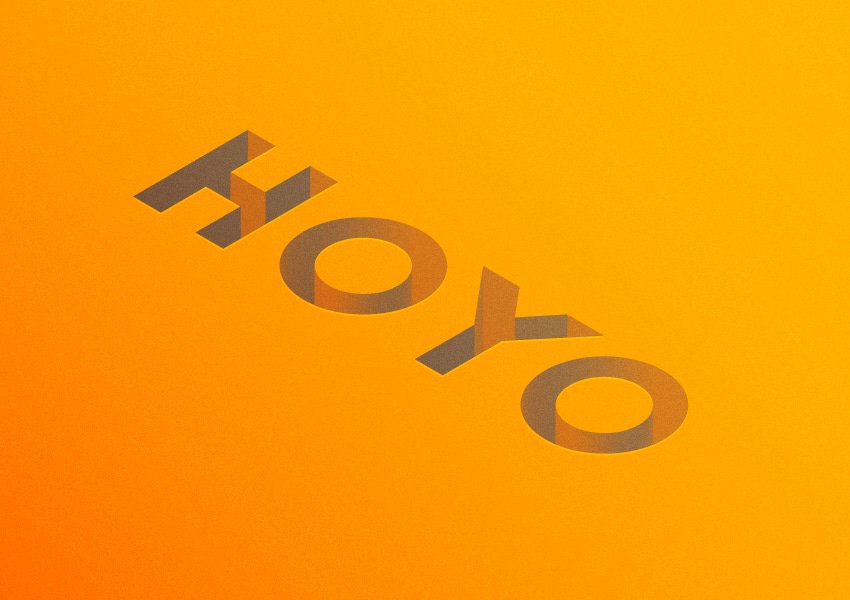
You have just learned how to create a stunning 3D text effect in Illustrator with simple steps. This effect makes the text more professional and attractive, suitable for graphic design, banner or logo.
If you want to explore more unique typography techniques, try adding lighting or shadow effects to add depth. Don't forget to save your work in a format that's suitable for multiple uses.
Was this article helpful?
Your feedback helps us improve.
Related Articles
 Adobe Illustrator 2021.26.0 - download Adobe Illustrator 2021.26.0 here3 minutes read
 How to Warp, bend text in Adobe Illustrator5 minutes read
 Common Adobe Illustrator shortcuts9 minutes read
 Steps to create borders for photos in Illustrator trong4 minutes read
 How to create beautiful text borders in Photoshop2 minutes read
 Cropping and deleting shapes in Adobe Illustrator4 minutes read
Reader Comments 0
Sign in with email or Google to join the discussion.