How to create a Zoom OAuth meeting link between servers in Python
Learning how to create a secure Zoom meeting link in Python for server-to-server communication with OAuth authentication is not difficult. Here are detailed instructions..
Learning how to create a secure Zoom meeting link in Python for server-to-server communication with OAuth authentication is not difficult. Here are detailed instructions.
Whether you've integrated Zoom meetings into the Python app or are just planning to do so, Zoom says the JWT app will be decommissioned on September 1, 2023. You'll have to switch to the OAuth or server-to-server OAuth option to avoid service downtime.
The OAuth option requires the user to authenticate to the web via a Zoom account. But if you just create Zoom meeting links without user permissions, the server-to-server OAuth option is the ideal choice.
So how can you achieve this with Python?
Create OAuth app from server to server on Zoom
To get started, go to Zoom Marketplace to build a new app:
1. Scroll through the application list and locate the Server-to-Server OAuth banner . Then, click the Create button .

2. Enter a name for the application in the field provided. Then click Create . This action takes you to another page.

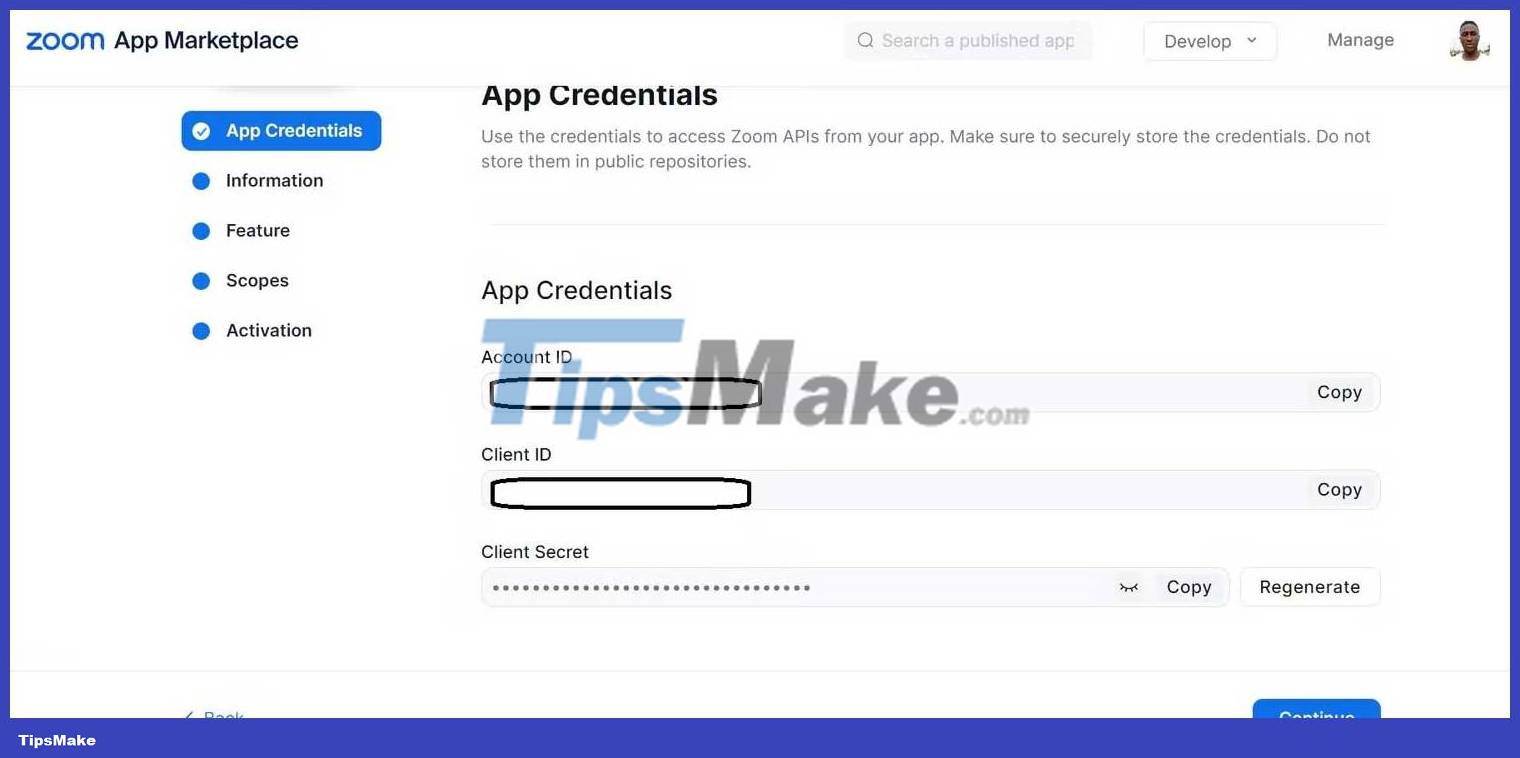
3. Copy all application credentials, including Account ID , Client ID , and Client Secret . Click Continue once done. You may want to paste them in the environment variables file to hide them.
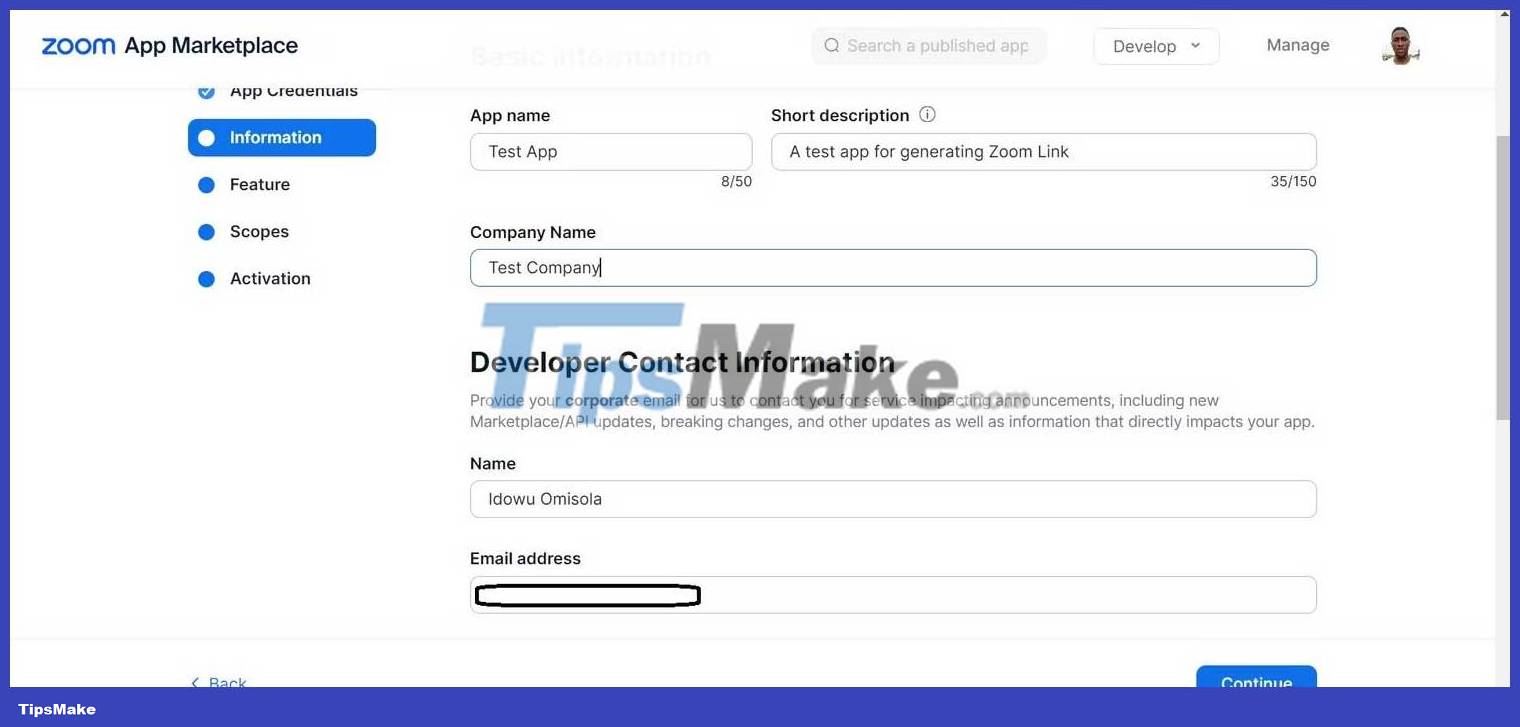
5. On the following menu, fill in the basic information in the information field and press the Continue button .
5. Click Continue on the following page.

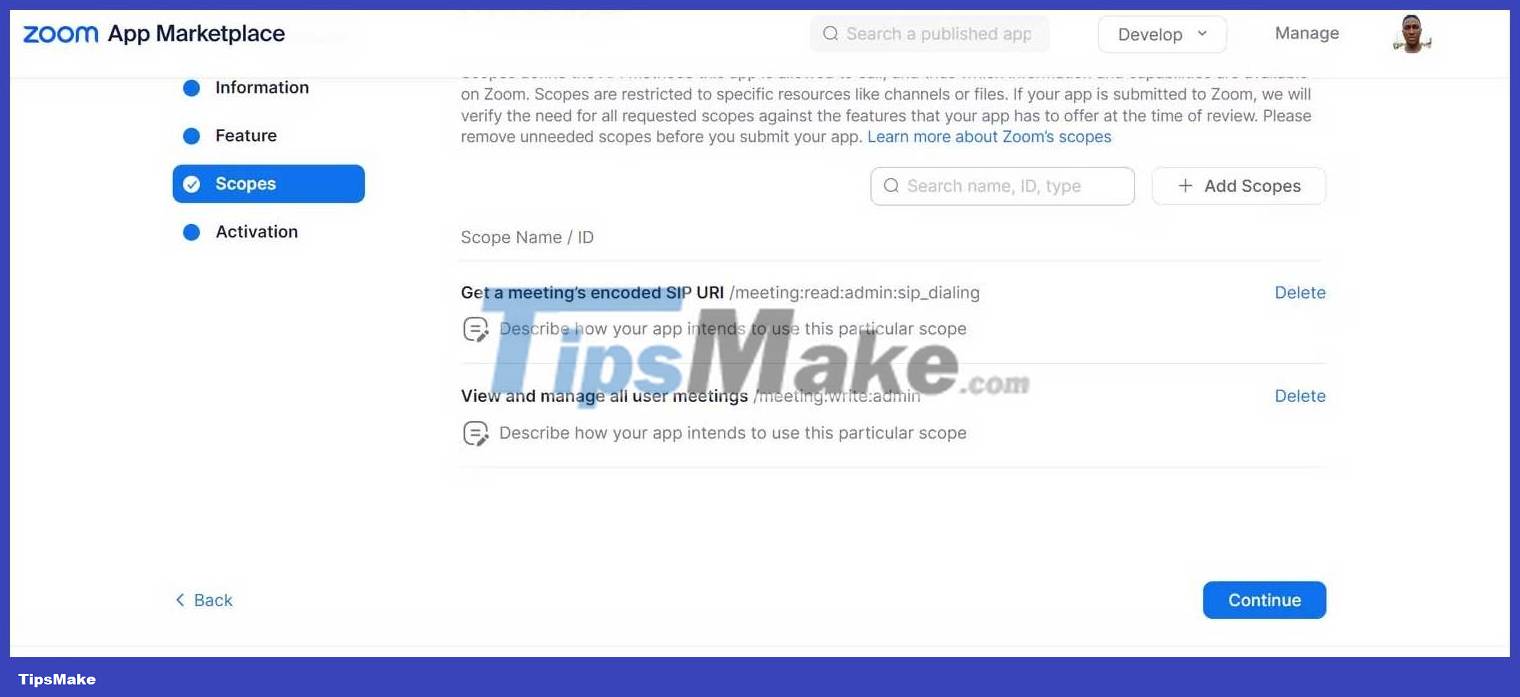
6. Next, click Add Scopes and add the following scopes; Get a meeting's encoded SIP URL and View and manage all user meetings .
7. Click Continue . Finally, click Active your app to start interacting with the Zoom API via the OAuth server-to-server app.

Python code to create Zoom link
Once you've completed all the steps above, you can quickly create meeting links using the Zoom API. Here is the full code to do this:
import requests # thay thế bằng ID của bạn client_id = "" # thay thế bằng ID tài khoản của bạn account_id = "" # thay bằng bí mật client của bạn client_secret = "" auth_token_url = "https://zoom.us/oauth/token" api_base_url = "https://api.zoom.us/v2" # tạo hàm liên kết Zoom def create_meeting(topic, duration, start_date, start_time): data = { "grant_type": "account_credentials", "account_id": account_id, "client_secret": client_secret } response = requests.post(auth_token_url, auth=(client_id, client_secret), data=data) if response.status_code!=200: print("Unable to get access token") response_data = response.json() access_token = response_data["access_token"] headers = { "Authorization": f"Bearer {access_token}", "Content-Type": "application/json" } payload = { "topic": topic, "duration": duration, 'start_time': f'{start_date}T10:{start_time}', "type": 2 } resp = requests.post(f"{api_base_url}/users/me/meetings", headers=headers, json=payload) if resp.status_code!=201: print("Unable to generate meeting link") response_data = resp.json() content = { "meeting_url": response_data["join_url"], "password": response_data["password"], "meetingTime": response_data["start_time"], "purpose": response_data["topic"], "duration": response_data["duration"], "message": "Success", "status":1 } print(content)
This code first sends a query to Zoom's URL token for the authentication token. Pass this down through the header to Zoom's API, which returns a response containing the meeting details identified in the payload. The start time of the meeting (start_time) with the payload must be in ISO 8601 format (formatted with Python's string operator).
For example, you could call the function to schedule a meeting for 8/23, at 3:24 p.m. like this:
create_meeting( "Test Zoom Meeting", "60", "2023-08-23", "18:24", )The API returns a JSON containing a variety of information, including the meeting link, password, ID, and more. You can print response_data and extract the data you need as done in the above code.
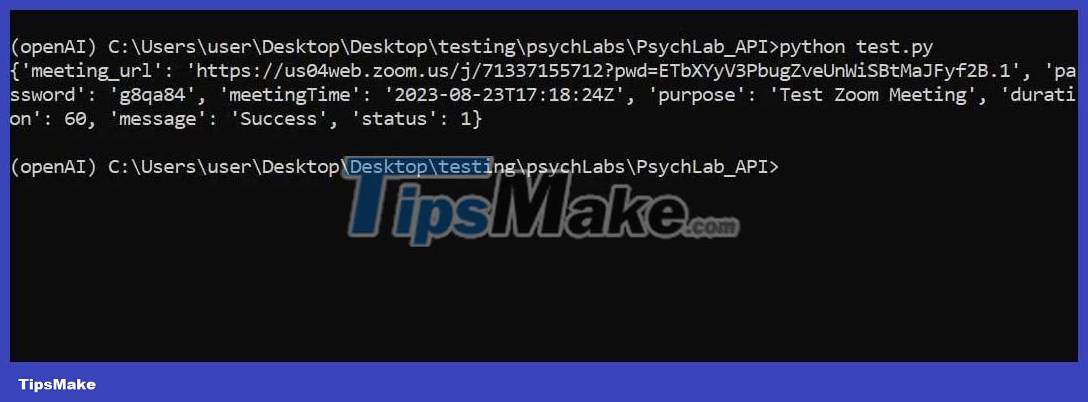
For example, the query results look like this:
Integrate Zoom Meeting into the application
While the example above doesn't include web or API integration, building the app with Django, Flask, FastAPI, or another Python framework, you can easily include your code in the codebase.
If you build an API, you can convert it into an endpoint that any client can use. You can even borrow this idea to build a web in a language other than Python.
Hope the above guide is useful to you!