How to create a Windows 10 October 2018 Version 1809 installation USB
There are many ways to install Windows 10 October 2018 Version 1809, and creating a Windows 10 October 2018 Version 1809 installation USB is one of them. Using a USB drive allows you to install any version of Windows 10, and you can even lend it to friends or colleagues to share..
Creating a Windows 10 1809 installation USB is not an unfamiliar concept; indeed, USB drives are very convenient for computer users today, and there's no reason why you shouldn't carry a standard Windows 10 installation file with you , especially the newly released Windows 10 October 2018 Version 1809 .

Even novice computer users can easily create a Windows 10 1809 installation USB drive using this method, as it's very simple. Creating a bootable USB drive is no longer as complicated as before. With just a few basic steps, you can create a bootable USB drive with Windows 10 October 2018 Version 1809.
Instructions for creating a Windows 10 1809 installation USB
Tools needed:
- A USB drive with a minimum capacity of 8 GB.
- Download Rufus , software specifically designed to help us package Windows 10 October 2018 Version 1809 onto a USB drive.
Download Windows 10 October 2018 , the latest version currently available.
Note: Choose between 32-bit or 64-bit versions, as well as Home, Professional, or Enterprise.
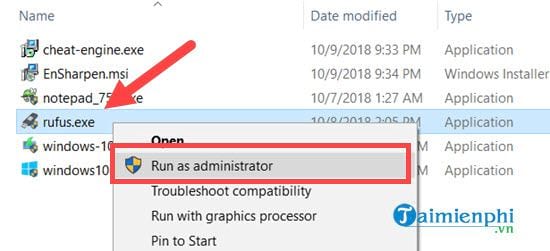
Step 1: First, open Rufus after downloading it. Remember to run the program in Administrator mode .
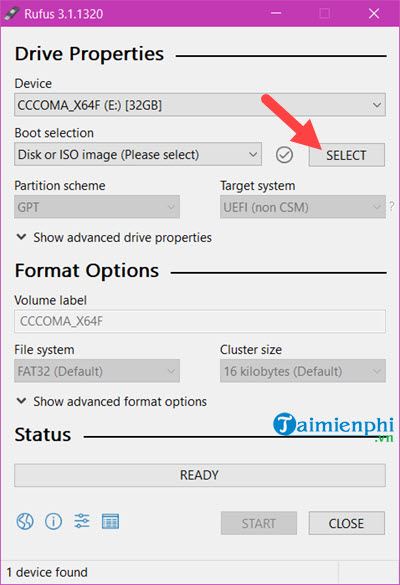
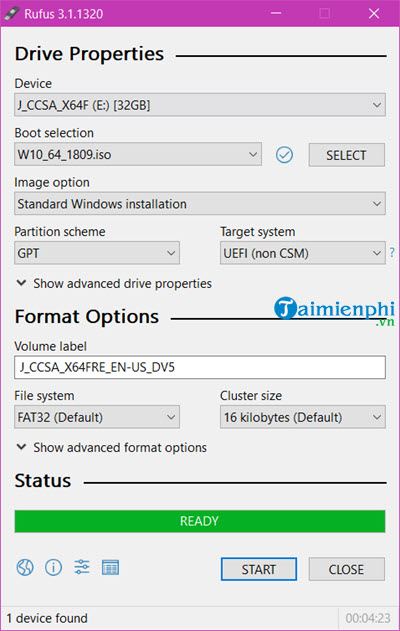
Step 2: The Rufus interface will appear. Plug in your USB drive, select the correct drive for the USB drive, and then click Select.
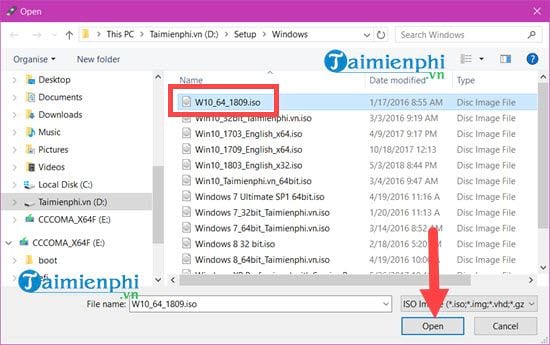
Step 3: Select the Windows 10 October 2018 Version 1809 file that we downloaded above.
Step 4: After making your selections, remember to set the Partition scheme to GPT , then click Start. You can also name it as you wish below.
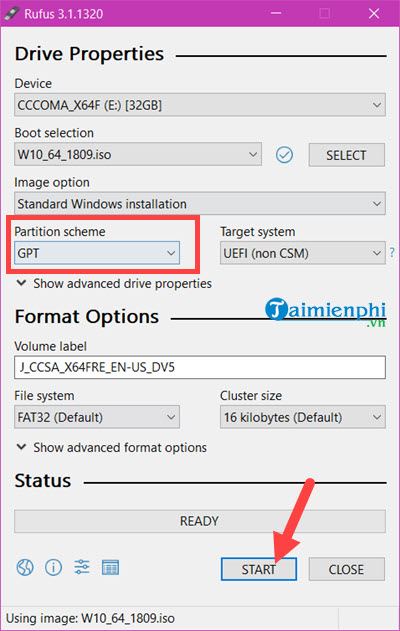
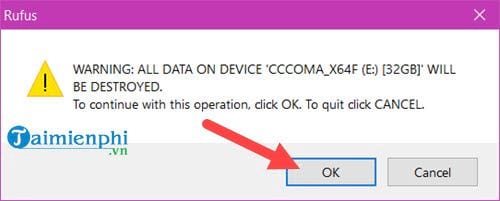
The system will warn you that all old data will be deleted, which is a necessary step > please click OK.
Step 5: Wait for Rufus to display a green " Ready " message ; once that's done, the Windows 10 1809 installation media creation is complete. Now you can access your BIOS to proceed with installing Windows 10 October 2018 Version 1809.
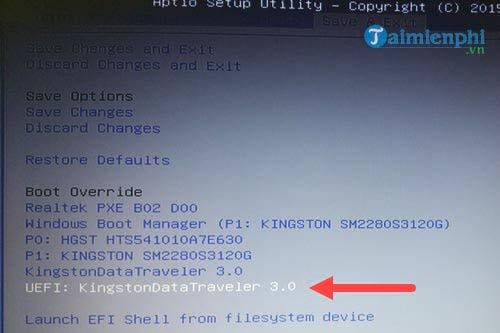
Step 6: First, access your computer's or laptop's BIOS and select UEFI for USB. The display may vary depending on your motherboard. Also, refer to instructions on how to access the BIOS to determine the specific model you are using.
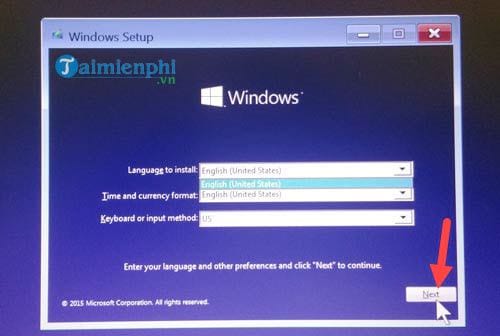
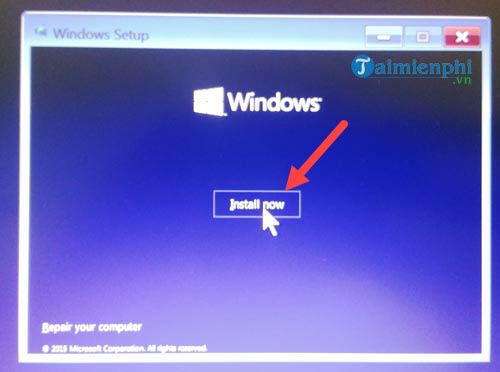
Step 7: This is the basic Windows 10 installation step; you can click Next .
Next, click Install to begin the installation process.
After this step, select the drive and follow the instructions to install Windows 10 October 2018 Version 1809. If you've never installed Windows 10 before, please refer to the Windows 10 installation guide here.
The above is a guide to quickly create a Windows 10 October 2018 Version 1809 installation USB. Although the steps may take some time, they are not difficult at all. With this, you now have a portable installation drive that you can use anytime, anywhere.
Besides creating a Windows 10 1809 installation USB, you can also update to Windows 10 October 2018 Version 1809 directly on your existing Windows 10 system. Refer to our guide on how to update to Windows 10 1809 for a faster upgrade.