How to Create a CRUD App with Django's Class Based Viewers
Let's learn how to build a task management app using CRUD principles and a class-based viewer in Django..
One of the main features of Django is its built-in support for creating projects on CRUD operations (Create - Create, Read - Read, Update - Update, Delete - Delete). Although Django's class-based viewer provides a quick, easy, and flexible solution for building web applications, many programmers are still used to using function-based viewers.
Class-based views provide several benefits over function-based viewers, including inheritance, code structure, code reusability, etc. Although implementing class-based views may seem a bit complicated, the article will help you understand that concept by building a task manager application and providing step-by-step instructions.
What is a class-based viewer in Django?
In Django, viewers are Python functions that receive web requests and return responses. Class-based viewers (CBVs) are an alternative to defining viewers in Django using Python's classes instead of functions.
CBV has a number of advantages, like better code arrangement, easier code reuse, and the ability to use inheritance to create variations of an existing viewer. CBV also provides built-in methods like get() and post() with which you can override custom actions.
Class-based viewer available in Django
Django provides a number of built-in CBVs for common uses, like displaying object lists or creating new ones. Some of those CBVs are:
- ListView : This is a viewer that shows a list of objects retrieved from a template. For example, a page that lists all the posts available in a blog uses ListView.
- DetailView : This viewer displays a detailed view of an object extracted from a model. You can use DetailView to show details of specific posts in the blog app.
- CreateView : This viewer exposes a form to create a new object and handle form submission. For example, in a task manager app, you would use this viewer to create new tasks.
- DeleteView : This viewer displays a confirmation page for object deletion and page deletion processing.
- UpdateView : This viewer shows a form that updates the current object and handles the form submission.
Django also provides other viewers, including TemplateView, RedirectView, and FormView. You can refer to Django's documentation for class-based viewer insights.
Build a task management app with Django's class-based viewer
Building an app like a task management app will allow you to understand how to implement CRUD operations with CBV. A task manager has features that allow users to create, udpate, delete and read tasks. These features are suitable for CRUD operations. The following steps will help you build a task management app with Django CBV.
Django project setup
To create a task management app with Django, you should start by following these steps:
1. Install Django into the Python virtual environment with the command:
pip install django2. Create a Django project. The following command will create a project named project_core .
django-admin startproject project_core .3. Create an app named task_manager .
python manage.py startapp task_manager4. In settings.py add app name to INSTALLED_APPS list .
INSTALLED_APPS = [ 'task_manager', ]5. Open the file urls.py in your project directory and configure the URL for the app task_manager :
from django.urls import path, include urlpatterns = [ path('', include('task_manager.urls')), ]Modeling a task management app
In the application folder (or task_manager ), open the models.py file and create the model for the task manager application. Here is a sample template you can use:
from django.db import models class Task(models.Model): title = models.CharField(max_length=200) description = models.TextField() completed = models.BooleanField(default=False) created_at = models.DateTimeField(auto_now_add=True)Move the model with this command:
python manage.py makemigrations && python manage.py migrateCreate Django forms for your app
You should have a form to handle the Create and Update operations . In the app directory, create a file named forms.py . For example:
from django import forms from .models import Task class TaskForm(forms.ModelForm): class Meta: model = Task fields = ['title', 'description', 'completed'] widgets = { 'title': forms.TextInput(attrs={'class': 'form-control',}), 'description': forms.Textarea(attrs={'class': 'form-control',}), 'completed': forms.CheckboxInput(attrs={'class': 'form-check-input'}), }The above code has a class named TaskForm , which defines the fields and widgets of the form. It also specifies the model to use.
Create Django Viewers for Each CRUD
A basic CRUD app with CBV requires at least 4 viewers to handle the whole thing efficiently. The next steps will show you how to create them.
Import required modules and packages
Open the views.py file and do the following imports:
from django.views.generic import ListView, DetailView, CreateView, UpdateView, DeleteView from django.urls import reverse_lazy from .models import Task from .forms import TaskFormCode above enter 5 CBV. It also imports reverse_lazy to navigate the user to the specific URL after submitting the form. Finally, it imports the previously created Task and TaskForm model.
Create a viewer that lists sample objects
The task management app will have a page listing all the tasks created by the user. To create a viewer for it, you would use a ListView . For example:
class TaskListView(ListView): model = Task template_name = 'task_manager/task_list.html' context_object_name = 'tasks'
The above viewer defines 3 properties:
- Model defines the template to use for a particular view.
- Template_name tells Django which template is present in the browser.
- Context_object_name defines a name that allows the template to access the list of objects in the model.
Most CBVs contain these three attributes.
Create a viewer to handle task details
Each user-created task will have a detailed information page. The ideal CBV to handle this is DetailView . Here is a simple example:
class TaskDetailView(DetailView): model = Task template_name = 'task_manager/task_detail.html'Create a viewer for task creation
Create a viewer to handle creating or adding new tasks. This is the Create part of the CRUD operation. The right viewer for it is CreateView . Usage is as follows:
class TaskCreateView(CreateView): model = Task form_class = TaskForm template_name = 'task_manager/task_form.html' success_url = reverse_lazy('task_list')The above code introduces 2 attributes: form_class and success_url .
The form_class attribute tells the viewer what class the form should display and use its actions.
Success_url specifies how to redirect the user after submitting the form. It uses the reverse_lazy function to get the name of the URL path.
Create a viewer for editing tasks
To allow users to edit or update tasks, you should create a view like this:
class TaskUpdateView(UpdateView): model = Task form_class = TaskForm template_name = 'task_manager/task_form.html' success_url = reverse_lazy('task_list')The above viewer is similar to the TaskCreateView created from scratch. The only difference is using UpdateView .
Create a viewer to handle the delete operation
To allow users to delete tasks whenever they want, you should use CBV DeleteView . For example:
class TaskDeleteView(DeleteView): model = Task template_name = 'task_manager/task_confirm_delete.html' success_url = reverse_lazy('task_list')Configure the application's URL
In the application directory, create the file urls.py and configure the URL pattern as follows:
from django.urls import path from .views import TaskListView, TaskDetailView, TaskCreateView, TaskUpdateView, TaskDeleteView urlpatterns = path('', TaskListView.as_view(), name='task_list'), path('create/', TaskCreateView.as_view(), name='task_create'), path('tasks//', TaskDetailView.as_view(), name='task_detail'), path('tasks//update/', TaskUpdateView.as_view(), name='task_update'), path('tasks//delete/', TaskDeleteView.as_view(), name='task_delete'), ]The above URL pattern is similar to the one generated with a function-based view. The difference here is that the as_view() function is appended to the last part of the name of each view.
Create a template for the view
Allowing users to implement the action defined in the view mentioned above shows that you provide an interactive interface. From the initial created view, the task manager app will have 4 user interfaces.
In the app folder, create 4 HTML templates. You should also create a base.html file. You can style Django templates with Bootstrap to save time.
Task list template
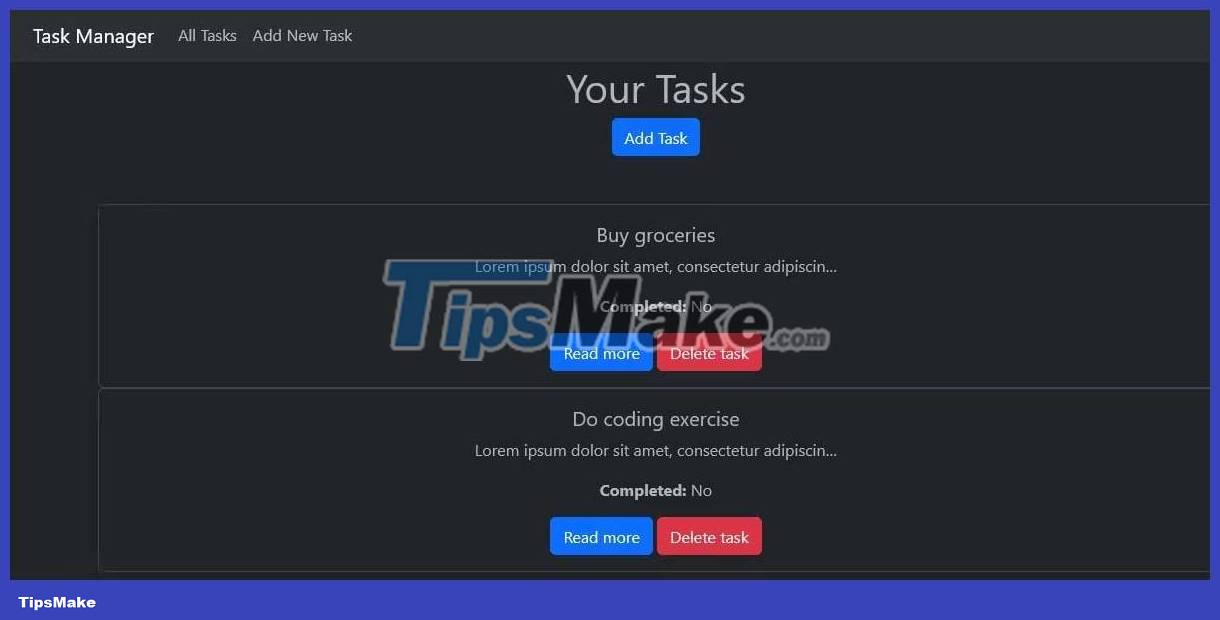
This template will include code that enumerates all the tasks in the model. A core example of this code is:
{% extends 'base.html' %} {% block content %}Your Tasks
Add Task {% for task in tasks %}{{ task.title }}
{{ task.description|truncatechars:50 }}
Completed: {% if task.completed %}Yes{% else %}No{% endif %}
Read more Delete task {% empty %}No tasks yet.
Add Task {% endfor %} {% endblock %}
With some Bootstrap classes, you can create a page that looks like this:
Task detail form
This page will show the full details of each created task. Here is an example you can use:
{% extends 'base.html' %} {% block content %}{{ task.title }}
{{ task.description }}
Completed: {% if task.completed %}Yes{% else %}No{% endif %}
Edit task Delete task {% endblock %}Depending on the styling method, your page should look like this:

Task form template
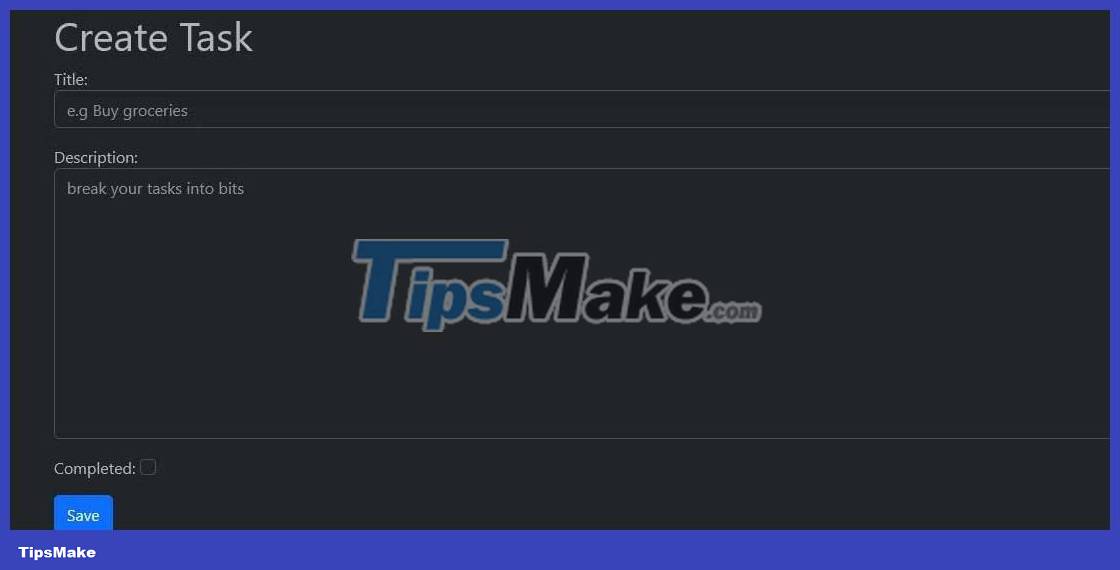
This template contains a form that allows the user to create or update a task:
{% extends 'base.html' %} {% block content %}Create Task
{% csrf_token %} {{ form.as_p }} Save {% endblock %}Result:
Task deletion form
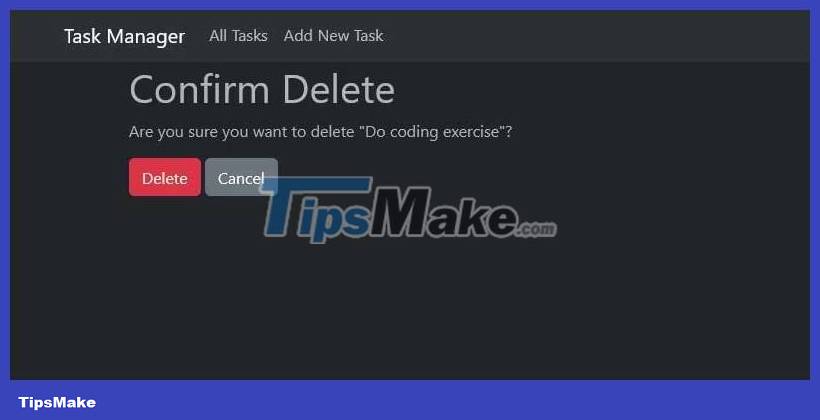
This template will be a confirmation page to prevent the user from accidentally deleting the action:
{% extends 'base.html' %} {% block content %}Confirm Delete
Are you sure you want to delete "{{ object.title }}"?
{% csrf_token %} Delete Cancel {% endblock %}With some Bootstrap your page should look like this:
Here's how to create a CRUD app with Django's class-based view . Hope the article is useful to you.