How to create a checklist in Microsoft Excel
Checklists are a great way to track tasks or processes. Here's a step-by-step guide on how to create a checklist in Excel..
Checklists are a great way to track tasks or processes. Here's a step-by-step guide on how to create a checklist in Excel .

Step-by-step guide to creating checklists in Excel.
This article will guide you on how to create an Excel checklist with checkboxes for completion. Basically, you only need to follow 3 steps:
- Activate the Developer tab.
- Enter the tasks to be completed into the spreadsheet.
- Add checkboxes and advanced formatting.
1. Open the Developer tab.
You activate the Developer tab on the ribbon to create a checklist. Do this by right-clicking on the ribbon and selecting Customize the Ribbon .
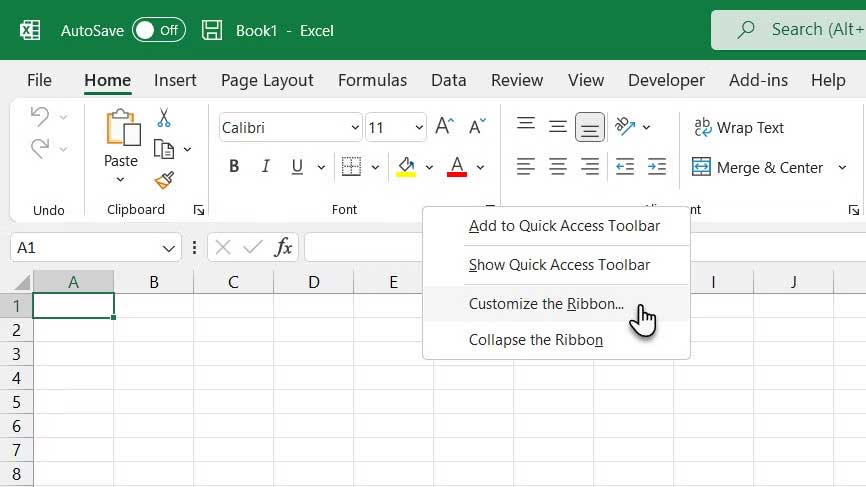
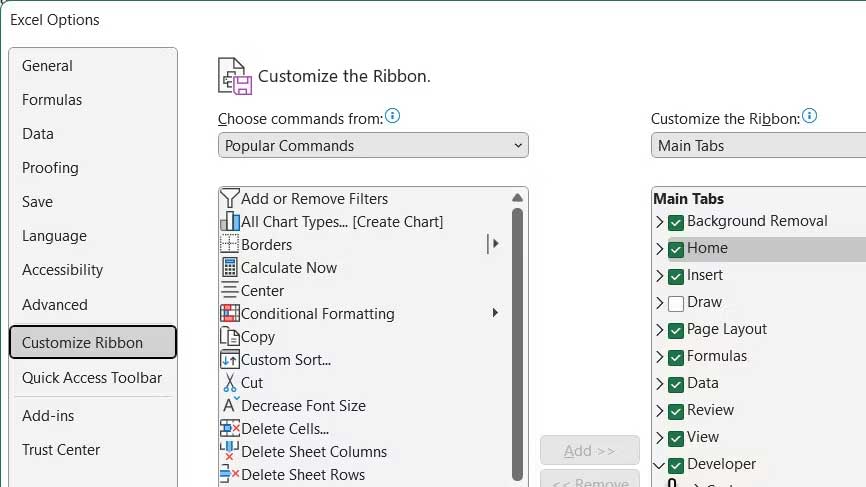
In the Main Tabs list on the right side of the Excel Options dialog box, check Developer and click OK .
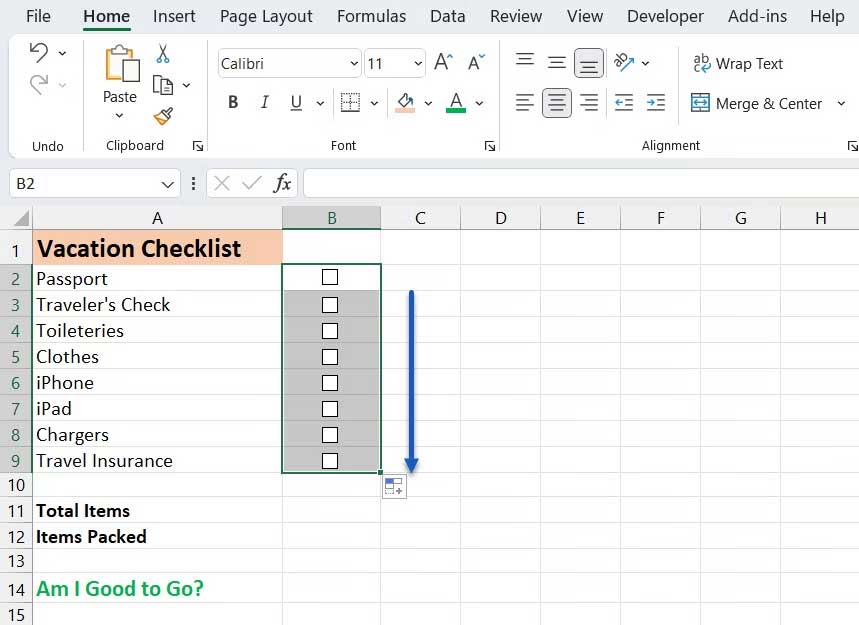
2. Enter the checklist items into the spreadsheet.
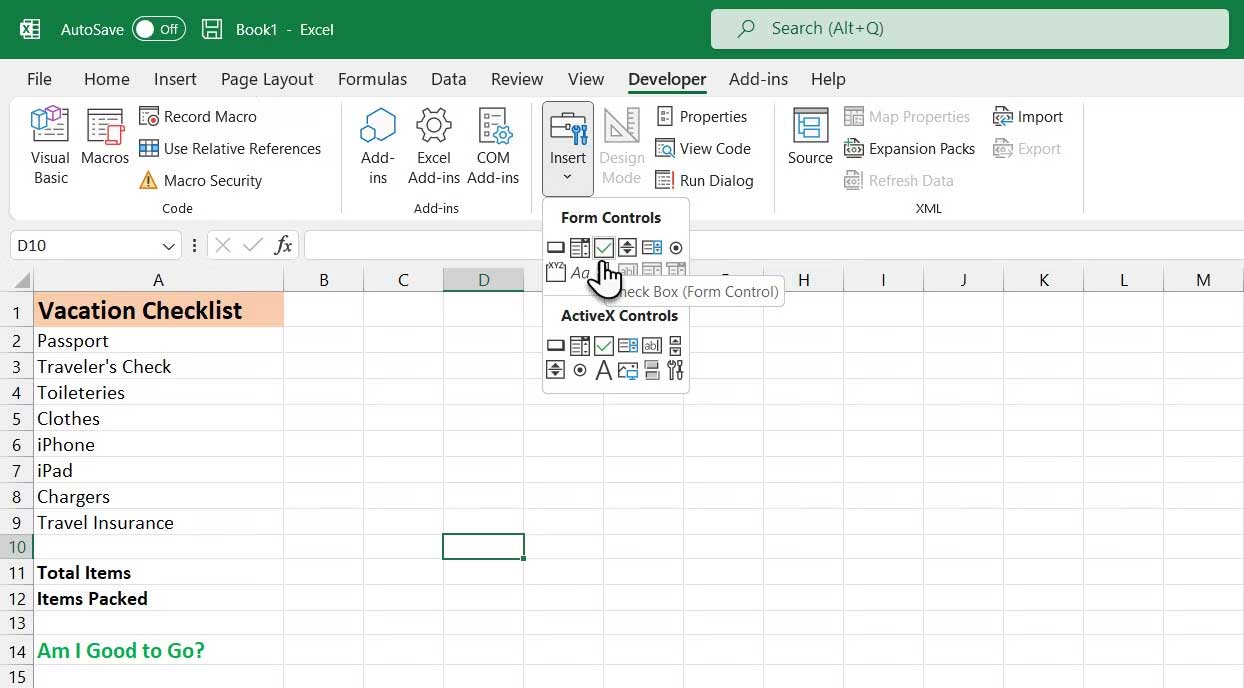
Enter your to-do list, one item per cell. In this example, you have one cell for the total number of items and another cell for the total number of items packaged together, or the number of items marked on the list.
The "Am I good to go?" box will be red with "NO" if all items are unchecked. If all items are checked, the red box will turn green with "YES" .
Click the Developer tab . Then, click Insert in the Controls section and click the Check Box (Form Control).
3. Add checkboxes
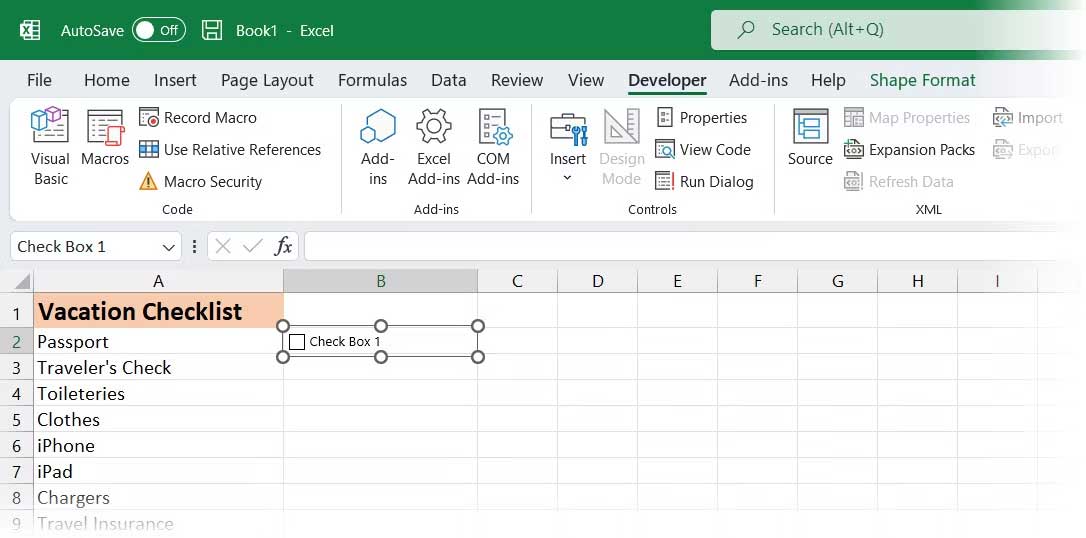
Select the cell where you want to insert the checkbox. You'll see text to the right of the checkbox. Just the text box, not the actual text, is needed here. Even though the checkbox control is selected, highlight the text next to the checkbox and delete it.
Checkbox control prevents checkboxes from automatically resizing after you delete text. To resize them, right-click the box to select the checkbox, then left-click it. Selected boxes will have circles in the corners.
Drag one of the circles on the right toward the checkbox to resize the border to fit the checkbox. Then, you can move the checkbox toward the center of the cell using the four-headed cursor.
This example aims to copy the checkbox to the rest of the items in the to-do list. To select the cell containing the checkbox, select any cell surrounding it that doesn't contain the checkbox. Then, use one of the arrow keys on your keyboard to move to the cell containing the checkbox.
To copy the checkbox to other cells, move the cursor to the bottom right corner of the selected cell containing the checkbox until it changes to a plus sign. Make sure the cursor is not a hand icon. That will check the box.
Drag the plus sign downwards over the cells where you want to copy the checkbox and release the mouse button. The checkbox will be copied to all those cells.
Above is how to create a basic checklist in Excel . Hopefully, this article is helpful to you.