Table of Contents
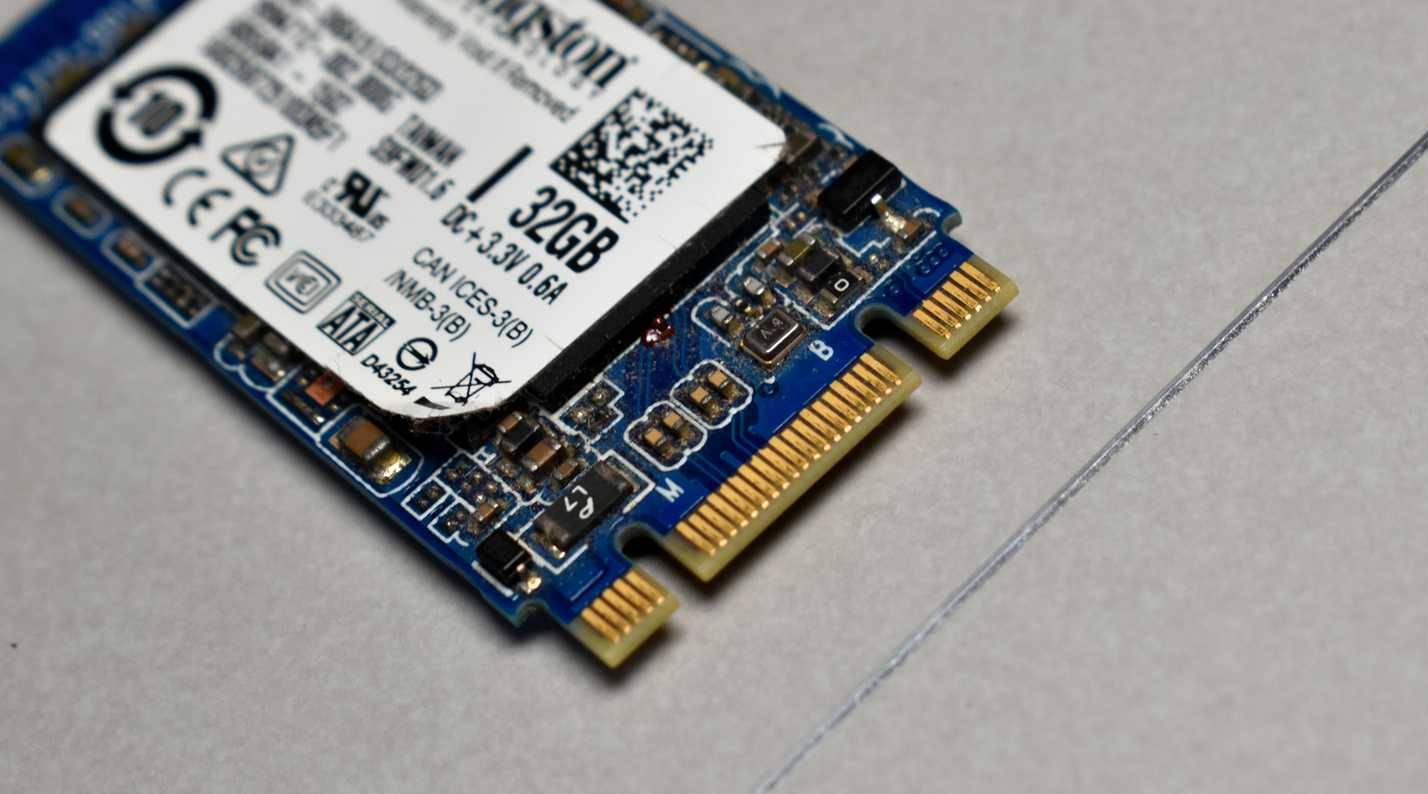
An SSD removed during a laptop upgrade can become a fast external drive, but the enclosure must match the drive's physical format and storage protocol. Before buying anything, identify whether the SSD is a 2.5-inch SATA drive, an M.2 SATA drive, or an M.2 NVMe drive. M.2 describes the card shape; it does not guarantee NVMe compatibility.
Identify the SSD before choosing an enclosure
Read the label and look up the exact model number. If the old laptop still works, its service manual or storage utility can also identify the interface. This overview of SATA, M.2, and NVMe laptop SSDs explains the distinctions.
| Drive type | Enclosure required | What to verify |
|---|---|---|
| 2.5-inch SATA SSD | 2.5-inch SATA-to-USB enclosure | Drive thickness, enclosure fit, and USB connector |
| M.2 SATA SSD | M.2 SATA-to-USB enclosure | B-key or B+M-key support and card length |
| M.2 NVMe SSD | NVMe-to-USB or compatible Thunderbolt/USB4 enclosure | M-key support, card length, host-port requirements, and cooling |
An NVMe-only enclosure will not operate an M.2 SATA drive, and a SATA-only enclosure will not operate an NVMe drive. Some dual-protocol products support both, but the specification must say so explicitly.
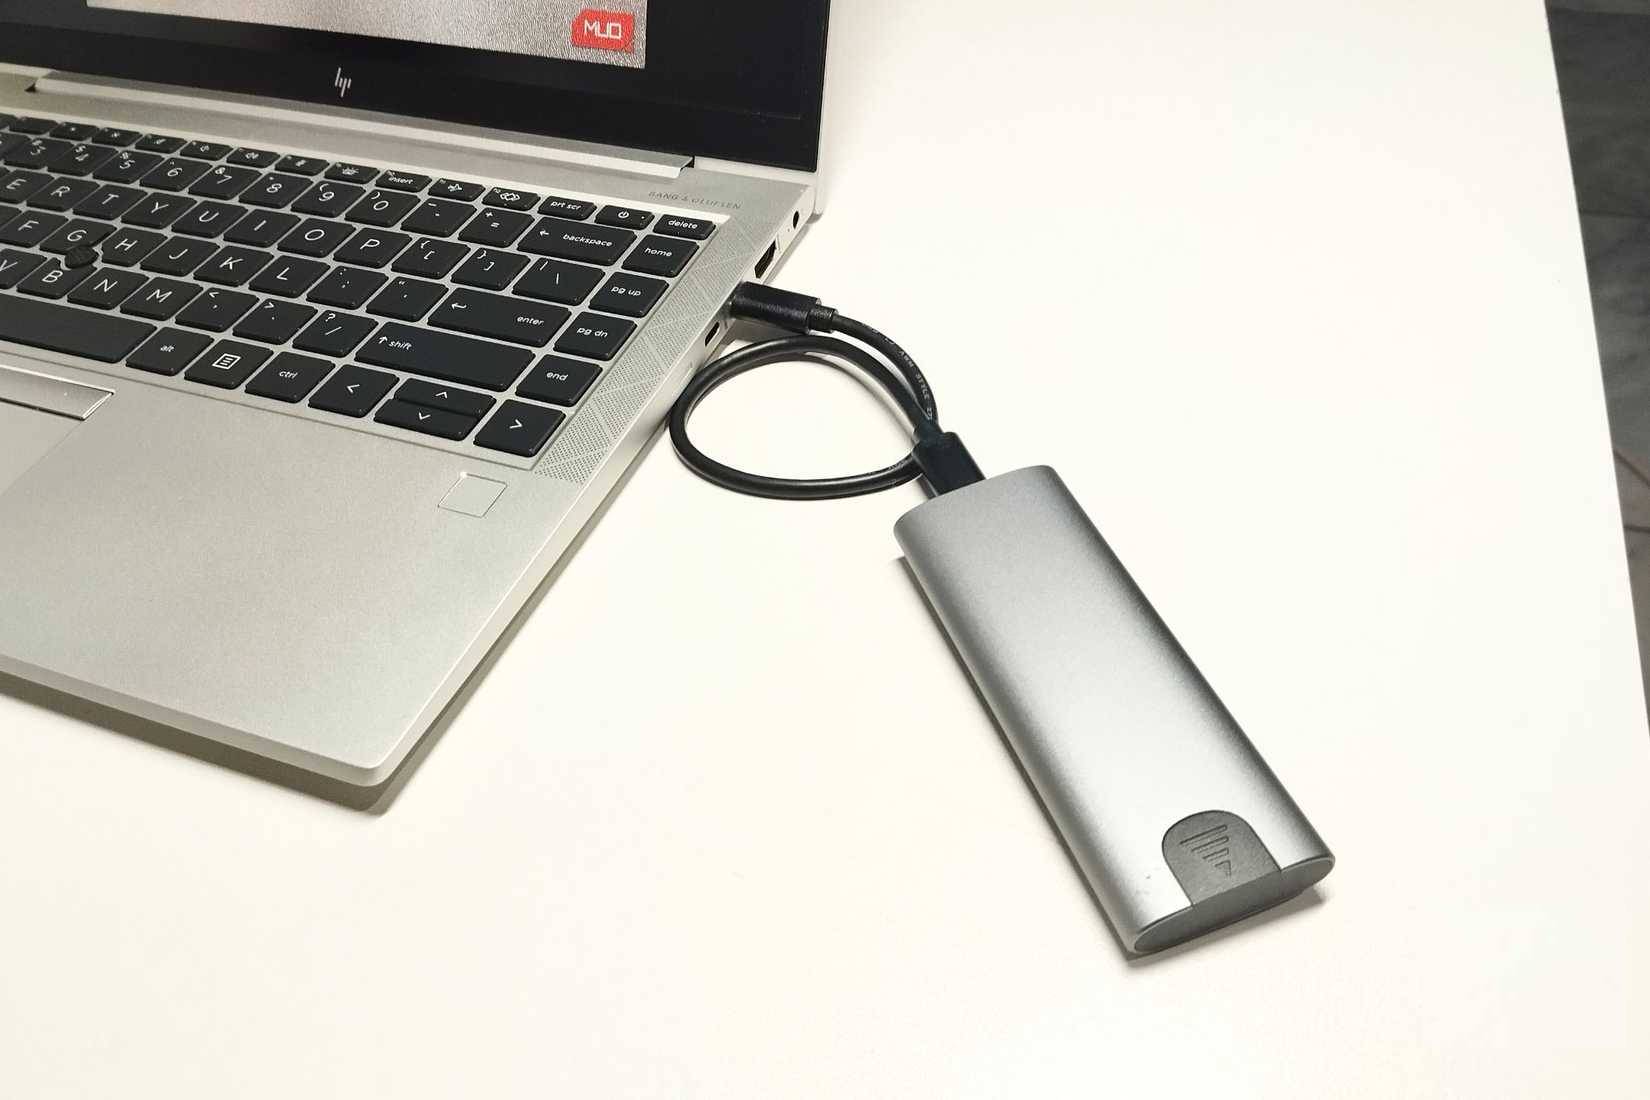
Check length, connector, and cooling
M.2 modules commonly use dimensions such as 2230, 2242, 2260, or 2280; the first two digits are width in millimeters and the remaining digits are length. Confirm that the enclosure has the correct mounting position.
Fast NVMe drives can become hot during sustained transfers. An aluminum case, correctly fitted thermal pad, and supported heat spreader can reduce throttling. Remove protective film from a thermal pad only when the enclosure instructions tell you to, and do not stack pads or force the case shut.
Understand the USB speed limit
The drive, enclosure bridge chip, cable, and computer port must all support the same link for the best speed. A “10Gbps” USB link has a theoretical signaling rate of 10 gigabits per second, but protocol overhead and the enclosure mean real file-transfer throughput will be lower than 1,250MB/s. Small-file transfers and a nearly full or hot SSD can be slower again.
- 5Gbps USB: adequate for basic storage and many SATA SSDs.
- 10Gbps USB: a practical mainstream choice for an NVMe enclosure.
- 20Gbps USB: requires 20Gbps support from the enclosure, cable, and host port.
- USB4 or Thunderbolt: can offer higher-performance PCIe tunneling, but capability varies by computer and enclosure. A USB-C-shaped port alone does not promise a particular speed or Thunderbolt support.
Use the cable supplied or recommended by the enclosure maker. A charge-only or lower-rated cable can cause slow speed, disconnects, or no detection.
Install the SSD in the enclosure
- Shut down the laptop, unplug power, and remove the SSD according to its service manual.
- Discharge static electricity and handle the module by its edges.
- Insert the drive into the matching connector at the angle specified by the enclosure instructions.
- Secure it with the provided screw, latch, or rubber retainer. Do not overtighten or bend the board.
- Fit any thermal pad as directed, close the case, and connect it to the computer.
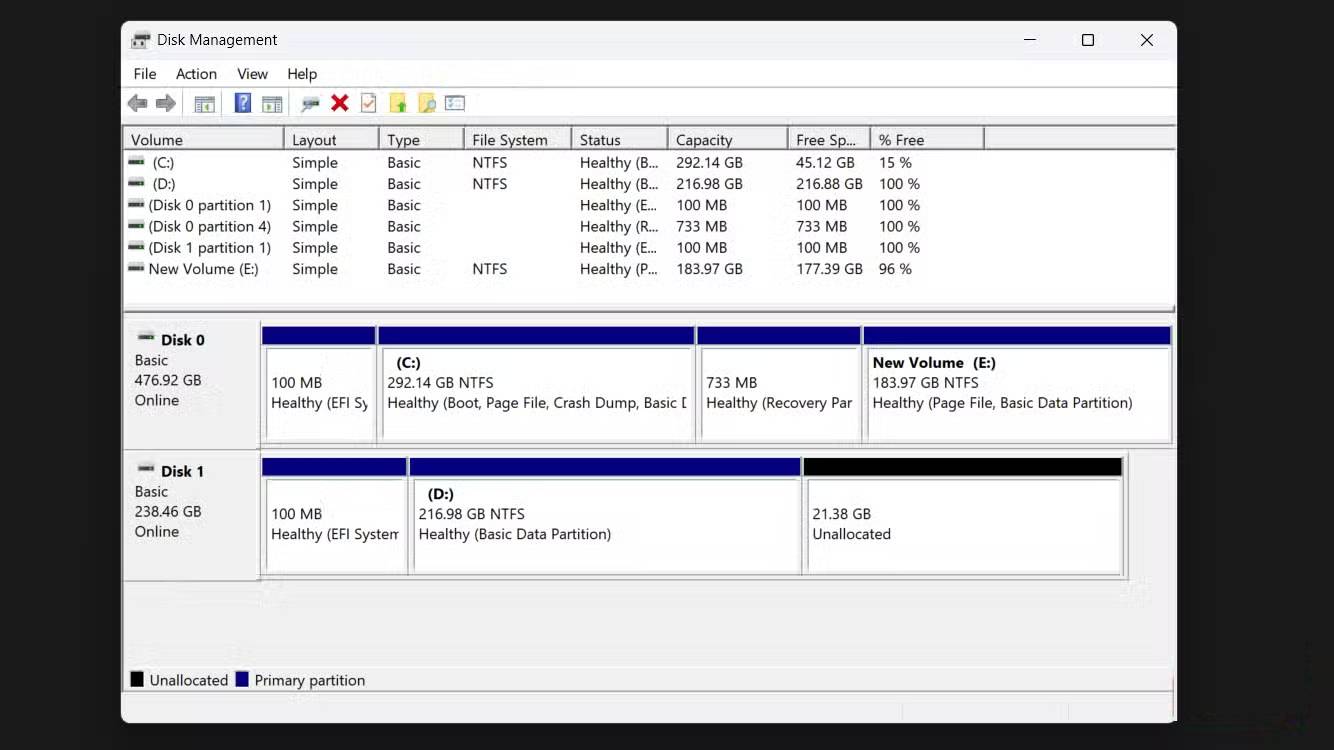
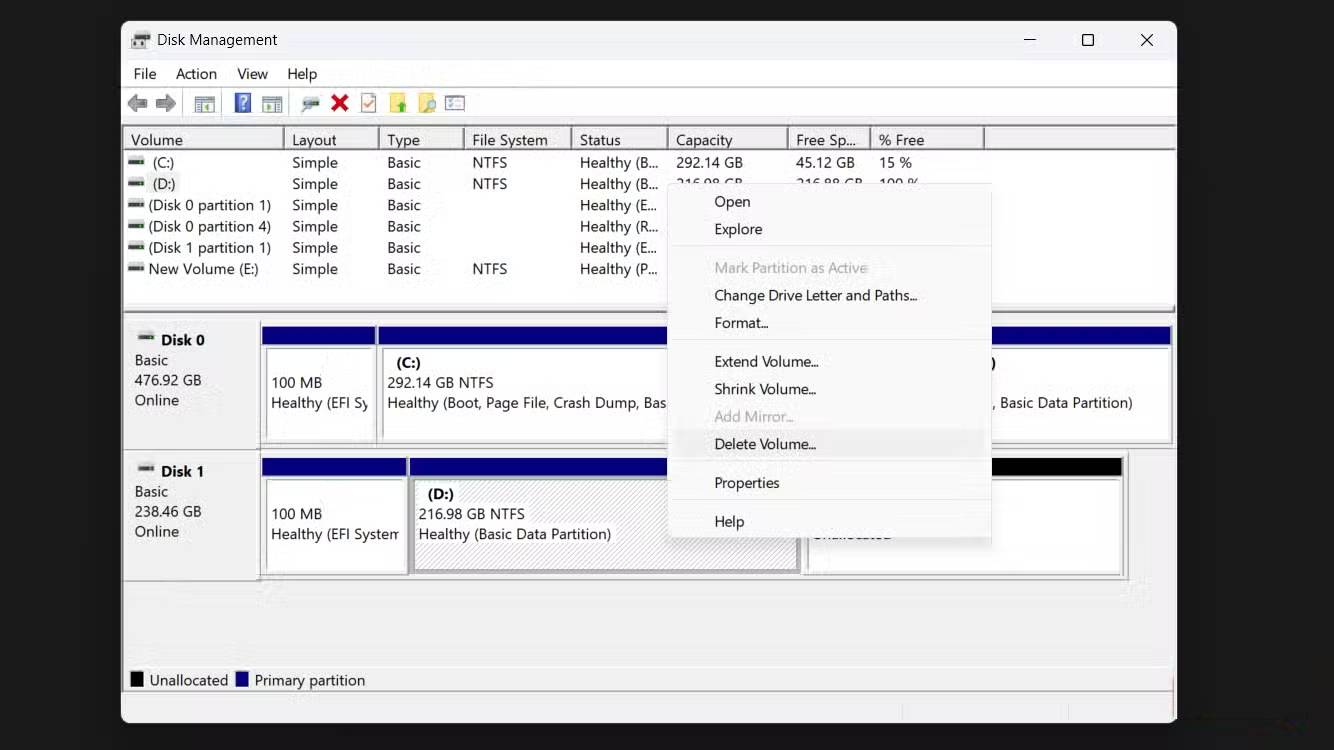
If the drive does not appear, check Disk Management on Windows or Disk Utility on macOS. Then test another known-good data cable and compatible port. Recheck the SATA-versus-NVMe specification before assuming the SSD has failed.
Back up the old data before deleting partitions
An old Windows SSD may contain an EFI system partition, recovery partitions, BitLocker-encrypted volumes, and personal files. Copy everything you need before formatting. If BitLocker asks for a recovery key, unlock the volume with the correct key; formatting does not recover encrypted data.
Warning: deleting a partition permanently removes access to its files. Disconnect unrelated external drives where practical, identify the SSD by both model and capacity, and verify the target again before every destructive action.
Create one clean volume in Windows
- Right-click Start and open Disk Management.
- Locate the external SSD by its model, capacity, and connection status. Do not rely only on a drive letter.
- Right-click each unneeded volume on that external disk and select Delete Volume.
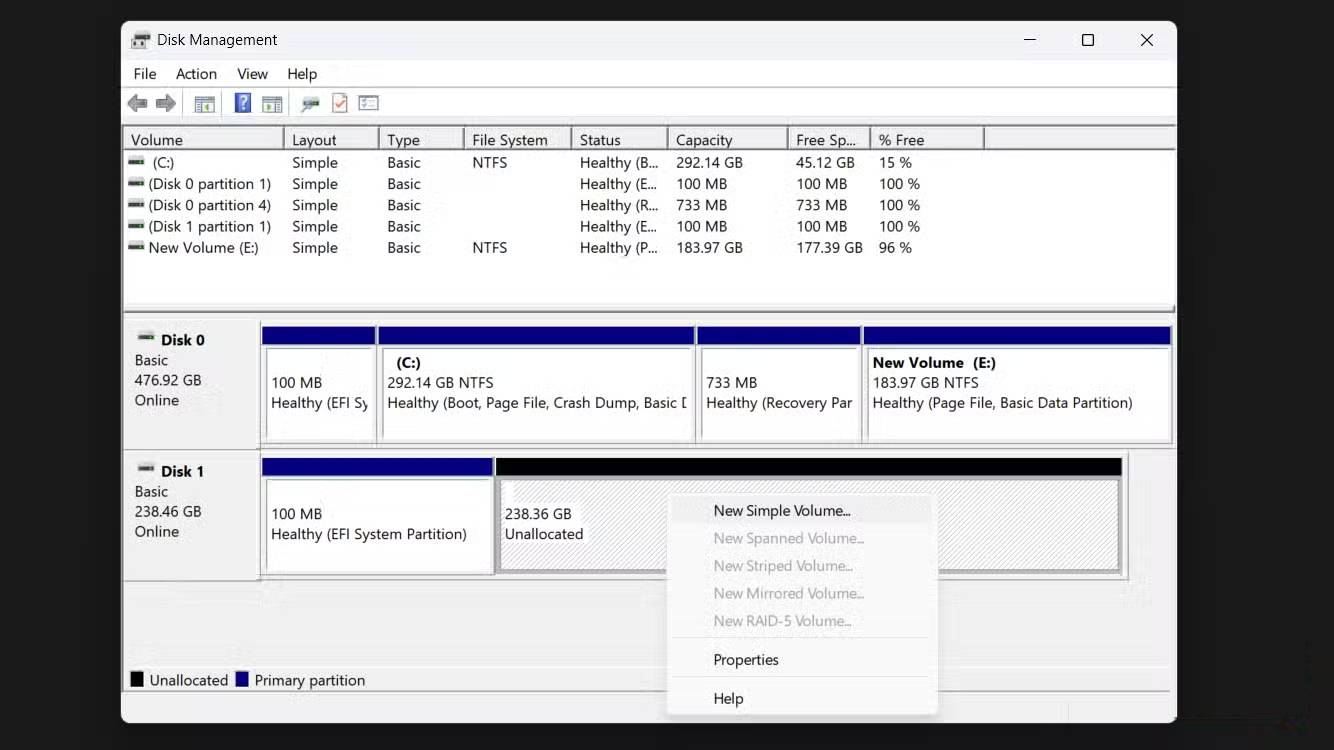
- When the space is shown as Unallocated, right-click it and choose New Simple Volume.
- Choose a size, assign a drive letter, select a file system, add a volume label, and complete the wizard.
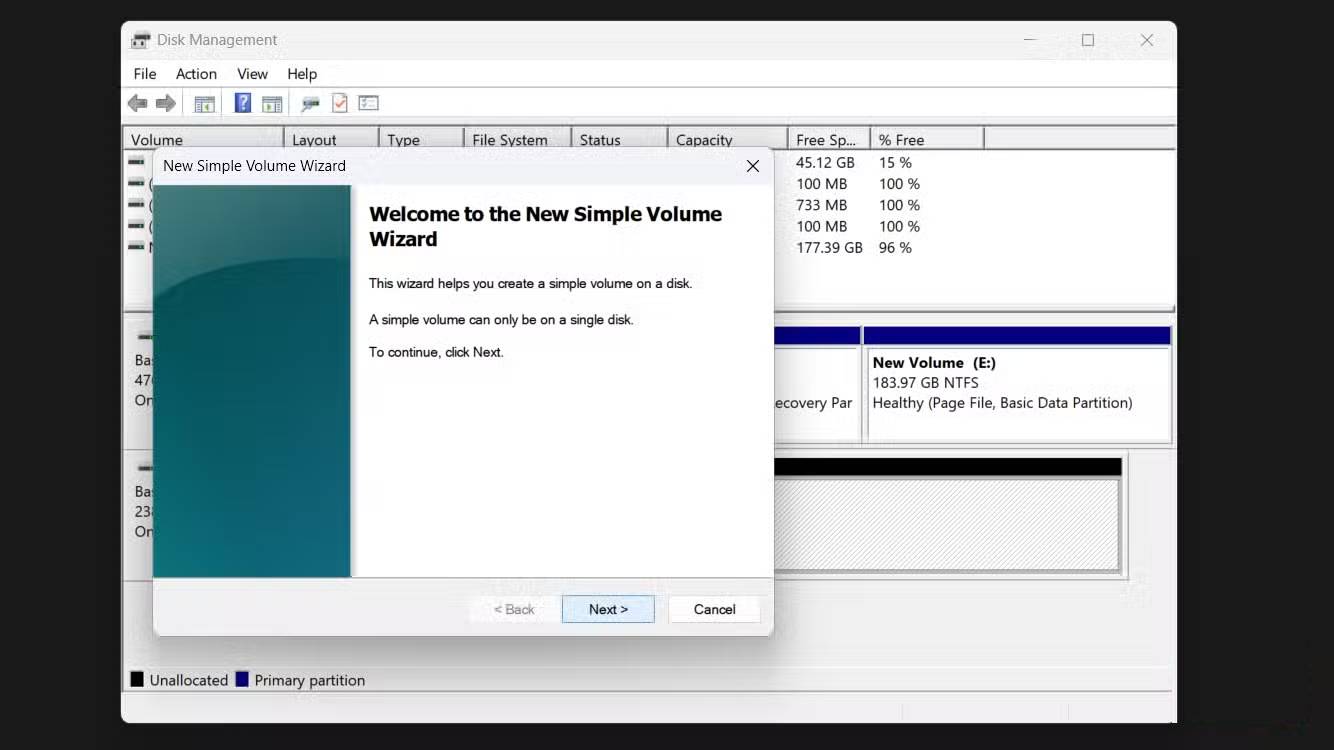
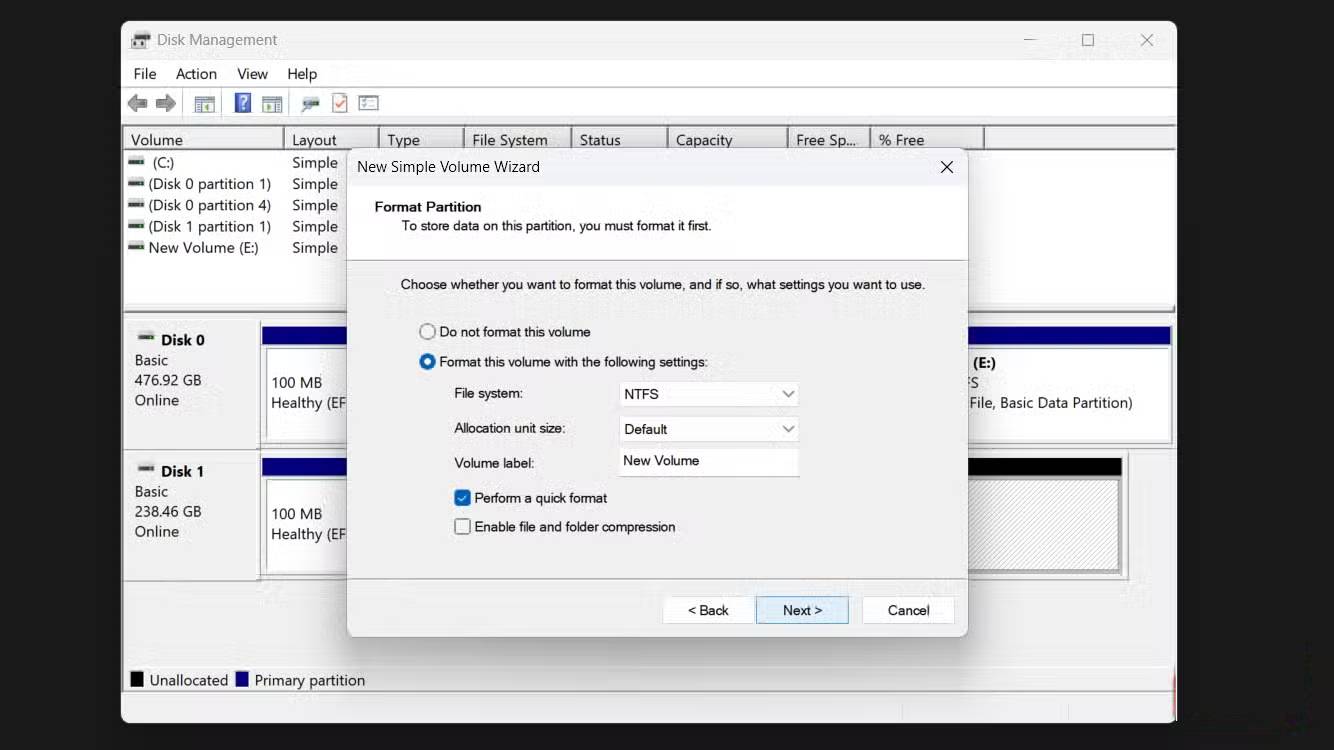
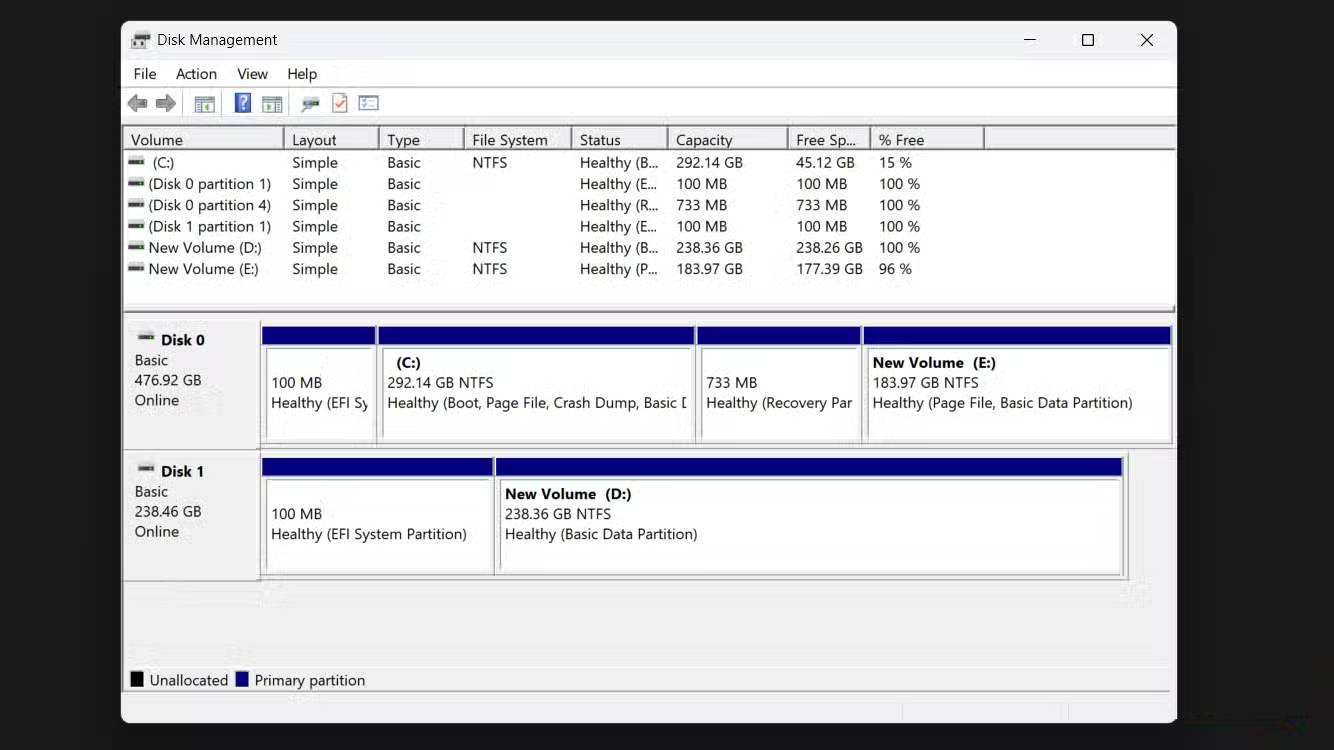
Disk Management may refuse to delete some protected system partitions. The DiskPart clean command can remove the partition map, but choosing the wrong disk destroys the wrong drive's layout. Use it only after a verified backup and careful disk identification; see this DiskPart cleaning explanation before proceeding.
Choose the right file system
- NTFS: the normal choice for a Windows-only working drive. macOS can usually read NTFS but does not provide general NTFS write support without additional software.
- exFAT: useful for large files shared between current Windows and macOS systems, with broad Linux support. It lacks some NTFS features and should still be ejected safely.
- APFS: suitable for a Mac-focused SSD, especially for Mac-only workflows; Windows does not support it natively.
No file system makes a portable drive compatible with every television, game console, phone, or older computer. Check the target device's supported formats first.
Practical uses and limits
An external SSD works well for project files, a game library, video scratch media, virtual machines, and large transfers. Whether an application or game can run from it depends on the software license, launcher, host operating system, and connection speed; it is not automatically portable between computers.
You can also create bootable installation or diagnostic media, but copying an existing internal operating-system volume into an enclosure does not guarantee it will boot. Firmware settings, drivers, encryption, and operating-system licensing can all matter.
Finally, an external SSD is not a backup if it holds the only copy. Portable drives can be lost, dropped, disconnected during a write, or fail without warning. Keep important data in at least one separate location and use the operating system's safe-eject function before unplugging the enclosure.
Related Articles
 How to Turn Off Hard Drive When Not in Use on Windows 113 minutes read
 How to Turn Off the Hard Drive After Not Working in Windows 104 minutes read
 How to Turn an Old Hard Drive into an External Drive?17 minutes read
 How to Install and Use SSDs for Laptops7 minutes read
 How to Turn Off Quick Access on Google Drive3 minutes read
 The Best Cheap Laptops7 minutes read
Reader Comments 0
Sign in with email or Google to join the discussion.