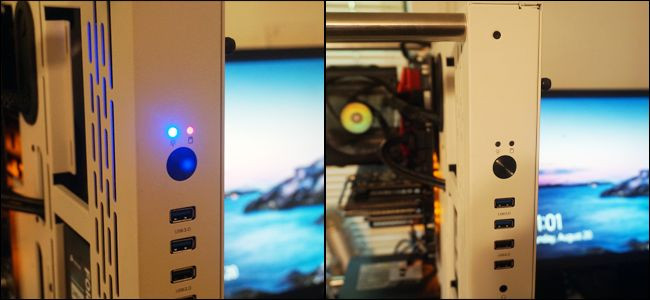
How to manually turn off the power light and hard drive light on the desktop
Desktop computers produce a certain amount of noise and light during operation. This light is emitted from the energy indicator light and the hard drive light. Of course you can turn off the computer, but if you want to let it run without light (like when you want to use a personal computer in a dormitory or studio room), there is a way to turn off the light. this.
Before embarking on practical guidelines, there is an easy and fast way to avoid these lights being used with electric glue to cover it up. You can also use specialized tapes to dim LEDs. However, this way will make your computer look ugly. Then read on to turn off the power LED and hard drive from inside.
Step One: Find instructions for using your personal computer or motherboard if possible
The solution here is to disconnect the LED connecting the LED from the main control panel. These are small and often not labeled on the motherboard, so it's best to find instructions.
If you install the computer yourself, you can remember the wires during the initial construction. Just find the original user guide or search on your motherboard model online to get a PDF version. It will include a system dashboard diagram of specific cables for power LEDs and hard drives.
- Introduce how to find the model and manufacturer of the motherboard

If you buy an already assembled computer, this may be a bit more difficult because the manual may not be related to the motherboard. In this case, you can determine the part number of the motherboard and search for a manual that is separate from the computer or simply search for the system board diagram for that board.
Step two: Remove the computer case
Remove all power cords and data cables from the computer. Remove the side screws of the control panel, which may be screws with a screw on a normal sized desktop computer. Move the computer to a place with lots of light and easily access the motherboard.
If you don't know how to open the computer case, refer to the user manual. You should see the section next to the computer to see the upper part of the motherboard and its connections.
Step three: Unplug the power LED and hard drive
This is an important part, you should consult the user manual or instructions for arranging the system control panel connections. This part is usually at the bottom or right edge of the motherboard, in the opposite corner of the processor.

Remove the positive (+) and negative (-) cables of both the power indicator and the hard drive. Usually they are labeled "PLED" and "IDE_LED" or "HD LED" on the diagram, and if you're lucky, there are also small letters on cables and motherboards. Some motherboards support multiple power LEDs for sleep or power saving states.

Only unplug positive and negative power cables for power LED and hard drive, do not touch other cables: the other pins on the system control panel are for the on / off switch manually, the reset switch and sometimes Additional front ear plugs and motherboard warning speakers are available.
Step Four: Check the results
Now, you do not need to completely install the computer case, carefully plug it into the power outlet and turn it on. You will see the CPU fan and case fan start spinning, but the LED on the front of the computer case is not lit. Check the power switch and turn off the reset to make sure they are still active.

If your computer is not turned on, or the reset switch does not work, go back to step three, reattach all cables and try again, making sure to follow the instructions carefully.
I wish you all success!
You should read it
- ★ When you turn off the light in the room, where did the light go?
- ★ Instructions for making devices turn on and turn off lights automatically when the light / dark is super simple with only 50,000 VND
- ★ Know about bad sectors on your hard drive
- ★ How to Wipe a Hard Dive in Windows 10
- ★ Are green light filtering applications really effective?