How to Clean Your Printer's Print Head
Today's TipsMake will show you how to fix a clogged printer head. Print head clogs often occur due to ink drying out due to lack of use, which can lead to uneven or misleading printing results. Usually, a clogged print head can be fixed with the printer's built-in self-cleaning software, but if this doesn't work, you'll need to clean the print head manually.
Table of Contents
Use the self-cleaning feature on Windows
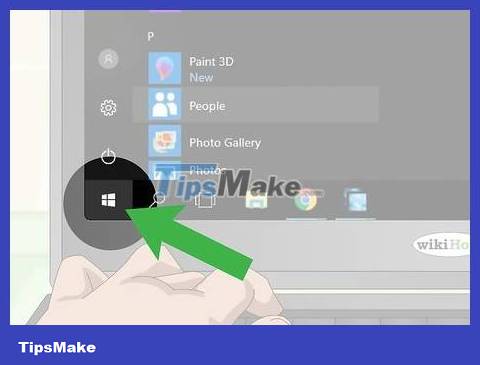
Open Start . Click the Windows logo in the lower left corner of the screen.
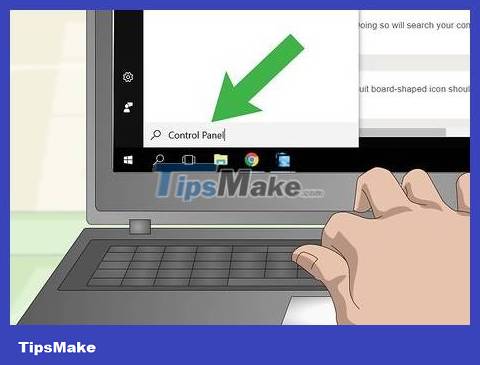
Enter control panelStart. The Control Panel application will be found on the computer.
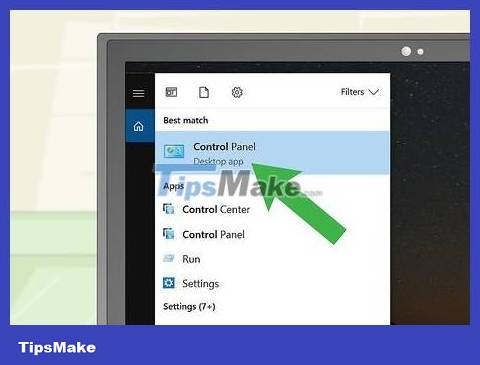
Click Control Panel . This blue circuit board icon is at the top of the Start window.
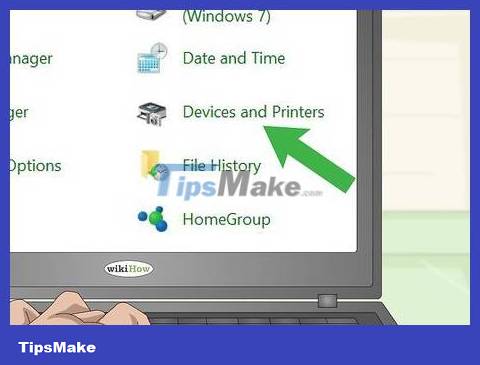
Click Devices and Printers . The option has a printer icon and is on the right side of the page.
If the Control Panel window uses the Categories view instead of Icons, you'll need to click the View devices and printers link under the "Hardware and Sound" heading. (Hardware and Sound).

Open the printer's menu. Right-click on the printer name that needs to be cleaned. The printer will be below the "Printers" heading near the bottom of the page. A menu will drop down.
If your mouse doesn't have a right mouse button, click the right side of the mouse or click down with two fingers.
If your computer uses a trackpad instead of a mouse, you can press down on the trackpad with two fingers, or tap the bottom right of the trackpad.
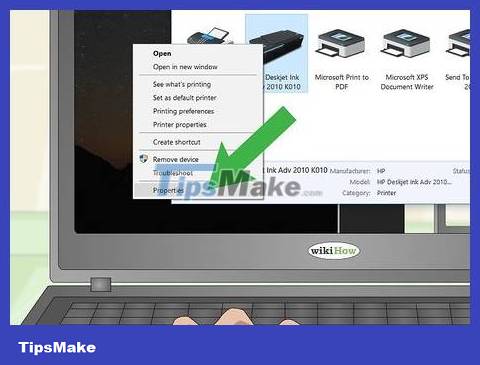
Click Properties . It's at the bottom of the drop-down menu. A new window will appear.
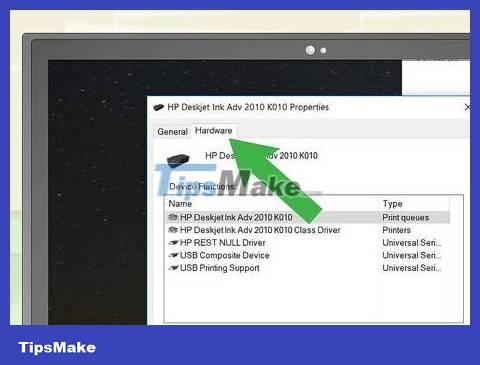
Click the Hardware or Maintenance tab . This option is at the top of the window.
Some printers set up a self-cleaning feature in the More Options or Tools tab .
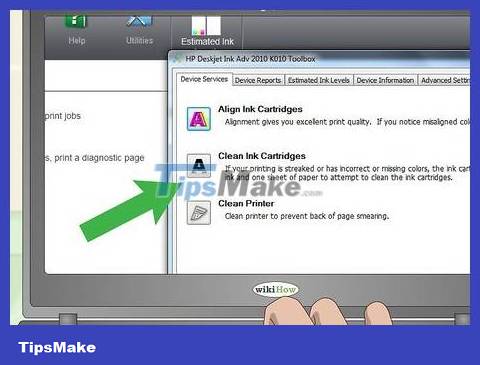
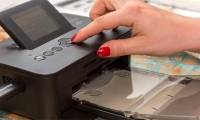
Click the "Cleaning" option. This option is usually called Clean Heads or Clean Cartridges , but look for any option with the word "Clean" on the page.
If you don't find the option to clean the printheads (or "nozzles", "cartridges", etc.), you should consult your printer's manual or online documentation. It's also possible that the printer doesn't have a self-cleaning option.

Follow the instructions on the screen. If prompted to do or click anything during the machine cleaning process, proceed. Otherwise, the printer will clean itself and you can then use it to print documents as usual.
You may see an option to print a test page to check if the cleaning process works properly.
If the test print results still show that the print head is still clogged, you will need to clean the print head manually to fix the problem.
Use the self-cleaning feature on Mac
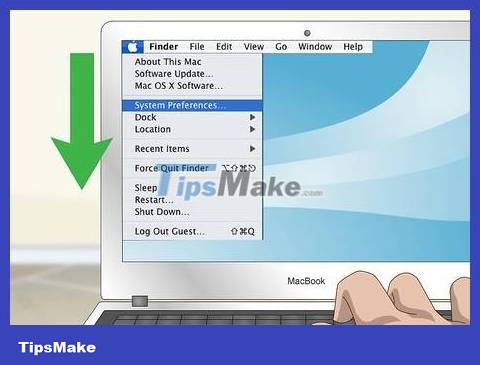
Open the Apple menu. Click the Apple logo in the upper left corner of the screen. A menu will drop down.
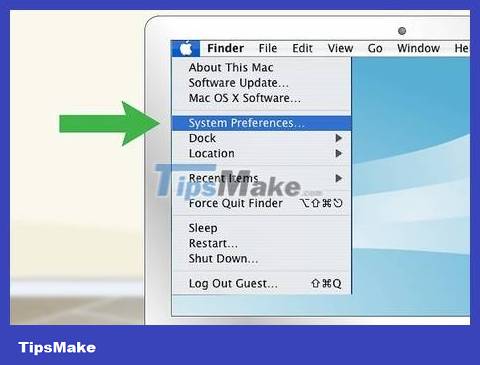
Click System Preferences… (System customization). This option is located in the Apple drop-down menu.
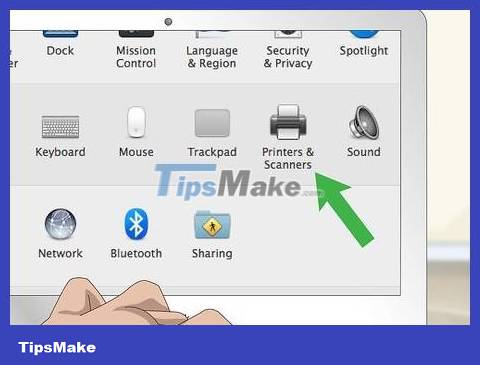
Click Printers & Scanners . This printer icon is on the right side of the System Preferences window.
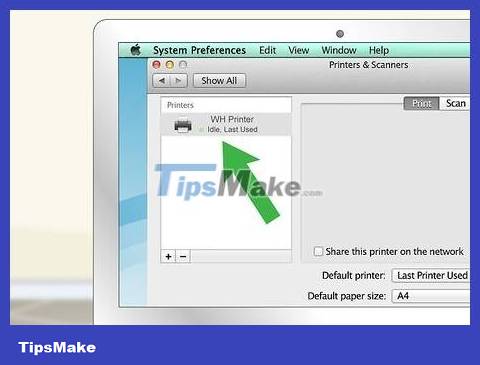
Select printer. Click the printer for which you want to run the self-cleaning program on the left side of the window.
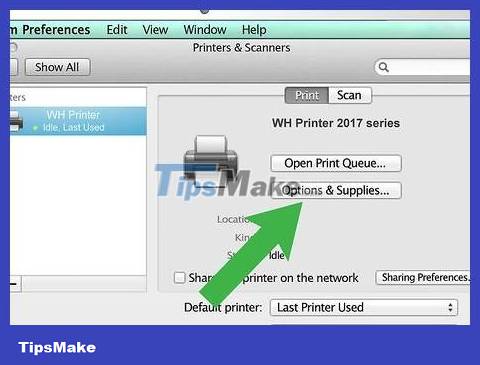
Click Options & Supplies… (Options & Supplies). This option is in the middle of the window.
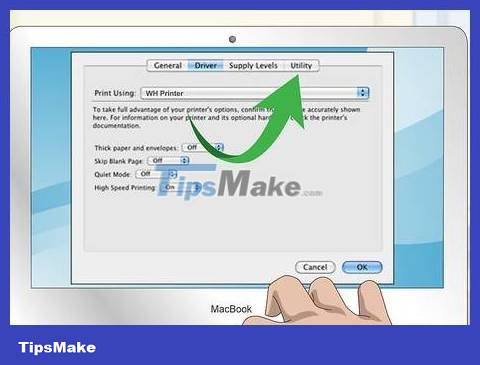
Click the Utilities tab . It's at the top of the page.
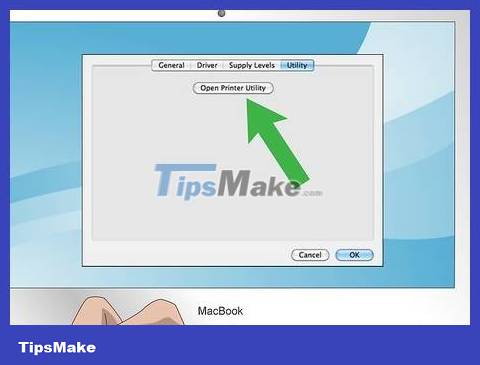
Click Open Printer Utility. This option is in the middle of the page.
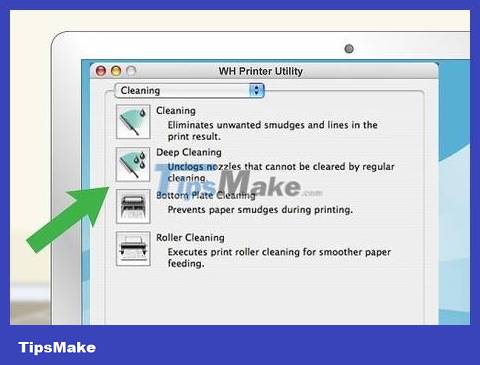
Select the "Cleaning" option. The name and location of the cleaning option may vary by printer, but there will usually be a Head Cleaning or Cartridge Cleaning section on this page.
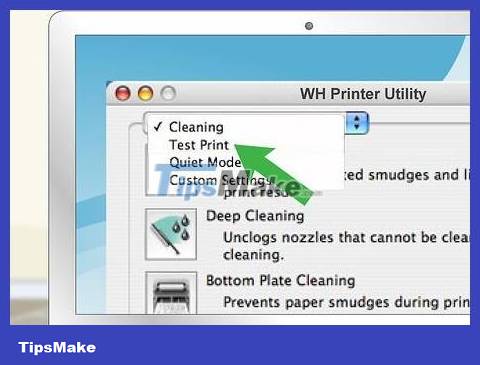
If the top of the window has a drop-down box, click it and select Cleaning from the drop-down menu.
If you don't find the "Cleaning" option, the printer may not support self-cleaning. Check your printer's manual or online documentation to confirm this problem.
Follow the instructions on the screen. If prompted to do or click anything during the machine cleaning process, proceed. Otherwise, the printer will clean itself and you can then use it to print documents as usual.
You may see the option to print a test page to check if the cleaning process works properly.
If the test print results still show that the print head is still clogged, you will need to clean the print head manually to fix the problem.
Clean the print head manually
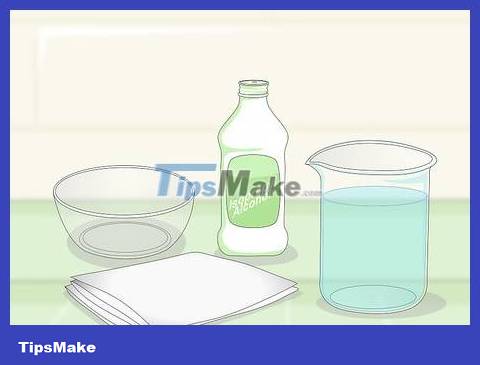
Preparing instruments. To clean the print head, you need the following tools:
Isopropyl alcohol
Water
Bowl or cake mold
Tissue
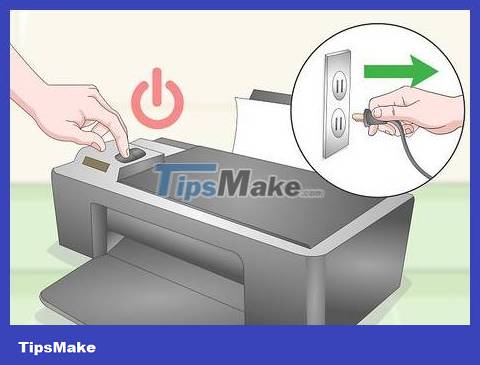
Turn off and unplug the printer. This will avoid damaging the printer as well as endangering you when removing the ink cartridge and print head unit.
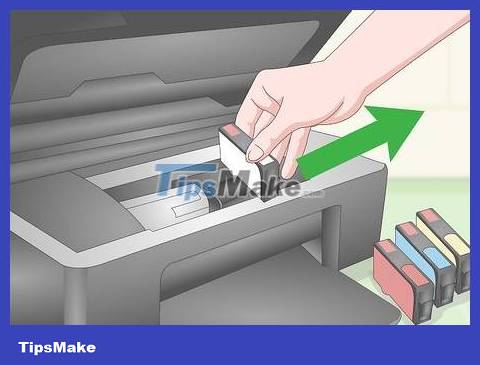
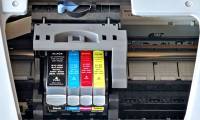
Remove the ink cartridge. Open the printer's main case, then remove each ink cartridge from the printer.
You should refer to your printer's manual or online user guide to properly remove the ink cartridge.
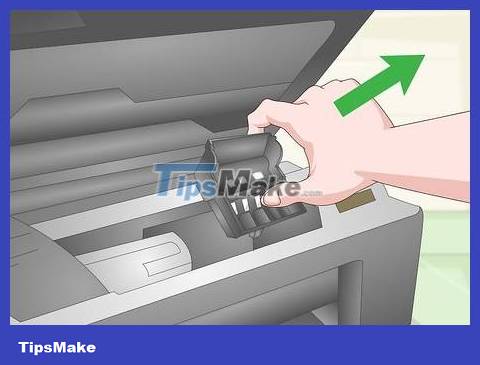
Remove the print head unit. This is the ink cartridge tray. The bottom of the print head part has a number of holes.
Again, you'll need to consult your printer's manual or online user guide to properly remove these parts for your specific product model.
If your printer uses a cartridge with an integrated print head, you can skip this step.
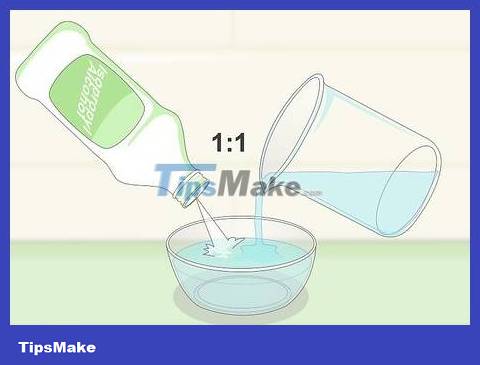
Mix a mixture of Isopropyl alcohol and water in a 50/50 ratio. Prepare half a cup of water and half a cup of alcohol (about 120 ml). Mix the two solutions together so that the mixture reduces the corrosiveness of alcohol and does not damage the print head.
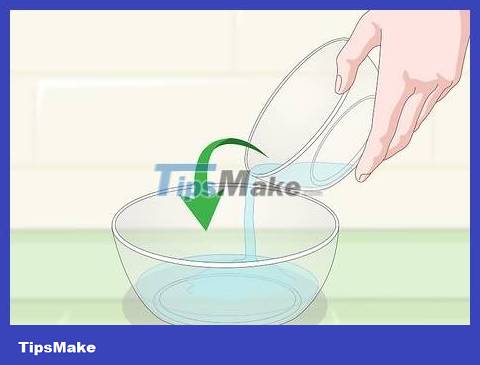
Pour the mixture into the bowl so that the mixture is slightly shallow (about 0.5 cm from the bottom of the bowl). We can add more later if it's too little.
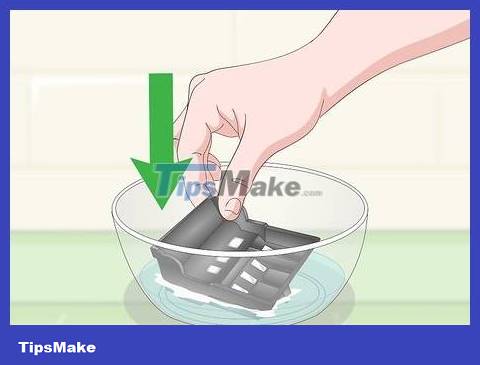
Place the print head unit in a diluted mixture of alcohol and water. Note: the mixture needs to cover the print head (or ink cartridge) by about 1 cm.
If the printer uses an ink cartridge that comes with the print head, add the ink cartridge to the same mixture as above.
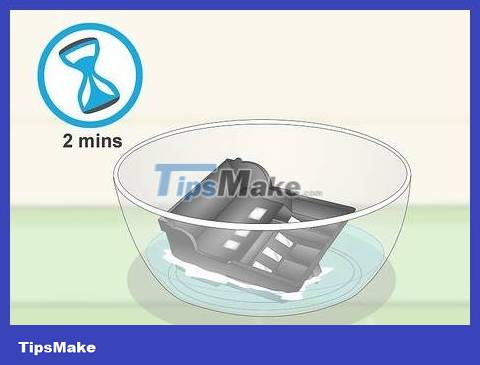
Soak the print head for at least 2 minutes. This way, the dried ink at the print head will have time to soften.
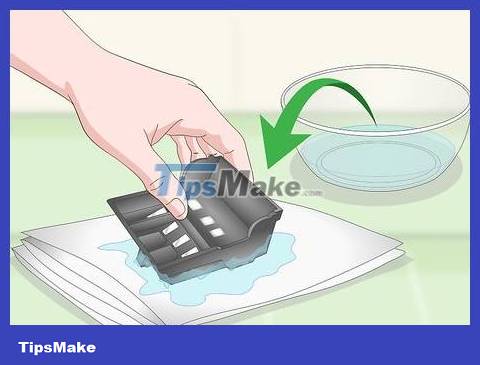
Place the print head on the tissue. Moisture and excess ink on the print head surface will be absorbed.
You need to let the printhead dry completely before continuing.

Check the print head again. Install the print head and ink cartridge into the machine, plug it in and try printing. The printer will operate as usual.
If the machine still does not print as usual, try soaking the print head (or cartridge) in a mixture of alcohol and water overnight.
Was this article helpful?
Your feedback helps us improve.
Related Articles
 How to clean the printhead of the printer4 minutes read
 Relax with 3 ways to print in this simple reverse order3 minutes read
 The best multifunction printer 201818 minutes read
 Top 6 best mobile photo printers 20197 minutes read
 5 best mobile printers of 20265 minutes read
 Select printer for small office7 minutes read
Reader Comments 0
Sign in with email or Google to join the discussion.