How to Wire a Contactor
Part 1 of 3:
Choosing and Shutting Off Contactor
-
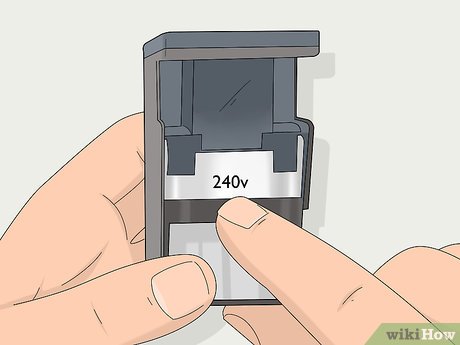
 Select a contactor that capable of handling the voltage and current. Contactors come with a built-in magnetic coil used to conduct electricity. Look on the top edge of the connector for a plastic tab containing information about the coil. Many devices require a 240-volt current to function, so you will need a contactor with a 240-volt coil.[1]
- Contactors are available online and at many big hardware stores. Also, check out construction supply stores.
- Check the device you plan on hooking up to figure out what kind of power supply it needs. Some very heavy pieces of equipment may even need as much as 480 volts to function.
-
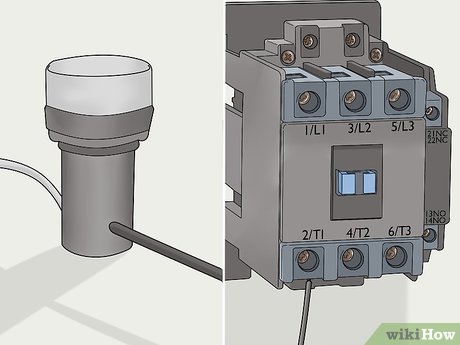
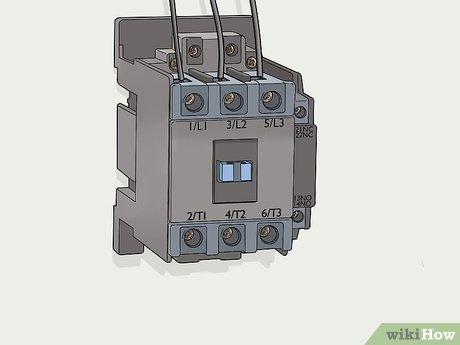
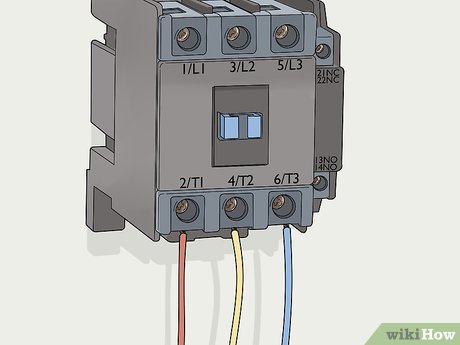
 Read the user manual to identify the outlets on the contactor. The input slots are labeled on most contactors, but check the manual for more information. Take advantage of the labeling to figure out how to hook the electrical wires to the contactor. The input slots will be labeled as L and are usually on top. The output slots, labeled as T, will be on the bottom.[2]
- You may also see labels like normally open (NO) and normally closed (NC). Generally, you use the NO slots to wire the contactor.
- The NC slot stays closed until you need to activate it. It's used for some types of wiring, such as setting up an emergency deactivation switch. When you press the switch, the contact opens to deactivate the electricity.
-
 Check for a separate auxiliary output contact on the contactor. Some contactors have an extra set of slots labeled with the letter A. These auxiliary spots signal parts of an electrical device that require a lower voltage to operate. The auxiliary output contacts should be rated at 120 volts.[3]
- For example, an auxiliary contactor could control the pilot light on a pump. The light would burn out if it received the 240-volt current the pump used. The auxiliary system may also be responsible for timers or display screens.
- A contactor can have several sets of auxiliary ports. You won't always need them, so don't worry if you don't have anything to plug into them.
-
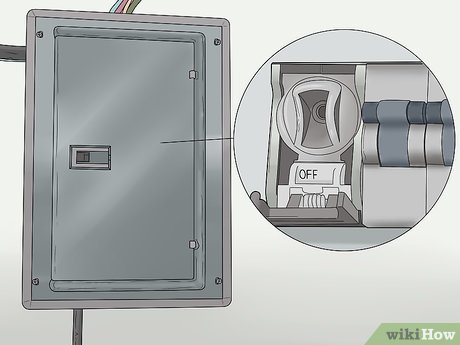
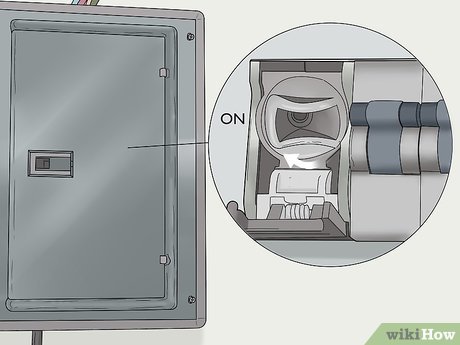
 Turn off the electricity before handling the wiring. Head down to the lowest floor of your home to find the circuit breaker or fuse box. It is usually located in an out of the way spot close to where the utility line enters your home. Open the door on the box and find the large switch on top. Flip the switch to shut off the power.[4]
- Test the electrical current by attempting to turn on lights and other nearby accessories. Make sure the power is off so you don't end up handling any live wires!
- Consider putting a note on the circuit breaker or fuse box so anyone living with you knows not to turn the power back on.
Part 2 of 3:
Opening the Wires and Contactor
-
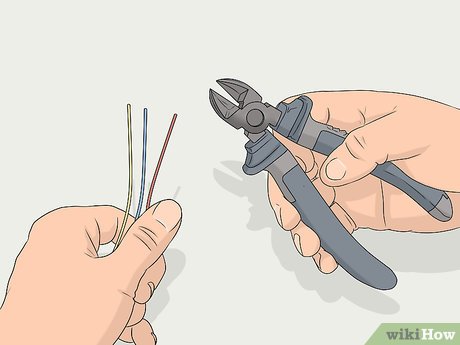
 Route the colored wires from your home's electrical circuit. Gather the wires from the closest circuit to the contactor. You should have enough wires to fit in the L slots on the top half of the contactor. The wires will usually have a color scheme like red, yellow, and blue. One wire fits into each slot on the contactor.[5]
- Make sure the wires are long enough to reach the connector. If you need to, trim them with pliers.
- Keep the wires separated so you know where they fit on the connector. Double-check that you have room for all of the wires on the contactor.
-
 Bring the wires from the device to the contactor. The device you wish to connect needs to be within range of the contactor. Position the device first to ensure your wires are long enough. The device's main wires should match the ones coming in from the electrical circuit. These will fit in the T slots on the bottom part of the contactor.[6]
- Your device may also have some smaller 120-volt wires colored black and red. Save these wires to plug into the auxiliary slots.
-
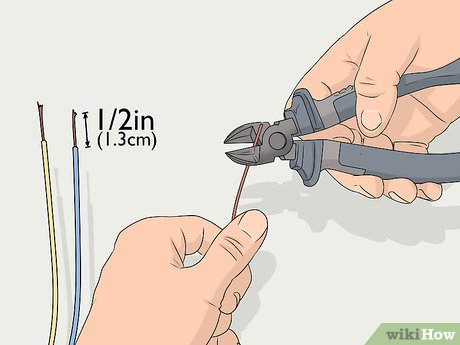
 Strip the ends of the wires by 1⁄2 in (1.3 cm). Cut through the insulation on the wires by using wire strippers. Lay a wire between the blades and then push down. After the blades break the insulation, pull the cut piece off to reveal the copper wire underneath it. Then, check the wire to ensure it doesn't have any strands hanging from it.[7]
- You can twist wire strands together to prevent them from hanging. If the wire still appears to be frayed, cut off the damaged portion and strip away more of the insulation.
- Stray strands may make unintended contact with a piece of equipment and cause electrical damage. Make sure the end of each wire looks neat before putting them into the contactor!
-
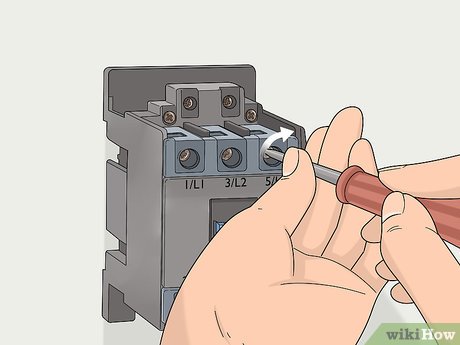
 Use a screwdriver to loosen the holding screws on the contactor. Every slot has a noticeable metal screw on the outside of the contactor. The screws will be near the slot openings. Use a screwdriver to turn the screws counterclockwise, opening the slots to prepare them for the wires you need to insert. If you need to close the slots back up, turn the screws clockwise.[8]
- The screws can be turned clockwise to pin the wires in place once they are plugged into the contactor. Check the opened slots on the contactor to ensure they are secure before turning the power back on.
Part 3 of 3:
Inserting the Wires
-
 Plug the power wire into the first auxiliary port if you are using one. Find the A1 port, then get the 120-volt wire on the accessory you wish to connect. The wire is usually colored black. Push the exposed end into the contactor slot, then tighten the screw to hold it in place.[9]
- Make sure you don't see any stray wire strands hanging out from the connector socket. Either twist the wire strands together or cut the wire to find an undamaged portion.
-
 Secure the white neutral wire to the next auxiliary slot. The remaining wires are all easy to connect since they fit the same way the power wire did. The 120-volt neutral wire comes next and has to be close to the power wire. It goes into the A2 slot on most contactors. This slot will be opposite from the A1 slot.[10]
- The neutral wire completes the circuit so electricity can flow safely back toward the power supply.
-
 Turn the electricity on momentarily to energize the contactor. Return to the fuse box or circuit box in your home. After reactivating the electricity, flip the contactor's switch to the on position. Listen carefully to the noises coming from the contactor. If it is working correctly, you will hear the inner screw switches click as they open and close.[11]
- If you don't hear the click, turn off the power and examine the wiring. You most likely put the wires into the wrong slots.
- Make sure the end of each wire looks neat without any noticeable strands. Also, check that the wires have been fully inserted into the contactor's slots.
-
 Connect the incoming power supply wires to the L slots. The remaining power wires in your home's electrical circuit plug into the 'line' slots labeled on the contactor or in its manual. You may have up to 3 remaining wires, usually with colors like red, blue, and yellow. Start with the first slot labeled L1 by loosening it and plugging in a wire. Fit the remaining wires to the other slots.[12]
- It doesn't really matter which of the line slots the wires go in. Try putting the red power wire in first, followed by the yellow and blue wires, for example.
- You may not have 3 wires to connect at this point. Remember to match the contactor to your wiring needs.
-
 Fit the outputs into the T slots on the contactor. Finish wiring the contactor by plugging in the electrical device you wish to set up. Loosen the screws on the blocks, then plug the wires in one at a time. The T, or load slots, are also numbered and correspond to the L slots you used earlier. This time, the wire color matters and depends on how you arranged the line wires.[13]
- As a rule of thumb, match the wire colors in the T slots to the ones in the L slots. For example, put a red wire into T1, a yellow one into T2, and a blue one into T3.
- Once you have the wires secure, you can reactivate the power and switch on the device you want to power.
Share by
Lesley Montoya
Update 04 March 2020
