Table of Contents
This updated guide examines How to Disable Bios Memory Options and organizes the essential facts, background, and practical takeaways in clear American English.
Part 1of 2:
Accessing the BIOS
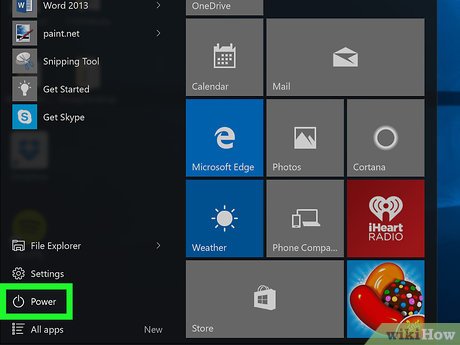 Restart your computer. Open Start
 , click the power icon
 , and click Restart .
- If your computer is locked, click the lock screen, then click the power icon in the bottom-right corner of the screen and click Restart .
- If your computer is already off, press your computer's "On" switch.
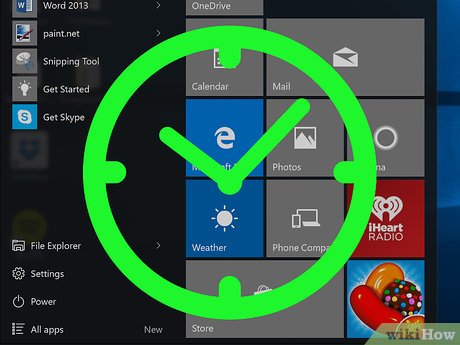 Wait for the computer's first startup screen to appear. Once the startup screen appears, you'll need to press your computer's setup key.
- If you see "Press [key] to enter setup" or something similar flash across the bottom of the screen and then disappear, you'll need to restart and try again.
 Press and holdDelorF2to enter setup. The key you're prompted to press might also be different; if so, use that key instead.
- You'll typically use the "F" keys to access the BIOS. These are at the top of your keyboard.
- Depending on your computer, you may have to hold theFnkey while pressing the setup "F" key.
- You can look at your computer model's manual or online support page to confirm your computer's BIOS key.
 Wait for your BIOS to load. After successfully hitting the setup key, the BIOS will load. You can then begin looking for the memory item that you want to disable.
Part 2of 2:
Disabling Memory Options
 Go to the "Advanced" page. Select Advanced at the top of the screen by pressing the→arrow key, then press↵Enter. This will open the Advanced page of the BIOS.
 Look for the memory option you want to disable. Common memory options include the following:
- Caching or Shadowing - If you're encountering a blue screen or memory issues in general, disabling your computer's BIOS caching may solve the problem.
- RAM - If you have custom-installed RAM that isn't working, you may be able to disable it from the BIOS without physically removing it from your computer.
- Available memory options will vary from BIOS to BIOS. You may have several memory options that other computers don't have, and vice versa.
- If you can't find the memory option you're looking for, try looking for it on another page (e.g., General ).
 Select a memory item you want to disabled. Use the arrow keys to move the selection box onto the "Enabled" or similar text to the right of a memory item. This will select it.
 Press the "Change" key. Doing so will disable your selected memory option. The "Change" key will vary depending on your computer's BIOS, but all BIOS screens display a guide in the lower-right corner that shows which keyboard keys perform certain actions.
- For example, you might press↵Enterto change the "Enabled" text to "Disabled".
 Press theEsckey. Doing so indicates that you're ready to exit the BIOS.
 Press↵Enterwhen prompted. This will save your changes and exit the BIOS. Your selected memory option has been disabled.
- Be sure to select the option to "Save and Exit" or press Y if prompted to save your changes.
FAQ
What is How to Disable Bios Memory Options about?
It provides a structured overview of bios, explains the main context, and highlights practical takeaways for readers.
Why does this topic matter?
Understanding the main concepts helps readers evaluate the issue, avoid common mistakes, and make better-informed decisions.
How should readers use this information?
Use the guidance as a practical starting point, confirm details that may have changed, and follow current product, safety, or security recommendations.
Related Articles
 Shortcuts to Boot Options and BIOS of Computer Lines4 minutes read
 How to Enter BIOS Windows 10 Asus, Dell, HP, Acer3 minutes read
 How to Change Computer Bios Settings5 minutes read
 5 Tips for Using the BIOS to Help You Master Your Computer8 minutes read
 Computer: How to Reset a Bios Password10 minutes read
 Instructions for Entering BIOS on Different Computers6 minutes read
Reader Comments 0
Sign in with email or Google to join the discussion.