How to change the presentation mode for screens in Windows 10
Display Switch is used to change the presentation mode for the main screen of Windows 10 PC. This tutorial will show you how to change the presentation mode for monitors in Windows 10.
Table of Contents
Display Switch is used to change the presentation mode for the main screen of Windows 10 PC, to show only on the PC screen ( PC screen only ), project the same content on the second screen ( Duplicate ), expand on all screens ( Extend ) or only the second screen ( Second screen only ).
This tutorial will show you how to change the presentation mode for monitors in Windows 10.
Change the presentation mode for the monitor in the Project flyout menu
1. Follow step 2 ( Project ) or step 3 ( Action Center ) below, depending on how you want to open the flyout Project menu.
2. Press the Win + P keys or swipe from the right edge of the touch screen and move to step 4 below.
3. Open Action Center , click the Project button and move to step 4 below.
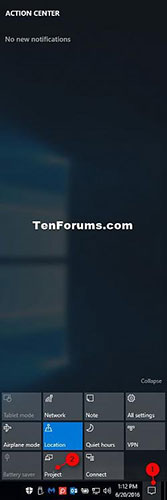 Open Action Center, click the Project button
4. Click the desired presentation mode ( PC screen only, duplicate, extend or second screen only ). You can also press the down arrow key until you see the projection mode you want and press Enter to apply.
For example, if you have a blank black screen and can't see the menu, you can do this below to restore default Extend settings.
Press the Win + P keys, press the down arrow key twice and press Enter .
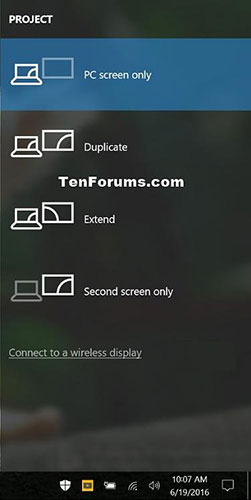 Click the desired presentation mode
Change the presentation mode for the screen with the command
Copy and paste one of the commands below that you want to use into the Command Prompt or the Run dialog box ( Win + R ) and press Enter .
PC screen only
%windir%System32DisplaySwitch.exe /internal
Duplicate
%windir%System32DisplaySwitch.exe /clone
Extend
%windir%System32DisplaySwitch.exe /extend
Second screen only
%windir%System32DisplaySwitch.exe /external
Was this article helpful?
Your feedback helps us improve.
Related Articles
 Top 6 Best Lock Screens and Wallpapers for Windows 109 minutes read
 How to change Windows 11 sleep mode settings2 minutes read
 5 customizations make the Windows interface more attractive6 minutes read
 How to create a two-screen switch mode shortcut on Windows 103 minutes read
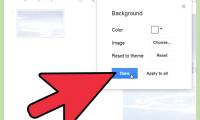 How to Change the Background on a Google Presentation6 minutes read
 Create unique lock screen on Windows 10 Mobile by Win Screens4 minutes read
Reader Comments 0
Sign in with email or Google to join the discussion.