How to change Windows 11 sleep mode settings
If you want your device to stay on longer or don't want it to go to sleep automatically, Windows 11 lets you adjust display settings and timeouts..
Windows 11 has a feature that automatically puts your computer into Sleep mode after a period of inactivity to save energy and extend your computer's battery life. If you want your device to run longer or don't want it to automatically go to sleep, Windows 11 allows you to adjust your display settings and timeout. Here's how to change Sleep mode settings in Windows 11 .
How to change Windows 11 sleep mode settings
Step 1:
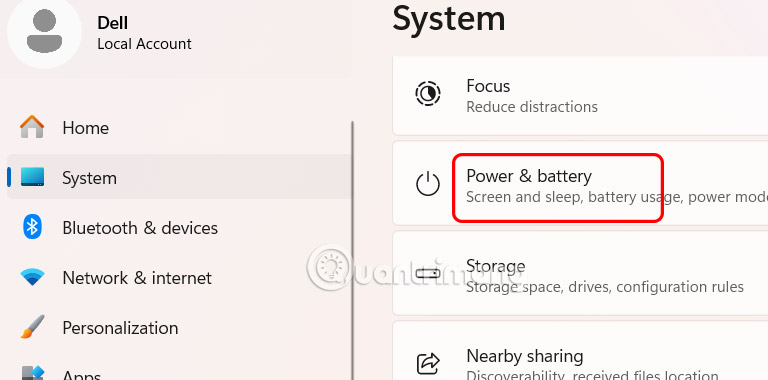
Open Settings then click on System then look to the right and click on Power & battery .
Step 2:
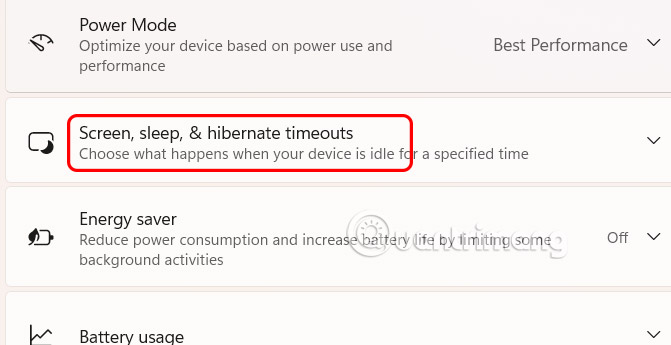
Switch to the new interface, select Screen, sleep, & hibernate timeouts to adjust.
Step 3:
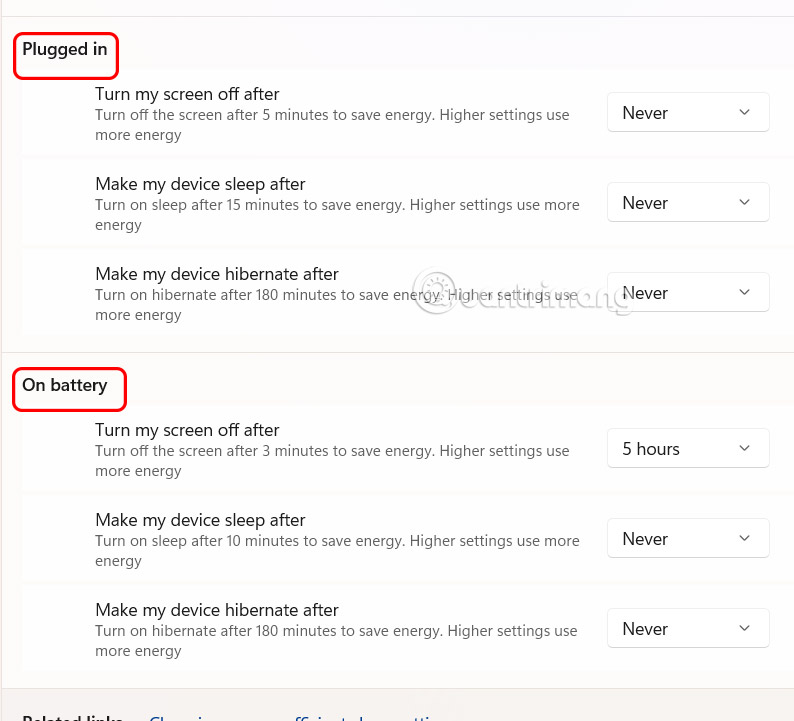
In the adjustment list, you choose how long the computer will wait before turning off the display while plugged in or running on battery.
Continue to select how long the computer waits before going to sleep when plugged in or running on battery.

Once you complete the steps, your computer will go to sleep or turn off the display according to your configuration.
If you want maximum energy savings, the default settings of 5 and 3 minutes for both plugged-in and battery mode are optimal for most people. However, you can always increase or decrease these values to suit your preferences.
How to turn off Windows 11 Sleep timer
Preventing your computer and monitor from automatically going to sleep on Windows 11 is also very simple.
Under Screen, sleep, & hibernate timeouts, we will change it to Never to prevent the screen from automatically turning off for the Plugged in setting.
Select Never to prevent the computer from automatically going to sleep for the On batter setting.