Table of Contents
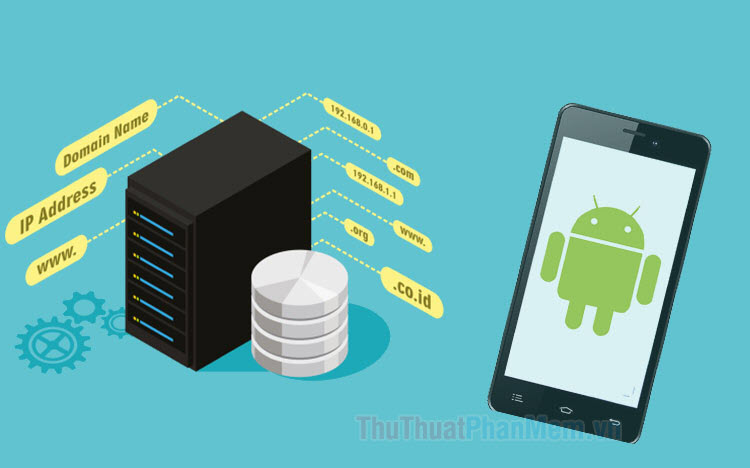
This guide explains how to change DNS on Android Phones, with clear steps, practical tips, and important checks before you begin.
1. Change DNS on Samsung phones
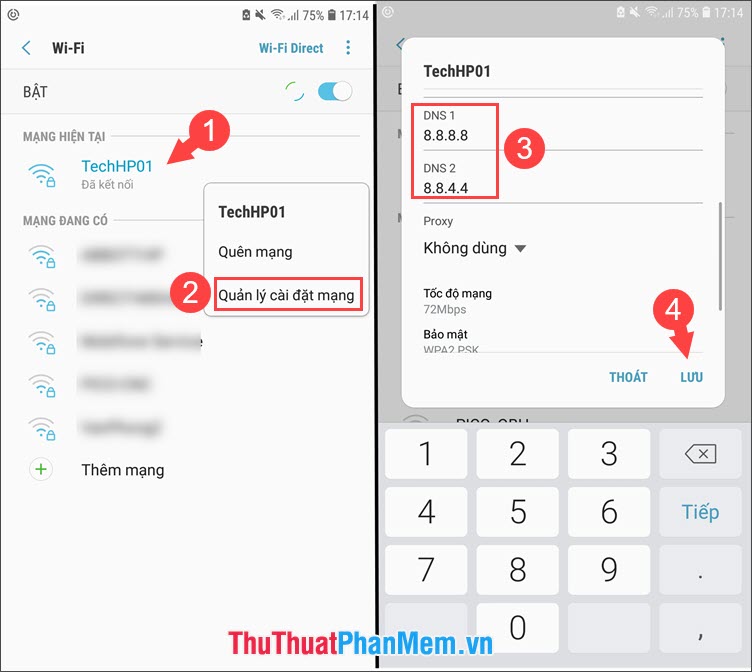
Step 1: Go to Settings => Connection => Wi-Fi.

Step 2: Touch and hold the name of the connected Wi-Fi network => Manage network settings . Then you find down and change DNS 1, DNS 2 according to your purpose. To complete the changes, click Save to finish.
2. Change the DNS on Xiaomi phones
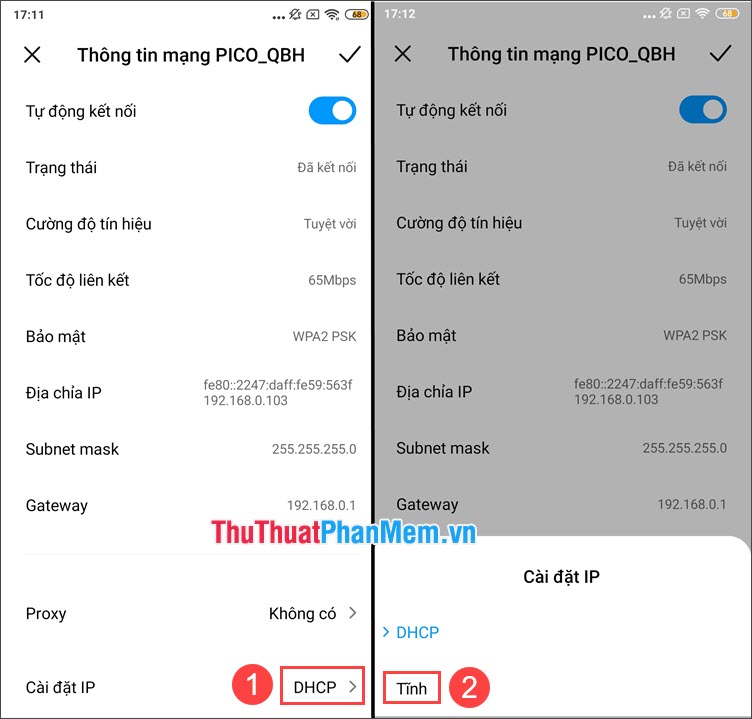
Step 1: Go to Settings => Wi-Fi => touch the arrow next to the name of the connected Wi-Fi network.

Step 2: Go to IP Settings and switch from DHCP to Static .
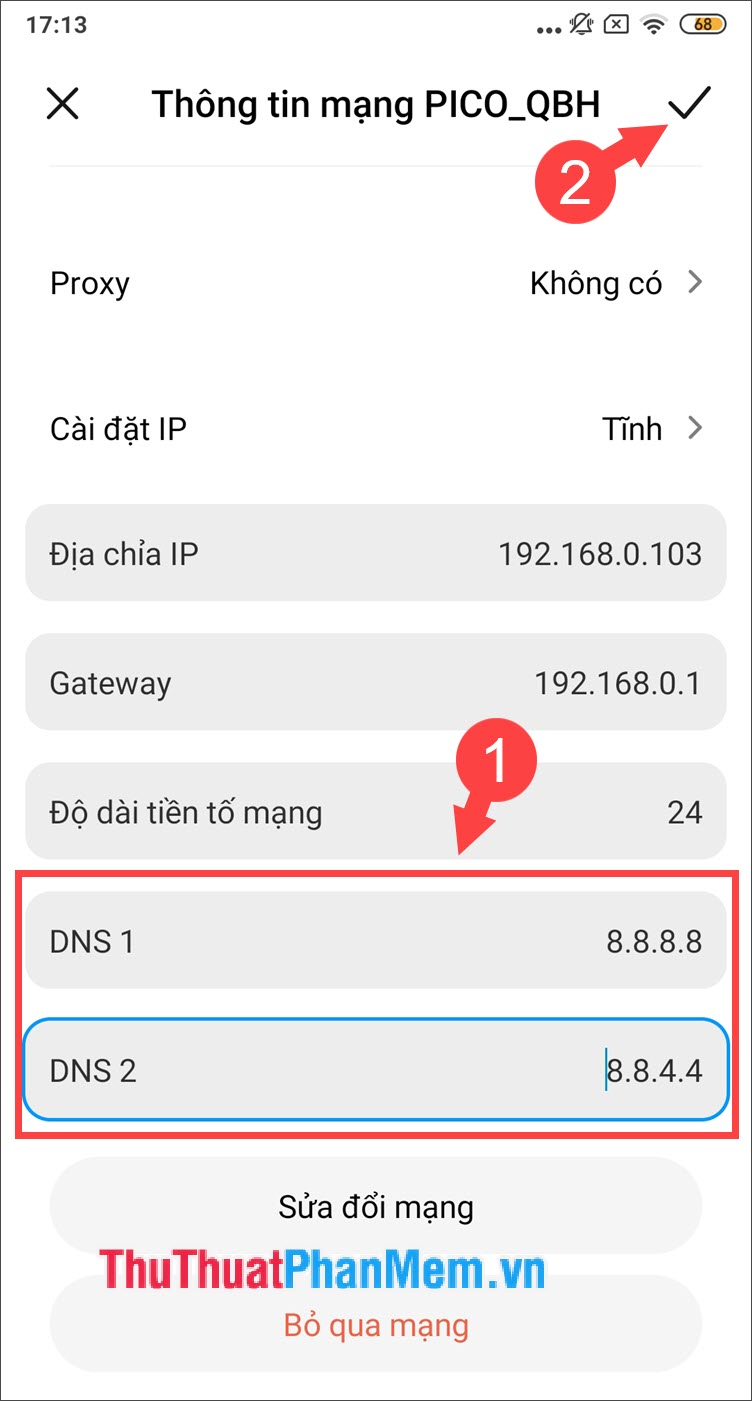
Step 3: You swipe down and find DNS entries 1, DNS 2 and change the DNS address according to your purpose. To save, touch the tick in the top right corner.
In addition to the common DNS addresses are 8.8.8.8 and 8.8.4.4 there are many other useful DNS addresses that we can change to improve network speed. Please refer to the following article: http://TipsMake. vn/dns-chuan-cua-vnpt-fpt-viettel-dns-vnpt-dns-fpt-dns-viettel/
With instructions to change DNS on Android phones, we can improve network speed or access blocked websites more easily. Good luck!
FAQ
What should I know about Change DNS on Android Phones?
Focus on the key features, requirements, limitations, and practical use cases explained in this guide.
How do I get the best results with Change DNS on Android Phones?
Follow the recommended steps, use current software or information, confirm compatibility, and review settings before major changes.
Are there any risks or limitations?
Potential limitations depend on compatibility, data quality, cost, privacy, support, and how the product or method is used.
Related Articles
 How to Change the Font on Android Phones7 minutes read
 Changing Your DNS to 1.1.1.1 on Android and iPhone Is Very Simple5 minutes read
 Change Voice on Phone: How to Change the Voice on Android Phones3 minutes read
 Change DNS Iphone: How to Change DNS on Iphone, Android Phones3 minutes read
 6 Things to Do to Sell Android Phones Are Priced8 minutes read
 Instructions to Change the Zalo Language on Android and Iphone3 minutes read
Reader Comments 0
Sign in with email or Google to join the discussion.