How to Burn a CD from Amazon Downloads
Part 1 of 2:
Downloading Your Songs from Amazon
-
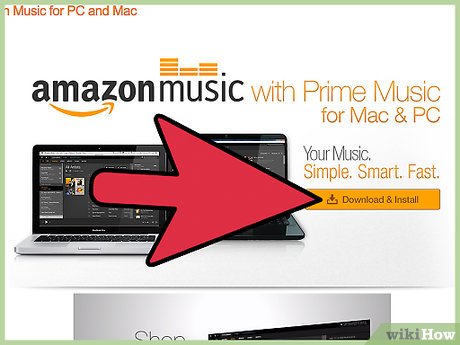
 Install Amazon Music. Visit the Amazon Music download page and click the orange ' Download and Install' button in the middle of the page. This will download the app's installer. It's compatible for both PC and Mac.
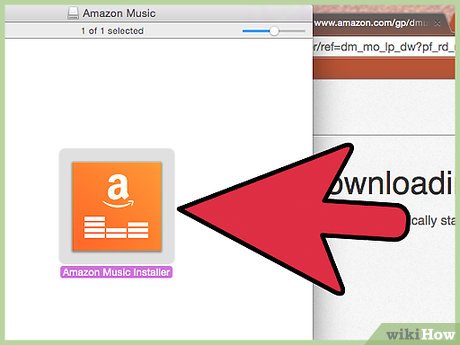
- Once downloaded, run the installer and follow the instructions to install Amazon Music.

- Once downloaded, run the installer and follow the instructions to install Amazon Music.
-
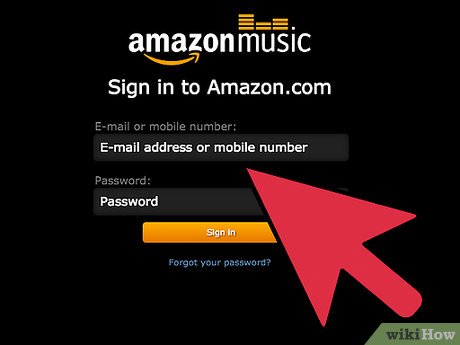
 Log in with your Amazon account. Once opened, you will be greeted by the login page. Enter your Amazon account login details into the fields provided, and click 'Sign in.'
- If you don't have an account yet, you can create one for free. All you need is your name, valid email address, and password.
-
 Add billing information (if necessary). If you haven't added any billing information to your Amazon account, you will be prompted to do so after logging into the Amazon Music app. Add your credit/debit card information into the first section and the billing address in the second section. Click 'Continue' at the top to proceed.
 -
 View your music. By default, the music library displayed will be from the Amazon cloud. These will be all the songs you purchased from the website.
- If you're not on the cloud music library, click the cloud icon at the top-left corner.
-
 Search for music. Scroll through your music list, and click the one you want to download. You will be taken to its info page.
- You can also search for your song if your music list is too extensive to scroll through. Just type in its name in the search field at the upper right corner.
- If you want to purchase more songs from the Amazon store, just click 'Store' at the top of the window. You'll be shown a list of new releases, best sellers, and featured songs and albums. Select the one you like, and click 'Buy' to get it.
-
 Download music. Click the 'Download' button on the info page, and this will download the song to your computer. To download multiple songs, keep the ⇧ Shift key pressed down, and select the first and last song of a playlist that you want to be downloaded.
Part 2 of 2:
Burning Your Amazon Songs into a CD
Using Windows Media Player
-
 Insert a blank CD. After downloading the songs from Amazon, insert a blank CD (CD-R or CD-RW, as both are compatible) into your system's CD or DVD burner drive. A window will pop up with some options.
- The usual CD sizes are around 700 MB with 80 minutes playing size.
- You will need to have a drive that is capable of burning discs. Most modern DVD drives can burn CDs.
-
 Select 'Windows Media Player' from the list. Click 'OK' and Windows Media Player will open.
 -
 Open the Burn menu. On top of the window, you will find three options: 'Play', 'Burn,' and 'Sync.' Click 'Burn' to open the Burn menu.
 -
 Select 'Music CD' from the drop-down menu under the Burn tab. This will ensure that the CD you are creating is a music disc.
 -
 Drag your Amazon music files to your CD. Click and drag the music from the 'Amazon MP3' folder in your system to the 'Burn List' tab in Windows Media Player. You can then view the free space left in the CD and can also name the CD in the bar below the Information page.
- In Windows, you'll find your Amazon music in the 'Amazon Music' folder in your 'My Music/Music' folder. In OS X, you'll find your Amazon music in the 'Amazon Music' folder in your 'Music' folder.
-
 Burn the CD. Click 'Start Burn' to burn the music files to the disc. This may take a while. Please be patient. After you have burned the CD, you should eject the CD and test run it in your system or any CD player in your home.
- CD-Rs usually takes 70-80 minutes at 1X speed, 30-40 at 2X, and 10-20 at 4X. At 7X, it usually takes 5-7 minutes to burn a 700MB CD.
Using iTunes
-
 Add the Amazon music to your iTunes library. After downloading your Amazon music, you'll need to add it to your iTunes library before you can use iTunes to burn it to a CD. Click the 'File' or 'iTunes' menu and select 'Add to Library'.
- In Windows, you'll find your Amazon music in the 'Amazon Music' folder in your 'My Music/Music' folder. In OS X, you'll find your Amazon music in the 'Amazon Music' folder in your 'Music' folder.
-
 Create a playlist of the songs that you want to burn into the CD. Open the iTunes Library and choose the 'Music' section. In the top bar, choose the 'Playlist' option. Next, in the bottom left corner of your screen, click the plus sign and then choose the 'New Playlist' option from the drop-down menu that appears.
- Name the playlist, and then click the Add To button. This will open your music library, allowing you toa dd the Amazon songs you just imported.
- Once the playlist is created, click Done beside the playlist's name.
-
 Reorder your playlist (optional). You can reorder your playlist by clicking on the song you want to move, drag it to the spot you in the playlist you want it to be in (like the first song in the list), and then unclick.
 -
 Open the 'Burn the playlist' window. Right-click on your playlist on the left panel, and select 'Burn Playlist to Disc' from the menu. A pop-up will appear. Here you can set burn preferences.
 -
 Set the burn preferences. In the 'Preferred Speed' option in the pop-up, it is recommended to select 'Maximum Possible.' In 'Disc Format,' choose either 'Audio CD' or 'MP3 CD'.
- MP3 CDs can hold more songs than a traditional audio CD, but not all stereos can play this format. Make sure that your stereo equipment supports MP3 CDs before burning one.
-
 Start burning. Click Burn in the pop-up window, and a message will be displayed prompting you to insert a blank CD. Do so, and the burning process will start.
- The entire process will take time depending on the number of songs chosen. After the burning, a message will be displayed, 'Burning Disc….Finishing,' which is the final step of the process.
-
 Eject the disc. After the completion, eject the disc by clicking the 'Eject' button on top, and then test the CD by using it in your system or any other CD player available.
Share by
Micah Soto
Update 24 March 2020


