How to bring Gmail shortcuts to macOS Mail application
Gmail shortcuts will help users manipulate faster and more efficiently while working, when Gmail is now an email service used by many people. If you like this shortcut set with the E key to store mail, Shift + R responds to mail in a new window, or the R reply message, . you can bring them to the Mail application on macOS. How to bring Gmail shortcut to Mail application on macOS will be in the article below.
Step 1:
First of all to be able to use this shortcut, we need to install bundle (plugin) Gmailinator and activate it on the system. Open Terminal and activate bundle for the Mail application with the following command.
defaults write com.apple.mail EnableBundles -bool true
When applying this statement, the Enablebundles value will be converted to true . Mail application will not check bundles if not enabled. So you need to be sure to follow the above command.
Step 2:
Next we will download Gmailinator according to the link below.
- https://github.com/jgavris/GMailinator/tree/sierra-uuid
At the interface click on the Clone or Download button, then continue to press the Download ZIP button. After downloading, proceed to extract the above file.

Step 3:
Next we need to download XCode from the Mac App Store application store under the link below.
- Download XCode for macOS
Note to users , XCode has 4GB capacity, so the download process will be relatively long and you need to ensure a stable Internet connection.
Step 4:
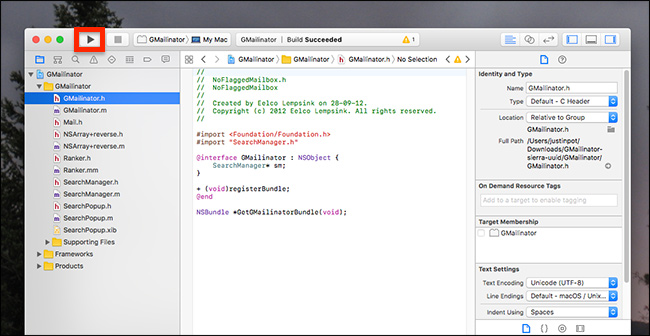
Next, double click the GMailinator.xcodeproj file to open it on your computer.

Step 5:
The command line appears on the interface. You can click the Play button at the top interface to run and install bundle.

When running the Mail application if the version does not work, we will see an error message. If an error message does not appear, it means we can open the Mail application and use familiar Gmail shortcuts on this application.
Now, the bundle installed will be at ~ Library / Mail / Bundles / . In case you want to remove bundle, just delete this folder and you're done.

Step 5:
List of support shortcuts for Mail application on macOS include:
- #: Delete mail.
- /: Search for mailboxes.
- !: Mark spam messages.
- a: Answer all letters.
- c: Create a new message.
- e, y: Archive.
- f: Forward the message.
- G: Go to the last message.
- g: Go to the first message.
- j: Go to the next message.
- k: Go to the previous message.
- l: Move to the folder.
- o: Open the selected message.
- R: Refresh, download new messages.
- r: Reply to the letter.
- s: Mark the letter.
- u: Mark read the message.
- U: Mark unread messages.
- v: View raw messages.
- z: Cancel operation.
With the above implementation, users can use the familiar shortcut shortcut in Gmail to the macOS Mail application. We will need to use bundle Gmailinator and through XCode to be able to install and set up this shortcut key.
I wish you all success!