Table of Contents
This updated guide explains how to Backup and Restore Email Data in Outlook through clear steps, practical examples, and important checks that help prevent common errors.

Instructions on how to backup and restore email data in Outlook, invite you to track and learn offline.
Back Up Email Data in Outlook
Step 1 : On the Outlook interface, select File .
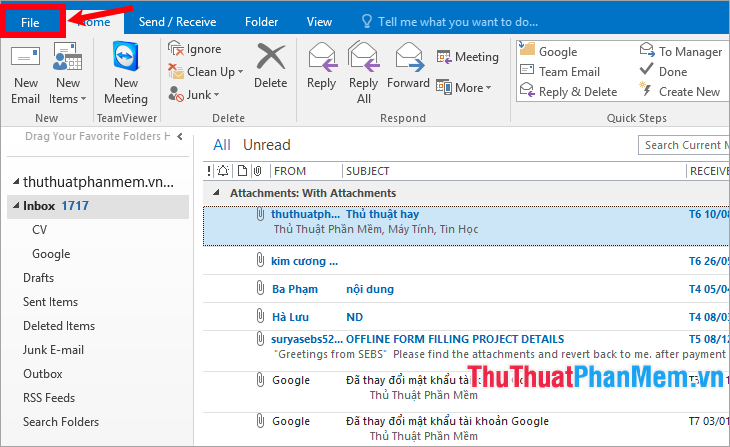
Step 2 : Next, select Open & Export -> Import / Export.

Step 3 : The Import and Export Wizard dialog box appears, select Export to a file in the section Choose an action to perform and select Next .

Step 4: Next, in Create a file of type, select Personal Folder File (. pst) and select Next to continue.

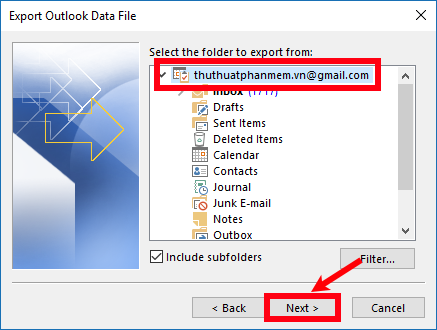
Step 5: On the Select the folder to export from interface, select the folder you may need to back up, tick the Include subfolders box to back up the subfolders, then click Next .
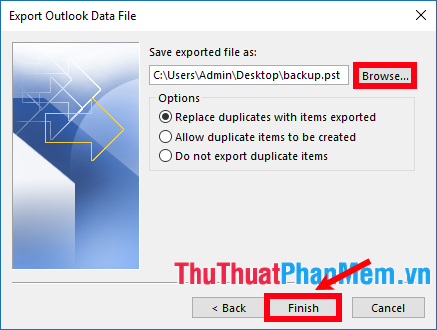
Step 6: Next in the section Save exported files as you select Browse and select the folder where you may need to save the backup file, you need to remember this location so that when you need to restore will use. Then select Finish to finish.
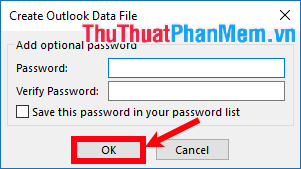
The Create Outlook Data File dialog box appears if you may need to make sure no one can access the backup file, enter the password in the Password section and re-enter the password in Verify Password and click OK . If you do not want to create a password, enter nothing and select OK .
So you have successfully backed up email data in Outlook.
Recover Email Data in Outlook
To recover email data in Outlook you follow the steps below:
Step 1: On the outlook interface, select File -> Open & Export -> Import / Export.
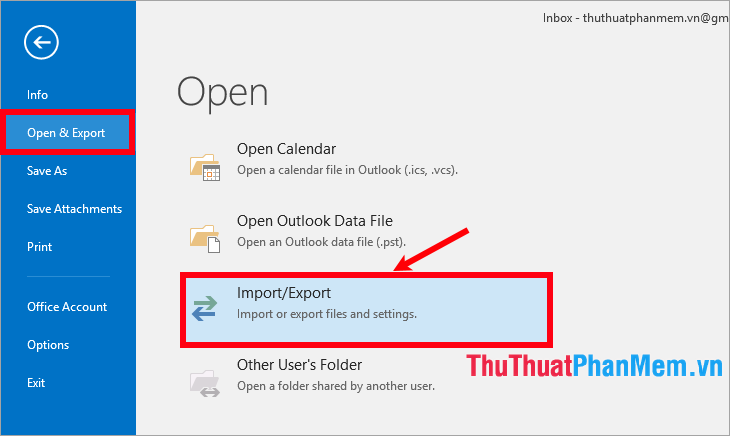
Step 2 : In the Choose an action to perform section, select Import from another program or file and select Next .
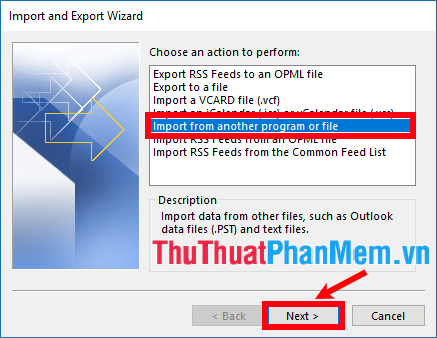
Step 3 : Select Outlook Data File (. pst) in the Select file type to import from section and select Next to continue.
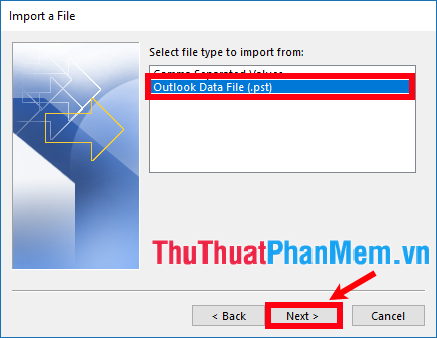
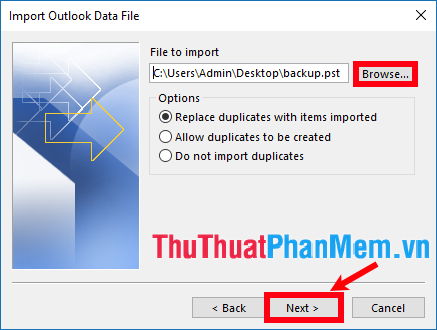
Step 4 : In the File to import section, select Browse to the backup files you may need to restore and select Next .
Step 5 : Next, you should select the Include subfolders before ticking to recover the subfolders, select Import items into the same folder in ( Select the items into the same folder ) and select the recovery account. Then click Finish to finish.
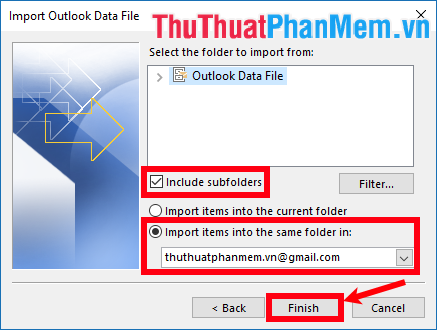
So you have recovered email data in Outlook.
Above TipsMake. vn has instructed you in detail how to backup and restore email data in Outlook. Hope this article will help you. Good luck!
FAQ
What is the easiest way to Backup and Restore Email Data in Outlook?
Start with the requirements in this guide, then follow each step in order. Check the result after every major change so problems are easier to identify.
Can beginners follow these instructions?
Yes. The process is organized into practical steps, and you can repeat any step before moving forward.
What should I check if the method does not work?
Confirm your software or device version, permissions, settings, file format, and internet connection when the task depends on online services.
Related Articles
 Instructions for Basic Steps to Backup Outlook Data9 minutes read
 How to Use Backup and Restore on Windows 7?6 minutes read
 How to Backup Outlook Email with File History on Windows 109 minutes read
 How to Use Iperius Backup Free to Back up Windows Data4 minutes read
 Instructions on Simple Ways to Back Up Outlook Data6 minutes read
 How to Backup and Restore Data on iPhone, iPad3 minutes read
Reader Comments 0
Sign in with email or Google to join the discussion.