How to Add JARs to Project Build Paths in Eclipse (Java)
Part 1 of 5:
Adding Internal JARs
-
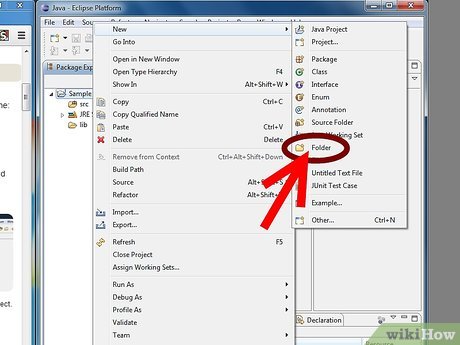
 Create a new folder named lib in your project folder. This stands for "libraries" and will contain all the JARs you'll be using for that project.
 -
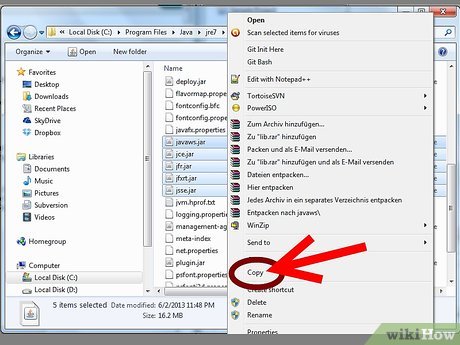
 Copy and paste the JARs you need to lib. Select the JAR files you need and right-click them. Select them and click copy. Then paste them into the lib folder by clicking File then Paste or using Control or Command V.
 -
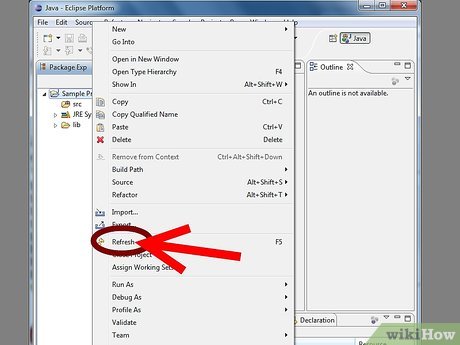
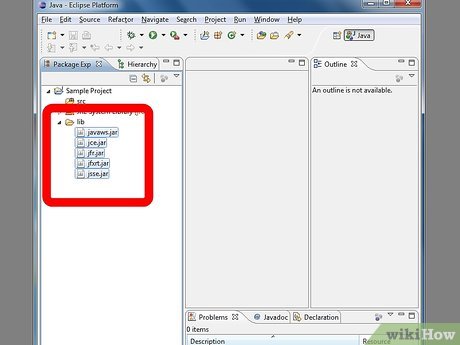
 Refresh your project. Do this by right-clicking the project name and selecting Refresh. The lib folder will now be visible in Eclipse with the JARs inside.
Part 2 of 5:
Configuring Your Build Path
- Expand the lib folder in Eclipse. Click the arrow to the left of the folder to expand it.
-
 Select all the JARs you need. Hold ⇧ Shift and click the JARs in the expanded folder.
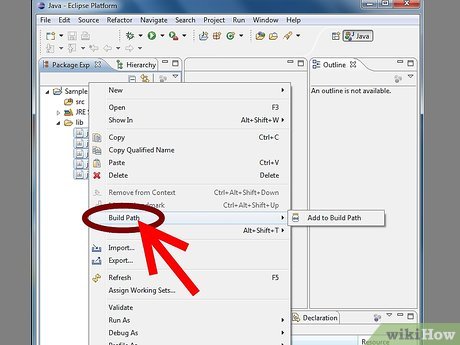
 - Right-click the JARs. This opens a pop-up menu to the right.
-
 Navigate to Build Path. Placing the mouse cursor over "Build Path" displays a submenu to the left.
 - Select Add to Build Path. The JARs will disappear from lib and reappear in Referenced Libraries.
Part 3 of 5:
Configuring Your Build Path (Alternative Method)
- Right-click the project name. This displays a pop-up menu to the right.
-
 Navigate to Build Path. It's in the pop-up menu that displays when you right-click on the project name. This displays a sub-menu to the right.
 -
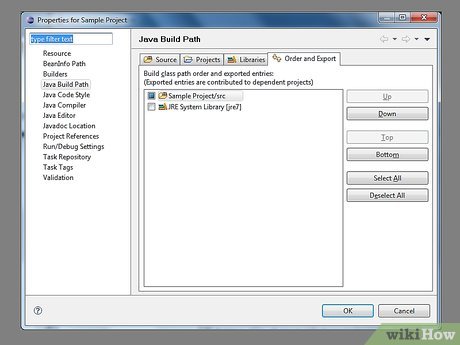
 Click Configure Build Path. The project properties window will appear showing your build path configurations.
 -
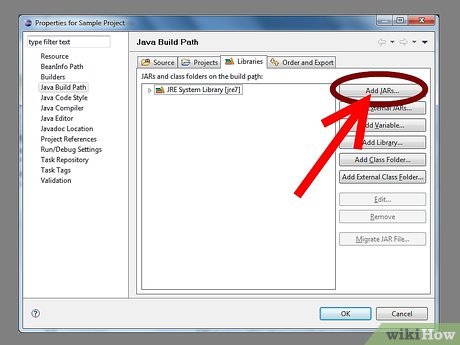
 Select the Libraries tab. It's at the top of the project properties window.
 -
 Click Add JARs. It's on the right side of the project properties window.
 -
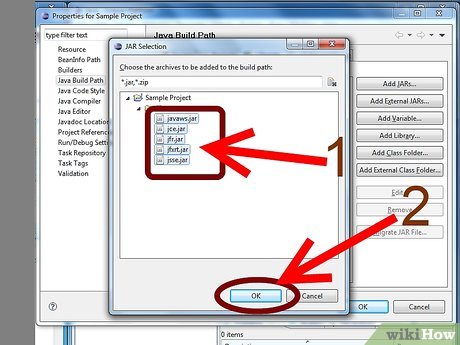
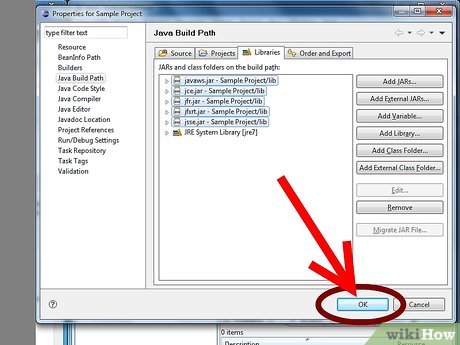
 Select the JARs you want and click OK. The JARs will now appear in the list of libraries in the build path.
 -
 Click OK to close the properties window. The JARs will now be in Referenced Libraries instead of lib.
Part 4 of 5:
Adding External JARs
- Right-click the project name. This displays a pop-up menu to the right.
- Note: It is much better to reference JARs that exist in your project or in other projects - this allows you to check in all of your dependencies to your version control system.
-
 Navigate to Build Path. This displays a sub-menu to the right.
 -
 Click Configure Build Path. The project properties window will appear showing your build path configurations.
 -
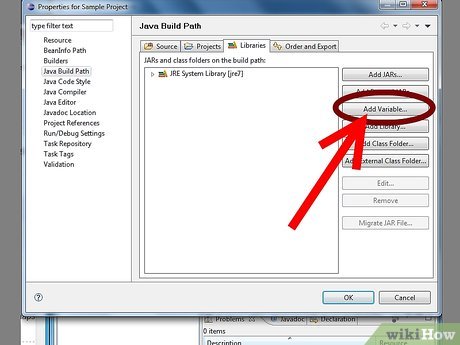
 Click Add Variable. It's to the right of the project properties window.
 -
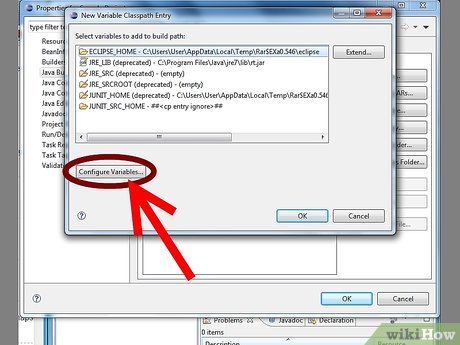
 Click Configure Variables. It's at the bottom of the New Variables window.
 -
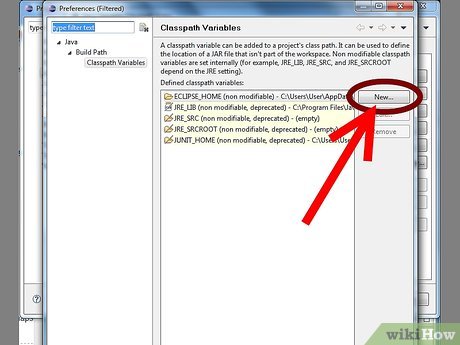
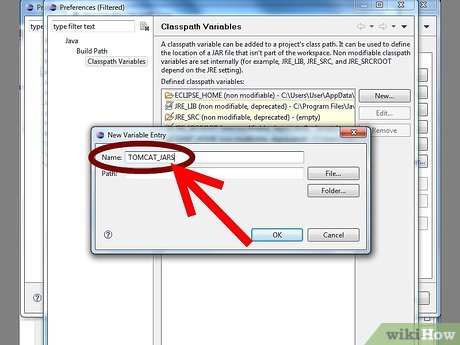
 Click New. It's at the bottom of the preferences window.
 -
 Type a name for the new variable. For example, if these are JARs for Tomcat, perhaps you could call it "TOMCAT_JARS".
 -
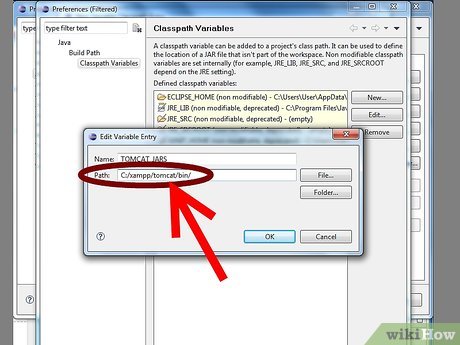
 Browse to the directory that contains the JAR for the path. Click the Folder button and browse to the directory that contains the JAR path.
- You can also Click File and select a specific jar file for the variable, if you prefer.
-
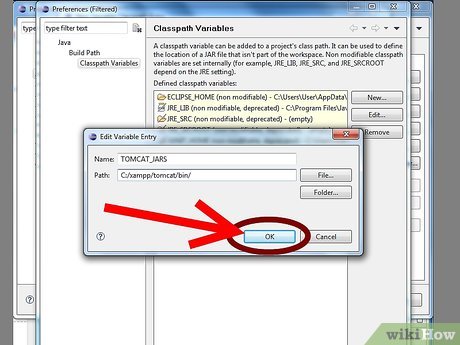
 Click OK. This defines the variables.
 -
 Click OK. This closes the preferences dialog.
 -
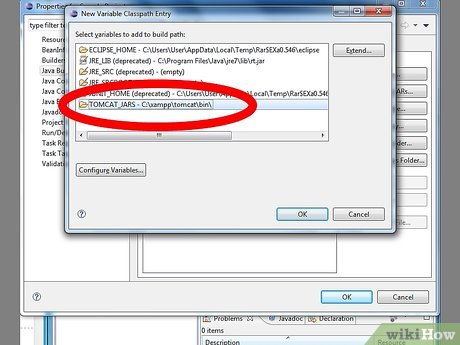
 Select the variable from the list. Click the variable to select it.
 -
 Click Extend. It's the button to the right of the list of variables.
 -
 Select the JAR(s) that you want to add to the classpath. Click to select the JARs. Hold ⇧ Shift to select multiple JARs.
 -
 Click OK. This closes the extend dialog window.
 -
 Click OK. This closes the new classpath variable dialog.
 -
 Click OK. This closes the build path setup dialog.
- If you share the project with someone else, they must also define the variable. They can define it under Window->Preferences->Java->Build Path->Classpath Variables.
Adding External JARs (Alternative Method 1)
- Right-click the project name. This displays a pop-up menu to the side.
- Note: If you use this method, the external JAR will need to be in the same location on the hard drive for anyone who uses this project. This can make sharing a common project more difficult.
-
 Navigate to Build Path. This displays a sub-menu to the right.
 -
 Click Add External Archives. It's in the Build Path sub-menu.
-
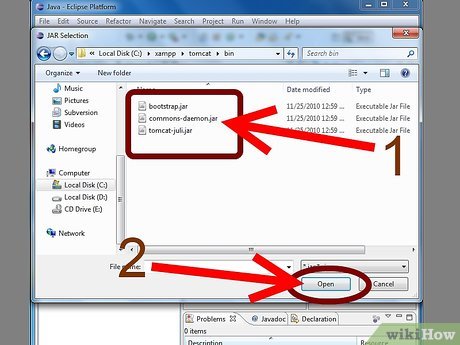
 Select the JARs you want and click Open. The JARs will now appear in Referenced Libraries.
Part 5 of 5:
Adding External JARs (Alternative Method 2)
- Right-click the project name. This displays a pop-up menu to the right.
- Note: If you use this method, the external JAR will need to be in the same location on the hard drive for anyone who uses this project. This can make sharing a common project more difficult.
-
 Navigate to Build Path. It's in the pop-up menu that appears when you right-click the project name.
 -
 Click Configure Build Path. The project properties window will appear showing your build path configurations.
 -
 Select the Libraries tab. It's at the top of the project properties window.
 -
 Click Add External JARs. It's on the right side of the project properties window.
 -
 Select the JARs you want and click Open. The JARs will now appear in the list of libraries in the build path.
 -
 Click OK to close the properties window. The JARs will now be in Referenced Libraries.
Share by
Kareem Winters
Update 05 March 2020
