Guide to creating barcodes using software, a solution for businesses.
Barcodes are an important tool in product management and inventory control. You can easily create barcodes using software without needing programming skills.
Table of Contents
Creating barcodes using software makes it easy to manage products and print professional barcodes without needing in-depth technical knowledge.
Criteria for selecting software
- User-friendly interface
- Supports multiple barcode types: UPC, EAN, Code 128, QR Code…
- Integrated printing: Export PNG, PDF files or print directly from the software.
- Flexible customization: Change barcode size, color, and content.
Instructions on creating barcodes using BarTender Barcode (free)
Step 1: Download and install BarTender Barcode software here.
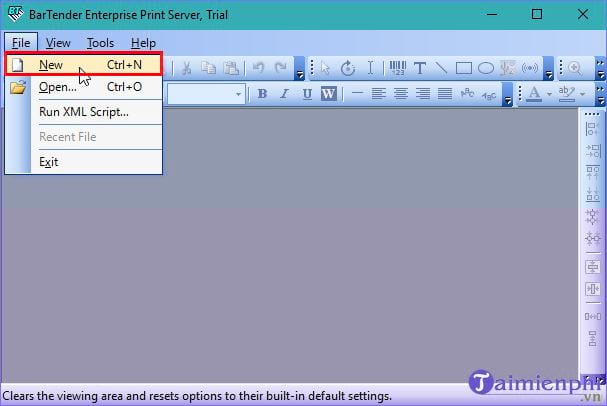
Step 2: Create a new document page
Open the software you just installed -> go to the File menu -> select New or press the keyboard shortcut Ctrl + N to create a new document page.
On the screen that appears, click Next and select the barcode printer you are using. Note: You need to install the barcode printer driver first so that the printer name will be displayed in the software window.
The image below shows our chosen printer, Foxit Reader PDF Printer -> you can choose a different printer based on the actual printer you are using.
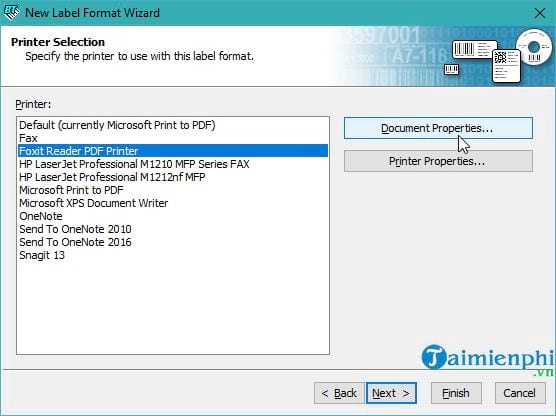
Next, look at the image above -> Select Document Properties . In the new interface that appears, customize as desired, click OK , and then click Next .
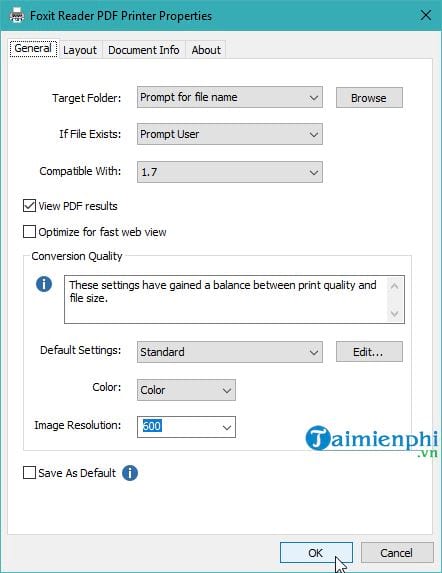
Note: The interface will vary depending on the printer you choose.
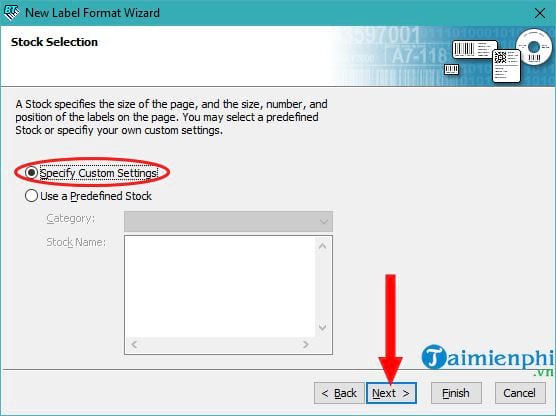
The Stock Selection interface appears -> select Specify Custom Setting , then press Next .
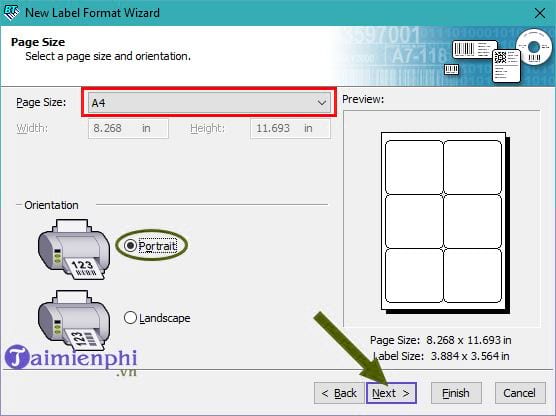
You select Page Size and choose Orientation (vertical or landscape) -> then click Next .
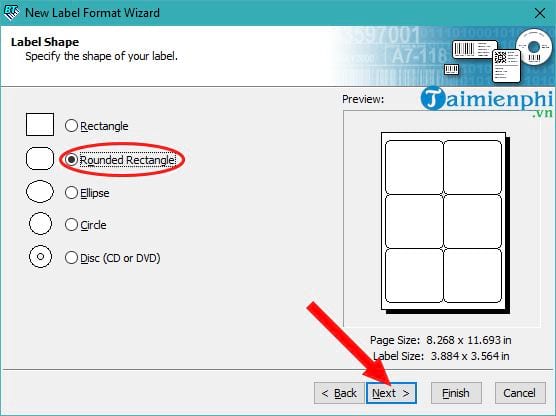
You choose the shape for the stamp.
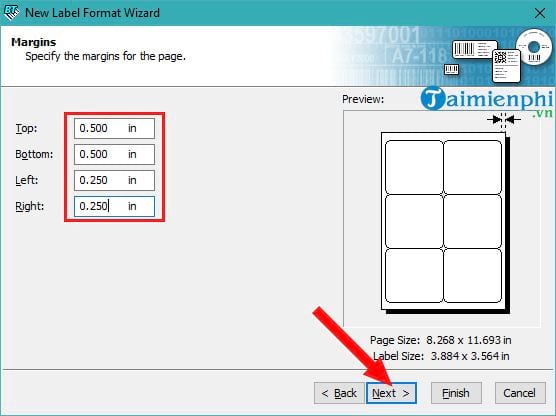
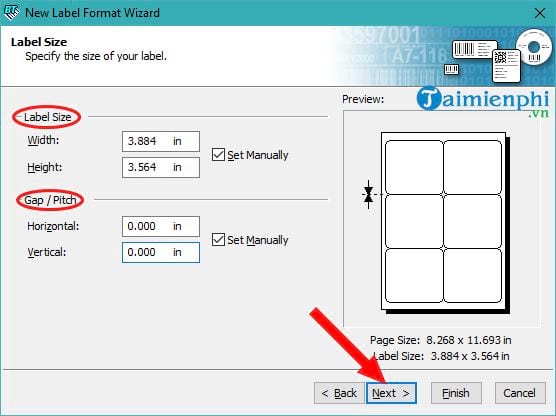
Next, you adjust the size and spacing between the labels as needed.
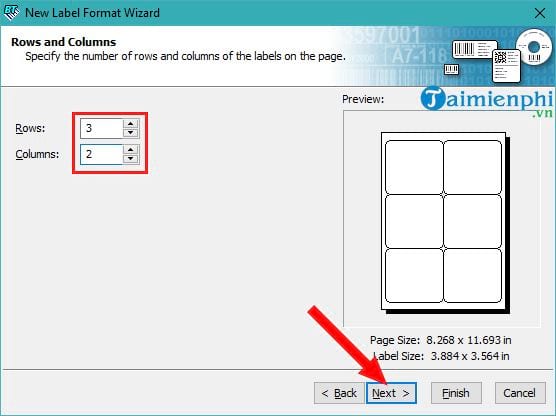
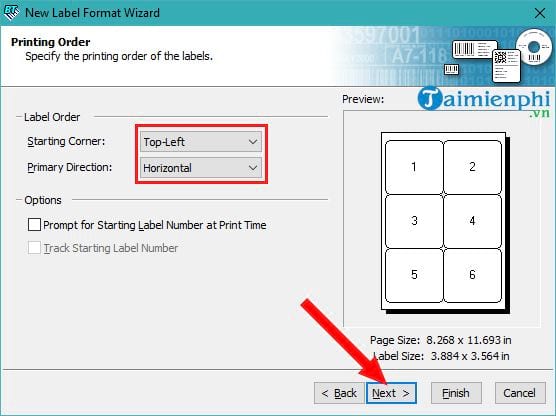
Next, you need to specify the number of rows and columns for the label. As shown in the image below, 3 rows and 2 columns are currently selected.
Continue by selecting the Label Size and Gap/Pitch that best suit your needs.
Select Label Order to choose the starting location for printing.
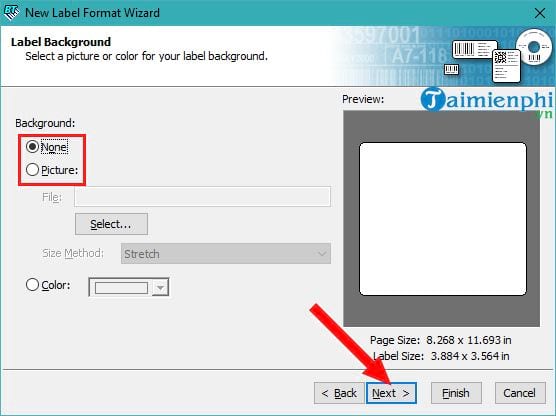
Choose a background if you wish.
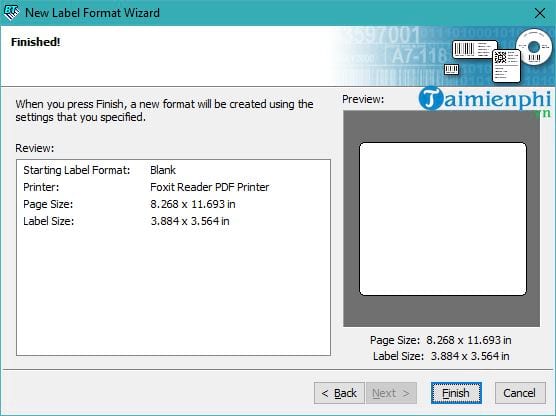
Finally, click Finish .
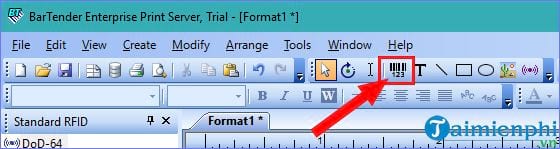
Step 2: Create barcodes
When you see the new page open, click the barcode icon on the toolbar as shown in the image below.
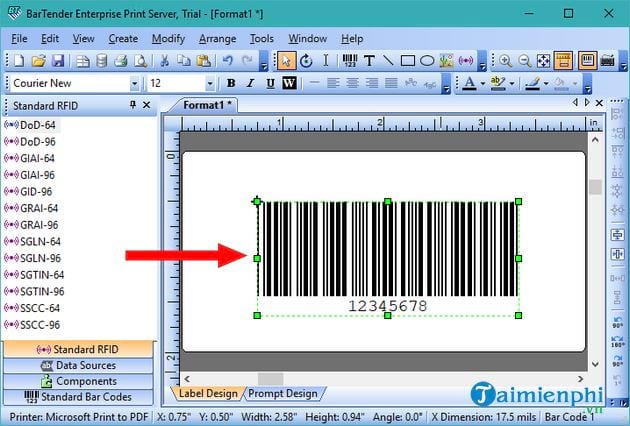
Click to display the barcode -> then adjust its size so it fits comfortably, ideally centered on the page for the best appearance.
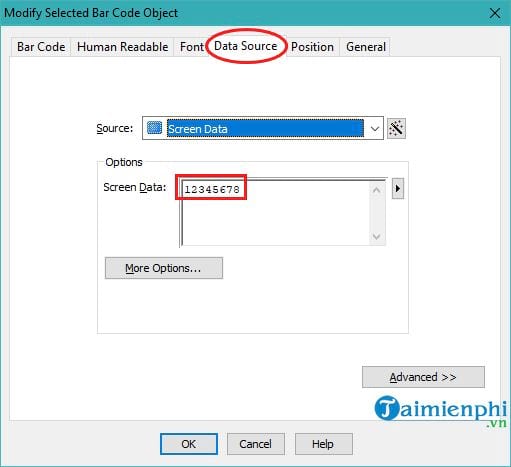
To edit a barcode, such as reselecting the font or size, double-click on the barcode. After double-clicking, the Data Sources section will display the content you want the scanners to read from the barcode you're about to create.
The image below is a demo of 12345678 -> you can choose other numbers and enter them here -> then press OK -> the barcode will automatically change accordingly.
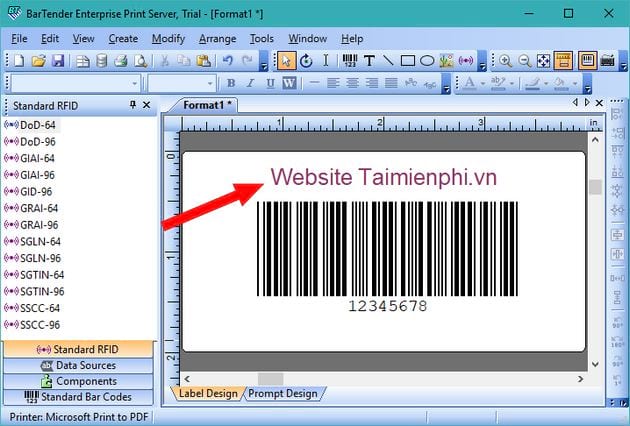
Add more text above if you like.
Step 3: Print the barcode
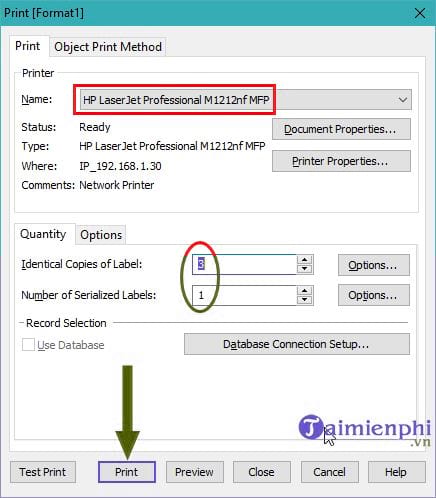
You can print barcodes by going to the File menu and selecting Print , or by pressing the keyboard shortcut Ctrl + P.
The Print interface will appear -> select the correct printer name and the number of labels to print -> then press Print to start printing.
After creating barcodes using the software, you can export the file or print directly depending on your needs. Besides BarTender, many other tools such as Barcode Generator , ECOUNT ERP , and NiceLabel also support professional barcode creation for products.
Was this article helpful?
Your feedback helps us improve.
Related Articles
 Guide to create and print barcodes with BarTender Barcode software5 minutes read
 Top 3 sections to create professional barcodes on computers3 minutes read
 2 ways to create barcodes in Google Sheets4 minutes read
 Learn about ERP, versatile management software for businesses18 minutes read
 TranS - Free online learning software2 minutes read
 Top AI tools for businesses6 minutes read
Reader Comments 0
Sign in with email or Google to join the discussion.