Table of Contents
This guide provides a practical overview of Guide to Create and Print Barcodes with BarTender Barcode Software, including its main features, benefits, limitations, and important considerations.
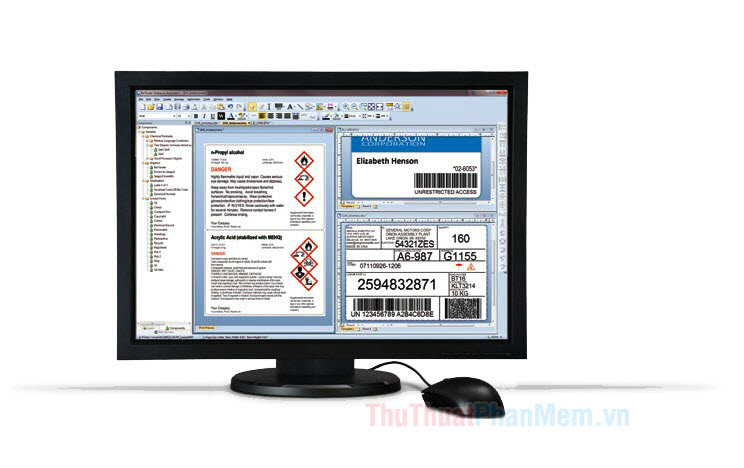
First, you need to download and install BarTender Barcode software at https://www. seagullscientific. com/free-edition-download/
1. Set up basic print page on BarTender
Step 1: After the download is complete, open the software and click on the Start a new BarTender document.

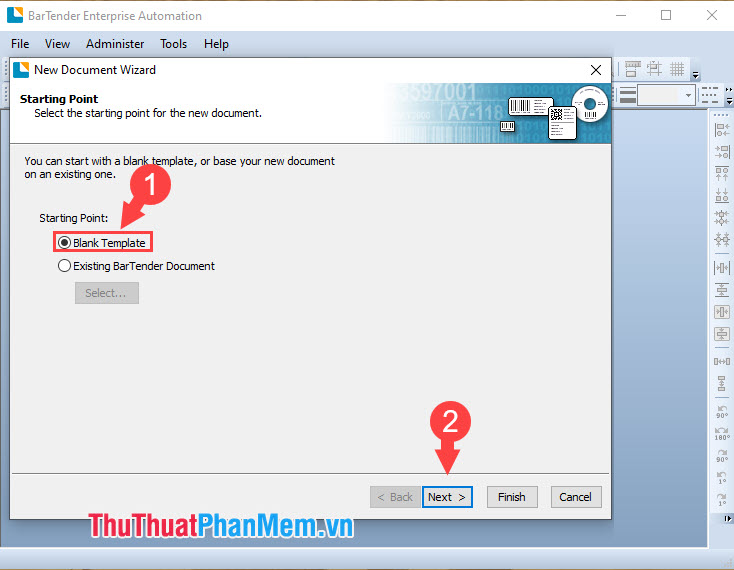
Step 2: Choose Blank Template (1) => Next (2) .
Step 3: Select the printer in the list. You can also choose Default (1) => Next (2) .

Step 4: You select the Specify Custom Settings (1) => Next (2) .

Step 5: Choose Page Size (1) as A4 for common and choose landscape printing style ( Landscape ) or portrait ( Portrait) in the Orientation (2) . Then click Next (3) to continue.

Step 6: Choose the outline shape for barcode label pattern (1) and click Next (2) .

Step 7: In this step, we set the print parameters for the barcode with the unit Inch . You set the Top (top), Bottom (bottom), left (left), right (right) (1) and select Next (2) to move to the next step.

Step 8: You set the number of rows ( Rows ), the number of columns ( Columns ) (1) so that when printing will print the corresponding barcode stamp pattern as shown in Figure Preview . Next, click Next (2) to move to the next step.

Step 9: This setting will align the details such as horizontal (Hozirontal) and vertical (Vertical). If you no longer want to edit, click Next .

Step 10: Arrange the print order according to the picture. If you are not satisfied with the order, please change the Printing Order . If not changed, please select Next to continue.

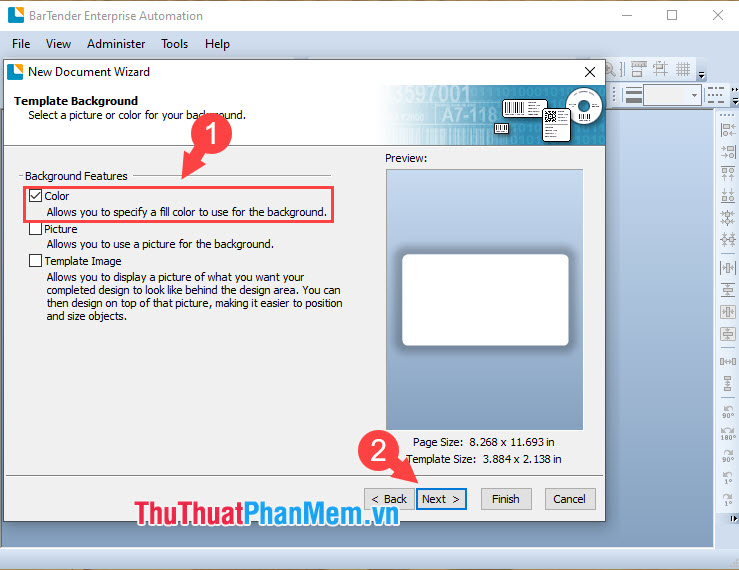
Step 11: If you want a simple barcode stamp, select Color (1) => Next (2) to select the background color for the barcode.
Step 12: Click on Background Color (1) and choose the color you like. Selecting the white background color will be the most reasonable and basic choice. Next, click Next (2) to go to the following step.

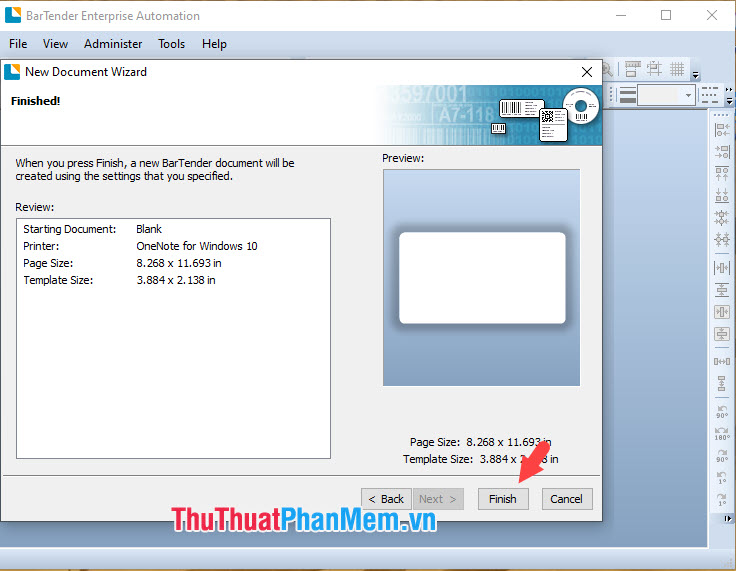
Step 13: Click Finish to complete the page setup.
2. Create barcodes with BarTender
Step 1: Click the Barcode icon to create barcodes.
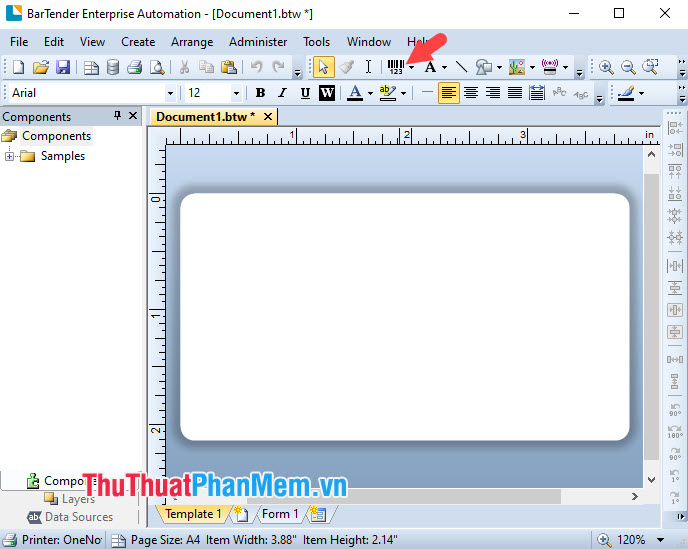
Step 2: Select the barcode category (1) => barcode model (2) and press Select (3) . Here, we can see many different bar code standards, but the General Purpose section contains the most common bar codes we encounter.

Step 3: You will see a mouse pointer with a bar code symbol as shown below. Please select the appropriate location and left click to create barcodes.

After creating the barcode, you can move or enlarge, reduce the barcode by clicking on each blue circle and dragging, zooming accordingly.

Step 4: To edit barcode information, right-click the barcode and select Properties or double-click the barcode.
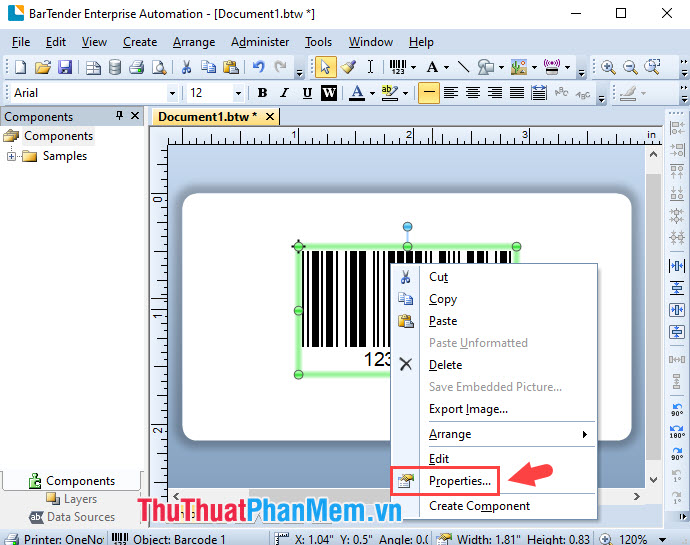
Step 5: Click on Data Source (1) and proceed to change the barcode number in the Embedded Data (2) .

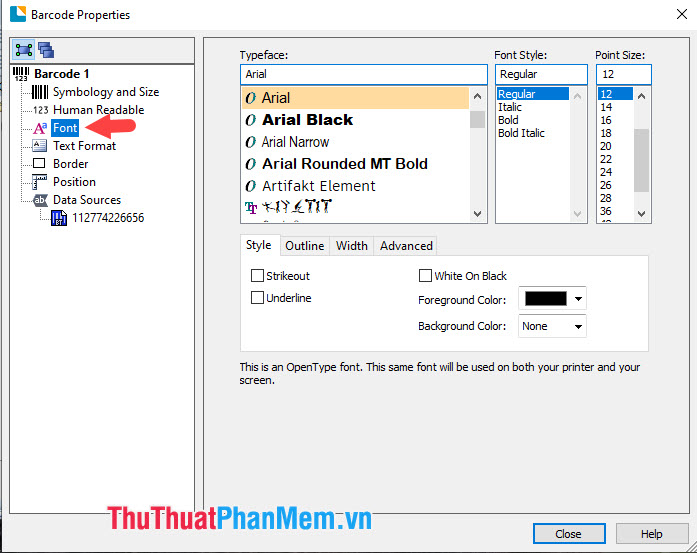
Step 6: Switch to the Font tab to set the font and create a unique bar code. Next, click Close to close the dialog box.
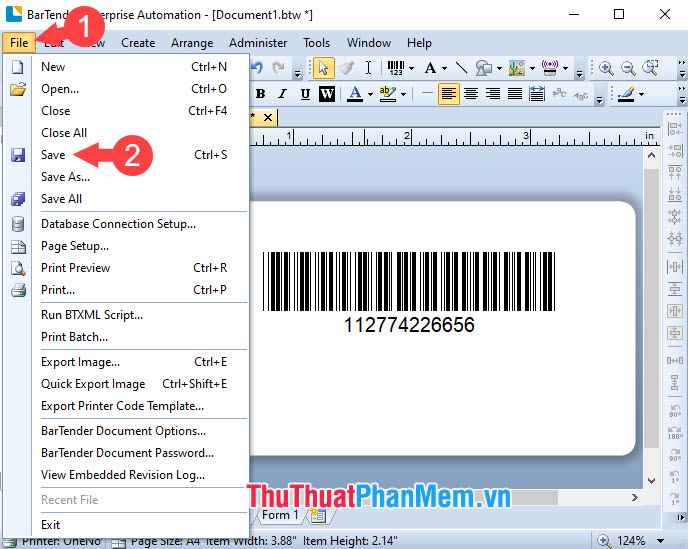
Step 7: You need to save the file with Ctrl + S or go to File menu (1) => Save (2) .
Step 2: Choose where to save the file, name the file (1) , set the file format (2) and click Save (3) .

3. Print barcodes with BarTender
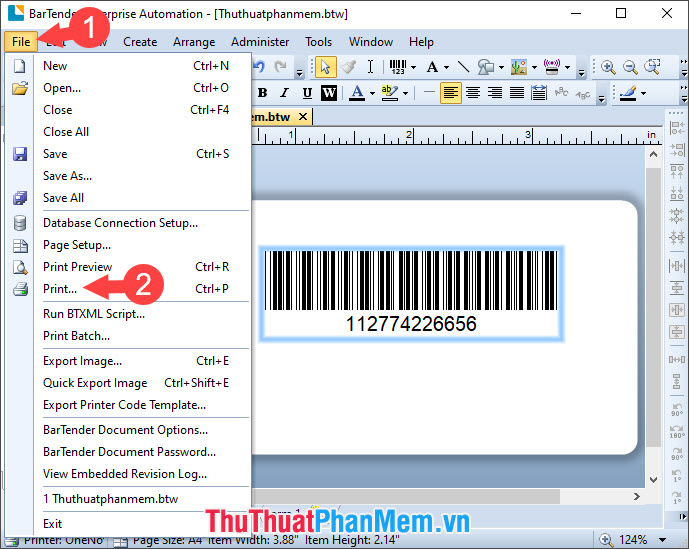
Step 1: You go to the menu File (1) => Print (2) to print barcode or you can use the keyboard shortcut Ctrl + P .
Step 2: Select the printer output (1) => select the number of prints (2) => press Print (3) to start printing.

With BarTender , readers can create and print barcodes quickly and safely. Good luck!
FAQ
What should I know about Guide to Create and Print Barcodes with BarTender Barcode Software?
Focus on the key features, requirements, limitations, and practical use cases explained in this guide.
How do I get the best results with Guide to Create and Print Barcodes with BarTender Barcode Software?
Follow the recommended steps, use current software or information, confirm compatibility, and review settings before major changes.
Are there any risks or limitations?
Potential limitations depend on compatibility, data quality, cost, privacy, support, and how the product or method is used.
Related Articles
 How to Scan Barcodes Using the Barcode Scanner Application on Android Phones5 minutes read
 How to Create Barcodes Using Software, a Solution for Businesses5 minutes read
 Top 15 Free Barcode Scanning Software for Windows Computers14 minutes read
 Barcode Creation in Word, Excel Simple and Easy3 minutes read
 How to Create Barcode Online, Create Barcode Online3 minutes read
 3 Best Sections to Create Professional Barcodes on Computers4 minutes read
Reader Comments 0
Sign in with email or Google to join the discussion.