Flash CS4: Rectangle Tool, coordinates and dimensions
In this lesson, you'll learn about coordinates and dimensions as well as familiarize yourself with the Rectangle Tool.
In this lesson, you'll learn about coordinates and dimensions as well as familiarize yourself with the Rectangle Tool.
Coordinates and dimensions
To accurately locate any object on the Stage, you need to set the object's coordinates via the object's X and Y values. To set the size for the object, adjust the parameters W and H of that object ( W stands for width: width, H stands for height: height).
The coordinate system of Flash is defined as follows: The X axis coincides with the horizontal line, the Y axis coincides with the vertical line. Original coordinates X = 0, Y = 0 coincide with the upper left corner. The more you go to the right of the origin, X will have a positive value and this value grows as the object moves to the right. The more you go under the origin, Y will have a positive value and this value grows as the object moves down.
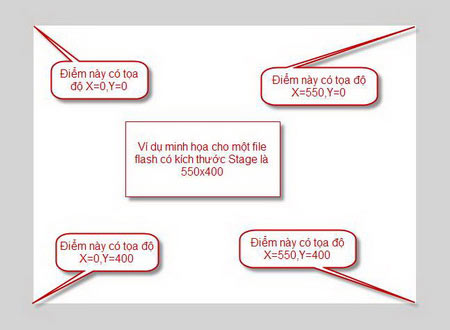
If the object is not symbol, the upper left corner of the object will be used to locate the object on the Stage . The X and Y coordinates of the object versus the origin are calculated according to this point.

If the object is symbol , Registration Point will be used to locate the object on the Stage . The object's X and Y coordinates compared to the origin are calculated according to this Registration Point. In the illustration below, Registration Point is the + mark.

Set up the Registration Point by clicking on one of the 9 boxes to the right of the Registration text in the Convert to Symbol dialog box.

To change the value of X, Y, W, H, click on the boxes next to the letters X, Y, W, H on the Property Inspector , then type the new value and press Enter .
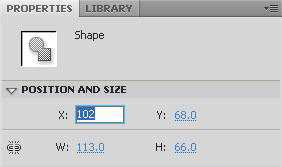
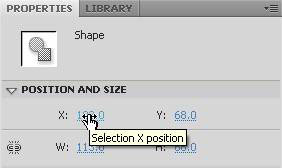
You can also change the aforementioned values by dragging the mouse as follows: Hover your mouse on the value box you want to change, when you see the mouse turn into a hand with a two-way arrow on your index finger appears, drag Mouse right or left and see the update results right on the Stage .
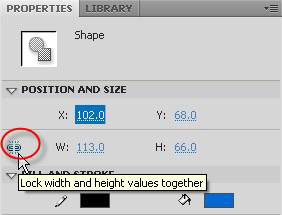
If you want to keep the W and H size ratios intact, click on the chain to lock the fixed ratio. In case of unlocking. The values of W and H will change independently.
Learn about colors
Set the border color or color for the rectangle by selecting a color from the palette.
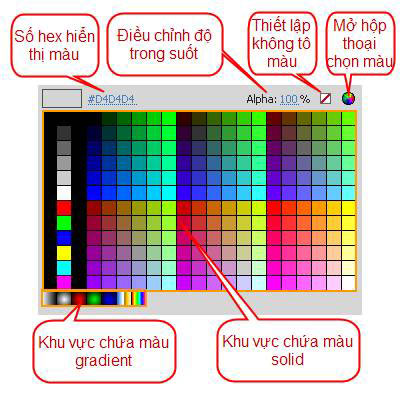
- Click on a color sample in the solid color area to set a monochrome color (pure color).
- Click on a color swatch in the gradient color area to set the fill color.
You can choose a color by hovering your mouse on the hex number box until the mouse turns into a hand with a two-way arrow on the index finger that appears, drag the mouse right or left and see the update result in the left pane. hex number. The color for the web is displayed in hexadecimal numbers - hex numbers, this number is written starting with # , followed by six consecutive numbers, the first two numbers represent red ( red ), two numbers between the representatives for green , the last two numbers represent blue ( blue ). These values can vary from 00 to FF , equivalent to 0 to 255 in decimal.
To adjust the transparency of the color, change the Alpha value in the number box to the right of the Alpha. The value 0 corresponds to complete transparency, which can be seen through the object to see the underlying objects. The value of 100 corresponds to a completely opaque, unnoticed bottom. Alpha values can be typed directly into or dragged to the right or left just like dragging hex values.
If you do not want to have a border or color, click the No color box (the Settings box is not colored in the illustration above).
If you want to choose a different color, click on the circular colored button in the upper right corner (Open the color picker dialog box in the illustration above). The Color dialog box appears:
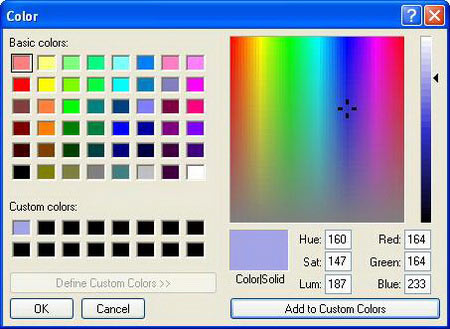
You can click the color in the Basic colors area or select the color in the right color area or drag the right triangle slider to select or type the value directly into the number box. Then click the Add to Custom Colors button and click OK to accept the selected color. That color will be applied to your audience.
Use Color Panel
You can use the Color panel to set the color for the object:
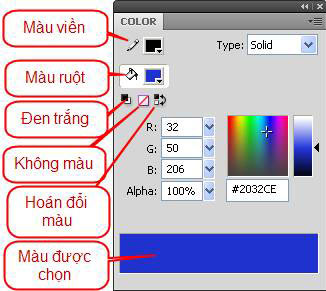
- Click on the box with the pencil to set the border color.
- Click to select the box with paint bucket to set the color of the intestine.
- Click to select the black and white box to set the black for the border and white for the intestine.
- Click to select colorless box to set colorless or borderless.
- Click to select the color swapping box to change the color of the gut color and vice versa.
You can select any color from the color area above the cell with the hex number or drag the right triangle slider or type the number directly into the hex number box according to the rule introduced in the previous section or type the number in the box R , G , B and Alpha or drag the slider to the right of these boxes. The color you select will be updated in the Color box selected.
Click the arrow to the right of the Type box to select a color type:
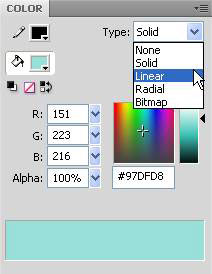
- None : colorless setting of the border or intestine.
- Solid : choose pure color.
- Linear Gradient : a linear transition color, the object will be shaded and transferred from the original colors in a straight line.
- Radial Gradient : the radial gradient color, the object will be colored, moving evenly from the original colors from the center.
- Bitmap : use bitmap content as fill color.
Use Gradient color:
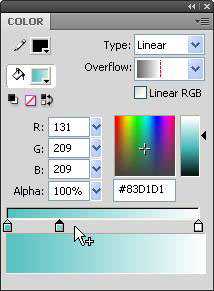
You can select the gradient color to fill the outline or the guts for the object.
To add the original color to the existing color, hover over the area containing the buttons representing the original color, when the plus sign appears below the mouse, click. To remove the original color, drag the original color representation button out of the area of the button representing the original color. To change the original color, double-click the representative button and then select the color from the palette. You can add up to 15 colors for gradient colors. However, you should note that the more complex the color will increase the final size of the work and may make the work slow if you choose tween for the object.
Select the Linear RGB box to make the gradient look smoother after you have manipulated the graded gradient object.
The Overflow option helps you set how to display gradient colors when the fill area is larger than the area of the gradient color.
Learn about the Rectangle Tool
To select the Rectangle Tool, click on the Rectangle Tool icon on the toolbar:
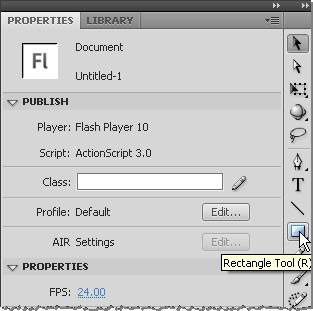
After selecting the Rectangle Tool , the mouse will switch to the + sign. To draw, click on the top position, drag the mouse to the last position and release the mouse to get a rectangle. If you hold down the Shift key while drawing, you'll get a square. If before you release the mouse button, press the down arrow or up several times, you can get the rectangle with rounded corners or concave. You can also change the rounded or concave angles by adjusting the parameters on the Property Inspector .
Property Inspector will automatically update to provide the information related to the Rectangle Tool as follows:

Just below the Property Inspector is a rectangular icon with the words indicating you are selecting the Rectangle Tool
Just below the Fill and Stroke section is the color selection for the border (Stroke-left) and the intestine (Fill-right).
Select the color from the palette when you click on the black box next to the pencil to set the color for the border or the green box on the right next to the paint bucket to set the color of the rectangle of the rectangle.
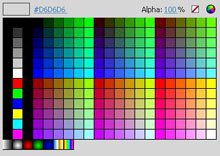

Next, choose the size of the border. You can either drag the slider to the right of the Stroke text or type the number directly into the box to the right. When you drag the slider, the right pane updates the value according to the slider position.

The next part is to select the style for the border. If you click on the black triangle next to the pencil, you can choose one of the following contour types:
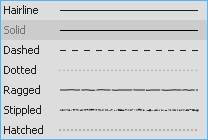
If you click on the pencil, you can customize the extra parameters for the border in the following dialog box:
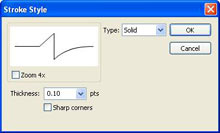
You can experiment to find a nice border style. However, one thing to note is that complex designs will increase the final size of the work.

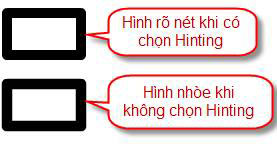
The Scale section shows the outline when enlarged or reduced. If you click on the black triangle, you will have the following options:

Normal : Change according to scale value.
Horizontal : Only scale horizontally.
Vertical : Point the scale vertically.
None : Does not change with scale value.
If you select the Hinting box, Flash will adjust itself to round the stroke value, avoiding the appearance of blur in the horizontal or vertical line.

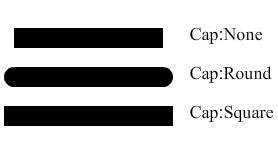
The Cap option helps you show the straight line tip style. If you click on the black triangle, you will have the following options:


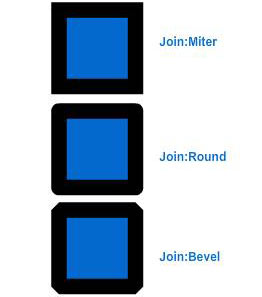
Join helps you show the style of the intersection of two straight lines. You will get the following choices when clicking on the black triangle:

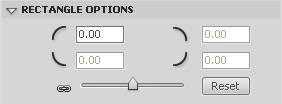
Rectangle Options help you adjust the roundness of the corners of the rectangle.
You can drag the slider to the right or left to adjust: Drag to the right to adjust the roundness (the values in the cells will be positive), drag left to adjust the concave (values in the cells will is negative).
You can also type values directly into the top left box.
If you click on the chain to open it, you can change the value for each cell to apply to each corner of the rectangle.
To return the initial default values of the rectangle, click the Reset button.
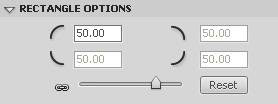
Example rectangle with rounded corners:

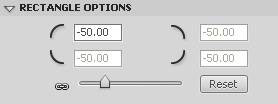
For example, the rectangle has a concave angle:

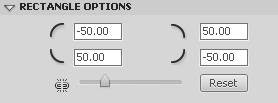
For example, the rectangle has four different angles:


 How to Draw a Circle in Gimp
  How to play Among Us in color blind mode
  Create Button in CSS
  How to add color coded terminal code to Microsoft Word
  How to create and use custom gradients in Google Slides
  How to change the Facebook background color