Fix CPU 100% error, resolve CPU overload issue.
The CPU usage exceeding 100% is a very common problem. This 100% CPU usage restricts computer operations, causing it to slow down. The following methods to fix this CPU usage issue will help you work faster and more stably, eliminating lag and stuttering..
This article helps us:
- Fixes the issue of CPU running at 100%
- Helps your computer run faster
CPU usage exceeding 100% can be caused by many factors, such as running too many applications simultaneously, viruses, or infrequent cleaning. In this article, TipsMake will guide you through some basic ways to fix CPU usage errors , helping you protect your CPU and extend its lifespan.

Fix 100% CPU usage error, resolve CPU overload issue.
Fix CPU 100% error, resolve CPU overload issue, fix CPU Usage error.
Table of Contents:
1. Cleaning your computer .
2. Removing background software .
3. Checking your antivirus software .
4. Checking System Idle Processes .
5. Disabling startup with Windows .
6. Disabling Superfetch and BITS .
7. Checking the WmiPrvSE.Exe process .
8. Blocking Svchost.Exe .
1. Because the computer hasn't been cleaned.

One simple reason for the CPU 100 error that many people overlook is that the computer's temperature rises, causing the CPU to run hotter and have to reduce its clock speed. This is a very common cause of the CPU 100 error. Specifically, it's often due to a lack of regular cleaning, causing the thermal paste on the chip to peel off. This is when you need to clean your computer and reapply thermal paste. Always pay attention to the computer's location and room temperature to ensure it stays cool and prevent the CPU 100 error from recurring.
2. Uninstall default apps and close background apps.
For Windows 10, although it's the most popular operating system, there are still some unnecessary applications, and these can be the cause of 100% CPU usage errors. Therefore, you should uninstall unused default applications and disable background applications.
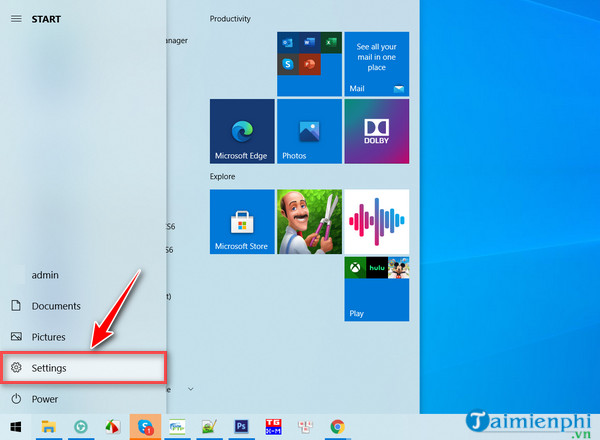
Step 1: From the user interface, click on the Windows icon in the bottom left corner of the screen and select the gear icon as shown below.
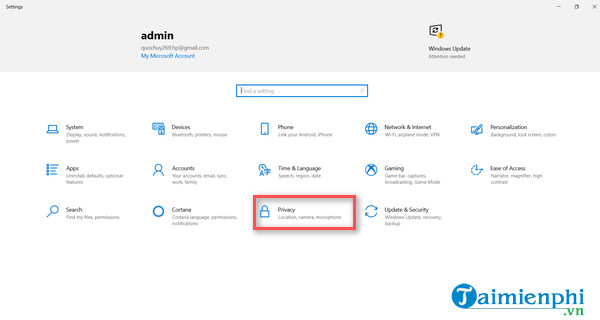
Step 2: When the Windows Settings interface opens, click on the Privacy option.
Step 3: Click on the Background apps section on the left and toggle the "Let apps run in the background" option to "Off" as shown below.

3. Check your antivirus software.
Antivirus software is highly effective in preventing viruses and malware from attacking your computer, but it's also one of the biggest CPU consumers. If your antivirus software is using too much CPU, uninstall it and find a lighter alternative.
4. Check System Idle Process
It's important to note that the System Idle Process isn't a virus or anything harmful to your computer; it simply indicates that the processor is idle. This is a very complex process on a computer. Checking it shows that your computer is running normally, and the System Idle percentage can reach up to 95% in sleep mode. If it's not the System Idle Process, then it's likely some software running in the background causing the CPU to use 100%.
5. Limit the number of programs that start with Windows.
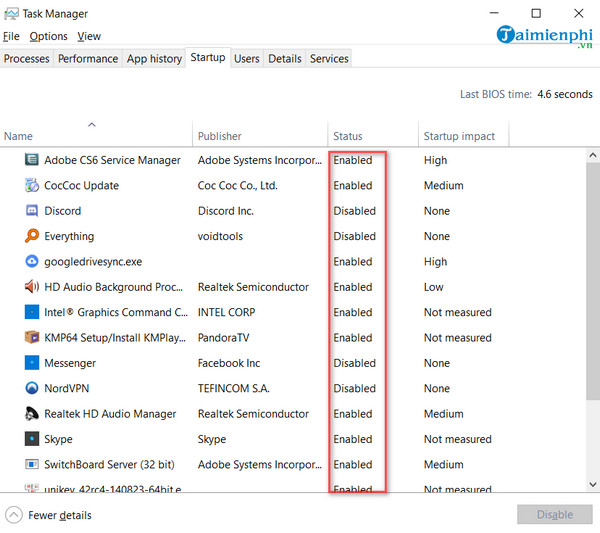
To check which programs start with Windows, go to Task Manager and select the Startup tab. If you see any unnecessary programs or those set to High, simply right-click and select Disable.
6. Turn off Superfetch, BITS, Windows Search Service
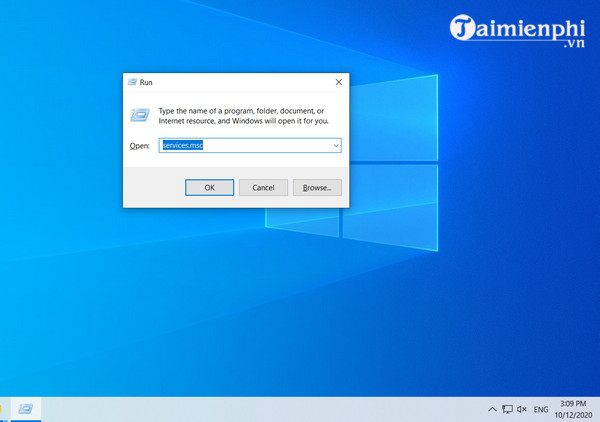
Step 1: Press the Windows + R key combination and type services.msc in the Run dialog box, then press Enter or OK .
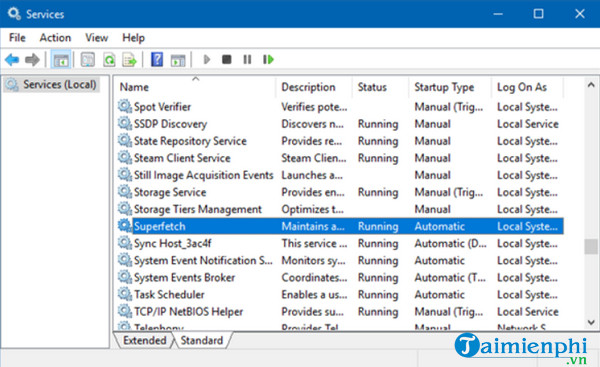
Step 2: The Services dialog box will appear. Find and double-click on Superfetch.
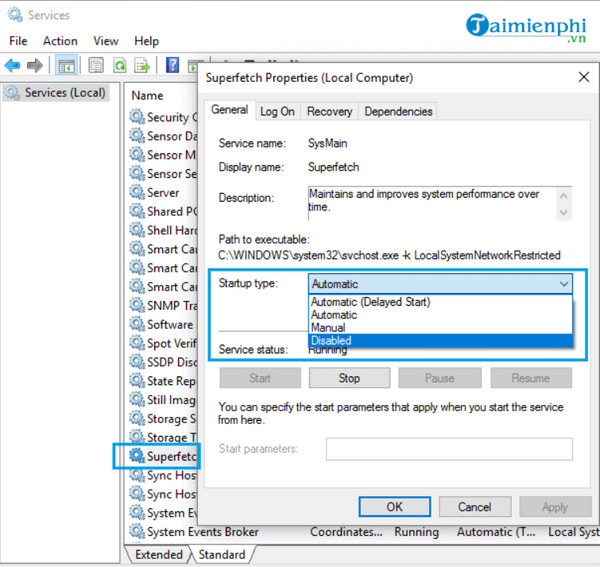
Step 3: Next, in Startup type, change the value to Disabled , click Stop in Service status to stop the service, and click OK to complete disabling Superfetch.
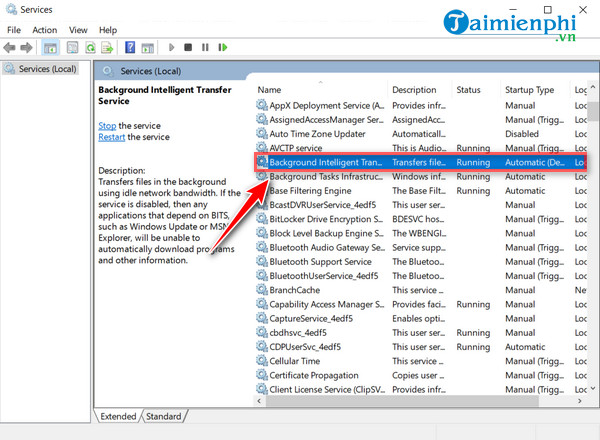
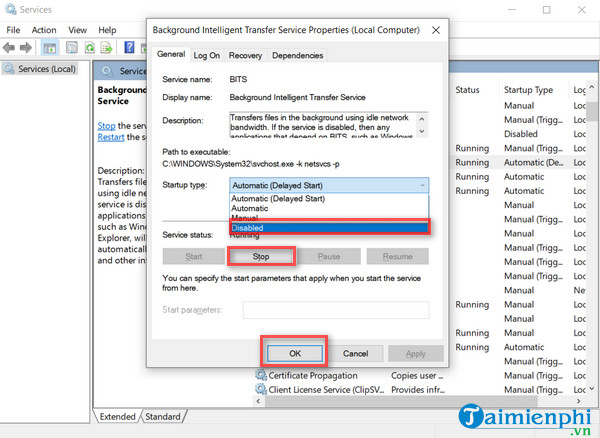
Step 4: Similarly, find and double-click on Background Intelligent Transfer Service , change the value to Disabled , click Stop in Service status to stop the service, and click OK.
Step 5: Finally, find Windows Search , change its value to Disabled , click Stop in Service status to stop the service, and click OK.
Additionally, you can disable some of the following background services:
Connected User Experiences and Telemetry
IP Helper
Plug and Play
Print Spooler
Program Compatibility Assistant Service
TCP/IP NetBIOS Helpe
Windows Push Notifications System Service
7. Check the progress of the WmiPrvSE.Exe process.
The first step in troubleshooting CPU overload is to check WmiPrvSE.exe, a process built into Windows that troubleshoots computer problems on the same network, but it often overcompensates. Microsoft itself has warned users about this process; although it doesn't always consume excessive CPU resources, you should check it and disable it if it's causing CPU overload.
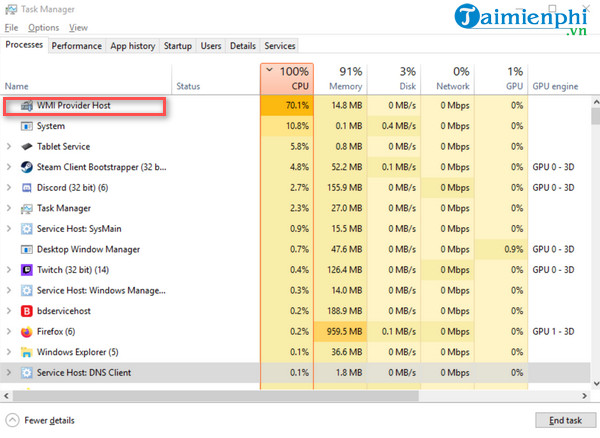
Step 1: Press Ctrl + Shift + Esc to open Task Manager.
Step 2: In the Processes section, check for any running process named WMI Provider Host; this is WmiPrvSE.exe. If it's consuming too much resources, stop it using the instructions below.
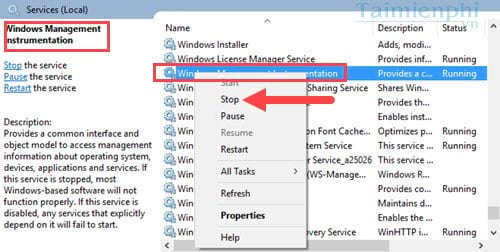
Step 3: Open the Services tab and select Open Services to find the source of WmiPrvSE.exe.

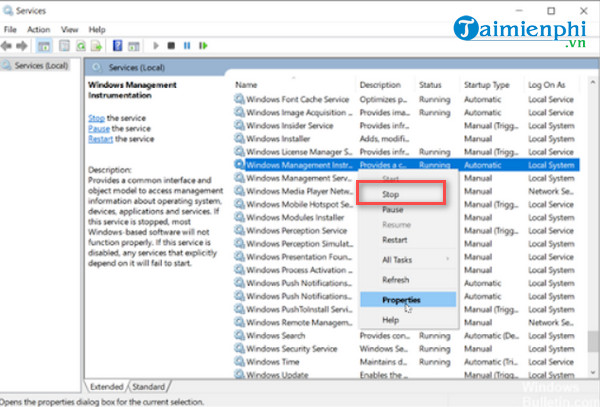
Step 4: In Services, find the file named Windows Management Instrumentation, then right-click and STOP the service.
8. Block Svchost.Exe
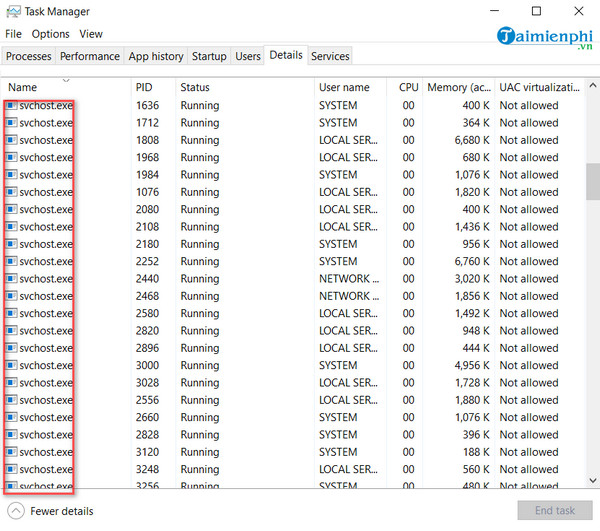
svchost.exe is known as a general support process for services running from dynamic-link libraries. To understand it better, you can go to Task Manager and look at the Services section; there are many services, each requiring its own process. Sometimes you will see dozens of svchost.exe running simultaneously in your Task Manager, which can consume a lot of CPU resources and cause CPU overload.
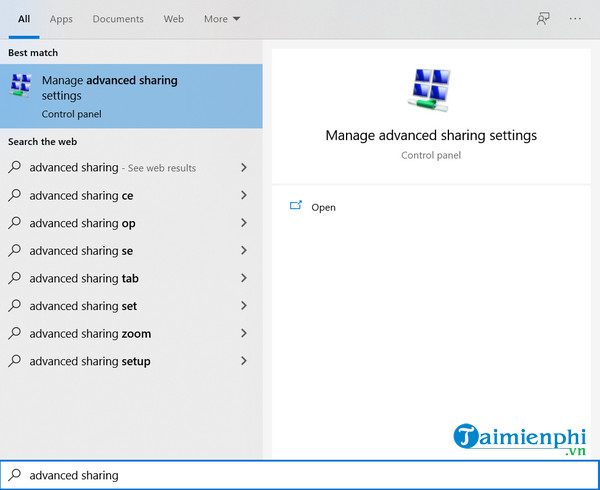
Step 1: To prevent svchost.exe from appearing randomly, we block it by typing "advanced sharing" into the Windows search bar and selecting the search result to access Advanced sharing settings.
Step 2: In Advanced sharing settings, turn off Network discovery and then click Save changes.

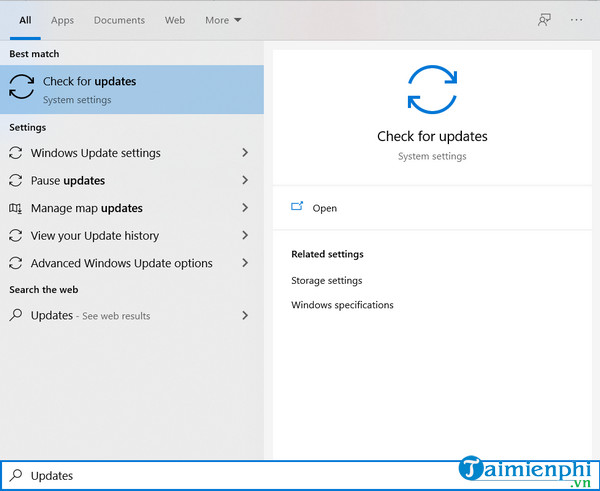
Step 3: Next, we need to disable Windows Updates, which is one of the things that creates svchost.exe. This typically consumes 25% of the CPU whenever an update is downloaded, although everything usually returns to normal after the download is complete. Reopen the Start Menu, type " update, " and select "Check for updates ."
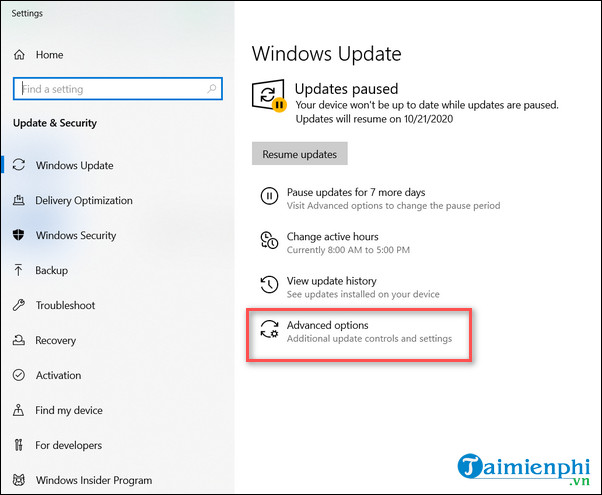
Step 4: In the Windows Update section, select Advanced options .
Step 5: Select Off to disable automatic Windows updates.
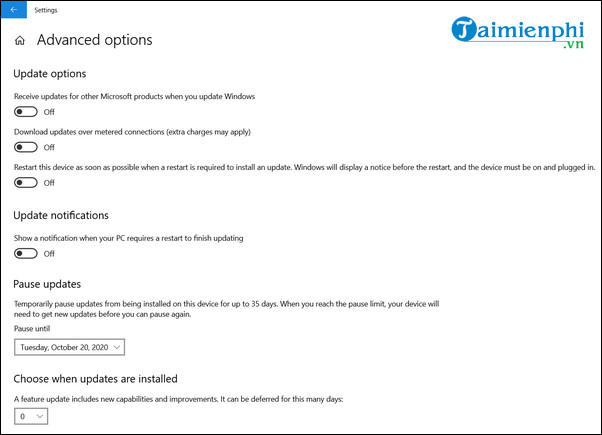
By doing the above, you temporarily disable updates from Windows Update; however, stopping updates is not the preferred option, as Windows patches are always beneficial for users.
On Windows 7
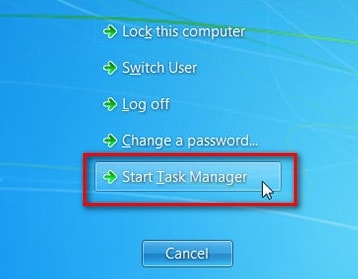
Step 1 : Immediately press the Ctrl+Alt+Delete key combination on your keyboard and then select Start Task Manager.
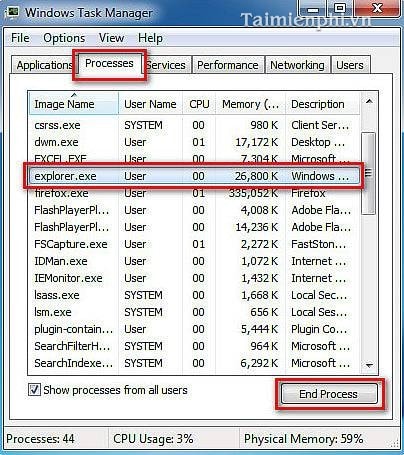
Step 2 : When the Windows Task Manager windowappears, select the Processes tab , then find Explorer.exe and click End Process to terminate that process.
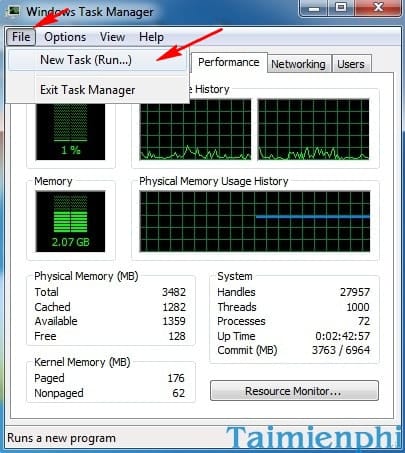
Step 3: After clicking End Process , the desktop will be blank. To return the desktop to its previous state, reopen Windows Task Manager.
- Select File -> New Task (Run.)
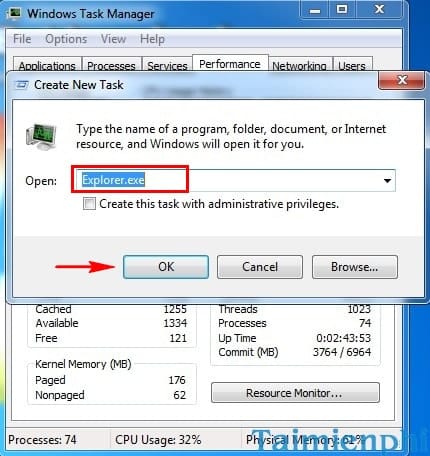
- Type Explorer.exe and select OK
Step 4 : Next, go to Start and select Control Panel (see image below).
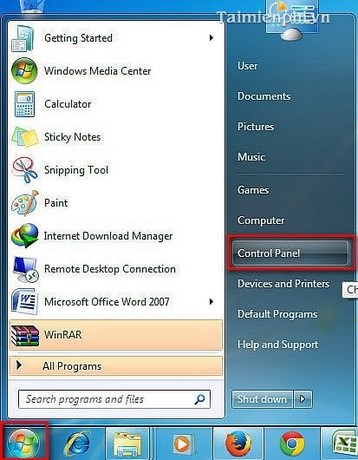
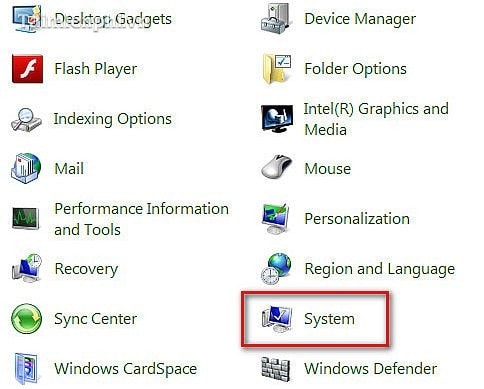
Step 5 : Next, click System (see image below).
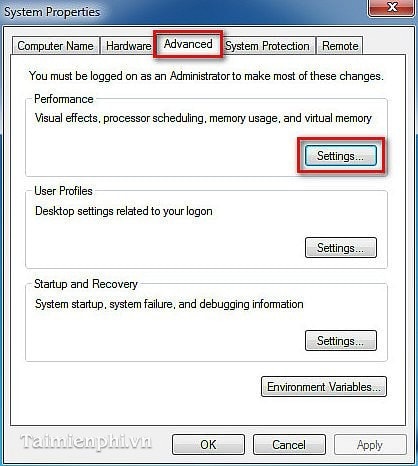
Step 6 : Click on Advanced system settings (see image below).

Step 7 : Select the Advanced tab and then click Settings … (See image below)
Step 8 : Select the Visual Effects tab , then uncheck " Show thumbnails instead of icons" and click OK (see image below).

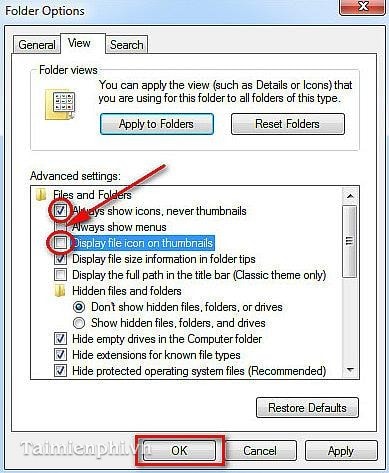
Step 9 : Open Windows Explorer , select Organize , then select Folder and search options (see image below).

Step 10 : In the View tab , check " Always show icon, never thumbnails" and uncheck " Display File Icon on thumbnails" . Finally, click OK to finish.
After completing the process, your computer will return to normal operation and will no longer freeze. Thus, with the above instructions, you can completely fix the 100% CPU usage error.
Additionally, ChromeOS is currently experiencing some bugs that cause the CPU usage to exceed 100. So, what is the simplest way to fix this error?