Table of Contents
This guide explains how to resolve Fix Computer Error That Automatically Turns on When There Is No User, starting with the most likely causes and moving through practical troubleshooting steps.

1. Turn off devices that can wake the computer
On motherboard devices, there is always a function to receive signals from peripheral devices to activate Windows startup. Because of that, you often see people waking their computers out of the Sleep mode by hovering with the mouse and typing a few keys, and the screen automatically pops up. To prevent the computer from turning on automatically you can turn it off as well.
Step 1: Open MenuStart and enter cmd . Then click Command Prompt to open.

Step 2: First, you need to enter the command to see which device wakes your computer last taught.
powercfg –lastwake
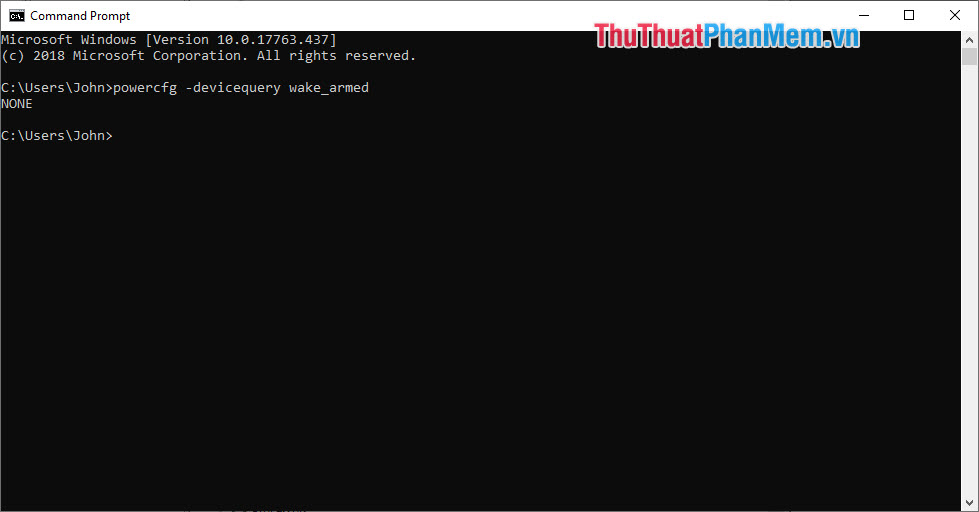
Step 3: You continue to enter the command to see the peripherals capable of waking the computer to teach.
powercfg –devicequery wake_armed
As you can see, on the computer software tricks, there are 05 devices that can wake up the teaching computer, including:
- 02 Optical Mouse - Compliant Mouse
- 02 Keyboard - Keyboard Device
- 01 network card Realtek - Realtek PCIe GBE Familt Controller
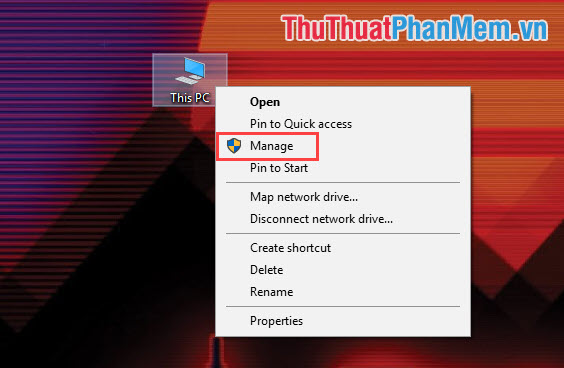
Step 4: Once you've identified the devices that can wake up our computer, then right-click on This PC and select Manage to reset the peripherals.
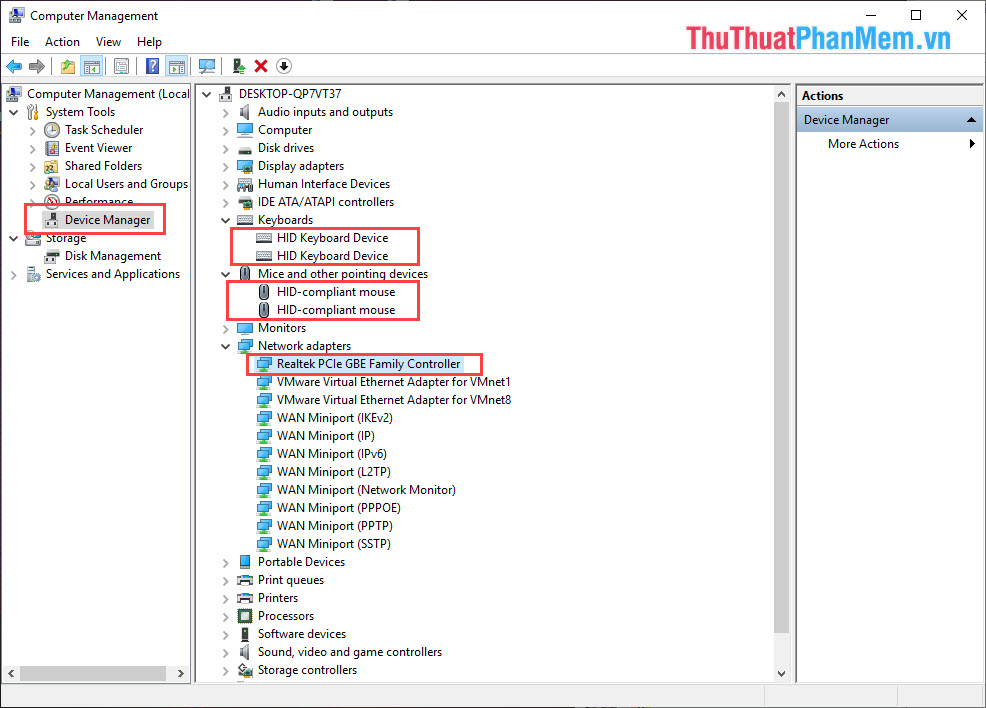
Step 5: Computer Management window appears, select the Device Manager tab. Then, you click one by one: Keyboards, Mice and other pointing devices, Network . When you click, you will see the names of the connected external devices one by one.
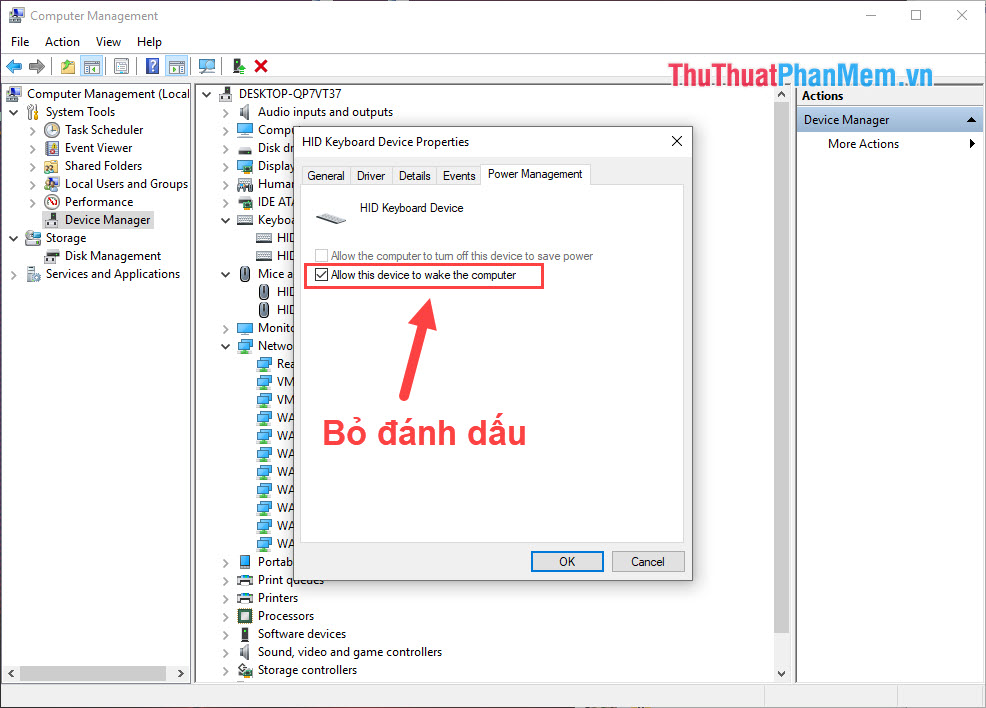
Step 6: Double-click on the device name, then select the Power Management tab . Finally, uncheck the "Allow this device to wake up the computer" and click OK to finish.
You do the same with the remaining peripherals on your computer.
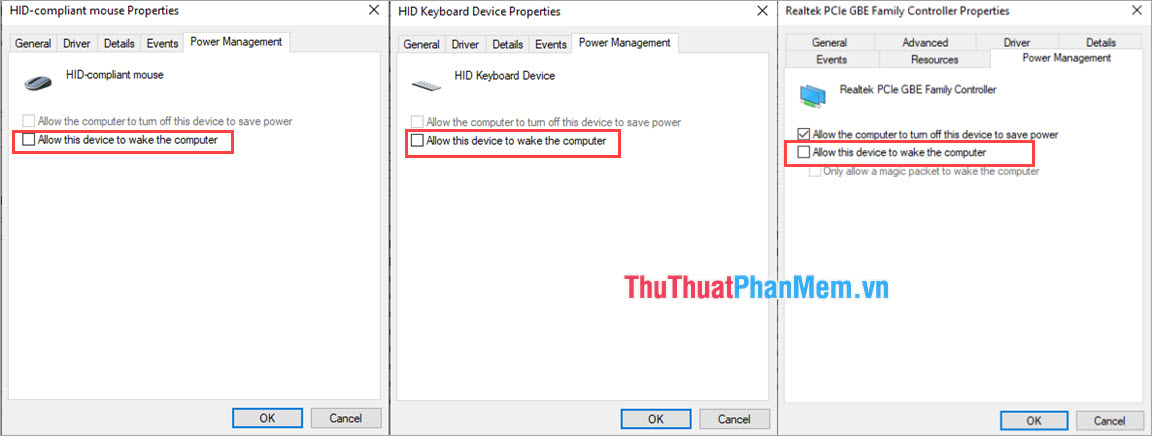
Thus, you have proceeded to fix the computer error automatically starts up. You can check again with the command " powercfg –devicequery wake_armed " in Cmd, if it displays NONE , there is no device that can wake up your computer.
2. Turn off Update Windows
The most special thing about Windows Supported operating systems is that when Update Windows, you will not be able to use the computer, you have to wait until the update process is completed. Because of that, Microsoft often sets Windows to Update when we turn off the computer or update itself at night (because at night nobody uses the computer).
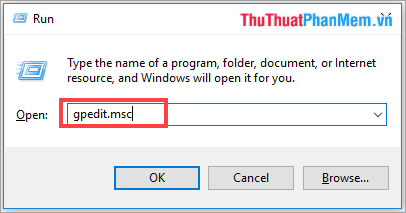
Step 1: You press Windows + R to open the RUN window. Then, you enter gpedit. msc to open Local Group Policy Editor .
Step 2: When the Local Group Policy Editor window opens, open the following folders one at a time:
Computer Configuration> Administrative Templates> Windows Components> Windows Updates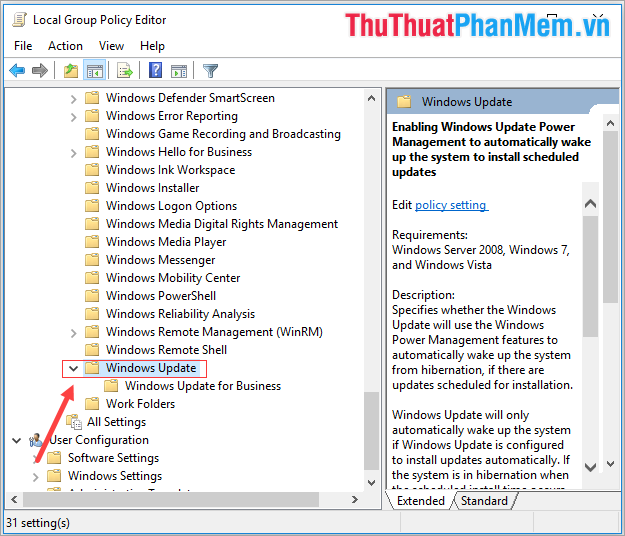
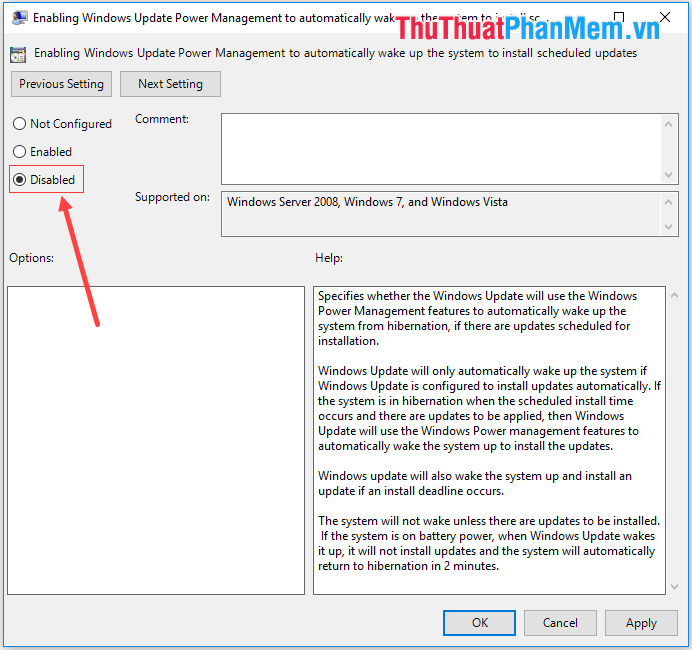
Step 3: Then, double-click Enabling Windows Update Power Management to automatically wake up the system to install scheduled updates to open the settings.
Step 4: When Enabling Windows Update Power Management window opens to automatically wake up the system to install scheduled updates, select Disable and click Apply -> OK to finish.
3. Turn off the automatic maintenance feature
On Windows systems there are many great features, among them are automatic maintenance. It will automatically start your computer and scan through important Windows data to see if there is a problem? This is an optional feature, so you can turn it off.
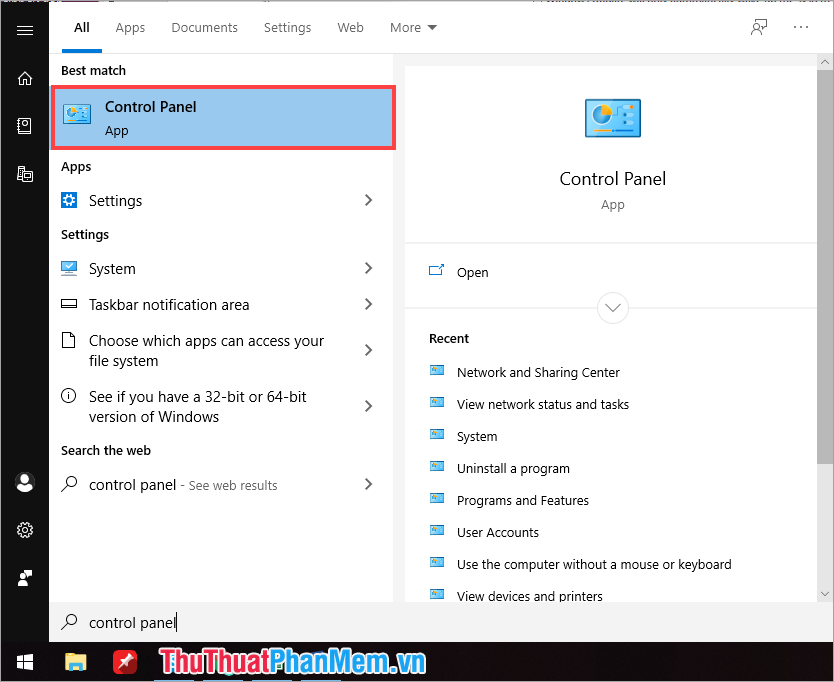
Step 1: Open the Start Menu and enter Control Panel to open.
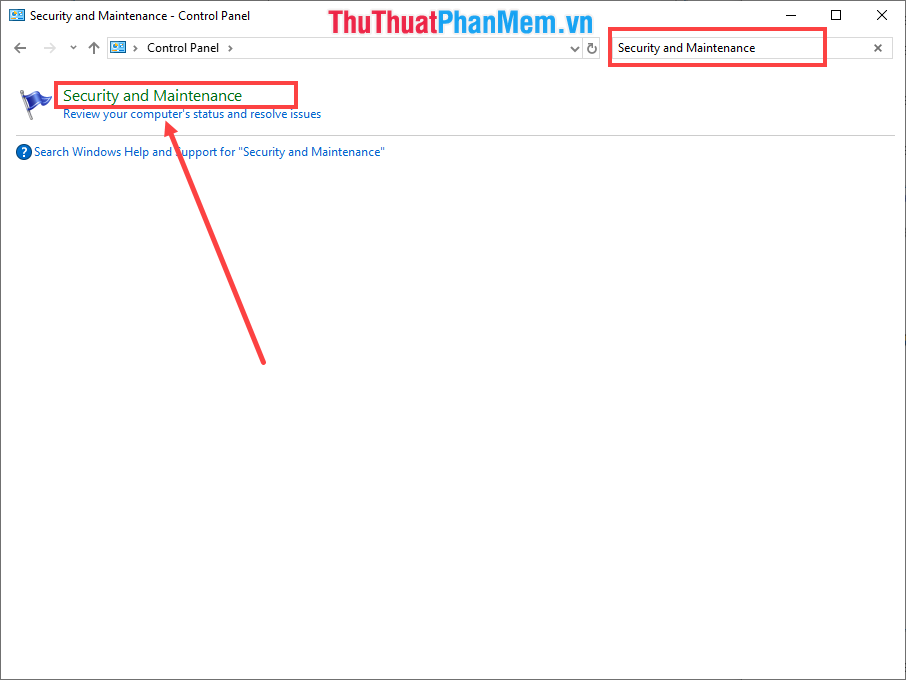
Step 2: Then, you enter Security and Maintenance into the search box and open it.
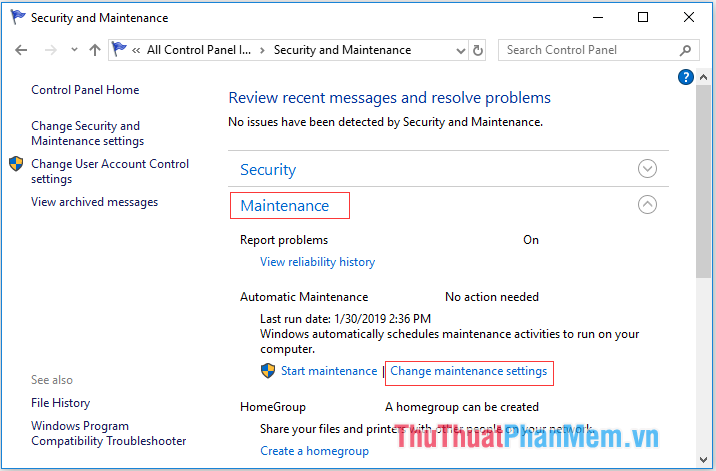
Step 3: Next, click on the Maintenance tab to open the contents. Here, you choose Change maintenance settings .
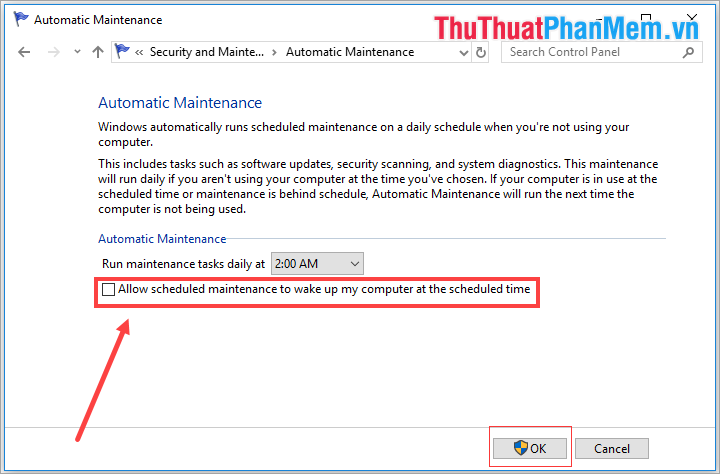
Step 4: The items you uncheck the Allow scheduled maintenance to wake up my computer at the scheduled time and click OK to finish.
4. Turn off the automatic restart feature
For whatever reason, if your computer is suddenly shut down, the Windows system will automatically understand and it will continue to try to reboot until the reboot is successful!
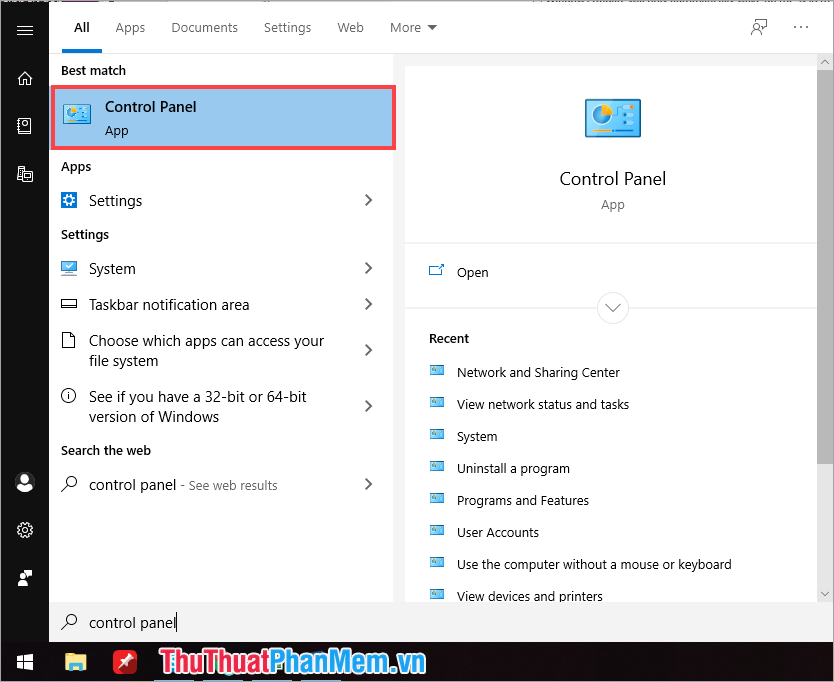
Step 1: Open the Start Menu and enter Control Panel to open.
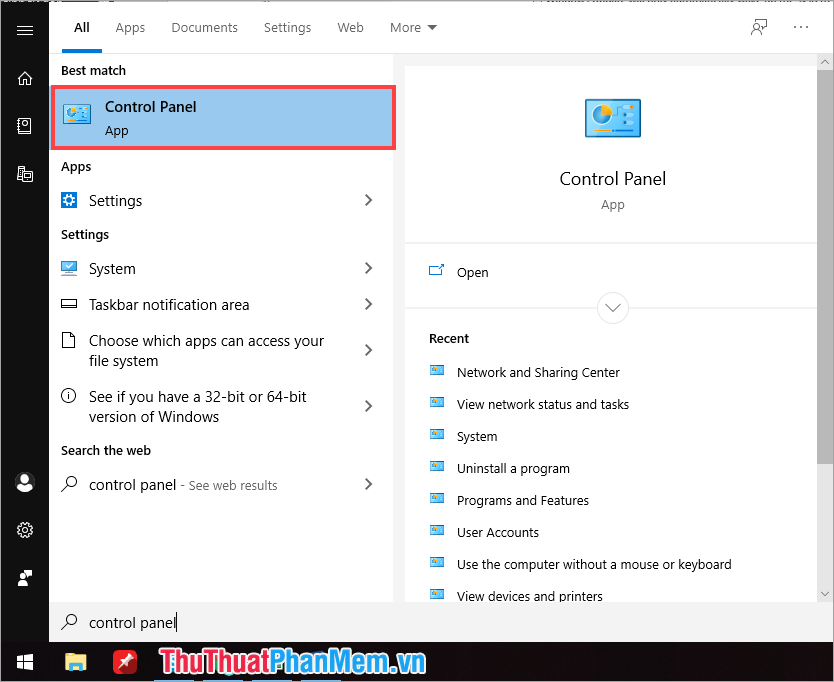
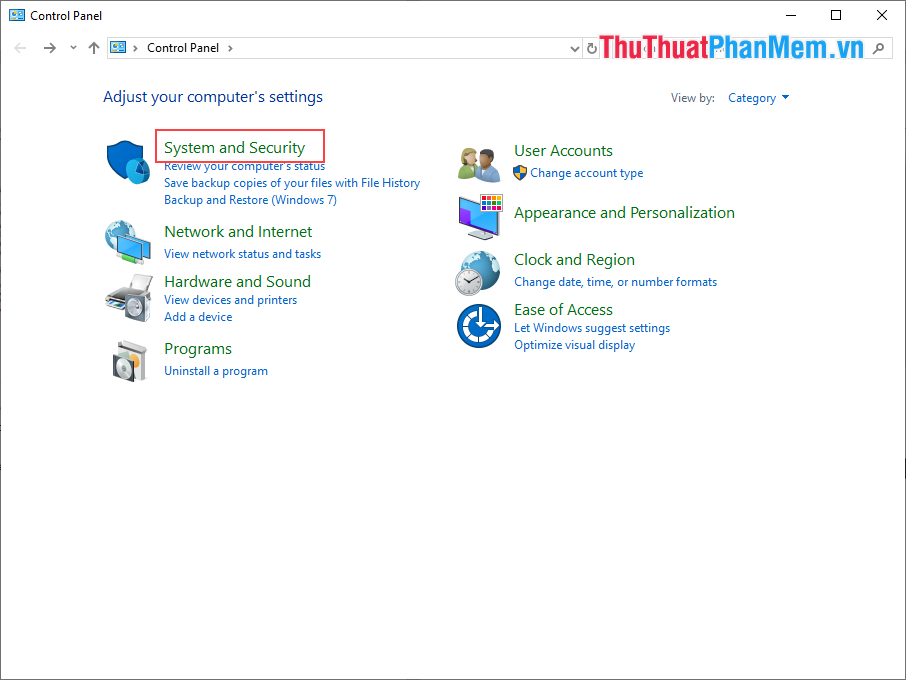
Step 2: You proceed to select System and Security .
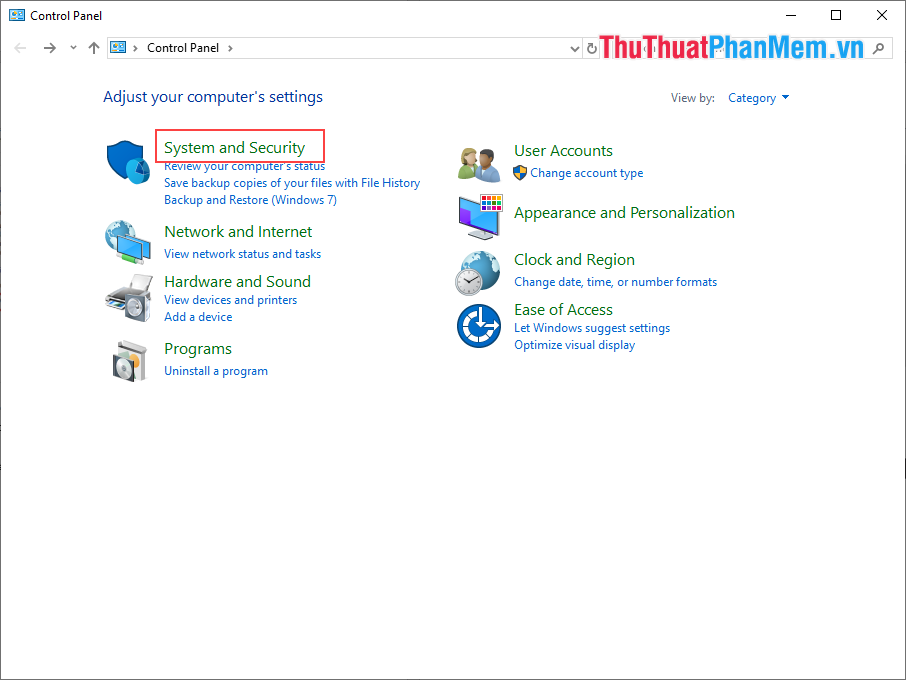
Step 3: Continue to select System to see the options inside.
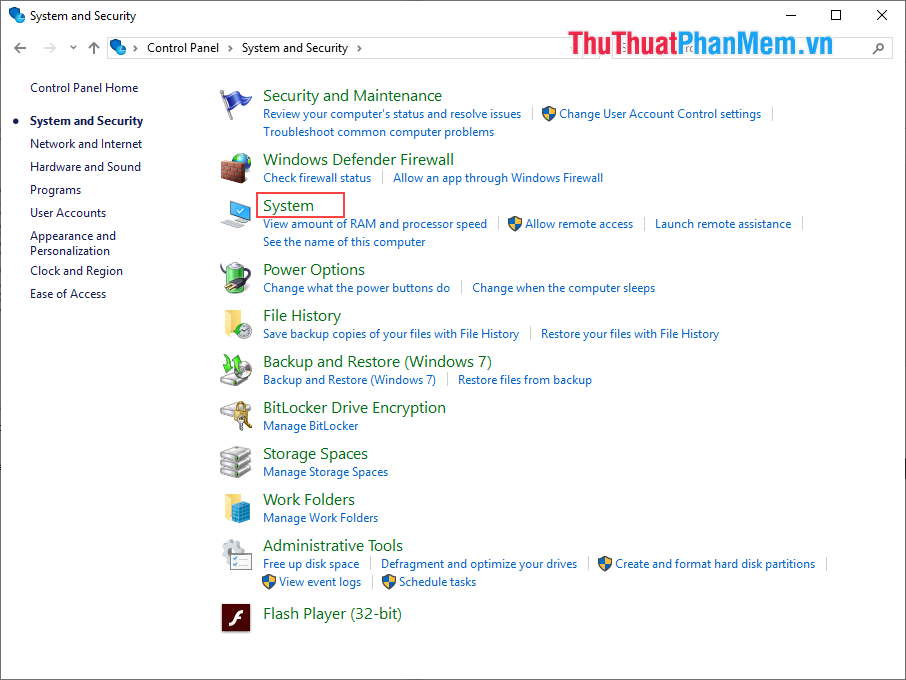
Step 4: After that, select Advanced system settings in the left hand window.
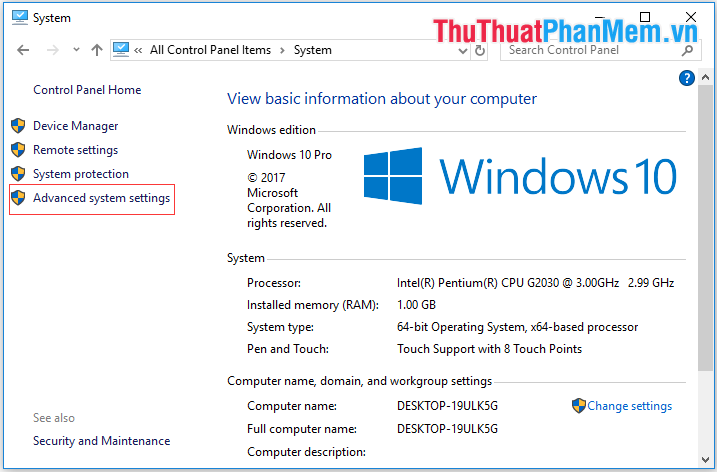
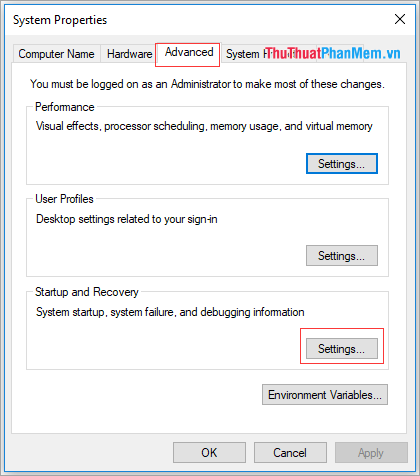
Step 5: When the System Properties window is opened, select the Advanced tab and click on Settings to set it up.
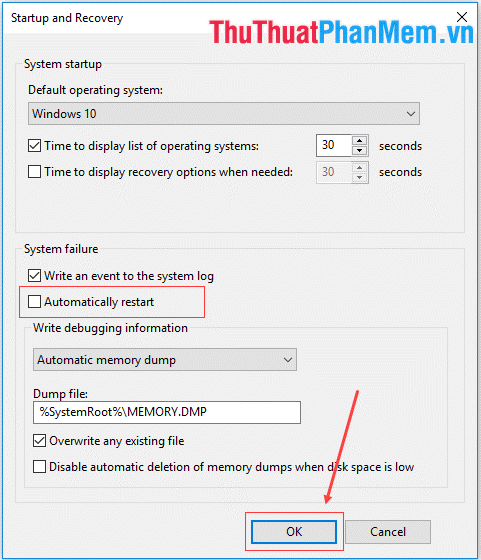
Step 6: Finally, uncheck Automatically restart and click OK to complete the setup.
5. Turn off the scheduled auto-start feature
Step 1: Open the Start Menu and enter Control Panel to open.
Step 2: You proceed to select System and Security .
Step 3: You proceed to select Power Options to set.
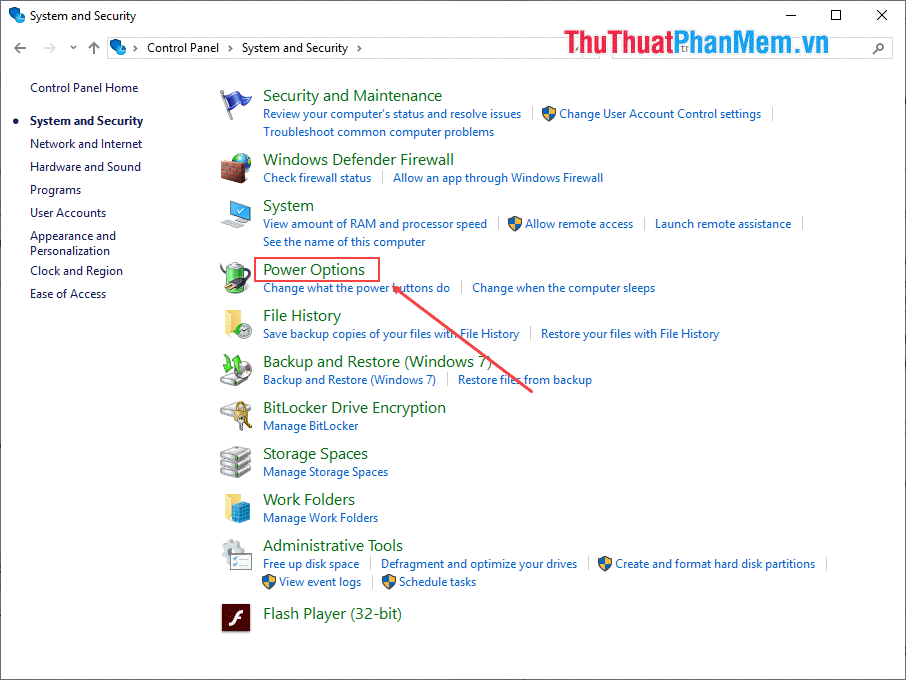
Step 4: Next, select Change plan settings to open settings.
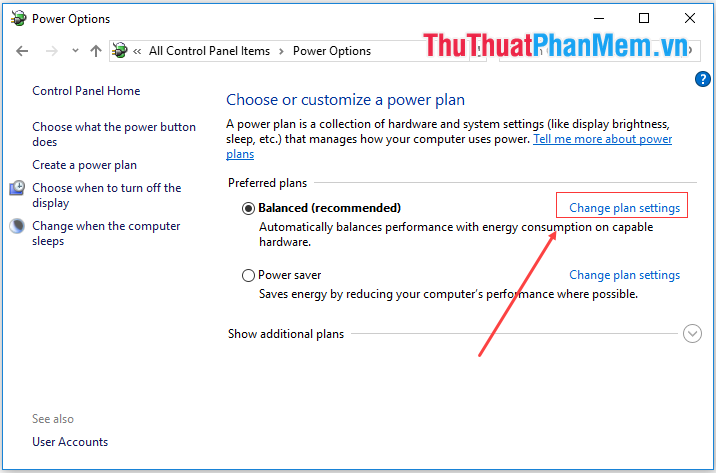
Step 5: Continue to select Change advanced power settings .
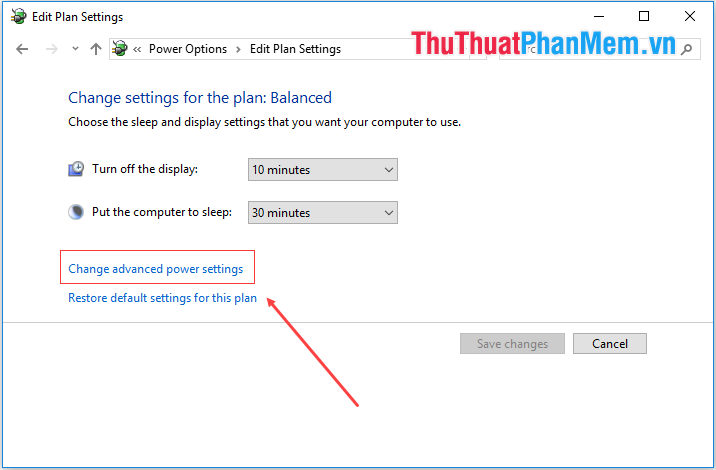
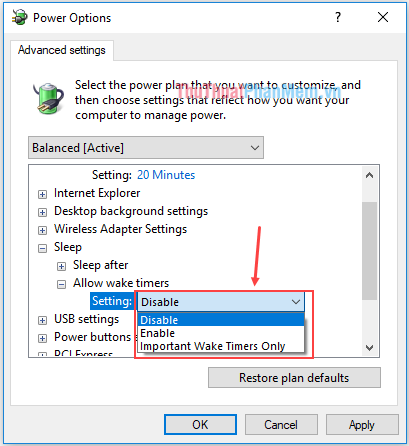
Step 6: Go to the Sleep section and click to view the subsections. Here, you switch Settings to Disable and click OK to complete the installation.
In this article, the software wizard has taught you how to fix the computer error that automatically starts when there is no user. Good luck!
FAQ
What usually causes Fix Computer Error That Automatically Turns on When There Is No User?
The cause may involve incorrect settings, outdated software, damaged files, permission problems, device compatibility, or a temporary system issue.
What should I try first to resolve Fix Computer Error That Automatically Turns on When There Is No User?
Restart the affected app or device, install pending updates, verify settings and connections, and follow the troubleshooting steps in order.
How can I prevent the issue from returning?
Keep software updated, maintain backups, avoid interrupted installations, and review system or device settings after major changes.
Related Articles
 How to Fix Computer Power on by Itself8 minutes read
 How to Fix the Error When the Computer Starts Automatically3 minutes read
 How to Enable Battery Saving Mode on Windows 113 minutes read
 5 Common Errors When Using LG G3 and How to Fix8 minutes read
 How to Fix A20 Error When Starting the Computer4 minutes read
 How to Fix the Error of the Screen Automatically Pulling Down on the Computer7 minutes read
Reader Comments 0
Sign in with email or Google to join the discussion.