Don't miss out on useful tools available on Windows 10!
Have you ever wondered if you already know and use all the tools on Windows 10? Surely we have missed some features because hidden tools will often be forgotten by users, not knowing that it brings many benefits to the operating system and operations when you work on your computer. .
In this article, Network Administrator will guide you how to discover each great hidden tool on Windows 10 version.
1. Troubleshooting Tool:
This tool is responsible for diagnosing and handling errors related to software, hardware, network, interface and security on Windows 10.
Step 1:
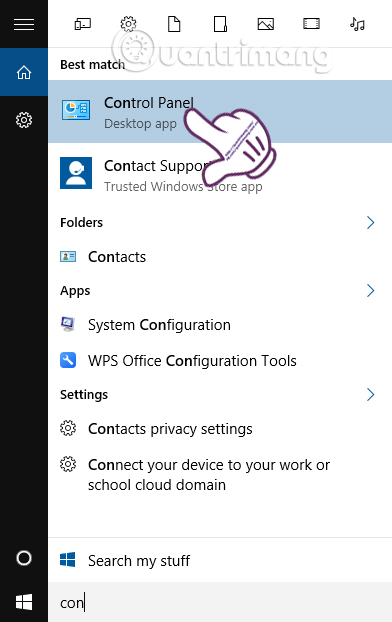
In the Windows search bar, type Control Panel and access the results.
Step 2:
At the new interface, find and click the Troubleshooting section.

Step 3:
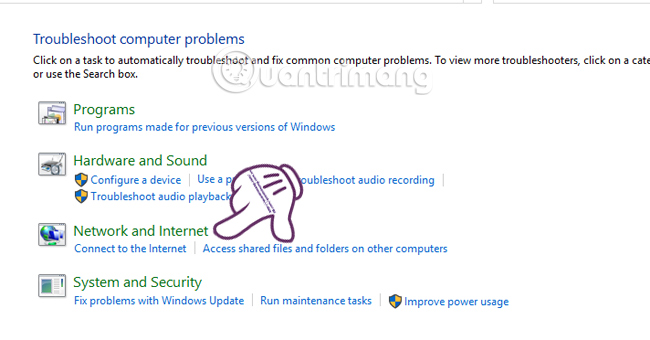
Next, we will see the following 4 items:
- Programs : programs, applications.
- Hardware and Sound : Hardware and sound.
- Network and Internet : Internet.
- System and Security : File system and security.
If your system is having any problems in the section, click on the item, such as Network and Internet .
Step 4:
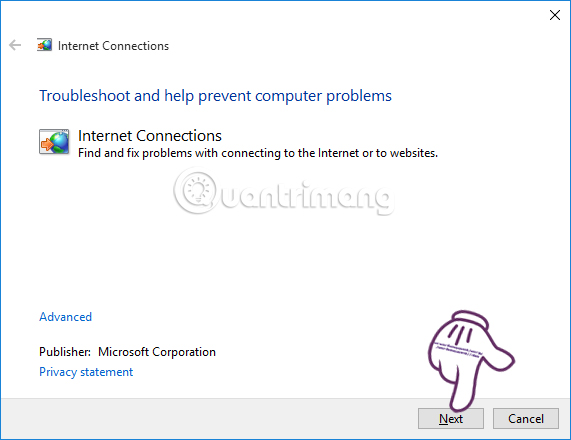
Next, click Next to proceed to detect and fix errors.
Note , with other items will appear more options. You just need to tick the part you want to fix.
Step 5:
We wait for the analysis, testing and processing process if any troubleshooting is possible. When the test is complete, if you can fix the error you will see a Fixed message .
2. File History Backup Tool:
If you are worried about losing data, the File History Backup tool will help us solve that problem. This tool will help users back up data, by capturing files using many different versions. It will then save to an external drive such as a USB drive or portable hard drive.
Step 1:
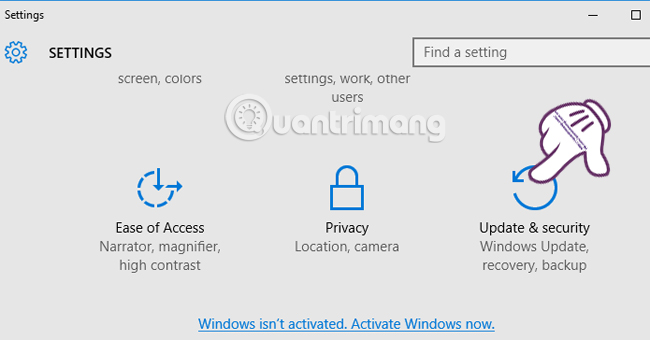
You access the Settings interface and select Update & Security .
Step 2:
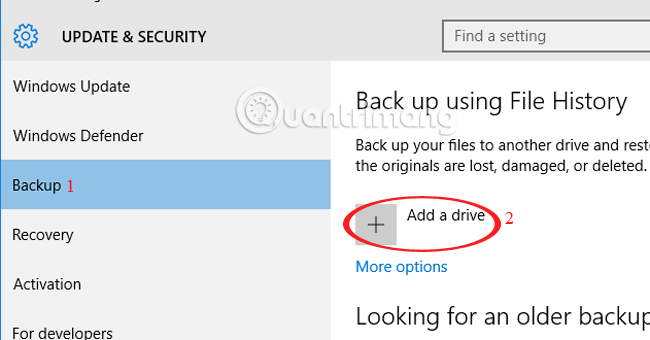
In the left menu, we choose Backup . Right after that in the right menu, under Back up using File History click on Add a drive .
Step 3:
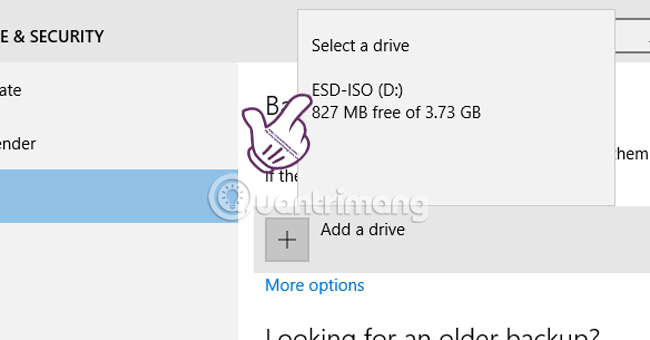
We wait for the system to identify the external storage devices that are connected, then click to select the drive to backup.
Step 4:
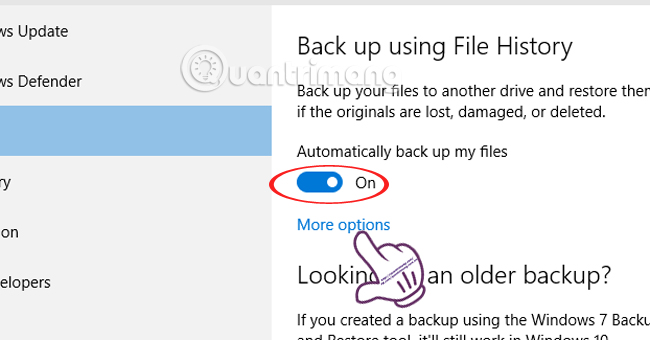
Once you have selected the storage device, you will see the option On the Automatically stream back up my files . We can also click More Options to see other information.
Step 5:
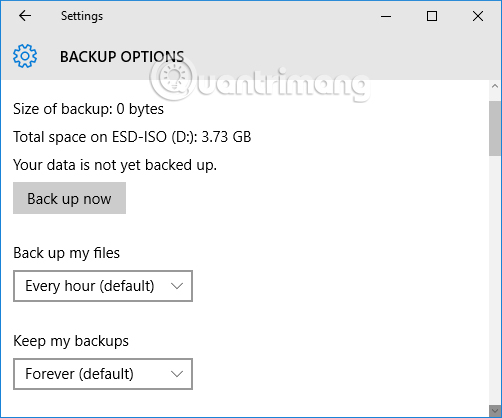
A new window appears. We will see information about the size of the backup data, the size of the drive, the time of backup. Back up my files , keep the backups Keep my backups .
Step 6:
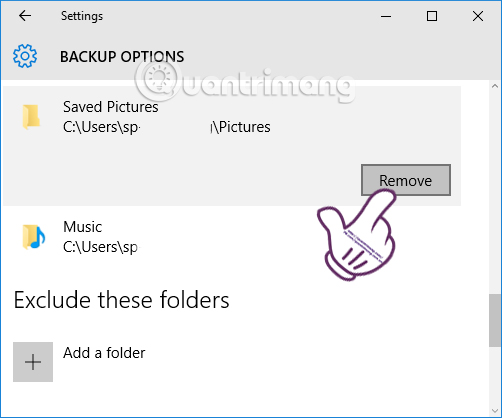
Scrolling down will be options if you want to remove backup folders that you don't want. Click the folder and then click Remove . After you have set up your preferences, just click Back up now above to proceed with data backup.
3. System Restore tool:
Although it has been disabled on Windows 10, you can re-enable this tool to use, to be able to restore the system state to the previous time. The tool will create restore points before we install new or updated software.
Step 1:
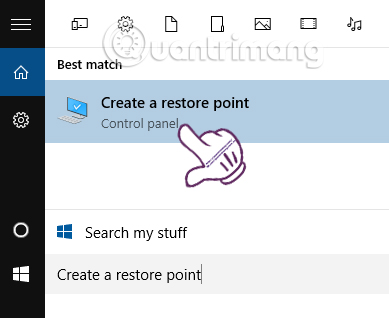
In the Windows search box, type Create a restore point , then click on the result found above the top.
Step 2:
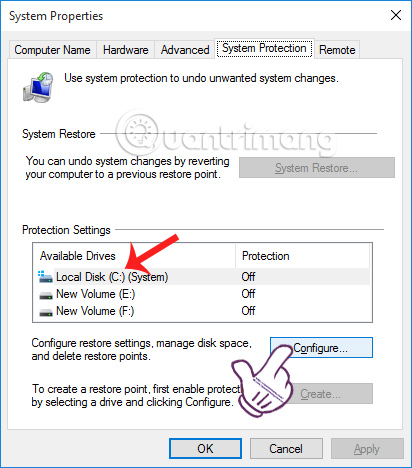
The System Propertie s dialog box appears and this feature is disabled.
Click the regular system partition C drive and click the Configure button.
Step 3:
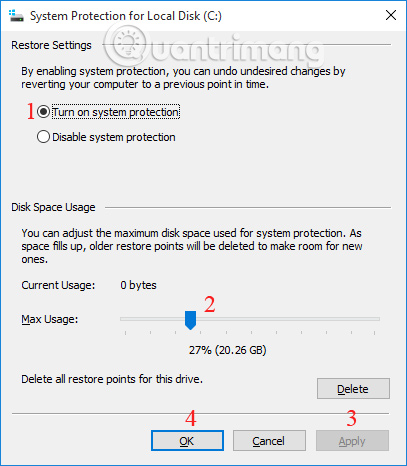
Next, we tick the Turn on system protection box . Under the Max Usage section, drag the slider to limit the backup space. You should leave 20 GB to press Apply> Ok to save.
4. Windows Memory Diagnostic Tool:
This tool is available on Windows to help diagnose errors on RAM, so we can find ways to fix it in time.
Step 1:
In the Control Panel , go to Administrative Tools .
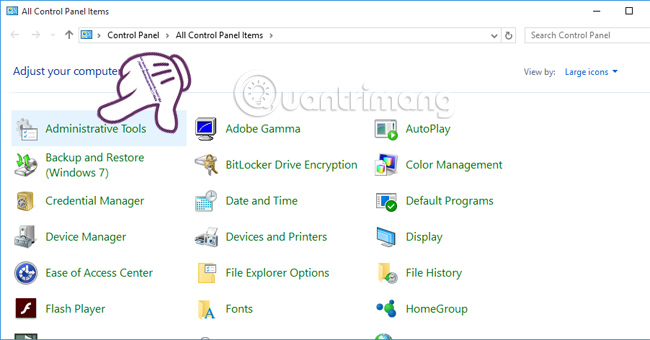
Step 2:
At the next interface, scroll down and select Windows Memory Diagnostic .
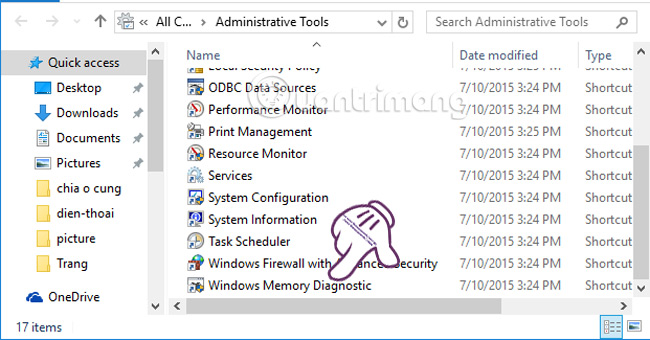
Step 3:
We will be asked to restart the computer for the diagnosis to take place correctly, click Restart now and check for problems (recommended) .
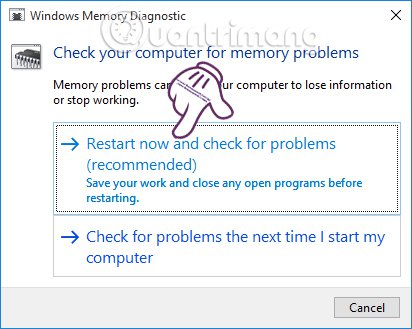
Step 4:
After restarting the computer, the tool will check your computer's RAM . You will not need to press any of the operations that the program will do automatically for us.
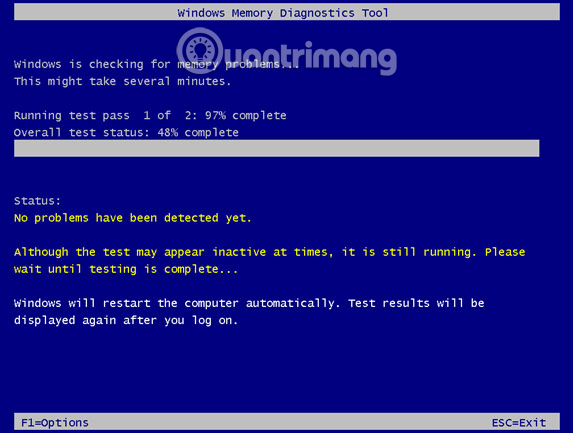
Step 5:
At the end of the process, the system will restart again. And the result message appears under the Taskbar.

5. Windows Reliability Monitor Tool:
This tool will monitor and evaluate conversions on Windows. The problems that arise, the operating data are all reported according to the chart from a scale of 1 to 10. If you want to know which application is the cause of the system failure, you can use this tool.
Step 1:
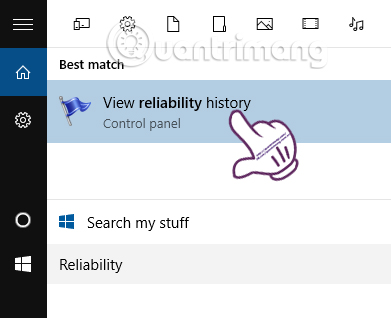
At Windows search, type keywords Reliability and click on the View Reliability History result.
Step 2:
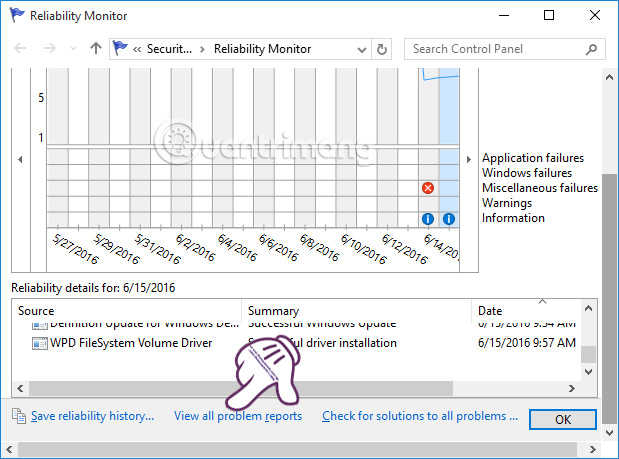
Here, we will see the Windows Reliability Monitor providing daily and weekly tracking reports, along with options:
- Save reliability history : Save the report history.
- View all problems reports : See full report content.
You will click on View all problem reports to see the content.
Step 3:
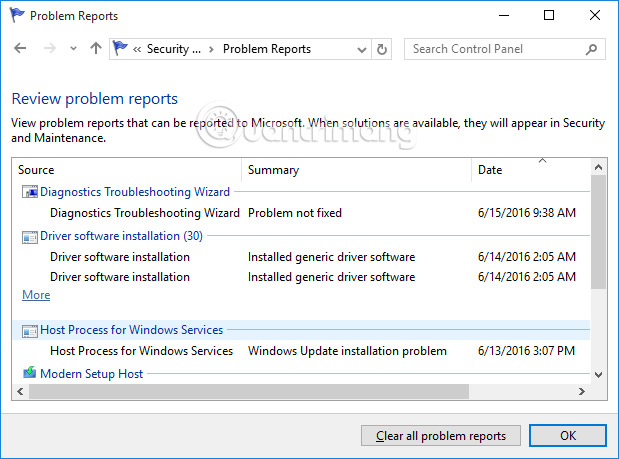
Detailed reports appear entirely.
6. Resource Monitor tool:
This tool serves to monitor network system performance, storage capacity and system performance.
Step 1:
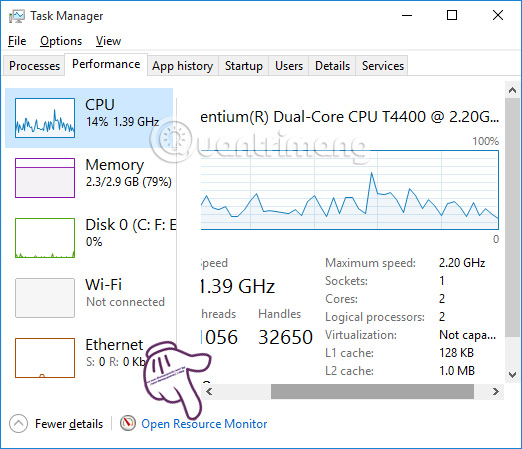
You open Task Manager , select the Performance tab. Then click Open Resource Monitor at the bottom.
Step 2:
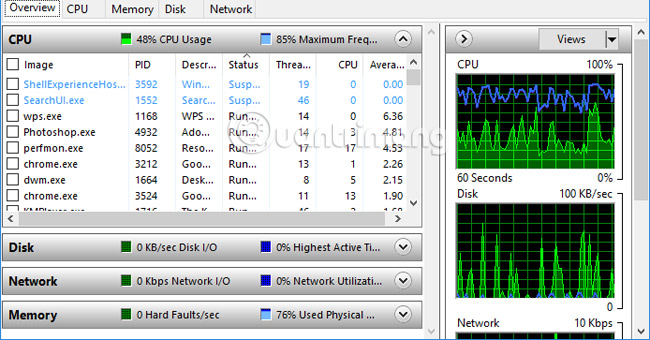
At the new interface, the tool will split into several sections for users to conveniently monitor:
- Overview : Continually update the activities of CPU, Disk, Network and Memory as a real-time chart.
- CPU : Operation is happening on the CPU.
- Disk : Displays the ongoing operations on the hard drive.
- Network : Displays detailed information about network activity.
- Memory : The process of using RAM.
7. Windows System Image Tool:
The Windows System Image or system image is an exact copy of everything on the hard drive, used for restoring the system as needed when you download the Ghost file. However, this tool is available in Windows 10.
Step 1:
At the Control Panel interface, click System and Security .
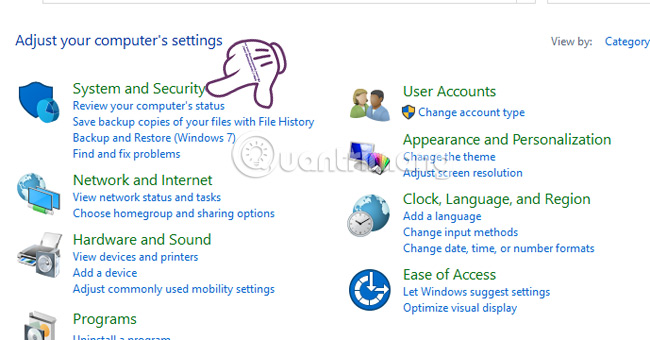
Step 2:
Next click on File History .
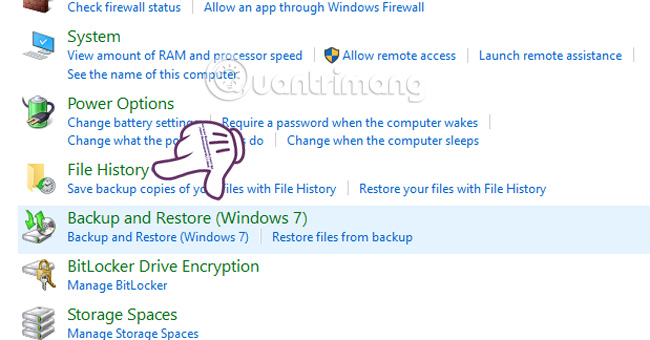
Step 3:
Click System Image Backup in the left menu bar.
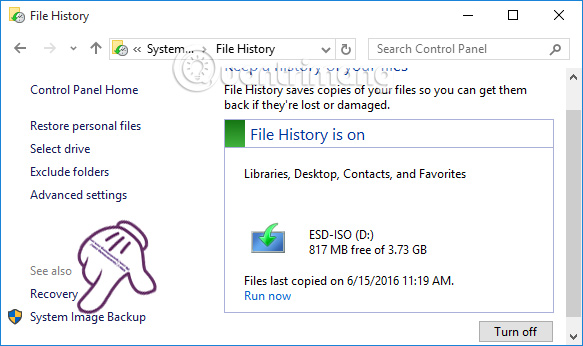
Step 4:
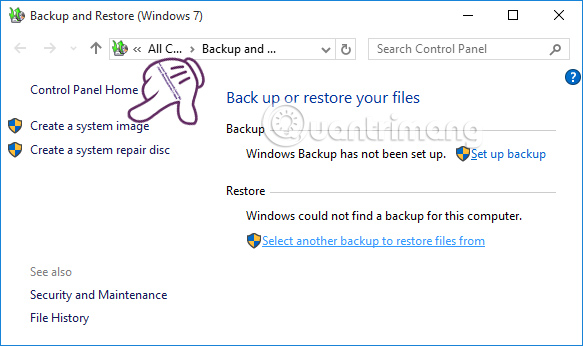
Next on the left menu, click on Create a system image .
Step 5:
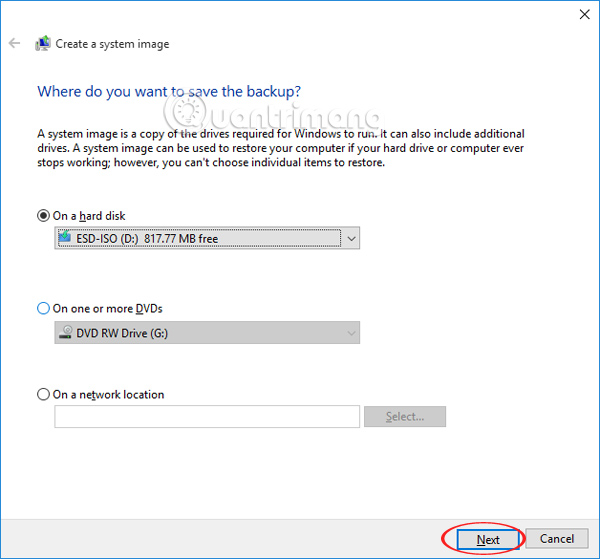
When the Create a System Image window appears, select the On a hard disk option to select the location for System Image data storage. Then click Next .
Step 6:
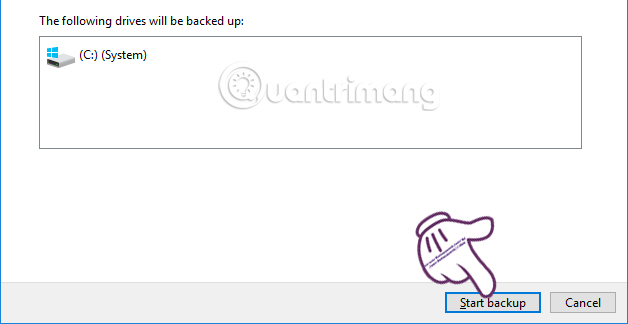
Finally, just press Start backup to proceed with the backup. As a result, the files after the backup will appear in the Windows Image Backup folder you selected earlier.
8. Defragment and Optimize Drives Tools:
This tool will rearrange files and folders to improve data access speed.
Step 1:
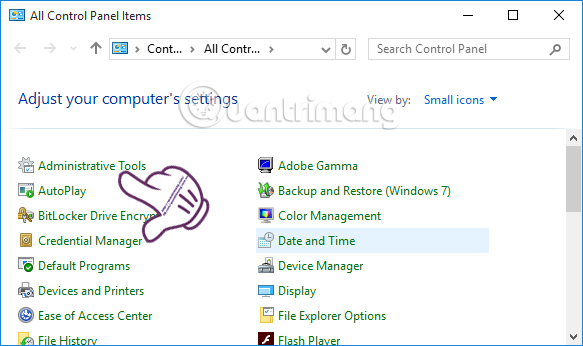
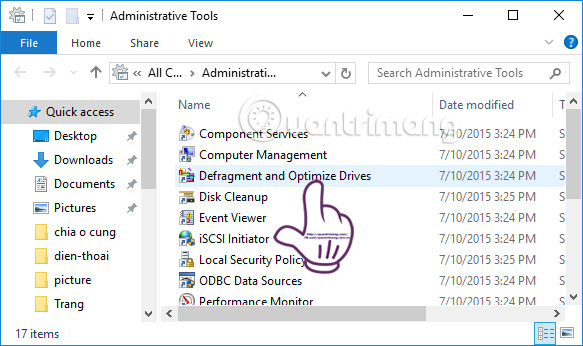
In the Control Panel interface, we select the Administrative Tools section .
Step 2:
You will select Defragment and Optimize Drives .
Step 3:
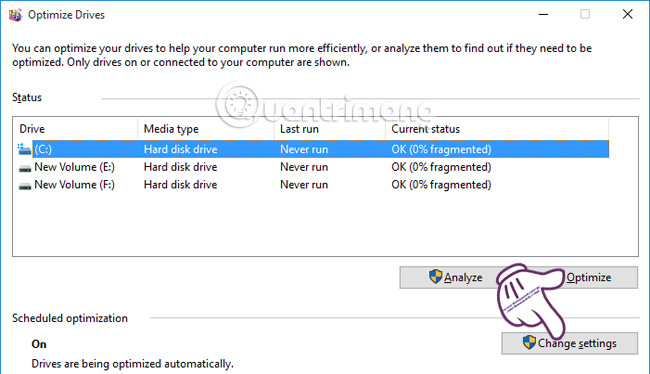
When using an SDD drive, there is no need to fragment the drive because the life of each drive is calculated by the number of write limits. To turn off automatic defragmentation , we click Change settings .
Step 4:
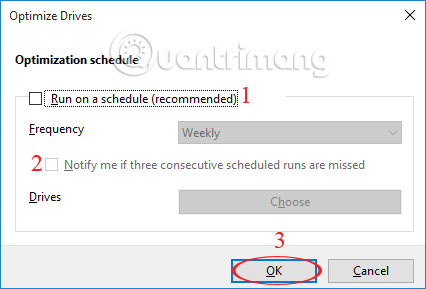
At the small window interface, you will uncheck the two boxes: Run on a schedule (recommended) and Notify me if three consecutive scheduled runs are missed . Click OK to save the settings.
Thus, we have introduced you to 8 useful tools on Windows 10 and how to use and activate that feature. Each tool has its own features, but looking at them will help your computer increase performance as well as support users in the process of using the computer.
Refer to the following articles:
- 7 ways to do, customize in post will help your Windows 10 "as fast as wind"
- How to open the virtual keyboard in Windows 10
- Ways to turn off your computer on Windows 10
I wish you all success!
You should read it
- ★ 5 ways to open Resource Monitor in Windows 10
- ★ 7 leading hardware error diagnosis tools for Windows 10
- ★ Instructions for using File History to backup and restore data
- ★ Learn Resource Monitor tool in Windows Server 2012
- ★ Learn about the management and monitoring functions of Resource Monitor tool