Configure the Lightweight Directory Service service - Part 3
In this next article, I will show you the procedure for creating a corresponding AD LDS instance and application directory partition .
In the previous article of this series, I showed you how to install Active Directory Lightweight Directory Service. In this section, we want to continue the discussion by showing you how to create an AD LDS instance.
The concept of an instance is unique to AD LDS (as opposed to Active Directory). As mentioned in the previous section, a Windows 2008 server can configure multiple folders at the same time. Each of these directories is attributed to an instance.
Here you must assign a name to each created instance. The name you choose will be used as a mechanism to identify instances on the server.
In addition to assigning a name to an instance, you must also assign the port number to it. Typically, LDAP communication takes place on port 389 and SSL encrypted LDAP communication will take place on port 636. You can use these ports for AD LDS, but only if you do not install Active Directory Directory Services. server.
One thing to note here is that each AD LDS instance requires a single port. This is obviously true when there are multiple AD LDS instances present on the same server. However, in case there is a dedicated server for an AD LDS instance, then an instance will be able to use ports 389 and 636 (assuming the server does not work as a domain controller).
Finally, each AD LDS instance will have a corresponding application directory partition. When creating an application directory partition, you will have to provide a name for it. The name you use may follow X.500 format or may be in FQDN format.
Above we explained what components are required for creating AD LDS instances, let us continue on and create such an AD LDS instance. Start the process by opening the Active Directory Lightweight Directory Services Setup Wizard. We can find this wizard shortcut on the server's Administrative Tools menu.
When the Active Directory Lightweight Directory Services Setup Wizard appears, click Next to bypass the Welcome screen. Here, we will see the screen similar to the one shown below in Figure 1, this window asks you to create a single instance or a copy of an existing instance.

Figure 1: Select the case to create a unique instance.
Click Next, and you will be asked to provide the name and description for the instance you are creating, as shown in Figure 2. To make it easier to verify, we use the default name (that's Instance1). However, during the actual deployment process, you should use a different name.
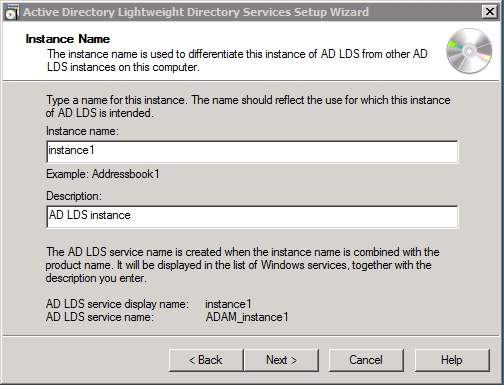
Figure 2: You must provide the name and description for your created Instance
When you click Next , you will be taken to the screen shown in Figure 3. As you can see in Figure 3, Windows defaults to using port 50,000 for LDAP communications with new instances and port 50,001 for LDAP communications. SSL encryption. You can change these ports (including 389 and 636) as long as the port is not used in the server and you do not plan to turn the server into a domain controller.
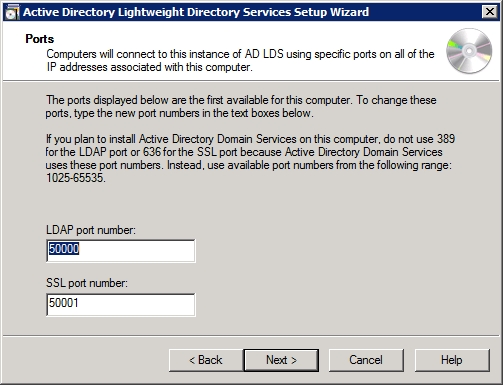
Figure 3: Windows defaults to using ports 50,000 and 50,001 for the new AD LDS instance.
Click Next, and you will see the screen shown in Figure 4. This window will ask if you want to create an application directory partition. The application partition directory here is basically a directory that you can use to store application data.
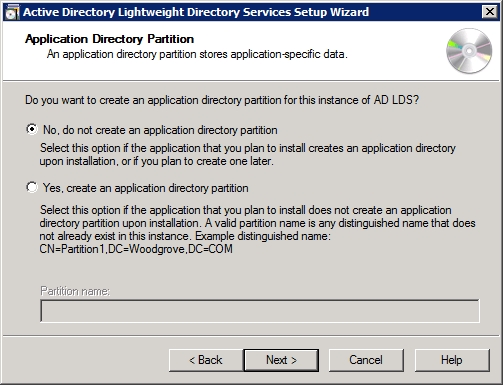
Figure 4: Continue and create an application directory partition
Because the whole point of creating an AD LDS instance is to allow application data to be stored in the directory partition, we need to select the option to create a new application directory partition. However, there are two situations where you may not want to create this partition. The first is that you don't want to, because you want to create it later. Another situation is that you plan to install the application to automatically create the partition when needed.
As I mentioned earlier, you must provide the name for the application directory partition. This is the name to distinguish between partitions.
Regardless of what type of name you choose, the important thing here is to put the right name in the first attempt to prevent errors.
After naming the computer, click Next, and you will be prompted to specify the path to save data files and data recovery files for the AD LDS instance. This wizard is shown in Figure 5, almost like setting up an Active Directory domain controller.
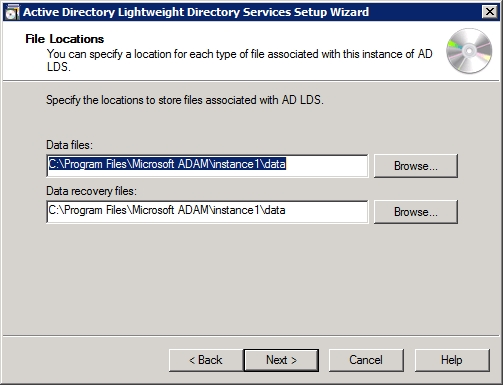
Figure 5: You must provide the path used for the AD LDS database
In an Active Directory environment, we can use the default path. However, when it comes to AD LDS, you may want to redirect data files and data recovery files to high-speed arrays or automatic failover arrays, which completely depends on how the AD LDS instance will how is used.
After providing the required path, click Next, and you will be prompted to provide a service account to use with the AD LDS instance. You can use the network service account or you can provide a domain service account. Clearly, servers can configure multiple AD LDS instances that are usually not domain members, so in some cases you may be required to use a network service account.
Click Next , and you will be prompted to specify the name of the user or group of users who can access administrative rights on the partition being created. By default, Windows will use the account you logged in to when you created the account, as shown in Figure 6, but it is better to specify another administrative group.
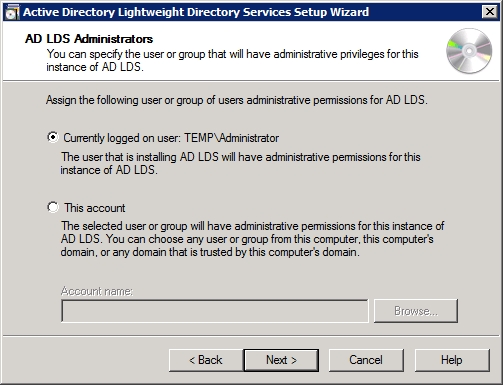
Figure 6: Specify the name of the user or group of users with administrative rights to the AD LDS instance.
After clicking Next , you will see a screen asking you to import the LDIF file. The LDIF files you choose will set up a schema for the instance. Here you are completely free to choose which LDIF file or combination of these files.
When you click Next , you will see a screen that summarizes the options you have selected throughout the wizard. Assume that everything appears to be exactly what you want, click Next, and then AD LDS instance will be created. When the process is complete, click Finish to close the wizard.
Conclude
In this section, we have shown you how to create an appropriate AD LDS instance and application data partition. In the next part 4, I will show you how to create a newly created partition copy.