Install WordPress on the server with Softaculous support application
In the following article, TipsMake.com will introduce you how to set up WordPress and work with just a few brief steps
QTM - Do you want to install WordPress on the server system in a simple and easy way? In the following article, TipsMake.com will introduce you how to set up WordPress and work with just a few brief steps .
One advantage of WordPress is to provide users with a free blog host account. And today, there are many webhosts that support many new features, allowing users to install and configure WordPress very simply. In the following example, we will guide you to install WordPress with cPanel with Softaculous (only applicable to hosts with Softaculous integration and support).
Softaculous demo version of driverdriver
Begin
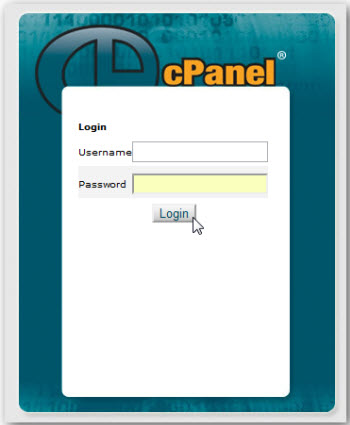
Login to the website admin page to start installing WordPress. Usually this path will be in the form of yourdomain.com/cpanel , depending on the host you are using:
After logging in, scroll down to the bottom of Software / Services and select Softaculous link :

Softaculous offers quite a number of popular web applications for blogs or personal websites, such as engines, wikis, photo management libraries, webmail clients . To install WordPress, click on the WordPress link on the side menu bar left:

The next page will show some brief information of WordPress, including ranking index, rating and feedback from the user community. Click on the Install link :

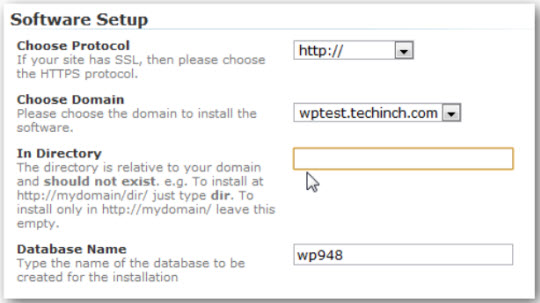
Next, fill in some information about your website. In default mode, Softaculous will automatically create the appropriate parameters, but you can still adjust it to suit your requirements. At the top of the page, select the domain to use for WordPress. In this article, we have installed WordPress on the http://techinch.com/ domain, so the rest is to check on one subdomain. Select the folder to install, if in default mode, WordPress will automatically install to yourdomain.com/wp . On the other hand, if you want yourdomain.com address to point straight to WordPress, leave this box blank:
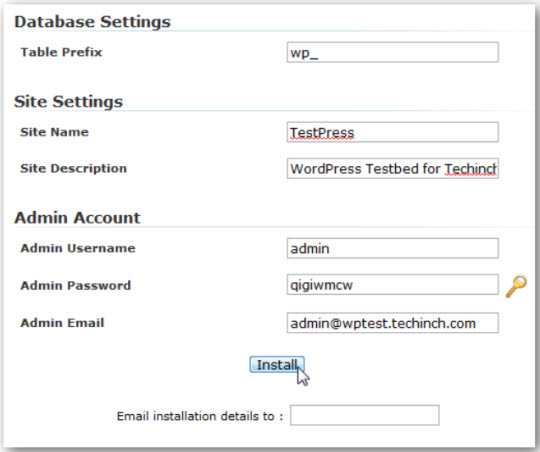
Declare the name and brief description of the website, as well as the administrator account login name, password and email address. If you need a more secure password, click the key icon and a randomly generated password string will automatically fill in the declaration box.
Wait a minute, you will see the WordPress notice board successfully installed on the system:
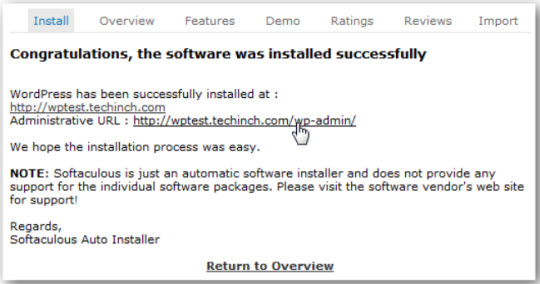
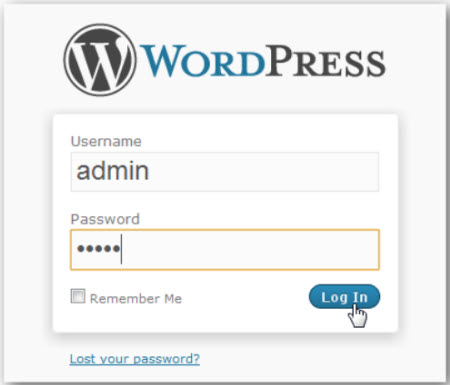
Click on that link to return to the main admin page of WordPress, or simply use the default path of yourdomain.com/wp-login.php . Login with the name and password declared above:
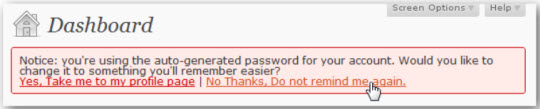
On the first login, WordPress will prompt you to change the password. If you use your own password, you do not need to change your password and choose No Thanks, Do not remind me again :
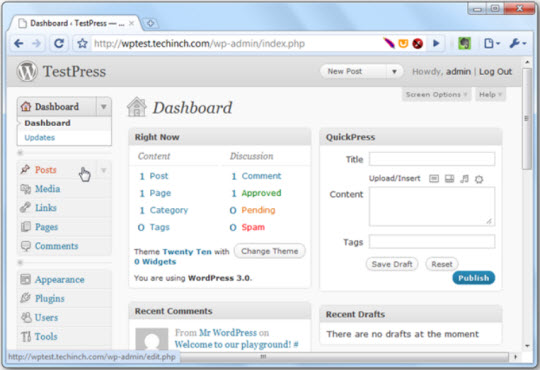
After that, you can perform operations such as adding articles, illustrations, changing theme mode . and many other components of WordPress directly from the WordPress Dashboard dashboard:
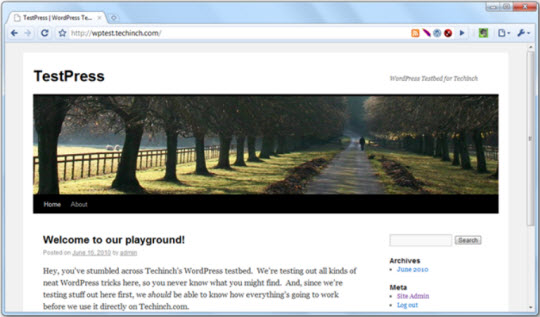
And here is the test page in this article:
After saving or deleting WordPress with Softaculous
Besides, Softaculous is also particularly helpful and powerful in maintaining Softaculous-based web applications. If you want to backup, restore or delete all WordPress, you can absolutely do with Softaculous control panel.
Login to cPanel and open Softaculous as above. Select the icon on the top right box:
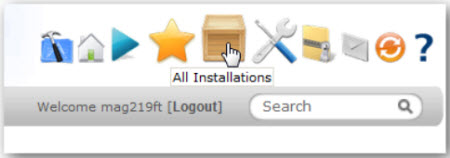
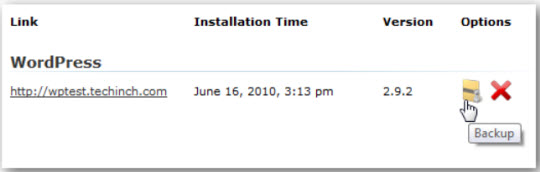
Here, you can see all installed applications, including specific time and version information, as well as direct links. Select the folder icon to back up or red slash to remove (this function will remove the entire selected application accordingly):
If you choose to back up, Softaculous will ask you if you want to back up folders, databases or both. Most users will usually choose both to ensure success. Select Backup Installation to confirm that you want to perform this process:
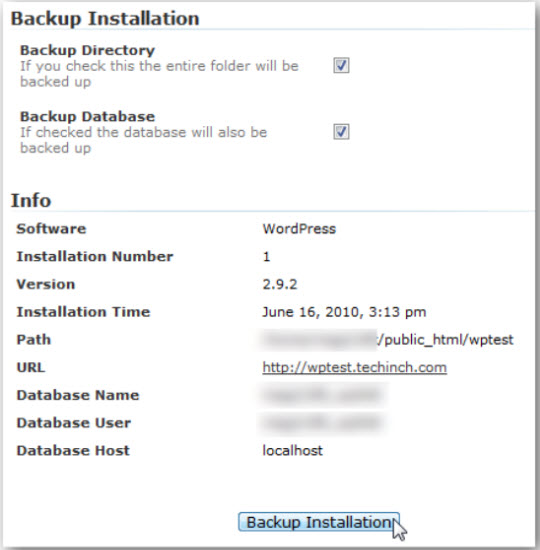
Choose Ok at the notice panel, and make sure you are opening the website while backing up:

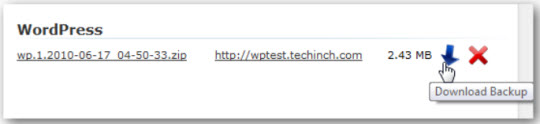
When the backup process is successful, Softaculous will display a notification for you. Select the Backups link to access the newly created backup file:

Select the green arrow icon to download the backup file to your computer, to delete this file from the server, click the red slash icon:
Good luck!
Was this article helpful?
Your feedback helps us improve.
Related Articles
 Instructions for installing WordPress on the Vitual Server with Cloud94 minutes read
 How to install WordPress locally on ServerPress4 minutes read
 How to install WordPress plugin6 minutes read
 Instructions for installing WordPress on Bluehost11 minutes read
 Instructions for installing WordPress on localhost - Part 15 minutes read
 Hackers break into WordPress servers2 minutes read
Reader Comments 0
Sign in with email or Google to join the discussion.