Table of Contents
This practical guide walks through 3 ways to restore chrome's browsing history, explains the main requirements, and highlights common issues that may appear along the way.
1. Use Google Activity
Step 1: First you access to Google Activity and select the item View item.

Step 2: You continue to choose the 3 dots as shown and other activities on Google.

Step 3: There will be a pop-up window you drag down the Chrome history section to review your browsing history.

2. Take advantage of Chrome's Restore Point feature
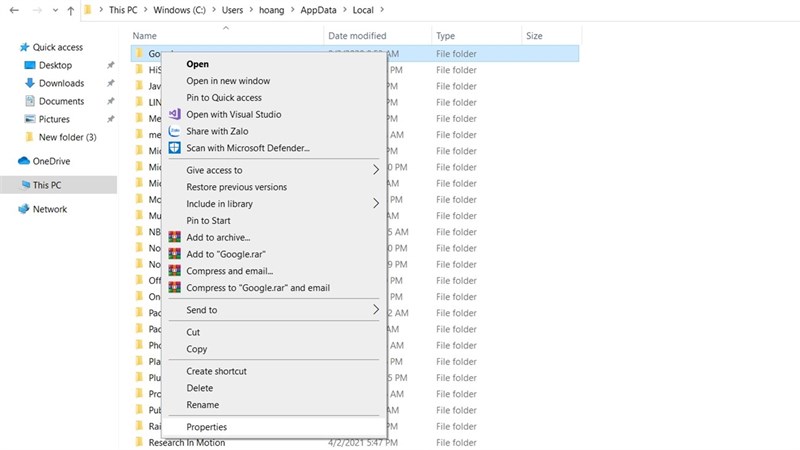
A feature quite familiar to you using Windows right. However, unlike Windows, this feature of Chrome will be completely automated. To be able to use the feature you access the following path: C: Users * username * AppDataLocal.
Step 1: Right-click on the Google Folder and select Properties.
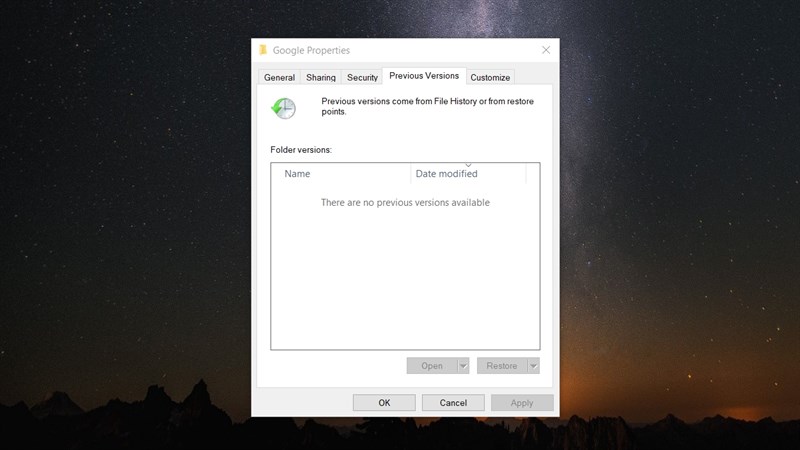
Step 2: Continue to choose the order: Previous Version> Restore with Restore.
3. Using Windows DNS cache
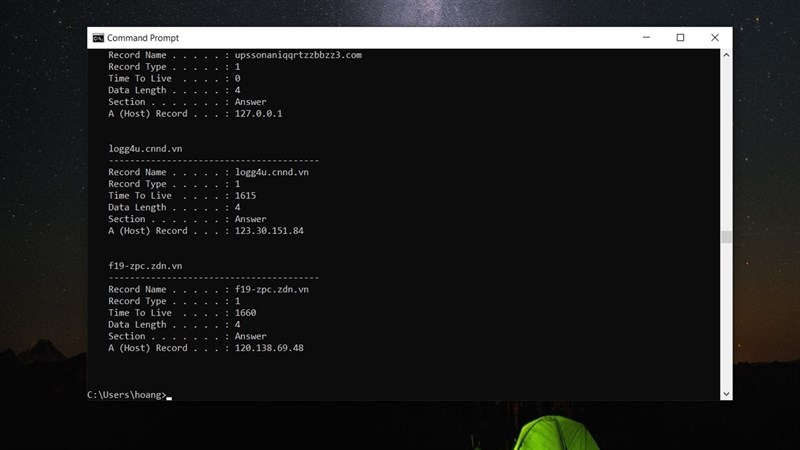
This is an interesting feature of Windows when you access a website, any system will change the domain name to the iP of that website. So even if you delete your browsing history, the DNS cache will still keep it all.
Note:
- The computer has not been restarted or shut down.
- Your computer must have an internet connection.
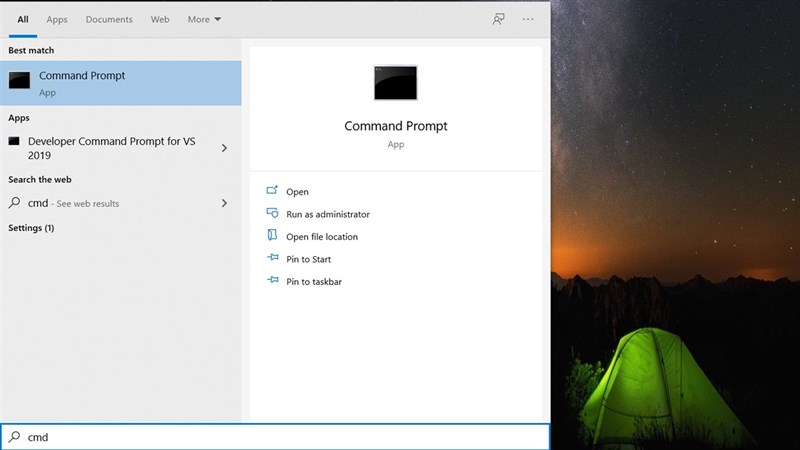
Step 1: Use the Windows search bar and call Command Prompt.
Step 2: Enter the command "ipconfig / displaydns" in cmd and press Enter.
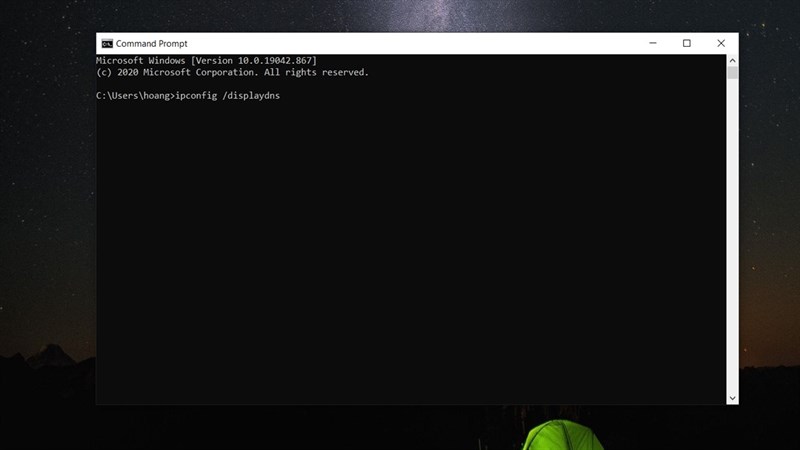
Step 3: Once completed, you will receive a list of the most recently visited websites.
So I have given you simple ways to recover the browsing history of Chrome browser on your computer. Hope this article is useful to you. Good luck.
Key Takeaways
Use the information above as a practical reference for 3 ways to restore chrome's browsing history. Review each step carefully, confirm any requirements, and choose the option that best fits your situation.
FAQ
What does this guide explain about 3 Ways to Restore Chrome's Browsing History?
It explains the main concepts, practical considerations, and useful steps related to 3 ways to restore chrome's browsing history without requiring advanced knowledge.
Who can benefit from learning about 3 Ways to Restore Chrome's Browsing History?
This information is useful for readers who want a clear overview, practical guidance, and reliable steps related to 3 ways to restore chrome's browsing history.
What should I check before applying this information?
Review the requirements, confirm that your device, software, or situation matches the instructions, and back up important data before making major changes.
Related Articles
 How to Recover Deleted Browsing History on Windows: Step-by-Step Guide5 minutes read
 How to Delete Browsing History on Ios93 minutes read
 How to Delete Browsing History on Chrome and Firefox5 minutes read
 How to Export Chrome Browsing History to HTML, CSV or TXT File3 minutes read
 How to Delete Browsing History on Coc Coc?3 minutes read
 Searching for Browsing History Has Been Deleted11 minutes read
Reader Comments 0
Sign in with email or Google to join the discussion.