Table of Contents
“Won't turn on” can describe three different failures: the laptop shows no signs of power, it powers on but the screen stays black, or it reaches the manufacturer logo but Windows does not load. Identify which stage fails before trying fixes. Start with the outlet, correct charger, peripherals, and a controlled power reset; do not open a sealed laptop or replace parts unless its service procedure and warranty allow it.
Stop immediately if the battery or case is swollen, there is liquid inside, the charger or port is burnt, the laptop smells unusual, or it becomes dangerously hot. Disconnect external power without pressing on a swollen battery and have the device serviced. Do not keep testing a wet or visibly damaged laptop.
Identify the symptom
| What happens after pressing Power? | Likely area to investigate |
|---|---|
| No lights, fan, sound, or charging indicator | Outlet, charger, USB-C power negotiation, DC jack, battery, or power circuitry |
| Lights or fan start, but the screen is black | Brightness, display panel/cable, memory, graphics, external display, or failed POST |
| Manufacturer logo appears, then an error or endless loading | Storage, Windows update, boot files, encryption recovery, or operating system |
| It starts briefly and shuts off | Power supply, battery, thermal protection, memory, board fault, or a shorted peripheral |
1. Check the charger and power source
- Disconnect docks, USB devices, memory cards, external displays, and network cables.
- Test the wall outlet with another device and bypass a suspect power strip.
- Inspect the charger, cable, connector, and laptop port for bends, looseness, debris, discoloration, or heat damage.
- Use the original charger or a manufacturer-approved replacement with the correct voltage, connector, and sufficient wattage.
- For USB-C charging, use a port that supports power input and a USB Power Delivery charger/cable rated for the laptop. A phone charger may fit but provide too little power.
- Leave a deeply discharged but otherwise normal battery connected to the correct charger for 20–30 minutes, then try once.

Watch for a charging LED and any blink pattern. Record the color and sequence; manufacturers often document diagnostic codes for memory, display, CPU, or power faults.
2. Perform a controlled power reset
A power reset clears residual controller state; it does not “calibrate” the battery or extend its lifespan.
- Disconnect the charger and every peripheral.
- If the laptop has a user-removable battery, remove it according to the model's manual. Do not pry open an internal battery compartment.
- Hold the Power button for about 20–30 seconds.
- Reconnect the charger without the removable battery and try to start the laptop.
- If it starts, shut it down normally, reinstall the battery, reconnect power, and test again.

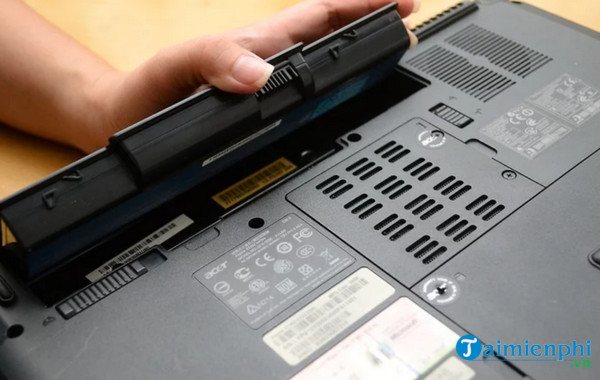
Some models have a documented emergency-reset pinhole or keyboard sequence. Use it only when the model's official manual identifies the control; a random hole could be a microphone or another component.
3. If the laptop powers on but shows no picture
- Increase brightness with the laptop's function key.
- Shine a flashlight across the panel. A very faint image can indicate a backlight or panel-power fault.
- Connect a known-good external display and use the laptop's display-switch shortcut.
- Listen for Windows sign-in sounds or accessibility prompts that suggest the OS loaded.
- If Windows appears to be running, press Windows + Ctrl + Shift + B once to request a graphics-driver reset.
- Observe whether moving the lid causes the image or backlight to flicker.
- Record any beep or LED code instead of repeatedly power-cycling.
If an external display works but the internal screen does not, the panel, cable, backlight, lid sensor, or related circuitry is more likely than Windows. If neither display works and the laptop fails POST, memory or motherboard diagnosis may be required. Use the broader laptop hardware test checklist after the machine can remain powered safely.
4. If the logo appears but Windows will not start
This is a boot problem, not a no-power problem. Photograph the exact message. Check whether BIOS/UEFI detects the internal SSD or HDD, but do not initialize, format, or clean a missing or unreadable drive.
- Remove nonessential external storage and restart once.
- If BitLocker asks for a recovery key, retrieve the correct key; do not erase the disk to bypass encryption.
- Use Windows Recovery Environment and try Startup Repair for a boot-file or update problem.
- If the drive is detected intermittently or SMART reports a critical condition, prioritize data recovery and replacement.
- If Windows starts only in Safe Mode, investigate a recent driver, application, or update.
Repeated automatic repair loops can come from storage failure as well as Windows corruption. Check the drive by following the HDD and SSD health guide before reinstalling.
5. Check a removable battery separately
On an older laptop with a user-removable battery:
- Try approved AC power with the battery removed.
- If it starts on AC only, shut down and reinstall the battery, then compare behavior.
- If it starts on battery but not AC, investigate the charger, port, or charging circuit.
This comparison does not prove a single component is faulty, but it gives a technician useful evidence. Never short battery contacts or use a charger not approved for the model.
When to arrange repair
Use the manufacturer or a qualified repair provider when:
- The correct charger and power reset produce no indicators.
- A port is loose, burnt, or requires pressure to work.
- The battery is swollen or the case is lifting.
- A documented LED or beep code indicates memory, CPU, graphics, or board failure.
- The laptop powers off under light load or becomes abnormally hot.
- The SSD is not consistently detected and valuable data is at risk.
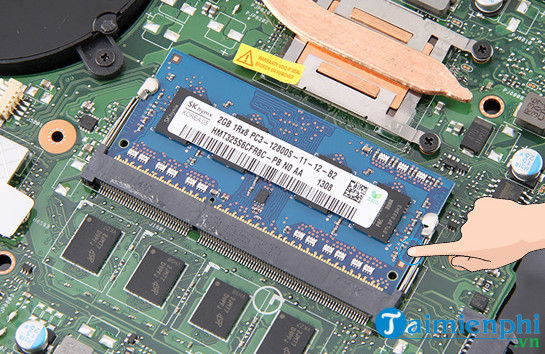
- The device is still under warranty or requires disassembly to reach the battery or RAM.
Provide the model and serial number, diagnostic code, charger wattage, whether an external display worked, and the exact point where startup stopped. Do not authorize a motherboard replacement until the shop has ruled out the charger, battery, display, storage, removable memory, and firmware—and ask how your data will be protected during service.
Related Articles
 How to Fold Laptop Screen Without Turning Off Win 104 minutes read
 How to Clean a Laptop Screen at Home5 minutes read
 The Simplest Guide to Turn on and Off Laptop Camera7 minutes read
 Is the Fan Screaming Loudly and Unusually Hot? How to Fix7 minutes read
 6 Ways to Fix Laptop Screen Not Turning8 minutes read
 The Computer Keeps Turning on and Off Without the Screen on, What Should I Do8 minutes read
Reader Comments 0
Sign in with email or Google to join the discussion.