Table of Contents
The easiest way to move to a new iPhone is Quick Start, which transfers directly from the old device or downloads a backup from iCloud during setup. A computer backup is useful when internet access is limited or you want a local restore point. Keep the old iPhone until you have verified the new one.
Before you start
- Update both iPhones if practical, and connect them to power and Wi-Fi.
- Turn on Bluetooth on the old iPhone.
- Know the old device passcode and Apple Account password.
- Create a fresh backup as a fallback.
- Check how the SIM or eSIM will move; carrier support varies.
- If the new iPhone is already set up, you must erase it to return to the Hello screen before using a full setup transfer.
Method 1: Quick Start
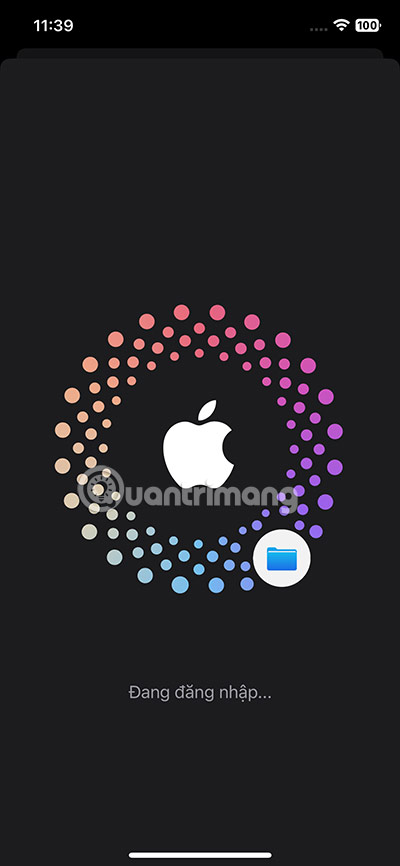
- Turn on the new iPhone and place it beside the unlocked old iPhone.
- When Set Up New iPhone appears on the old device, confirm the Apple Account and tap Continue.
- Use the old iPhone's camera to scan the animation on the new one. If the camera cannot be used, choose manual authentication.
- Enter the old iPhone passcode on the new iPhone and activate cellular service if prompted.
- Set up Face ID or Touch ID.
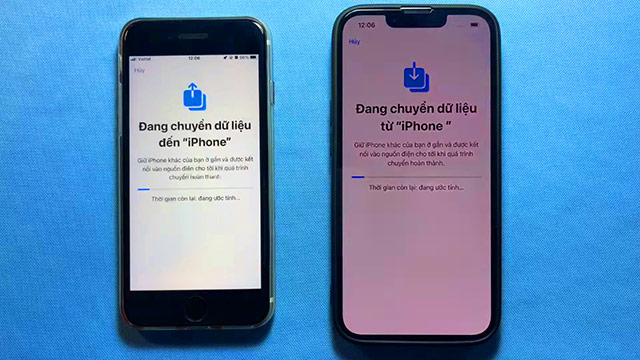
- At Transfer Your Data, choose direct transfer from iPhone or download from iCloud. Direct transfer keeps both devices occupied until it finishes; an iCloud download lets some apps and data continue downloading in the background.
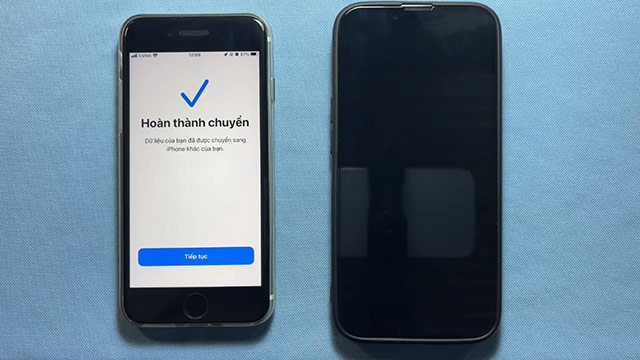
- Keep the phones near each other and connected to power until the transfer completes.
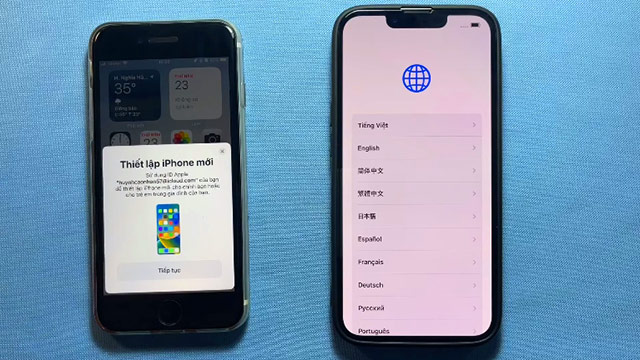
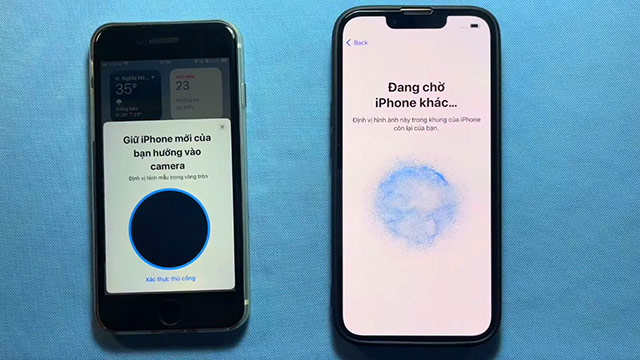
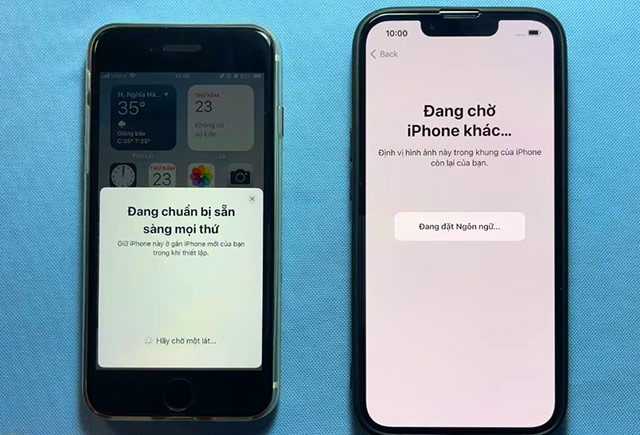
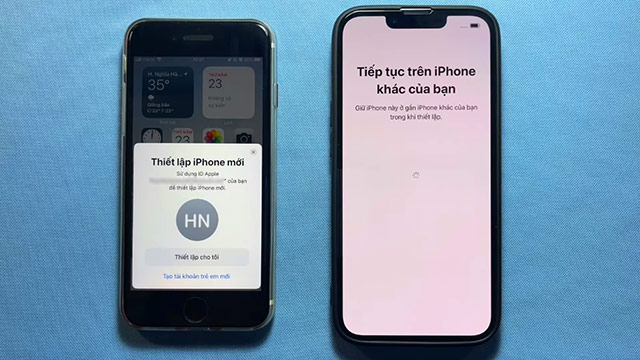
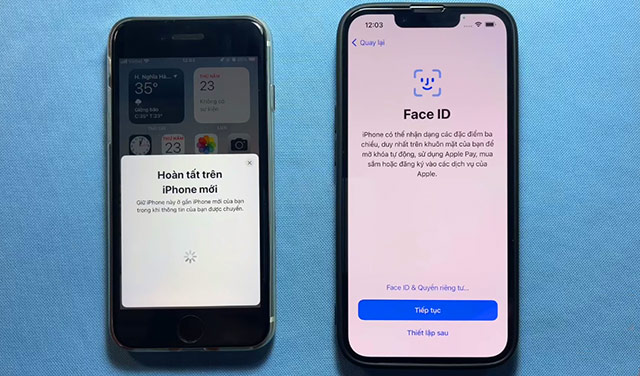
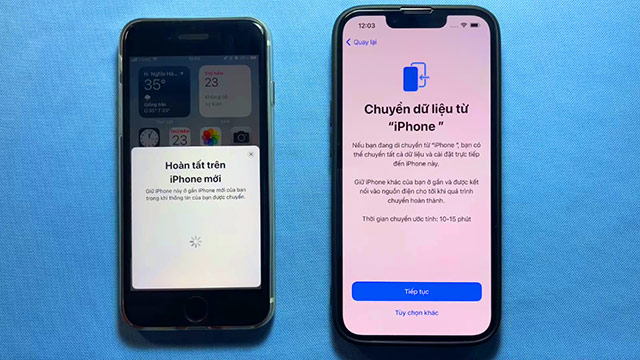
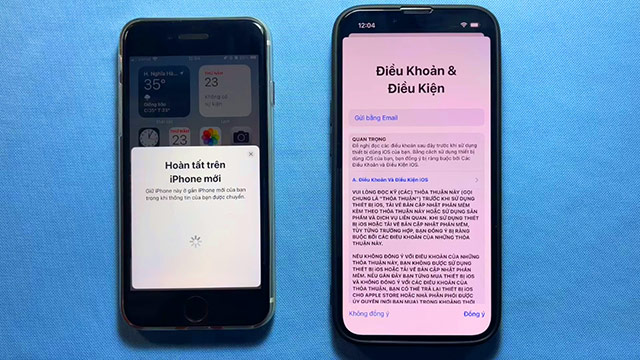
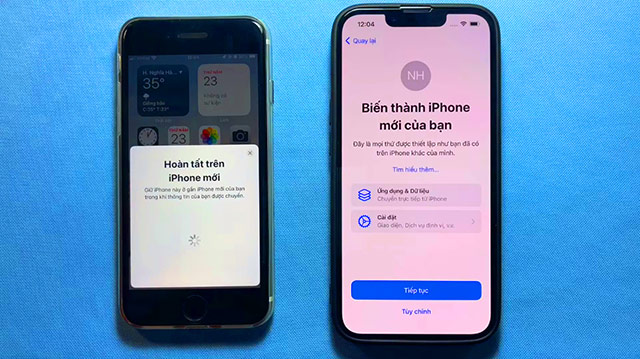
If the Quick Start prompt disappears, restart both devices and try again. Wireless transfer speed depends on data volume and the connection. Apple also supports a wired transfer with compatible adapters and cables.
Method 2: Restore from iCloud
Create a fresh backup
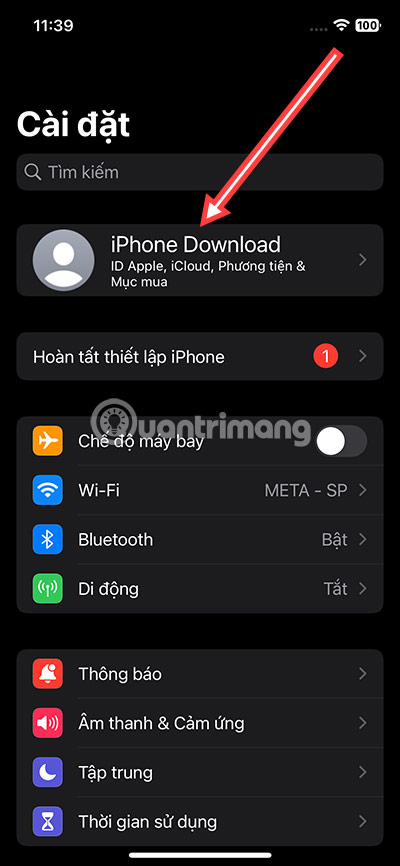
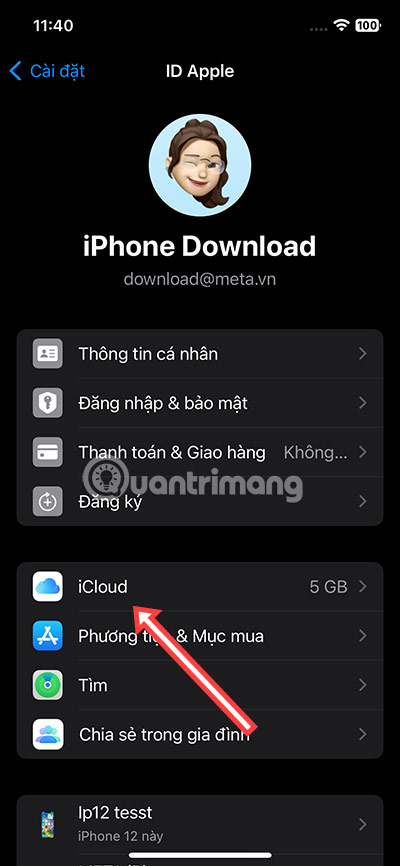
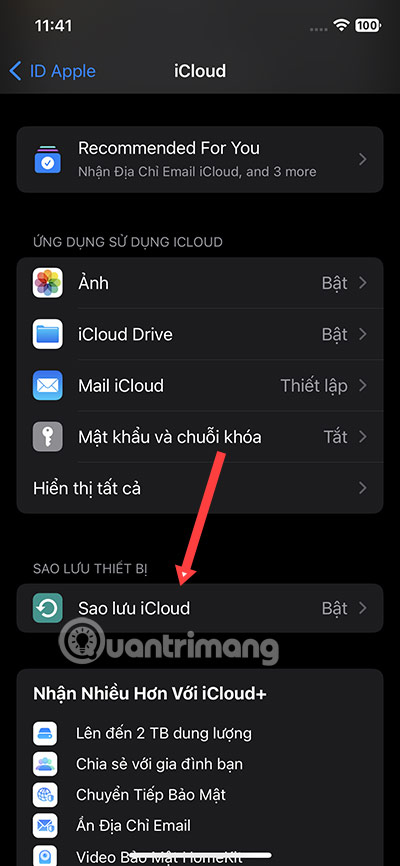
- On the old iPhone, open Settings > [your name] > iCloud > iCloud Backup.
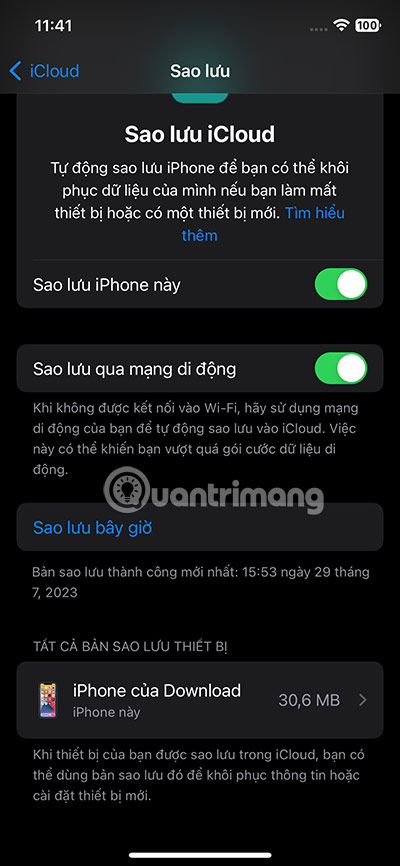
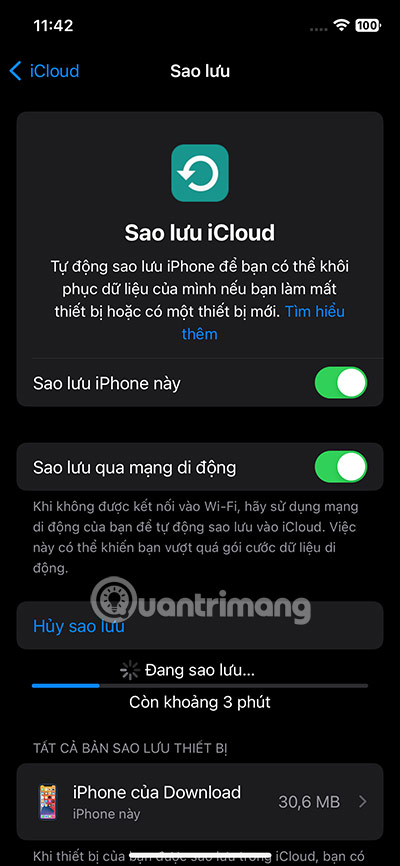
- Turn on Back Up This iPhone if desired, then tap Back Up Now.
- Stay connected to Wi-Fi until the backup finishes and verify the latest backup time.
Restore on the new iPhone
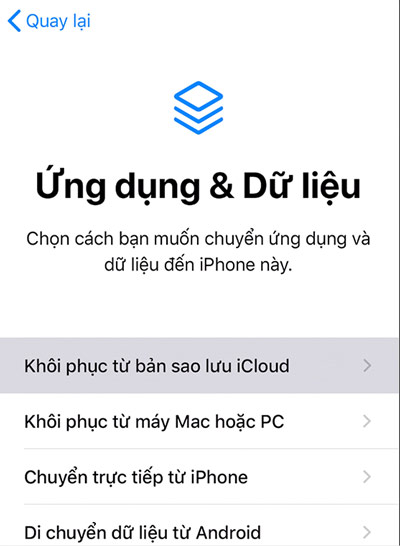
From the Hello screen, follow setup until Transfer Your Apps & Data, choose From iCloud Backup, sign in, and select the correct backup by date and size. Leave the phone on Wi-Fi and power while apps, photos, and other content continue downloading.
A new-device purchase may qualify for temporary iCloud storage if the existing plan is too small. Check Settings > General > Transfer or Reset iPhone > Get Started on the old device.
Method 3: Restore an encrypted computer backup
On a Mac, use Finder. On current Windows systems, use the Apple Devices app; iTunes remains relevant on older systems.
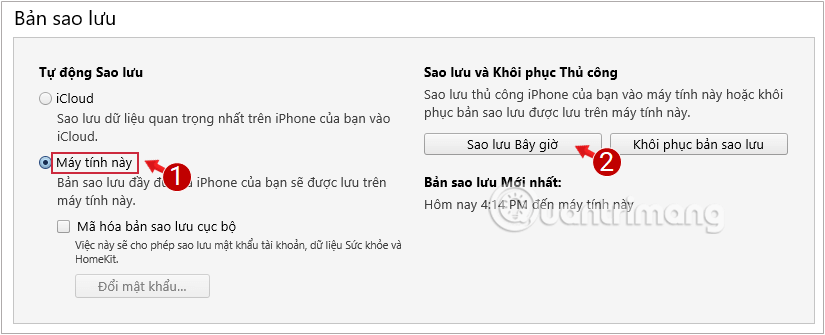
- Connect the old iPhone and select it in Finder, Apple Devices, or iTunes.
- Choose to back up all data to the computer.
- Enable Encrypt local backup if you need saved passwords, Health data, and Wi-Fi settings. Store the backup password safely; Apple cannot recover it for you.
- Select Back Up Now and wait for completion.
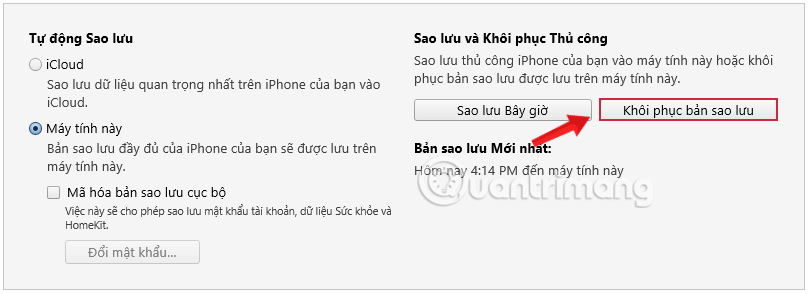
- Connect the new iPhone during setup, choose the computer-backup option, and select Restore Backup.
- Choose the correct backup by date and size and enter its encryption password if requested.
Transfer one contact instead of the whole phone
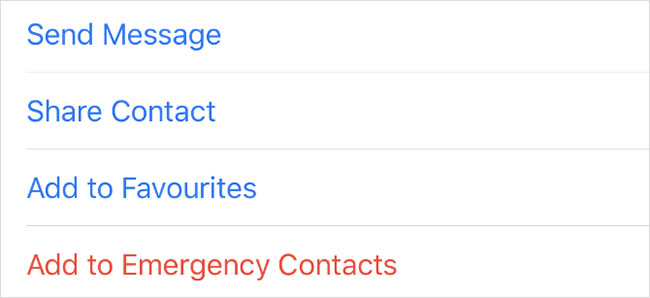
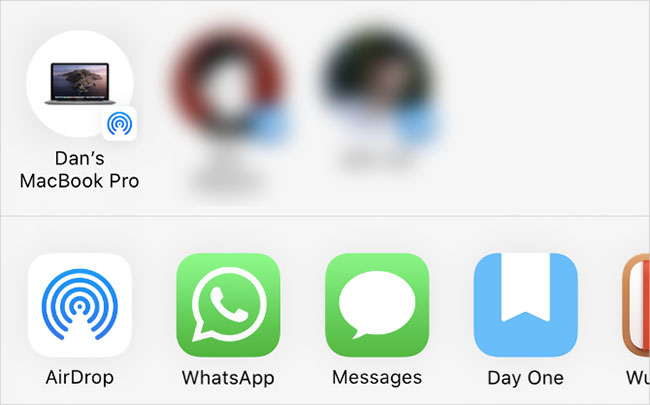
Open the contact in Contacts, tap Share Contact, select the fields to share, and use AirDrop, Messages, or Mail. Accept the item on the new iPhone and save it. For many contacts, syncing them through iCloud or the account that owns them is more reliable than sharing one by one.
Verify before erasing the old iPhone
- Make a call and test SMS, iMessage, and mobile data.
- Check photos, contacts, notes, messages, calendars, passwords, and Health data.
- Open important apps and reauthenticate banking, work, and authenticator apps as required.
- Pair Bluetooth accessories and transfer or re-pair Apple Watch.
- Wait for all downloads and photo syncing to finish.
Only after verification should you unpair Apple Watch, sign out where Apple instructs, and use Settings > General > Transfer or Reset iPhone > Erase All Content and Settings. If selling or giving away an eSIM iPhone, choose to erase the eSIM when prompted. See Apple's Quick Start guide and device handoff checklist for current steps.
For photos only, see ways to transfer photos between iPhones.
Related Articles
 How to Transfer Data from Old iPhone to New iPhone (iPhone X8 minutes read
 Ways to Transfer Android Data to iPhone6 minutes read
 How to Transfer Data from iPhone to Android?10 minutes read
 Ways to Transfer Contacts from iPhone to Android12 minutes read
 How to Transfer Data from Old iPhone to New iPhone with Anytrans8 minutes read
 How to Transfer Data from Old iPhone to New iPhone, Images7 minutes read
Reader Comments 0
Sign in with email or Google to join the discussion.