The most detailed steps to assemble a computer with a monitor
You need to connect your newly purchased PC to a monitor but don't know how? Refer to the most detailed steps to install a computer with a monitor.
Table of Contents
You need to connect your newly purchased PC to a monitor but don't know how? Join TipsMake to refer to the most detailed steps to install a computer with a monitor through the following article. As well as learn about the types of connection ports on the computer monitor so you can use it most conveniently.
Types of ports connecting monitors to computers
Learn about the types of monitor connection ports to accurately identify the port types, which will make it easier to assemble the computer case with the monitor.
VGA (Video Graphics Array)
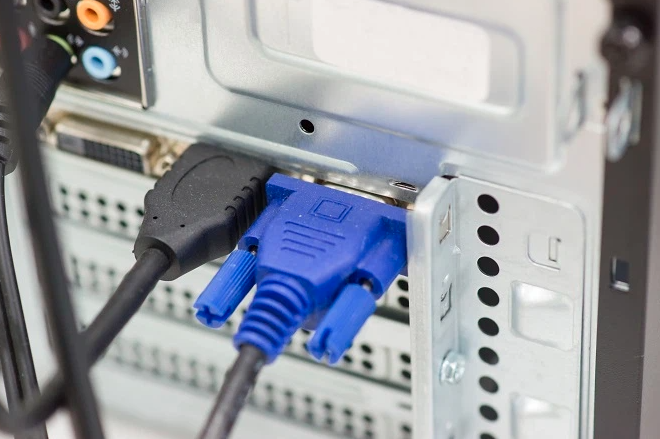
First of all, we have to mention VGA : This is a very popular port to connect many devices. And the characteristic of this VGA port is that it has 15 round holes and 2 locking screws.
DVI port
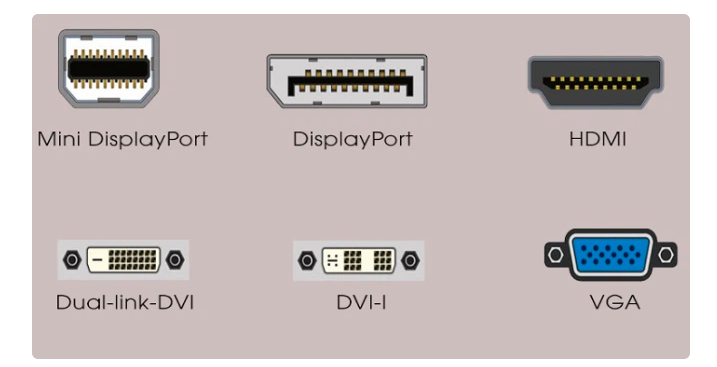
DVI (Digital Video Interface): This is a very popular type of monitor connection port. In particular, the port is responsible for transmitting signals between the CPU and the monitor to help transmit uncompressed image and video signals. In addition, the DVI port supports Analog and digital. There are 3 types of DVI connection ports: DVI-D, DVI-A and DVI-I.
- DVI-D: The DVI-D connector is for digital. The single-link connector has 19 pins and the dual-link connector has 25 pins.
- DVI-A: DVI Analog connection port is used to transmit signals in Analog form. Includes 17 pins and does not support Dual-Link.
- DVI-I: This is a type of connection port that can support both Analog and Digital. With this type of connection port, you can flexibly convert to suit your needs. Because it supports both, the DVI-I connector has more pins than DVI-D.
HDMI
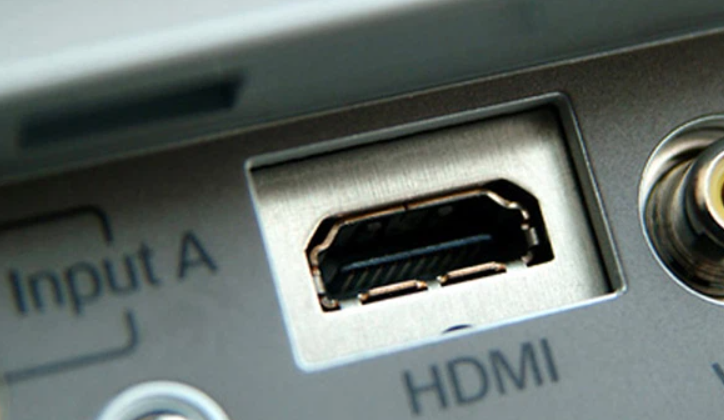
HDMI is an audio and video connection port that transmits data without compression, ensuring high resolution. This type of connection port has 6 sides and has the word HDMI . Compared to the two DVI and VGA ports, the HDMI port is rated higher. Currently, there are three popular HDMI standards: HDMI 1.4, HDMI 2.0 and HDMI 2.1.
DisplayPort
DisplayPort is a type of connection that can transmit high-quality image and video data from the source to display devices such as laptop screens, computers, TVs, etc. The identifying feature of DisplayPort is that it has 20 small pins.

This type of connection port, in addition to the main standard, also has two smaller standards: Mini DisplayPort and Thunderbolt. These two smaller standards will be recognized through the icon. In which, Thunderbolt is the lightning symbol, and Mini DisplayPort is the screen symbol.
Instructions for assembling a computer case with a monitor
Step 1: Prepare the connection wire.
Prepare the connection cable after determining the type of connection port, monitor, computer. Usually the manufacturer's monitor will come with a cable in the box. If you do not have a suitable cable, you can buy an additional suitable cable or use the most suitable converter ports.
Step 2: Plug the monitor signal cable into the computer
And once you have the connection cable, you need to determine the location of the connection port on the screen and on the PC case. Then, just plug the 2 ends of the cable into these 2 connection ports.
Note: When plugging in, make sure to plug in the correct direction, with the correct pin, with gentle, slow movements. Avoid plugging in the wrong direction, or plugging in forcefully, which can cause the connection head or connection ports to break, snap, etc.
Step 3: Check and install the screen
After you have plugged in the wires, you need to check everything again to see if the wires are correct and the connection port is securely plugged in. If the way you assemble the computer case with the monitor is correct, when you open the PC, you can completely install the monitor and start using it.
Screen installation steps:
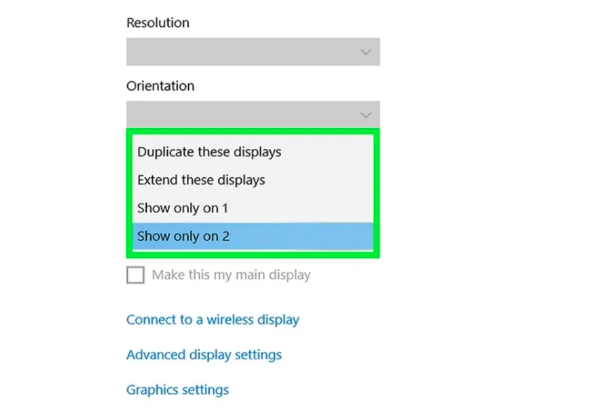
- For Windows computers: First open Settings from the Start menu > Select Settings > System > Display > Multiple displays.
- For MacBook: Go to the Apple icon in the top left corner > Select System Preferences > Displays > Display > select Scaled > Select the appropriate resolution.

Above is the most detailed way to install a computer case with a monitor and TipsMake shares. Hopefully the article will provide useful information to you, helping you to connect your computer case with your monitor in the fastest way.
Was this article helpful?
Your feedback helps us improve.
Related Articles
 Instructions on how to build a computer at home simply and quickly11 minutes read
 How to buy a computer monitor that suits your needs.6 minutes read
 The best online tools to help you assemble and build your computer4 minutes read
 7 Smart Ways to Use Your Monitor Without a Computer6 minutes read
 Experience choosing to buy the best computer monitor23 minutes read
 Instructions on how to assemble a PC in the simplest way9 minutes read
Reader Comments 0
Sign in with email or Google to join the discussion.