The easiest way to install and use Bluestacks X, 5, and 4.
This guide to installing Bluestacks X, 5, and 4 on Windows computers is for those looking for a stable solution to run Android applications, saving time on manual installation and enjoying smooth performance..
Table of Contents
1. System Requirements
2. Download, Installation, and Usage Guide
3. Tips for Optimizing Your Experience
4. Common Errors and How to Fix Them
Before downloading and installing, you need to check your computer's specifications to see if it meets the software's requirements. Checking your system requirements is simple: just press the Windows+R key combination, type dxdiag , and press Enter .

Instructions on how to download, install, and use BlueStacks
1. Installation and usage
Step 1: First, you need to download the latest version of BlueStacks X here.
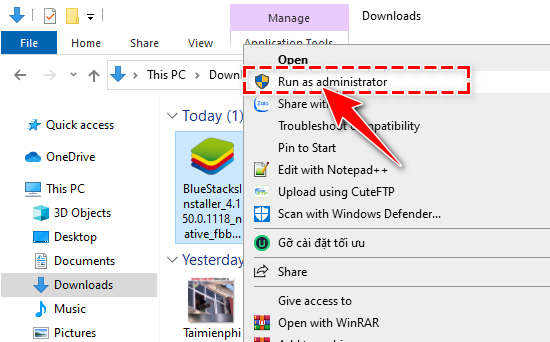
Step 2: After downloading, right-click on the .exe file and select "Run as administrator" to open it with administrator privileges.
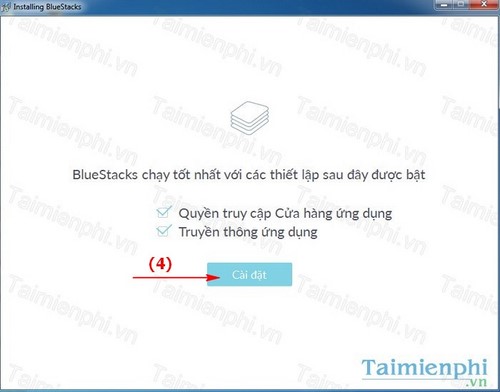
Step 3: In the installation interface, you can choose to customize the save location for the installer (click " Change ") or leave it as default, then select "Install".
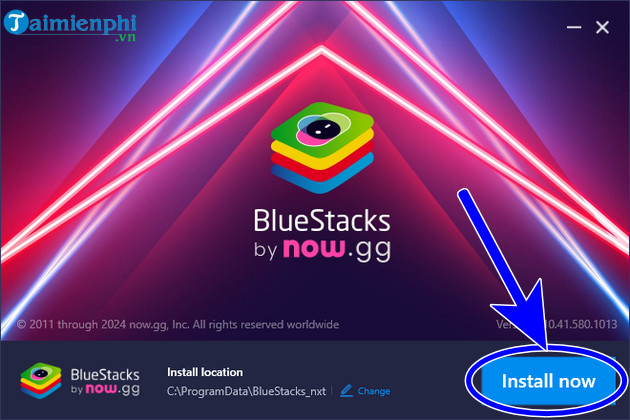
- If you choose Change , then select where to save the installer and then click Install Now.
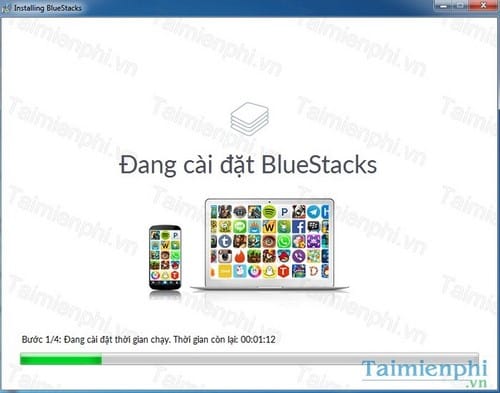
The system will automatically download and install BlueStacks X on your computer.
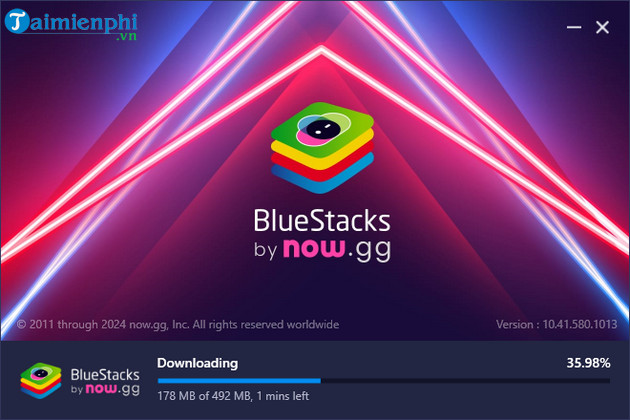
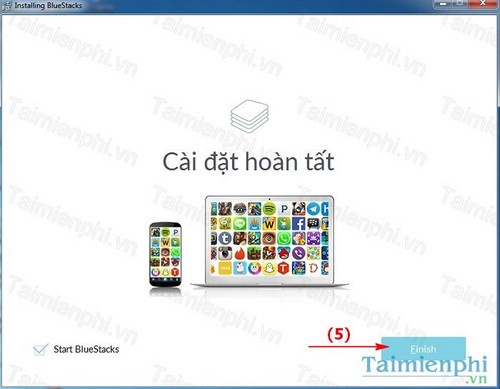
- The installation process will take a few minutes. Once complete, BlueStacks X will automatically start; keep selecting Next .
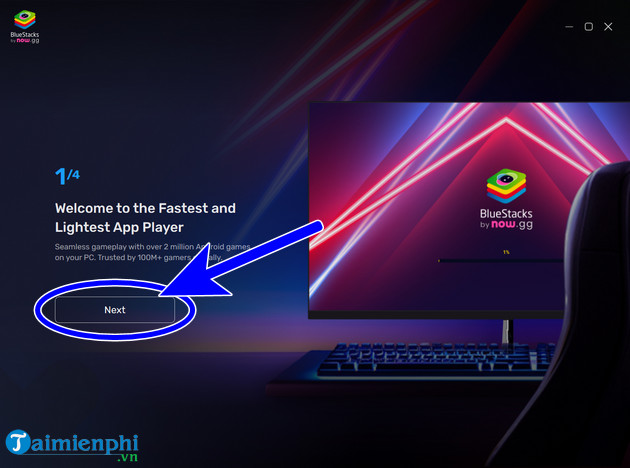
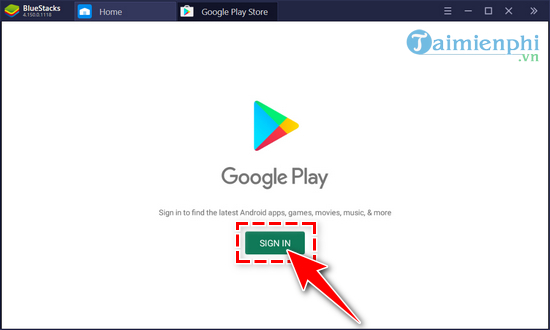
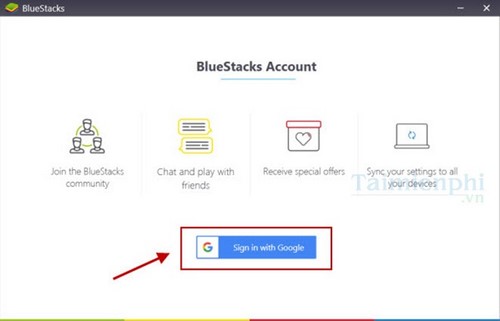
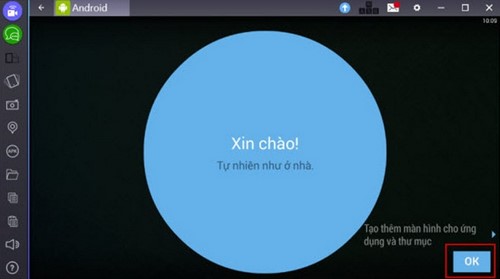
Step 4: The interface will look like the one below. Search for the game or app on CHPlay (Google Play Store)
- Log in to your Google account if prompted.
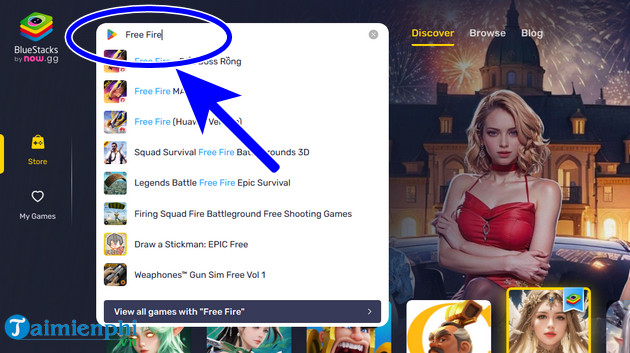
- Then select Install from Google Play
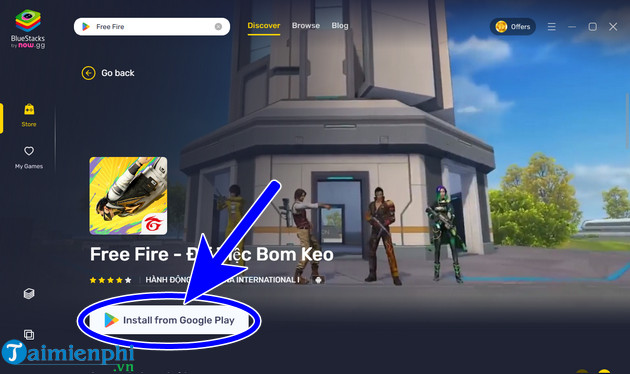
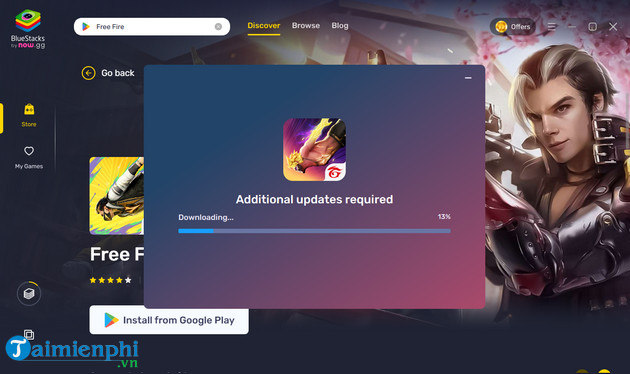
- The system will automatically install the app or game; once it's finished, it will open automatically, and then you can simply use it.
2. Installing and using BlueStacks 5
Step 1: Access the link and download the latest version of BlueStacks 5 here.
Step 2: Right- click on the file, select Run as administrator => select Runs , and click Yes if a message appears.

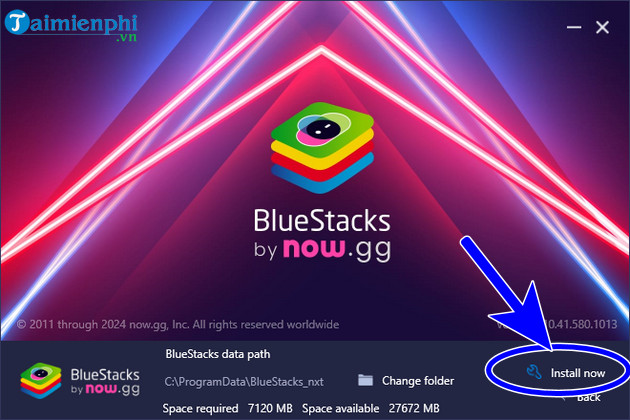
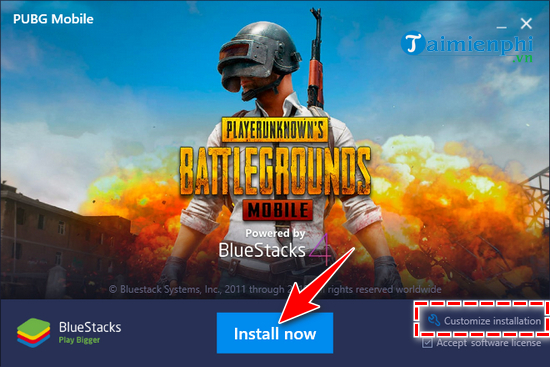
Step 3: On the initial screen, click " Install now" to install it on your computer. The default installation folder is located at C:ProgramDataBlueStacks_nxt .

- Alternatively, you can click on Customize installation in the far right corner to reset the installation folder location, then click Install now .

- The system will download and install automatically immediately; you don't need to perform any further actions.

Step 4: After the installation is complete, the system will automatically open the software; press Play Store .

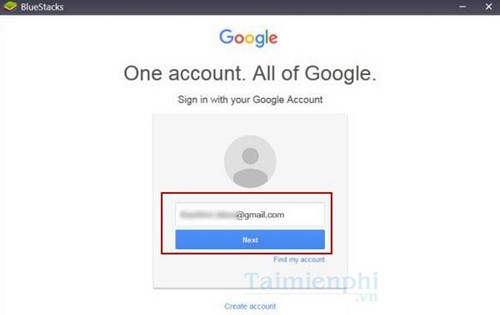
Step 5: Click Sign In , enter your Gmail account address , and then click Next .

3. Installing and using BlueStacks 4
Step 1: Similarly, you first need to download BlueStacks 4 from here to install it.
Step 2: Right-click on the downloaded .exe file and select Run as administrator.
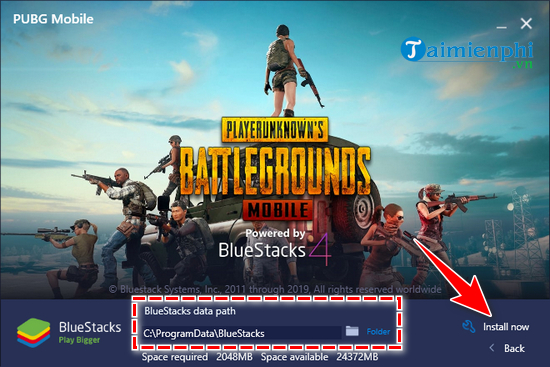
Step 3: In the installation interface that appears, click " Install now" . The system will automatically install it to the default folder " C:ProgramDataBlueStacks"
- or you can click "Customize installation" next to it to change the folder where it will be stored.
- Set the installation location for BlueStacks , then click Install.
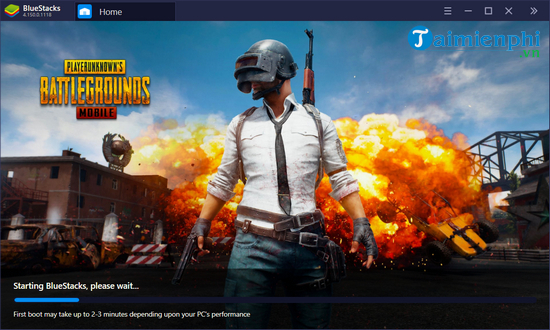
Please wait for 1 to 3 minutes while the system automatically installs on your device.
- Then open BlueStacks and select Google Play Store => press Sign in to log in immediately.
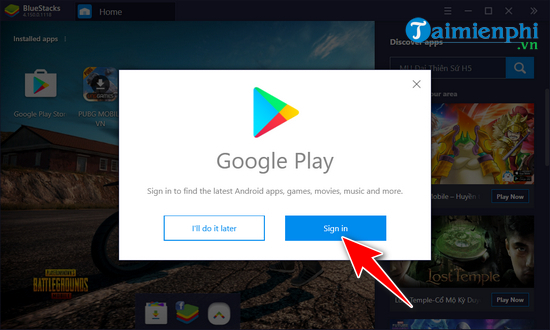
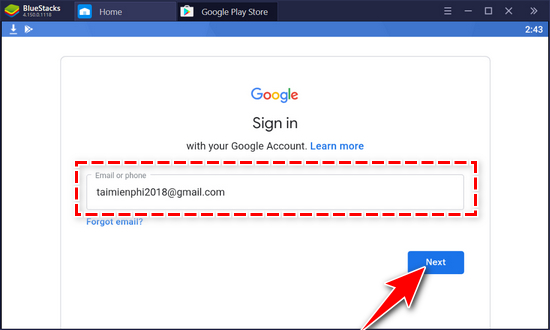
Step 4: The Google Play Store window will appear; select SIGN IN.
Step 5: Enter your Gmail account and then click Next .
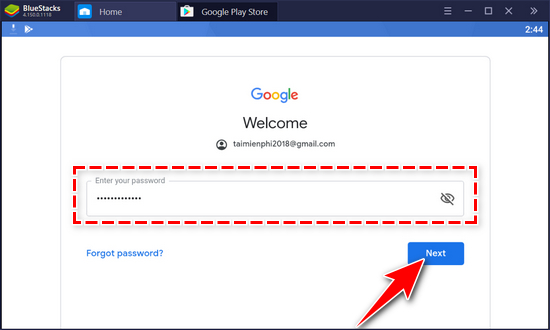
- Continue by entering your Gmail account password , then select Next .
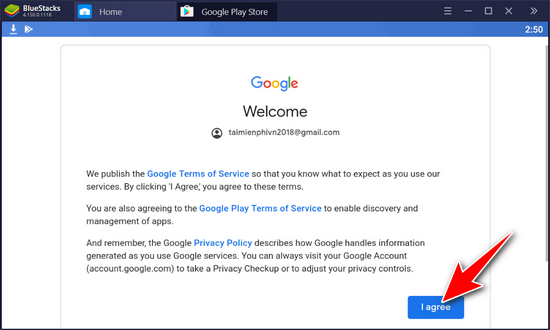
- Click "I Agree" to accept Google's terms of service.
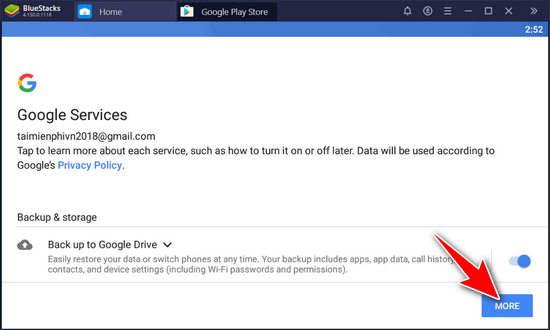
- In the Google services window, select More .
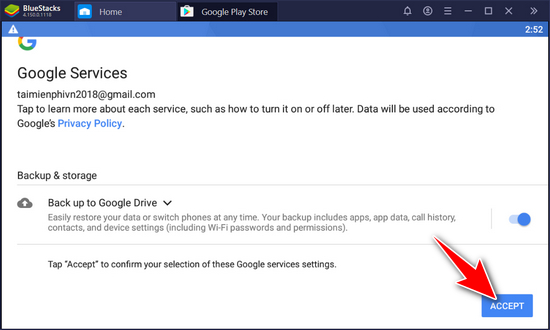
- Another option will appear; please click Accept .
4. Installing and using BlueStacks 3
Step 1: Download the BlueStacks 3 installer to your computer.
Step 2: After downloading, double-click the .exe file to begin the installation.
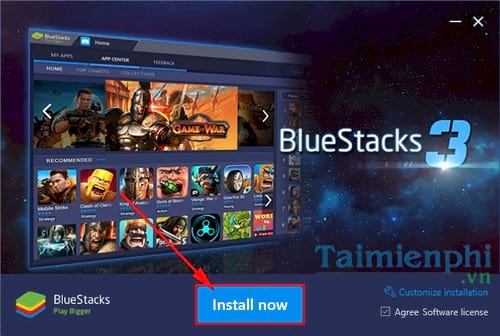
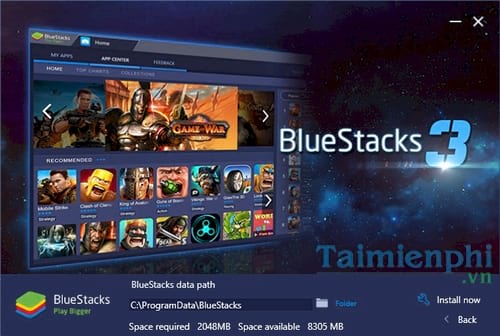
Step 3: The installation interface will appear; click " Install now" to begin the installation.
Alternatively, you can click on Customize installation to change the installation path to ensure you have the required 2GB (2048MB) of free space. The default path is C:ProgramDataBlueStacks
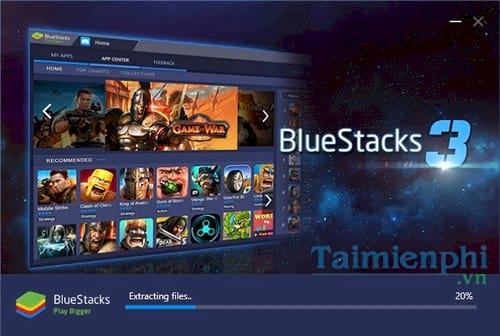
Step 4: Wait a few minutes for the software to automatically install on your computer. The installation speed may vary depending on your computer's configuration.
Step 5: After the installation is complete, simply click the white arrow button to familiarize yourself with the useful new features on BlueStacks 3.
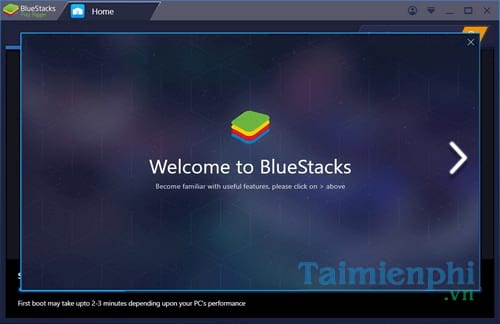
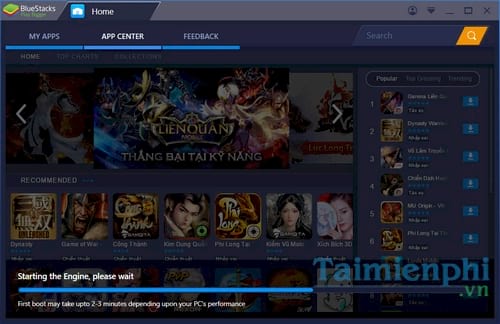
Wait a few minutes for the program to start up and begin your first session.
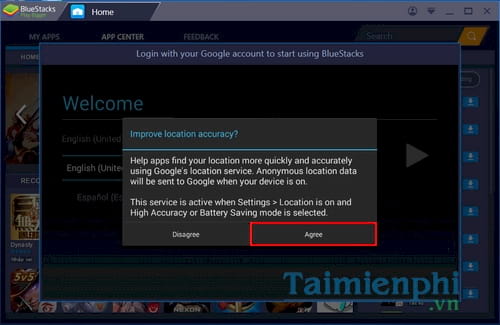
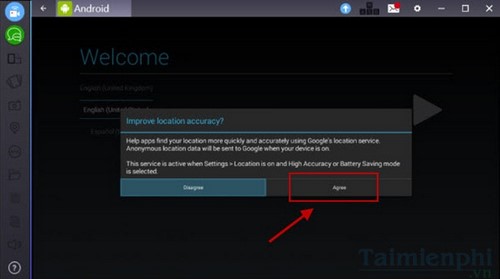
Step 6: Upon first launch, the system will prompt you to enable location services to determine your location and preferred application region, helping you download applications more accurately. Press Agree to continue.
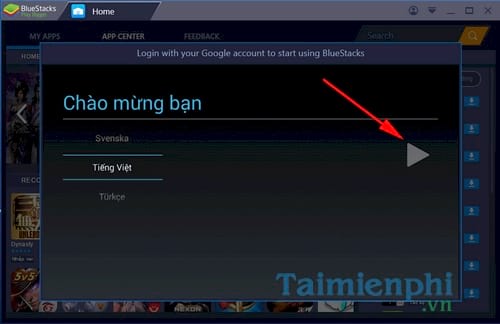
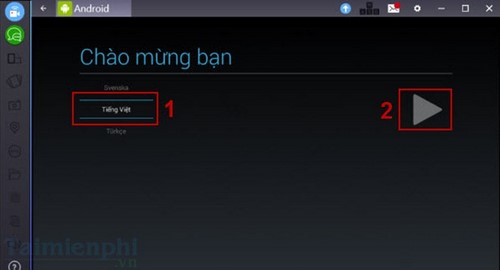
Step 7: Next, click the arrow icon after you have selected the language pack for the software. Here, I chose Vietnamese .
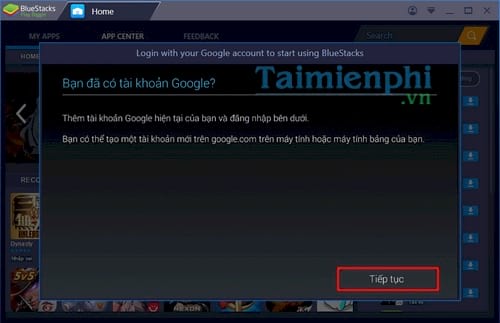
Step 8: The first time you run it, the system will ask you to provide your Google account to use the Google Play Store. Click Continue to proceed to the next step.
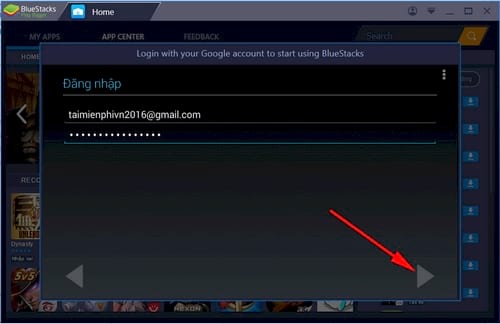
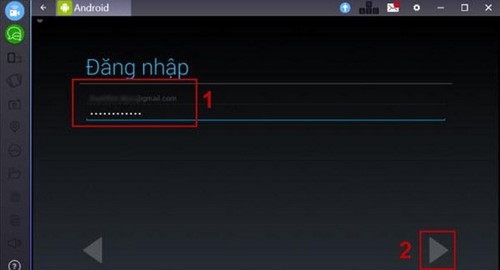
Step 9: Enter your Gmail account information and password, then click the arrow icon.
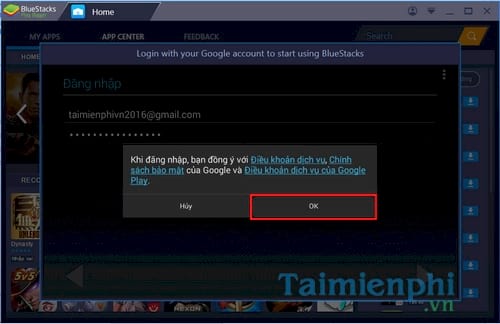
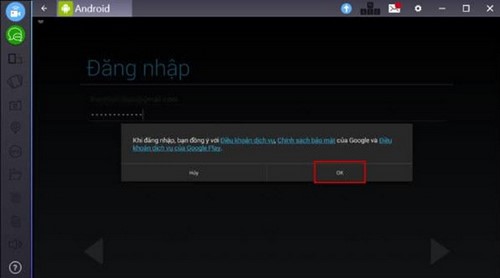
Step 10: Click OK to agree to the terms of use.
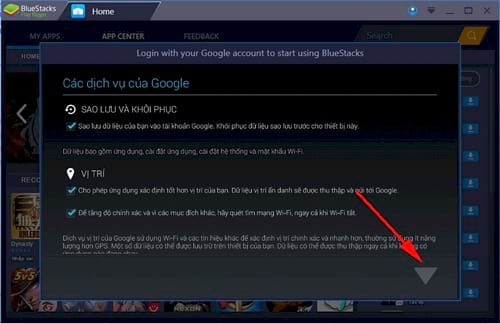
- Confirm Google services, then press the arrow key to proceed to the next step.
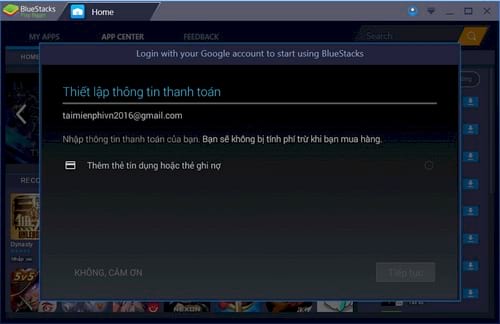
- Set up your payment account information so you can purchase paid apps online. If you don't need to and only want to download free apps, you can click " No, thank you ".
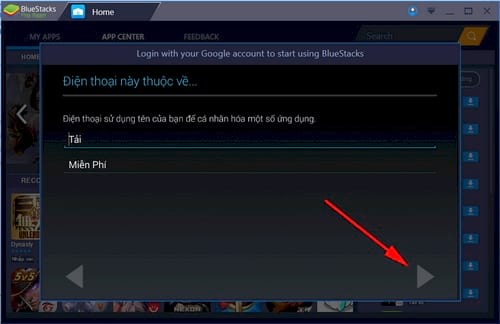
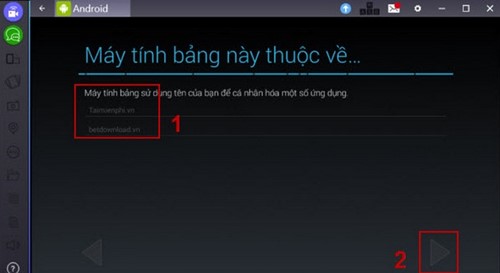
- Set the display name of the device
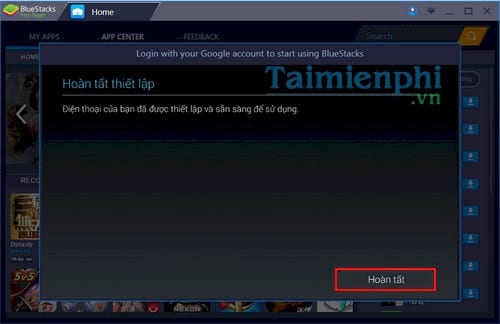
Finally, click " Complete" to finish the setup and start using the device.
5. Installing and using BlueStacks 2
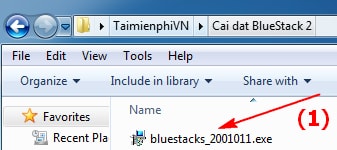
Step 1: First, you need to download the standard version of BlueStacks 2 here.
Step 2: Access the folder containing the downloaded BlueStacks 2 file and double-click the .exe file to install it.
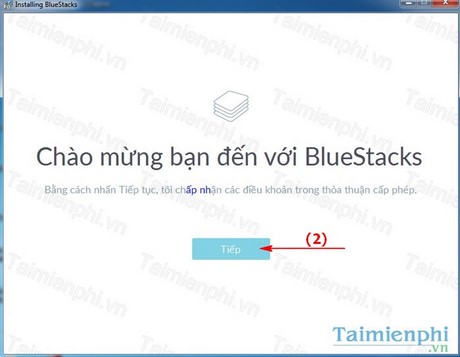
Step 3: Select Continue
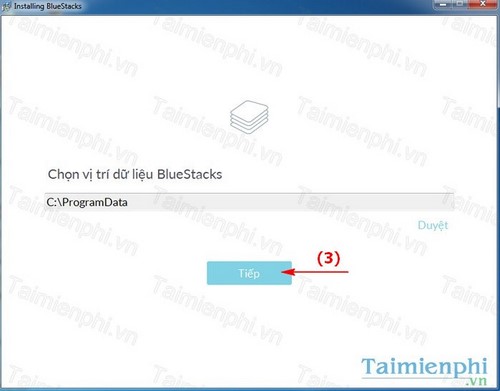
Step 4: Select the folder to save the data and select Next.
Step 5: Select Setup
Please wait a few minutes for the software to automatically install on your PC.
Step 6: Check the box next to "Start BlueStacks" and select "Finish" to open the program immediately, or uncheck the box to open it later.
- When you run the application for the first time, you need to sign in with your Google account. Click Sign in with Google .
- Enter your Gmail information and log in to Gmail.
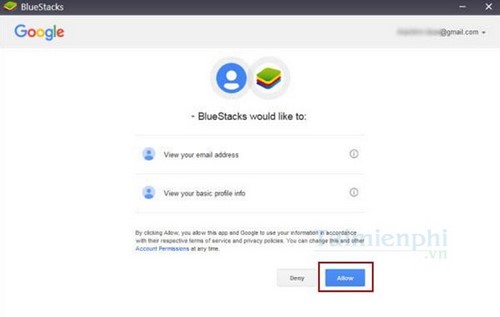
- After successfully logging in, click Allow to grant access.
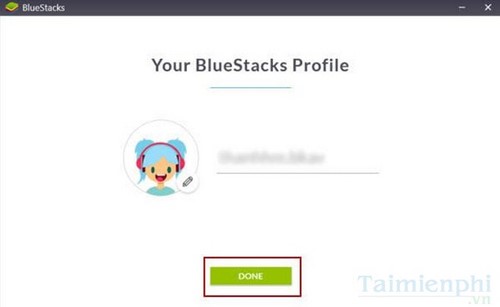
- Enter your Profile information and then click Done
- Continue by pressing Agree on the next screen.
- Select Vietnamese again if you want to use Vietnamese, then click the triangle icon.
- Click Continue to log in to your Google account.

- Re-enter your email and password, then click the triangle icon as shown in the illustration.
- Click OK to agree to the terms of use.
- Set the display name
- You'll be ready to use BlueStack shortly after.
Some tips to optimize the user experience.
- Maximize RAM: Open BlueStacks, click the "settings" (gear icon) in the sidebar, select the "Performance" tab, and adjust the RAM slider to a higher level (ideally 4GB or more if your computer has enough RAM).
- Reduce window size: Running the software in a smaller window will help reduce the load on the system. You can adjust the window size in the display settings.
- Turn off your antivirus program: Some antivirus software can slow down BlueStacks. Temporarily disable them while playing games to improve performance.
- Choose power saving mode: Use Eco mode in the settings to reduce CPU and GPU usage, helping your computer run more smoothly. This mode is especially useful when you are running multiple applications or games at the same time.
- FPS Lock: Adjusts the FPS according to your monitor's refresh rate to reduce lag. You can find this option in BlueStacks' graphics settings.
- Customize resolution and graphics settings: Reduce the resolution and graphics settings in BlueStacks' settings menu to optimize performance. Select "Engine" in the settings menu and adjust the parameters to suit your computer's configuration.
- Set up keyboard shortcuts: Customize keyboard shortcuts for in-game actions to increase reaction speed. You can go to the "Controls" section in the settings to set up shortcuts as you wish.
- Gamepad connection: Use a gamepad for a better gaming experience, especially with action games. BlueStacks supports many different types of gamepads, making it easy to connect and use them.
Common errors and how to fix them
- BlueStacks startup error:
+ Check if your computer meets the required specifications and update your graphics driver to the latest version.
- How to fix the problem if the application fails to load:
+ Ensure a stable internet connection and try restarting BlueStacks or your computer.
- Software update instructions:
+ Open BlueStacks and go to settings to check for the latest update. If available, follow the instructions to update.
One of the most common errors is the "25000" error. The 25000 error occurs because you haven't installed the correct driver for your computer or your graphics card driver is incompatible. Fixing the 25000 error when installing Bluestacks is quite simple; you just need to scan for missing drivers on your computer and update them.
Hopefully, this guide on installing and using Bluestacks X, 5, and 4 on your computer will help you run Android applications smoothly and save time. If you need more tips on lightweight Android emulators, feel free to visit Free Downloads anytime.