Table of Contents
This guide provides a clear, practical overview of steps to install and setup rider: powerful c#, .net, with useful context, important details, and straightforward takeaways for everyday readers.
However, if you are coding Java like me and want to switch to learning or coding C#, it will take time to get used to Microsoft's toolkit.
That's why in this article, I will install Rider - a tool (IDE) developed by JetBrain which is also the company that owns a series of famous software such as IntelliJ Idea, WebStorm .
Rider is designed for programming C# and C#-related technologies, so it will be very suitable for those who want to learn and use this programming language.
#first. How to install Rider
+ Step 1: First, you download the installation file here.
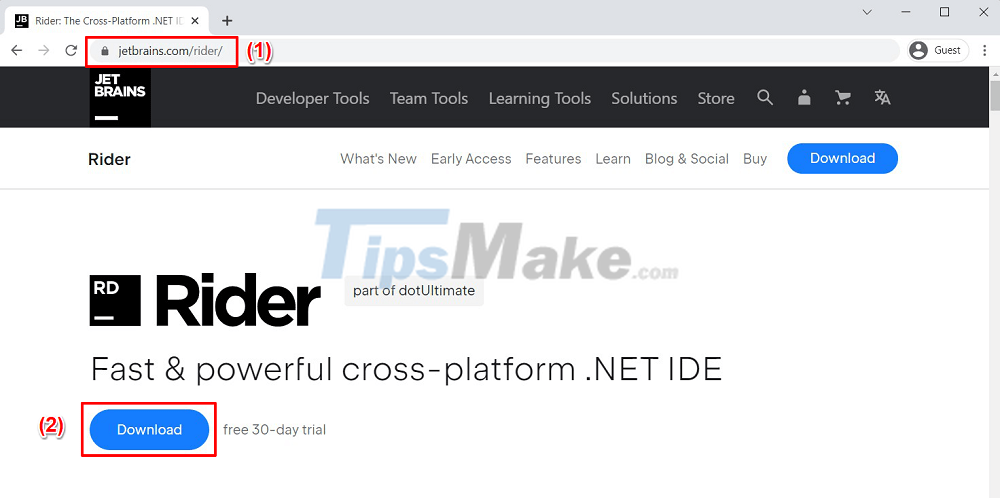
+ Step 2: The installation file is quite heavy (about more than 700MB), so you should note to keep the internet connection stable when downloading. After downloading, double click on the file to start the installation process.

Click Next => to continue the installation of JetBrains Rinder.
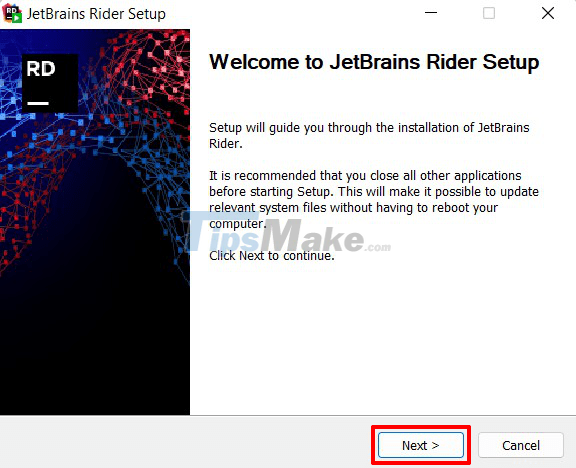
+ Step 3: This step you will choose the installation location, by default, the installation directory will be:
C:/Program Files/JetBrains/JetBrains Rider 2021.2.2
Note:
- Because I installed version 2021.2.2, the installation directory will be JetBrains Rider 2021.2.2. To change the installation directory, you can click Browse… as shown below (1)
- In addition, the minimum disk space requirement for installation is 2.4GB (later versions may be larger) (2)
=> In my opinion, just keep the default like that and click Next!

+ Step 4: Next, you can volume like me in the image below and then click Next to go to the next step.

At this step, click Install to start the installation process.

The installation process will not take too long, depending on your hard drive. If it is an SSD, the installation speed will be faster, and if it is an HDD, it will take a little longer.

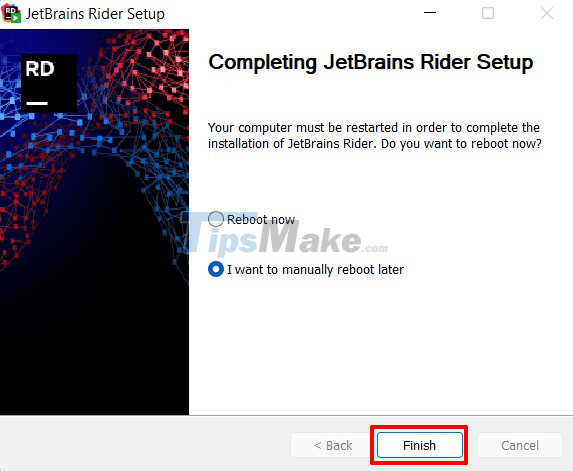
+ Step 5: Okay, so the installation is done. You click Finish to complete the installation process.
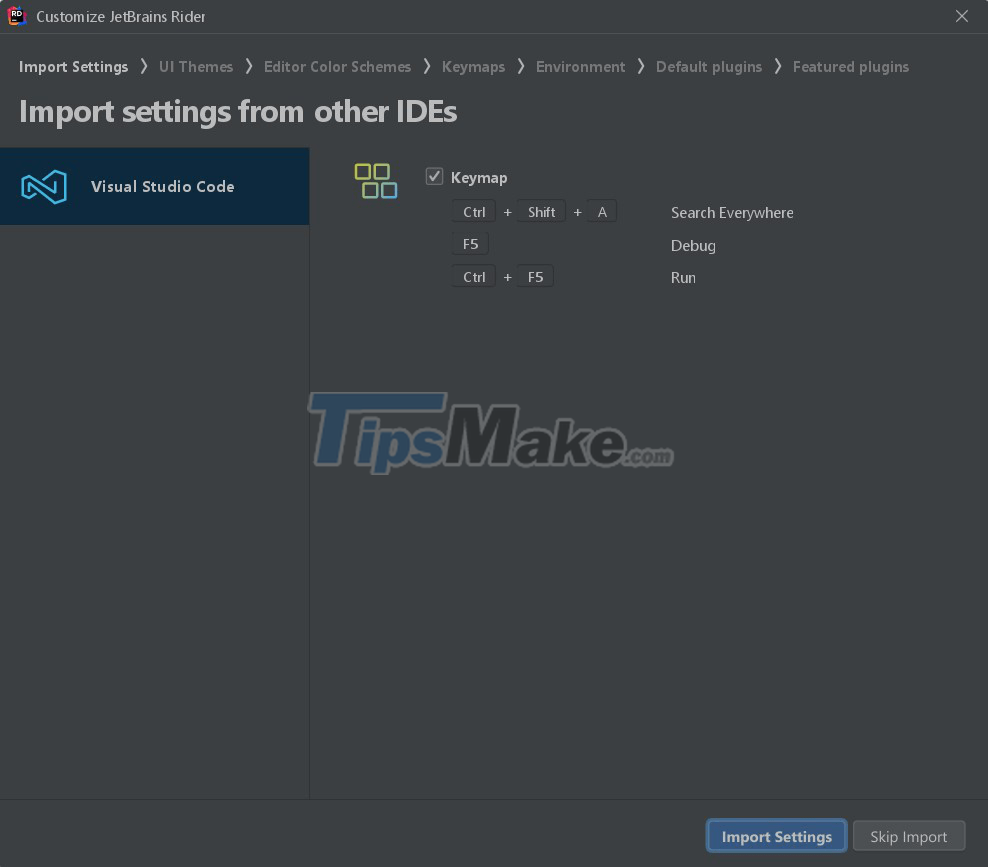
+ Step 6: After the installation is complete, you run the application, the first option is: Are there more settings from Visual Studio Code? (because quite a lot of users use VS Code to program C#)
Select Import Settings To add customizations from VS Code or select Skip Import to skip this step.
+ Step 7: The next step will be the selection of Theme. If you are afraid of eye strain or often use it at night, you can choose the Rider Dark theme with a dark color or if you like a light color, you can choose the Rider Light theme as shown below. This is up to you!
=> After selecting, click Next: Editor Color Schemes

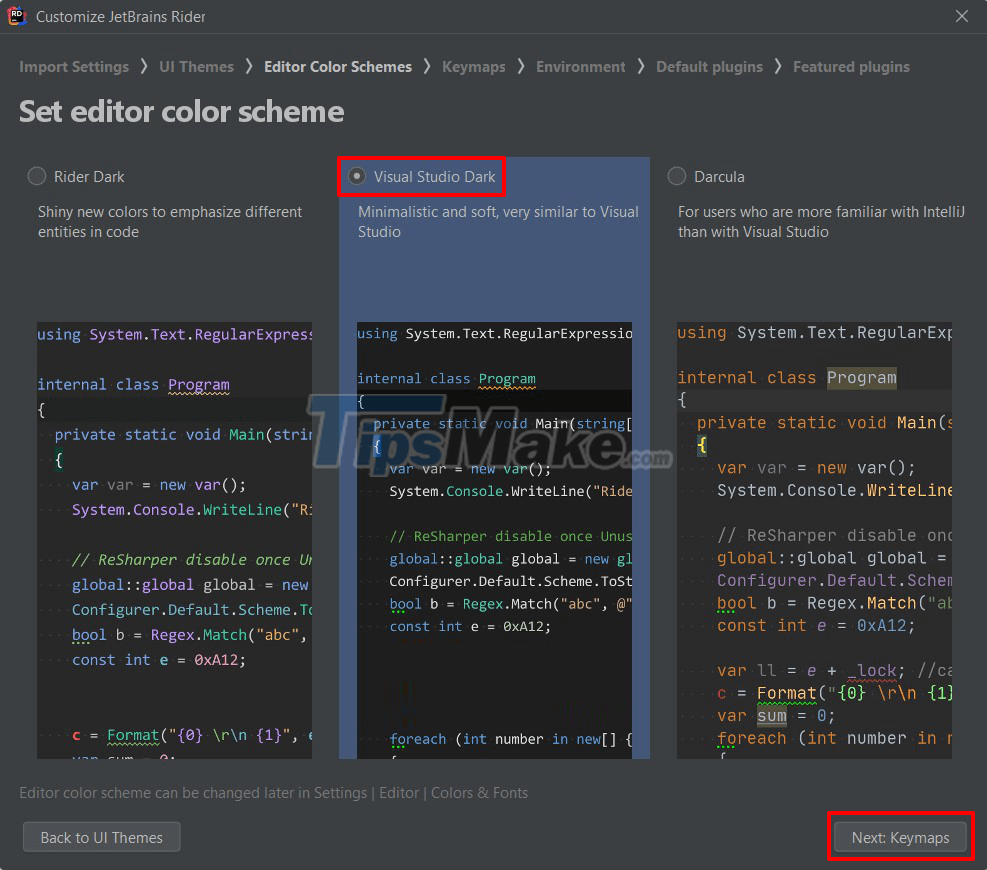
+ Step 8: The next step will be to set the editor color scheme (the color of the programming interface). Here I choose Visual Studio Dark (because I usually use VS Code). You can choose any other color you want.
=> Click Next: Keymaps to set shortcuts
You can choose a set of shortcuts from VS Code, IntelliJ depending on which tool you are used to before.

+ Step 9: The Rider tool supports .NET, Xamarin Anroid and Xamarin iOS & Mac environments. That is, it supports almost everything from the Web to mobile devices. You can click Next: Default plugins to continue.

The images below are the default tools enabled by Rider. For example, if you only do web programming, you can Disable other tools and leave only Web Development => then click Nexts: Featured Plugins

+ Step 10: If there are plugins available, you can download and use them. Here because I just installed it, I will not download any more plugins but click Start using JetBrains Rider.

+ Step 11: In the next step, you may encounter a warning Window Defender Firewall has block some features of this app. Click Allow access to allow it.

+ Step 12: Because Rider is a paid software, you can only try it for 30 days. To activate the trial mode, select the tab: Evaluate for fee => select Evaluate as shown below.

Next click Continue (note that whenever the notice is about to expire, you will reset it)

Okay, so the installation is done. Now you can use this tool to program C# and related technologies.

#2. Conclude
So in this article, I have installed Rider with you and have a few basic settings - an IDE of the JetBrain family that helps in programming C#-related applications and technologies.
Although many people still use Microsoft toolkits such as VS Code or Visual Studio, for those of you who are new to C# like me, this is really a powerful and user-friendly tool.
Key Takeaways
Use the information above as a practical reference for steps to install and setup rider: powerful c#, .net. Review each step carefully, confirm any requirements, and choose the option that best fits your situation.
FAQ
What does this guide explain about Steps to Install and Setup Rider: Powerful C#, .Net?
It explains the main concepts, practical considerations, and useful steps related to steps to install and setup rider: powerful c#, .net without requiring advanced knowledge.
Who can benefit from learning about Steps to Install and Setup Rider: Powerful C#, .Net?
This information is useful for readers who want a clear overview, practical guidance, and reliable steps related to steps to install and setup rider: powerful c#, .net.
What should I check before applying this information?
Review the requirements, confirm that your device, software, or situation matches the instructions, and back up important data before making major changes.
Related Articles
 Steps to Install Visual Studio: Powerful Microsoft6 minutes read
 How to Install Mathematica on Raspberry Pi3 minutes read
 Effective Microsoft .NET Framework Repair and Removal Tool5 minutes read
 Python - Powerful and Intuitive Programming Language: Key Facts8 minutes read
 15 Perfect Parts and Accessories for a PC Setup8 minutes read
 Steps to Initially Set up a New SSD on Windows 105 minutes read
Reader Comments 0
Sign in with email or Google to join the discussion.