Table of Contents
The simplest way to set up a VPN on an iPhone or iPad is to install the provider's official App Store app and approve its request to add a VPN configuration. Manual setup is also available when a workplace, school, or VPN provider gives you the exact server, protocol, account, and authentication details.
Before you start
- Choose a provider you trust; a VPN operator can handle traffic that would otherwise go directly through the internet provider.
- Read the privacy policy and subscription terms, including how to cancel a free trial.
- Keep the provider's server address, VPN type, remote ID, username, password, certificate, or shared secret available if configuring manually.
- On a managed work or school device, use the profile and instructions supplied by the administrator.
A VPN encrypts the connection between the device and the VPN server and hides the normal public IP address from destination sites. It does not stop all tracking, make unsafe sites trustworthy, remove malware, or guarantee access to region-limited content. For background, see what a VPN is and TipsMake's list of free VPN options for computers and phones.
Option 1: Configure a VPN manually
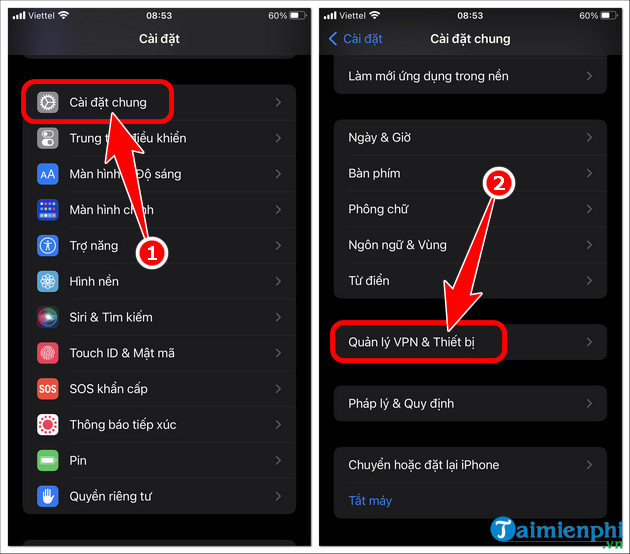
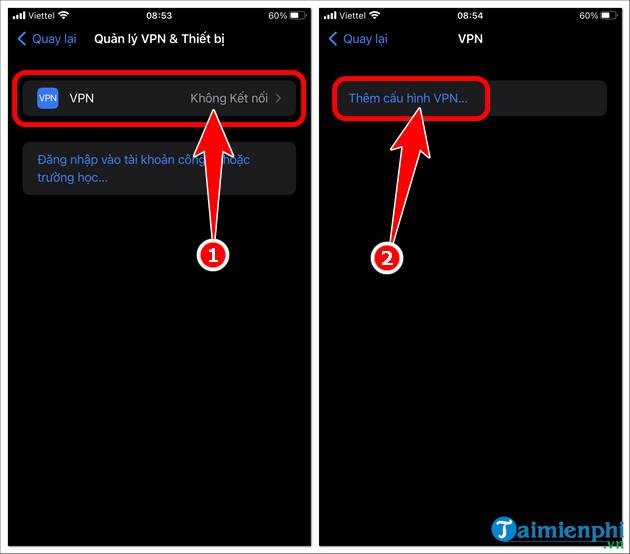
- Open Settings > General > VPN & Device Management. Depending on the iOS or iPadOS version and existing profiles, you may then need to tap VPN.
- Tap Add VPN Configuration.
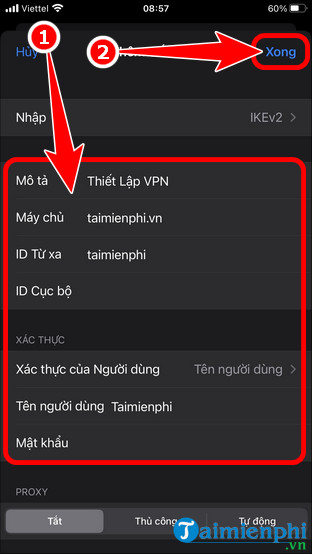
- Select the VPN type specified by the provider or administrator. Do not guess the protocol.
- Enter the supplied description, server, remote ID, local ID, account, and authentication details. Some configurations use a certificate instead of a password or shared secret.
- Tap Done, select the new configuration, and switch its status on.
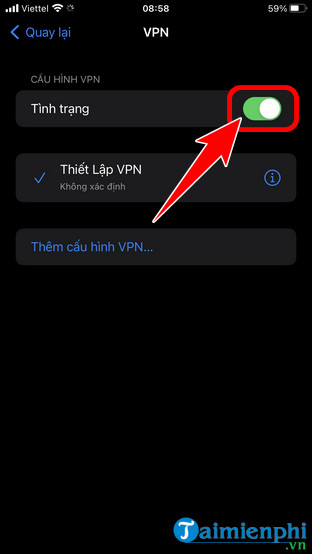
Apple supports built-in and app-based VPN technologies, including IKEv2 and IPsec configurations. Some enterprise functions require a managed device or configuration profile; Apple's VPN deployment overview explains those distinctions.
Option 2: Use a VPN provider's app
- Find the provider's official app in the App Store. Check the developer name, privacy details, permissions, and recent reviews.
- Create or sign in to an account if required, then choose the intended free or paid plan.
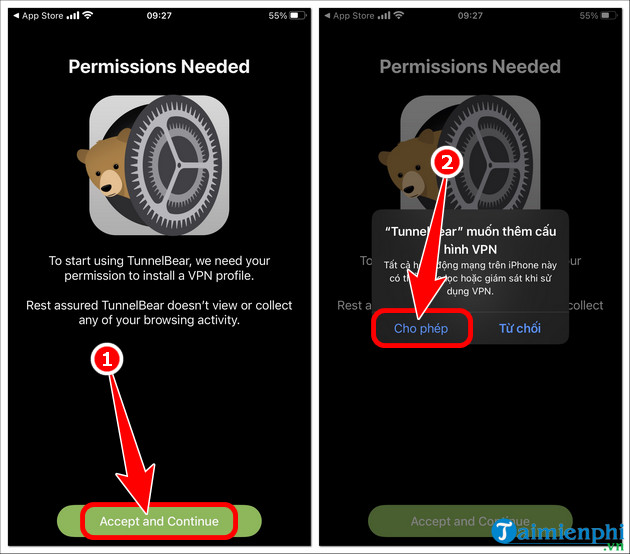
- Tap the app's connection button. When iOS asks whether the app may add a VPN configuration, tap Allow only if you trust the app.
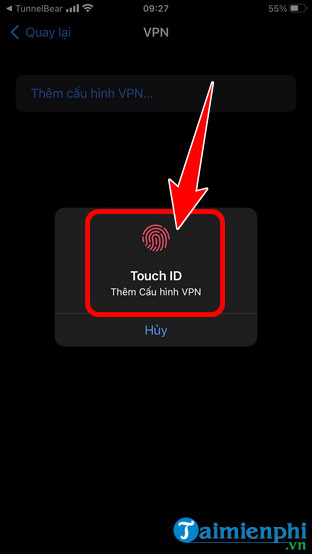
- Authenticate with Face ID, Touch ID, or the device passcode.
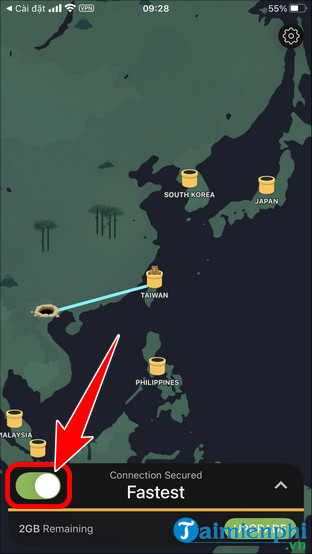
- Wait for the app to show Connected. A VPN indicator may also appear in Control Center or the status area.
The screenshots below use an older TunnelBear interface as an example; current prompts and plan screens may differ.
Verify and manage the connection
- Open a reputable IP-check page before and after connecting; the public IP should change.
- Test email, messaging, banking, and other essential apps. Some services request extra verification when the apparent location changes.
- Disconnect from the provider app or from Settings > VPN when the tunnel is not needed.
- If the VPN repeatedly drops, update the app, try another permitted server, switch networks, or ask the provider which protocol to use.
Remove an unwanted VPN profile
Open Settings > General > VPN & Device Management, select the VPN or configuration profile, and use its delete or remove option. Removing a configuration profile can also remove other settings, certificates, or accounts delivered by that profile, so review the description first. Apple documents profile removal in its iPhone network-settings guidance.
Does a VPN make iPhone browsing faster?
Usually not. Encryption and the extra server route can reduce speed. A VPN may improve performance only when it avoids a poor network route or a specific type of throttling. It cannot strengthen Wi-Fi reception or increase the connection plan's bandwidth. For other phone choices, compare TipsMake's VPN apps for phones.
Related Articles
 6 Simple Ways to Fix the Situation of iPhone and iPad Crashes While6 minutes read
 Sync Data Between iPhone and iPad in Just a Few Simple Steps5 minutes read
 How to Set up Icloud Email, Contacts and Calendar on iPhone or iPad4 minutes read
 How to Reset, Restore Factory Settings iPhone, iPad with5 minutes read
 Guide to Backup and Restore App Data on iPhone and iPad8 minutes read
 What to Do When the iPhone or iPad Can't Turn On?6 minutes read
Reader Comments 0
Sign in with email or Google to join the discussion.