Nilesoft Shell - Menu customization application in Windows Explorer
How to customize Windows context menu using Nilesoft Shell
Nilesoft Shell is a context menu extension application for Windows File Explorer. It allows adding new items or modifying existing ones added by third-party systems or software. Users can even create cascading menus and sub-menus and personalize them with different themes, fonts, background colors and opacity.
Install Nilesoft Shell
The installer can be downloaded directly from the Nilesoft website. Once downloaded, double click on the installer and wait for the installation to complete.
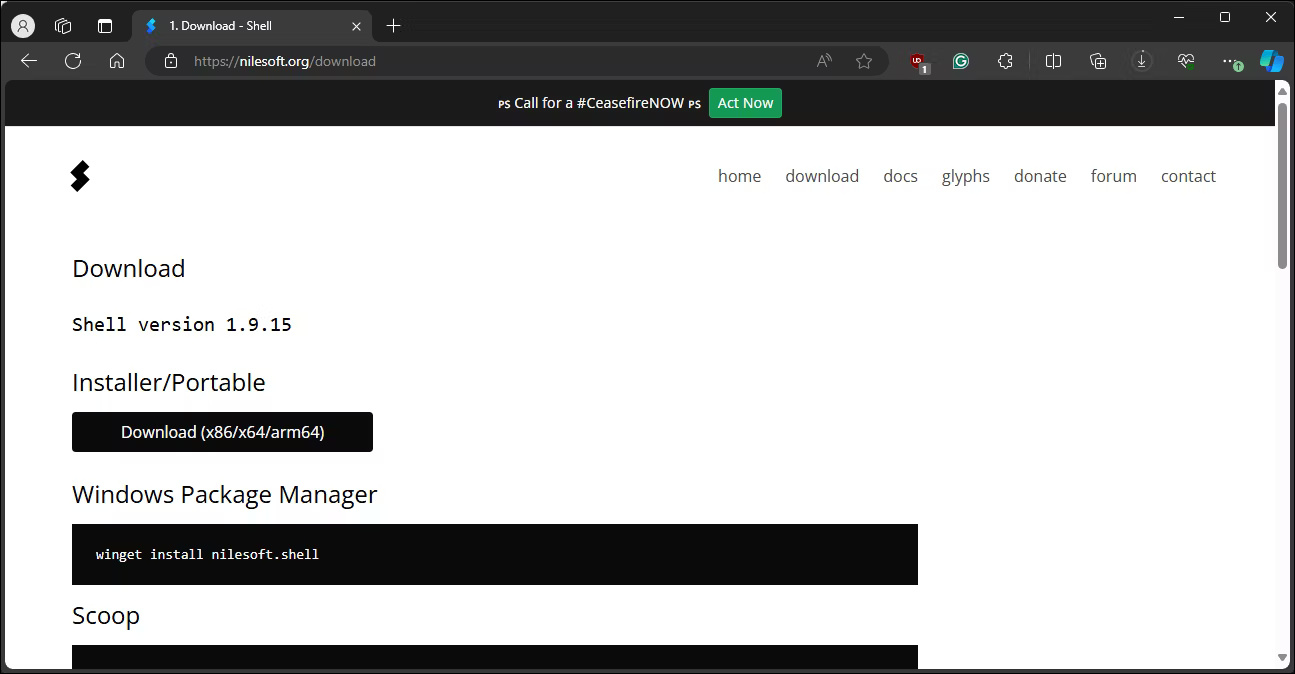
If that doesn't work, you can install Nilesoft Shell using a package manager like Winget, Chocolatey, or Scoop. Open Windows Terminal and type the following command, then press Enter :
winget install nilesoft.shellTo run the application:
1. Search for Nilesoft Shell in Windows Search.
2. Right click on the application and select Run as administrator .
3. Alternatively, press and hold Shift and right-click Taskbar , then go to Shell > Manager .

4. In the GUI dialog box, click Register to activate the software. The screen may flicker several times when Windows Explorer restarts.
Customize context menus
Once the integration is complete, Nilesoft Shell will display a new context menu when you right-click File Explorer. This menu includes existing, hidden options, and some additional options.

Although the Shell works well by default, you can customize it with new items and themes to meet your needs. To understand how the shell works and how to customize the context menu with additional options, see Nilesoft's documentation page.
Add or remove items from the context menu
The shell uses its own configuration files to define context menus. The shell.nss or Modify.nss file can be modified to add or remove entries.
The example will remove the WinRAR option added by the software during installation. Press and hold Shift , right-click the Taskbar and go to Shell > directory . Open the Imports folder and double-click to open the modify.nss file in Notepad.
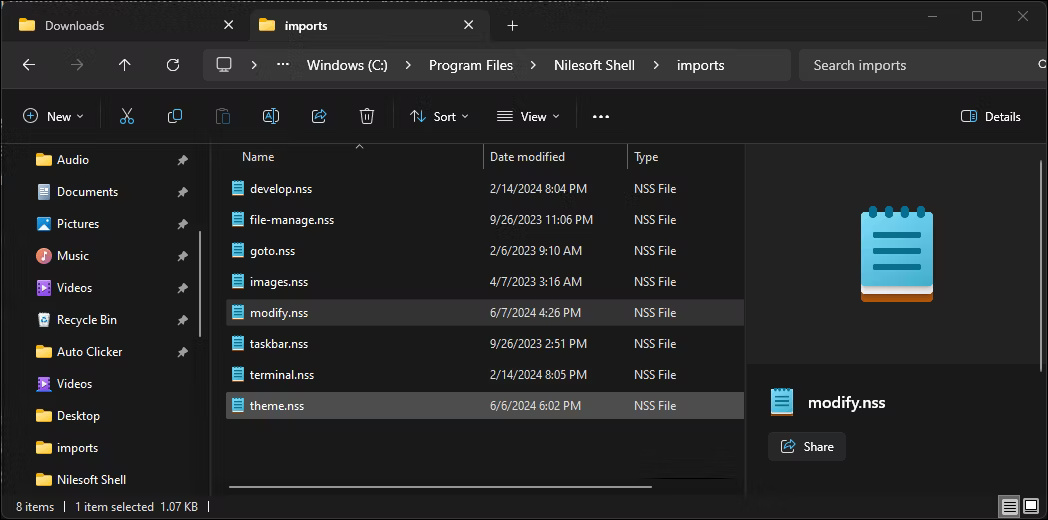
Now, add the following line of code to the Notepad file:
remove(find="winrar") 
In the above command, winrar is the identifier and is case sensitive. Replace Winrar with the option you want to remove. For example, to remove the Open With option from the context menu, add the following line of code to the file:
Remove(find="open with")To remove multiple entries, add all identifiers separated by a delimiter (|). To remove view, sort, refresh, and paste options from the context menu, enter:
Remove(find="view|sort by|refresh|paste")Now, let's try adding an item. To add a Google Chrome shortcut to the context menu, add the following command to the Modify.nss file:
item(title='Google Chrome' cmd='chrome.exe' image=icon.chrome) 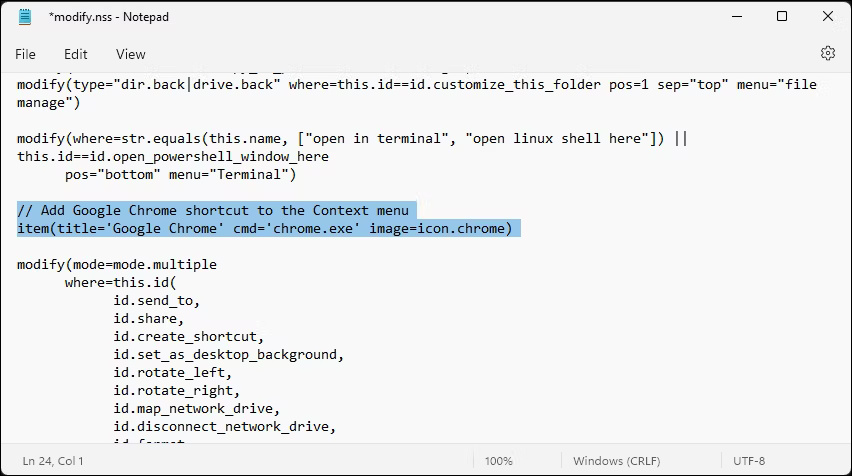
Once done, press Ctrl + S to save changes. Then press Ctrl + right click on the desktop to force the shell to reload the nss files. Right-click any item in File Explore to see the new menu item. If no changes are applied, check that the identifier name is correct.
It is also possible to add software shortcuts to the context menu using Registry Editor, but this is more complicated and risky.
Personalize context menus
You can further customize the appearance of the context menu by changing the background color, opacity, font size, and other properties to suit your needs. Open the Imports folder , then double-click to open the themes.nss file. To change the font size, modify the following line:
Font.size=20You can change the 20 in the command to a font size of your choice.
Next, set a different font by adding the following line:
Font.name="Lora" 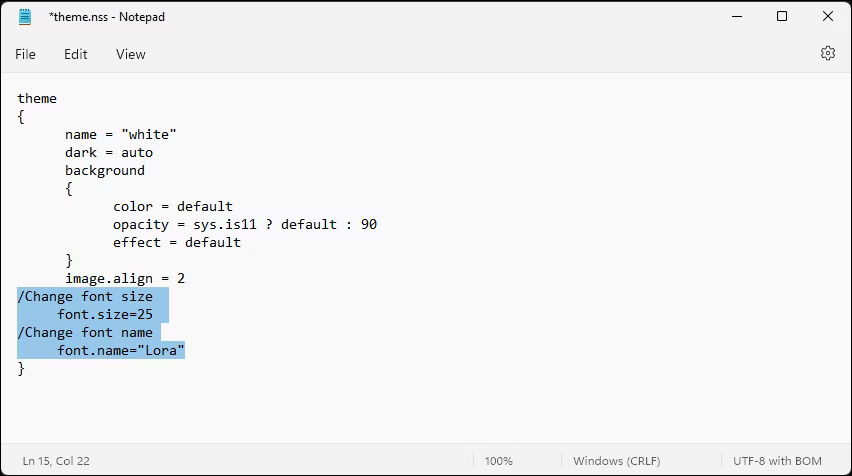
You can replace Lora with your preferred font name. To undo the changes, delete the command or set the font size to automatic.
Advanced customization
By default, Nilesoft Shell adjusts the default system theme for the context menu. You can personalize it by modifying the theme.nss file or installing third-party themes like Catppuccin for Nilesoft Shell. Theme, background color, opacity, and effects can be changed to the default theme or third-party themes.
To apply a dark theme, change the syntax from "dark" to "white". Replace with "modern" or "classic" to restore the default style:
theme { Name= "dark"To adjust the background color to orange, set the Color identifier to #F8C471. Set the Opacity between 70 and 30 for a more transparent look. Additionally, set the Effect indicator to 1 for transparent , 2 for blurred , or 3 for the acrylic effect . The blur level needs to be adjusted for these changes to be noticeable:
background { color = #24273a opacity = 70 effect = "1" 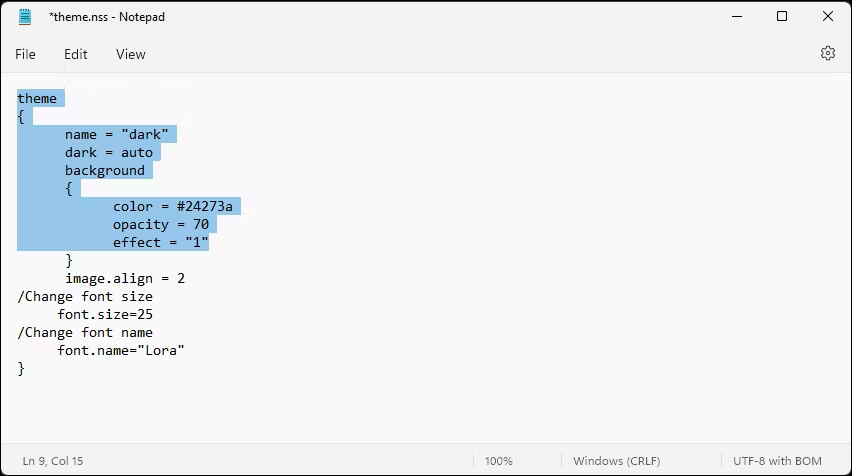
Save the file and reload the nss file to see the changes.
Remember that changes may not take effect immediately and require a restart. Also, don't forget to create a backup of the modified nss file. Multiple attempts to modify the configuration application caused it to stop working and required reinstallation. Having a backup can help you quickly restore your changes and avoid losing them due to errors.
 Ubuntu 22.10 Kinetic Kudu will end support on July 20, users should upgrade now
 Chrome on Android can read web pages aloud from within the app
 AMD Radeon 800M iGPU with 16 RDNA 3.5 cores scores more than 3600 points in 3DMark Time Spy, nearly equal to RTX 2050 Perf
 Turn teddy bears into ChatGPT
 After being fired, the former employee deleted 180 of the old company's servers
 The launch date of Samsung Galaxy Z Fold 6 and Flip 6 has been determined